manuals.online logo
Brands
  1. Home
  2. •
  3. Brands
  4. •
  5. Robe
  6. •
  7. Lighting Equipment
  8. •
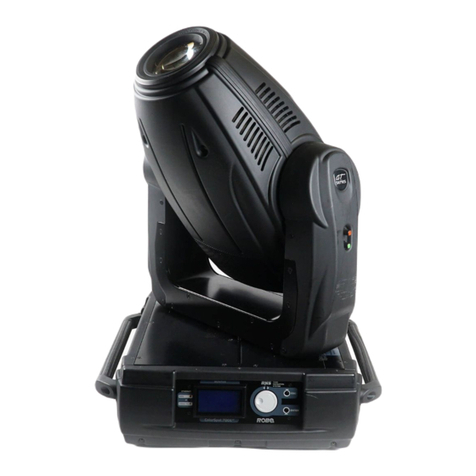
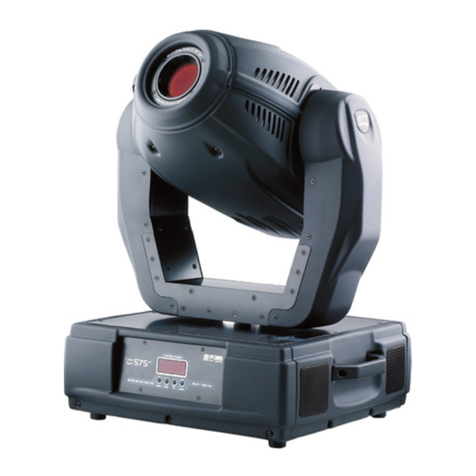
  9. Robe Tarrnatula User manual

Robe Tarrnatula User manual

Version 1.1
2
3
CAUTION!
Disconnect the Robin Tarrantula from mains before installing the beam shaper kit!
Instructions stated on the following pages describe remodelling the Robin Tarrantula to the Robin Tarrantula
with the beam shaper.
The Tarrantula Beam Shaper Kit includes:
1 x Beam shaper 2 x Head cover
1 x Connecting cable 1 x Tilt Stop
2 x Self-tapping screw 3x8 3 x Allen head bolt M4x35 with washers
2 x Cable holder 1 x Blank cap
2 x Self-tapping screw 2.2 x 6.5 2 x Self-tapping at head screw 3x8
1 x PCB RB3135
4
1. Remove both head covers (1), the rear cover (2) and the arm cover (3) (arm without tilt lock).
3 2
1
2. Unscrew the screw (4) which secures the zoom module (5) in the head.
3. Slide the zoom module (5) up to remove it from the head.
4
2. Unscrew the screw (4) which secures the zoom module (5) in the head.
3. Slide the zoom module (5) up to remove it from the head.
5
5
6
4. Remove PCB covers (6) and (7) by unscrewing 10 fastening screws (screws in red circles on the picture
below)..
7
5. Pass the connecting cable (8) through the pivot (9).
6. Screw the new head cover (11) with the aperture (10) for connector on the head.
9
810 11
6
7. Pass the connecting cable (8) with the connector (13) through the aperture in the new cover and screw it by
means of two self-tapping screws 3x8 (14). .
8
14
13
8. Arrange the shape of the connecting cable (8) as shown on the picture below, check especially bending of
the cable (15) that it will not restrict movement of the zoom module. Fasten the connecting cable to the white
conductors by means of the cable binder (16) as shown on the picture below.
16
8
15
7
9. Connect the connecting cable to connectors (17) in PCB. Fasten the connecting cable to bundled conductors
by means of two cable binders (18).
18
17
10. Unscrew the connector (13) from the head cover (11) and pull it out of the head cover. Remove the head
cover (11) from head and screw the PCB covers (6) and (7) by means of 10 fastening screws to the head.
11
13
6
7
8
11. Connect the Tarrantula to mains and wait for its reset. Take care of free connecting cable during the
Tarrantula reset.
12. Use the display menu Manual E󰀨ect Control to set the head to the horizontal position. Dimmer and Shutter
have to be closed (0 DMX).
13. Set the Zoom at 255 DMX, put and hold the zoom module horizontally on the head and slowly change
the zoom value at 0 DMX (the zoom module is pulling to the head).
5
Zoom=255
Zoom=0
14. Check the zoom movement.
15. Disconnect the Tarrantula from mains
16. Secure the zoom module to the head by screwing the screw (4).
4
9
17. Pass again the connecting cable (8) with the connector (13) through the aperture in the head cover (11)
and screw it by means of two self-tapping screws 3x8. Secure the connecting cable (8) to the cover by means
of the two cable holders (26) with self-tapping screws 2.2 x 6.5 (27) Screw the cover (11) on the head (check
the connecting cable does not obstruct in movement of the zoom module). Screw the second part of
the head cover and the rear cover of the head (2). .
1113
18. Unscrew the left Allen head bolt (19) fastening the original tilt stop (20) and screw the new tilt stop (21) on
the original tilt stop by means of the new Allen head bolt M4x35 (22). The washer (28) has to be inserted
to the hole in the original tilt stop (20). Do not tighten this bolt.
19. Unscrew the rest of original Allen head bolts, insert washers (28) to holes (29) and place the new tilt stop to the
position shown on the pictures below and screw it by means of the two Allen head bolts M4x35 (22). Fully
tighten all three Allen head bolts.
19 21 22
20
2
26 27
10
Important: the washers (28) has to be inserted in all holes (29) of the original tilt stop (20).
22
28
20 29
20. Place and screw the arm cover (23) on the arm.
23
21. Screw the blank cap (25) to the free opening (24) in the head cover by means of two self-tapping at head
screws 3x8 (26).
24
26
25
11
22. Install the beam shaper on the head.
Check the beam shaper orientation towards the xture head. The connector (30) on the beam shaper has
to snap to the connector in the head cover.
After placing the beam shaper on the xture head, secure it by means of the four screws (31).
30 31
Disconnect the Robin Tarrantula from mains before installing the beam shaper.
May 15, 2020
Copyright © 2020 Robe Lighting - All rights reserved
All Specications subject to change without notice
Made in CZECH REPUBLIC by ROBE LIGHTING s.r.o. Palackeho 416/20 CZ 75701 Valasske Mezirici
23. Connect the xture to mains and run EMS callibration.(tab Service-->Calibrations-->Calibrate Pan/Tilt EMS).
21. Remove the yoke cover (27) by unscrewing the four screws (28). Replace the original PCB (29).
Place the yoke cover (27) back and screw it.
27
29
28 28
12

Other Robe Lighting Equipment manuals

Robe Anolis Ambiane XP56 User manual

Robe

Robe Anolis Ambiane XP56 User manual

Robe RoboSpot User manual

Robe

Robe RoboSpot User manual

Robe DMX Control 1024 User manual

Robe

Robe DMX Control 1024 User manual

Robe Anolis UVinere Remote 1 User manual

Robe

Robe Anolis UVinere Remote 1 User manual

Robe Anolis Eminere 1 MC User manual

Robe

Robe Anolis Eminere 1 MC User manual

Robe Wash 575XT User manual

Robe

Robe Wash 575XT User manual

Robe ColorWash 250 AT User manual

Robe

Robe ColorWash 250 AT User manual

Robe ANOLIS Eminere Side 1 User manual

Robe

Robe ANOLIS Eminere Side 1 User manual

Robe ColorWash 575E AT User manual

Robe

Robe ColorWash 575E AT User manual

Robe ROBIN iPointe65 User manual

Robe

Robe ROBIN iPointe65 User manual
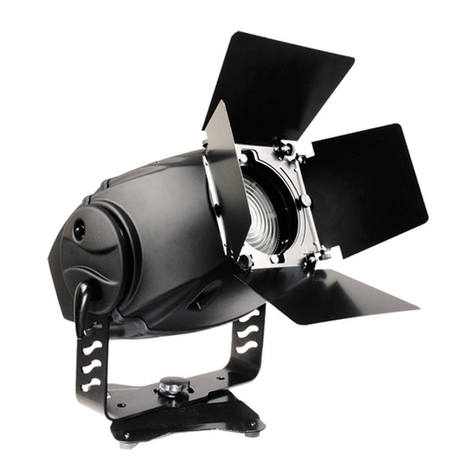
Robe Anolis ArcSource Outdoor 24 MC Integral RGBW User manual

Robe

Robe Anolis ArcSource Outdoor 24 MC Integral RGBW User manual

Robe Anolis Calumma XS MC User manual

Robe

Robe Anolis Calumma XS MC User manual

Robe ArcSource Outdoor 16 MC Integral RGBW US User manual

Robe

Robe ArcSource Outdoor 16 MC Integral RGBW US User manual

Robe Anolis Eminere 1 User manual

Robe

Robe Anolis Eminere 1 User manual

Robe Led Blinder 196 LT User manual

Robe

Robe Led Blinder 196 LT User manual

Robe LiteWare HO User manual

Robe

Robe LiteWare HO User manual
Robe DMX Control 512 User manual

Robe

Robe DMX Control 512 User manual

Robe Calumma Classic M MC User manual

Robe

Robe Calumma Classic M MC User manual

Robe Robin DL7S Profile User manual

Robe

Robe Robin DL7S Profile User manual

Robe Anolis ArcDot-US User manual

Robe

Robe Anolis ArcDot-US User manual

Robe Robin 100 LEDBeam Wireless DMX CRMX User manual

Robe

Robe Robin 100 LEDBeam Wireless DMX CRMX User manual

Robe Robin T11 Profile User manual

Robe

Robe Robin T11 Profile User manual

Robe ROBIN 300X User manual

Robe

Robe ROBIN 300X User manual

Robe Color Wash 700E AT User manual

Robe

Robe Color Wash 700E AT User manual

Popular Lighting Equipment manuals by other brands

Vision & Control LDLF30x300-IR850/UDC Instructions for use

Vision & Control

Vision & Control LDLF30x300-IR850/UDC Instructions for use

BoomToneDJ Maxi Beam 60 user manual

BoomToneDJ

BoomToneDJ Maxi Beam 60 user manual

Robus R60BHPIR-01 quick start guide

Robus

Robus R60BHPIR-01 quick start guide

Rush MH-3 Beam user manual

Rush

Rush MH-3 Beam user manual

Quoizel THO8631AB installation guide

Quoizel

Quoizel THO8631AB installation guide

Chauvet Duo Moons CH-160A user manual

Chauvet

Chauvet Duo Moons CH-160A user manual

STERNO HOME GL40044 instructions

STERNO HOME

STERNO HOME GL40044 instructions

IKEA STOTTA quick start guide

IKEA

IKEA STOTTA quick start guide

Home Zone Security LK48478V installation instructions

Home Zone Security

Home Zone Security LK48478V installation instructions

ALUZ A8 Series manual

ALUZ

ALUZ A8 Series manual

Anolis ArcPad 48 Integral/W user manual

Anolis

Anolis ArcPad 48 Integral/W user manual

Linergy PRODIGY PR08F10EBRT manual

Linergy

Linergy PRODIGY PR08F10EBRT manual

GE 79556a quick guide

GE

GE 79556a quick guide

Saber Compact ATD-80050 owner's manual

Saber Compact

Saber Compact ATD-80050 owner's manual

ProLights Jet PAR7ZIP user manual

ProLights

ProLights Jet PAR7ZIP user manual

Eaton SafeLite manual

Eaton

Eaton SafeLite manual

Valoya R-Series installation guide

Valoya

Valoya R-Series installation guide

Hydrofarm Magnetic Ballast Series instruction manual

Hydrofarm

Hydrofarm Magnetic Ballast Series instruction manual

manuals.online logo
manuals.online logoBrands
  • About & Mission
  • Contact us
  • Privacy Policy
  • Terms and Conditions

Copyright 2025 Manuals.Online. All Rights Reserved.