5
4. ELECTRICAL CONNECTIONS
Broadway Family SPA requires at most ca. 7,2 kW of power. In both
cases, the minimum cross-section of the cord should be at least
3x6 mm2. In the case of tubs installed outdoors, a cord with insulation
resistant to deterioration caused by weather conditions is required.
Protect the cord against mechanical damage. If the insulation or
cord is damaged, always replace it due to the risk of electric shock.
For 3x6 mm2cords, protect the tub’s power cord with a C-type
residual current device and a trigger current of 32 A. For safety
reasons, always connect the tub’s power cord to the mains using
an electrical connection protected by a residual current device with
a rated cut-off current of 30 mA. It is recommended to check the
residual current device periodically, according to the guidelines for
testing and resetting such devices.
The SPA tub should be connected to the building’s electrical wiring
permanently. The electrical wiring should be equipped with the
appropriate manual cut-off mechanism, enabling the opening of
contacts on each power supply pole. In addition, equipotential
bondings must be made using the clamp located on the tub
support frame. The minimum cross-section of the equalizer power
cord is 4 mm2.
All electrical connections should be made by a qualified
electrician.
For safety reasons, check the effectiveness of the anti-
electric shock protection from time to time by pressing
the TEST button on the residual current device. If the
power is not turned off immediately after pressing the
button, unplug the tub manually and contact a qualified
specialist. Do not use the SPA tub if the protections do
not function properly.
To prevent activation of the bath without water, switch off the
electrical power by pressing the test button on the differential-
current switch.
230V AC
7,2
electric connection
with kW efficiency protected
()3x6 mm2
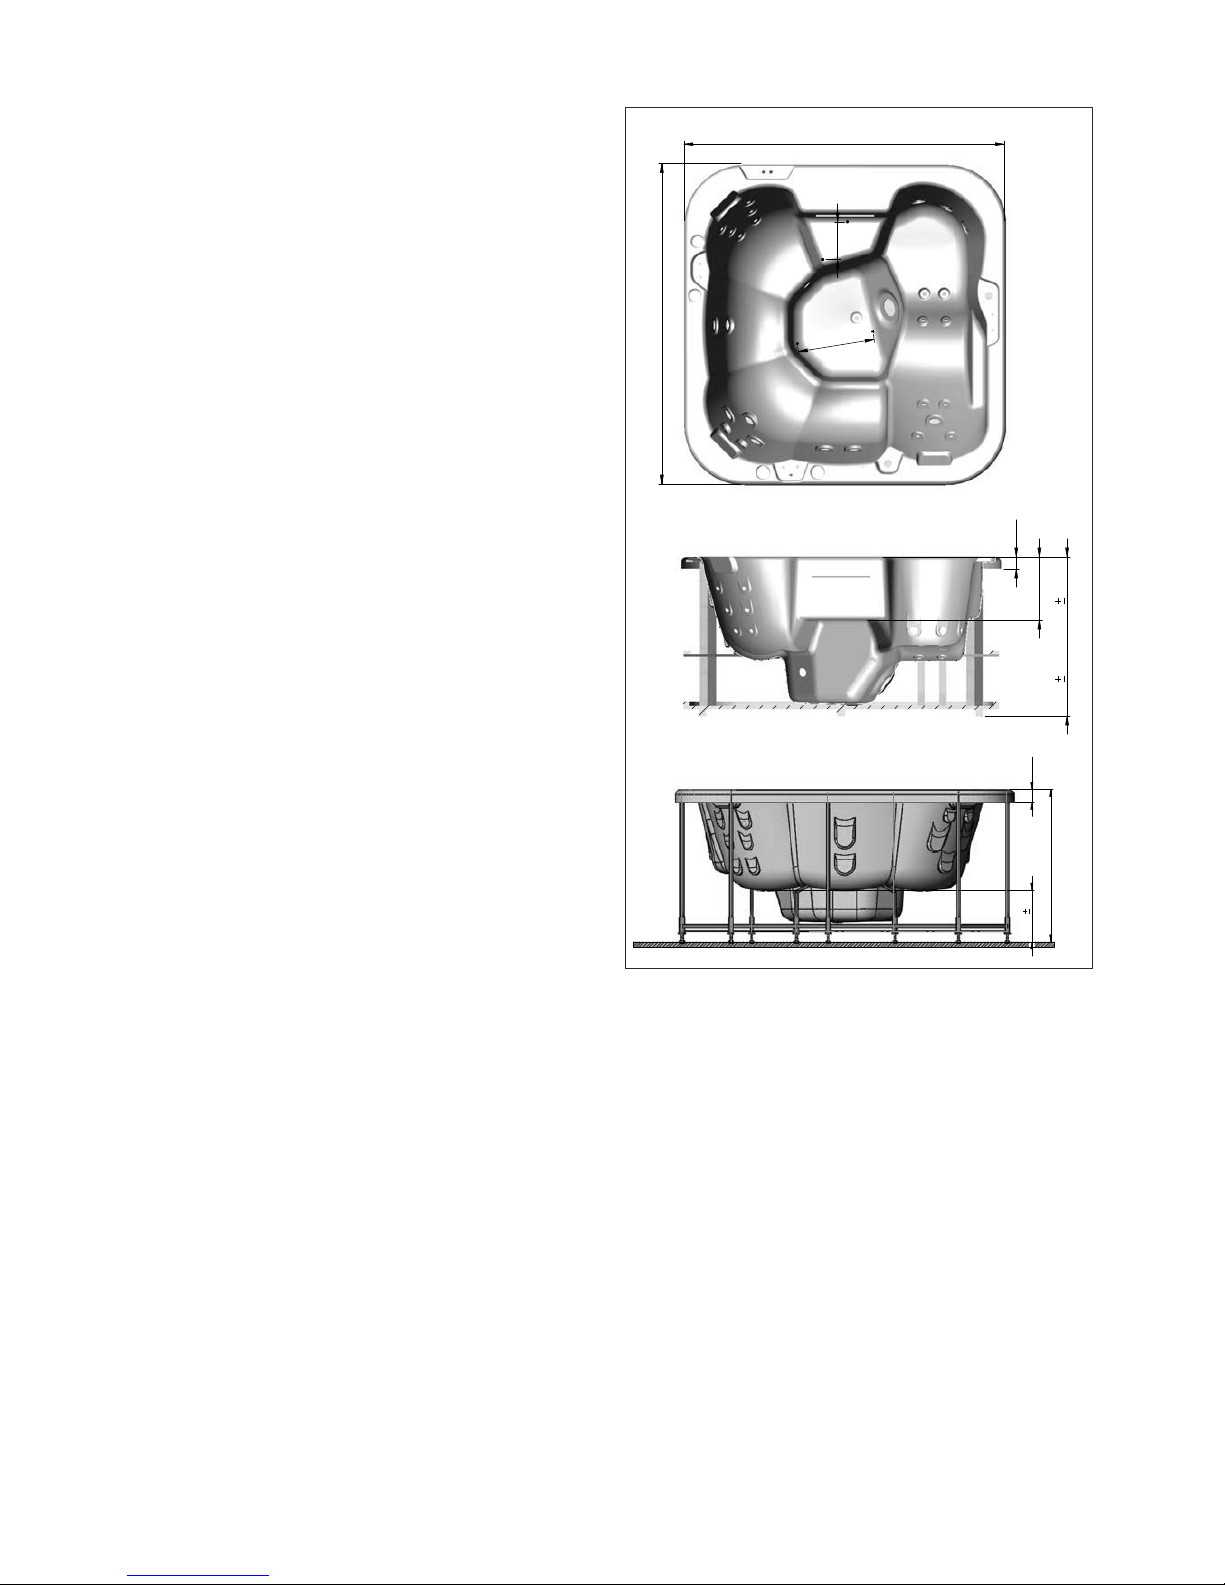
Skimmer filter
Sewage connection
50 mm
Water connection 1/2”
for water filling
4.1. GROUNDING CABLE CONNECTION
In order for the residual current device and the
tub it self to function properly, a grounding cable
with a cross-section of at least 2,5 mm2must
be installed. Connect the cable to the frame, as
illustrated. Connect the other end of the cable
to the protective grounding of the building’s
electrical wiring.
4.2. MAINS CONNECTION
As the bathtub is protection class I equipment it has to be permanently
connected to power supply (TN-S type) using IP X5 junction box. It is
recommended to install the connection box in area I (under the bathtub)
close to other electrical devices of the bathtub (more than 20 cm above
the floor).
The bathtub must never be connected using a plug.
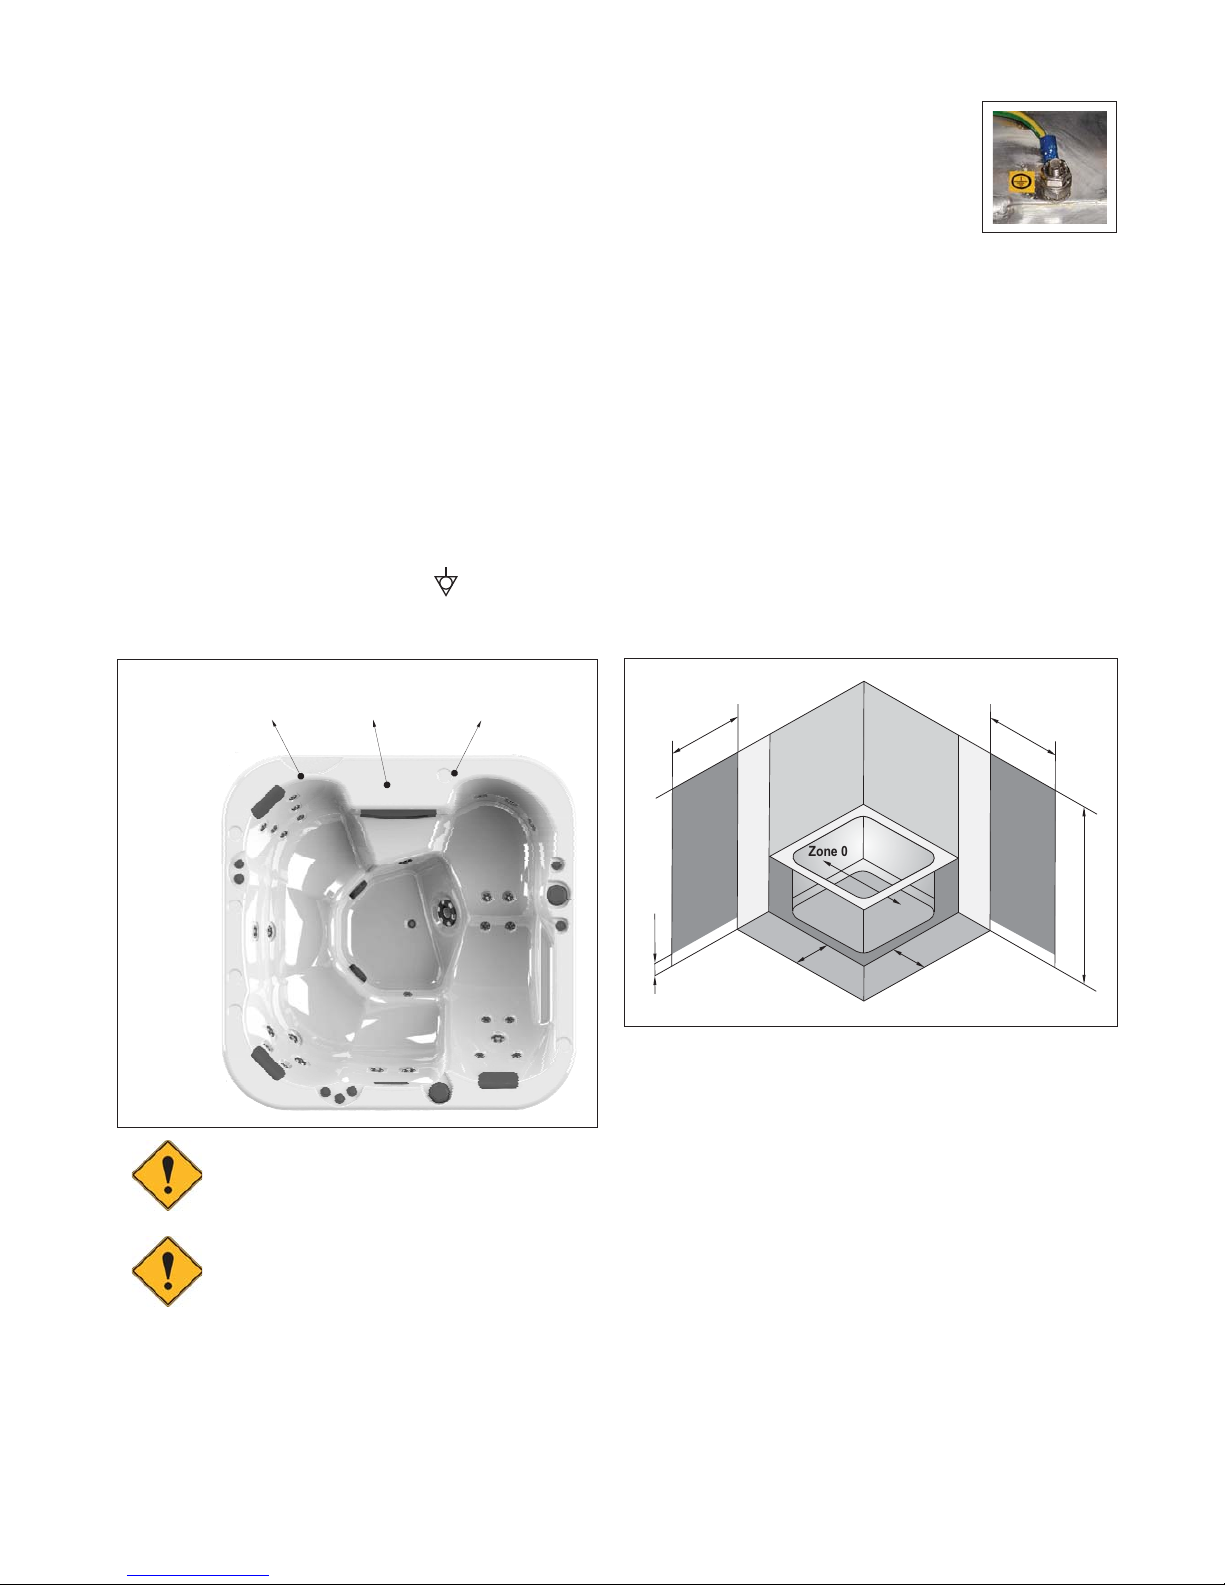
Zone 0 is the area inside the bath.
Zone 1 is the zone 0 area plus the space up to 2,25 m above the floor.
Zone 2 is the zone 1 area extended by 0,6 m, again up to 2,25 m above
the floor.
Zone 3 is the area reaching 2,4 m beyond zone 2, up to 2,25 cm above
the floor.
2,4 m
2,4 m
Zone 1 Zone 1
Zone 0
Zone 3
Zone 3
Zone 3
Zone 2
Zone 2
2,25 m
0,6 m 0,6 m
0,2 m
5. HYDRAULIC CONNECTION
For the connection, use PVC pipes and appropriate adhesive for this
type of material. Do not use metal pipes.
Make sure that there are no accumulated bags of air or water in the
fill or empty connection. The emptying circuit must guarantee perfect
emptying and, if the use of the drain so allows, a U-bend to prevent
bad smells.
Also, where required, the fill and empty circuits must also be fitted with
anti-backflow devices to prevent retrosuction..
Once the installation is complete, start up the equipment and check that
the joints are watertight. Mark the water level in the spa, leave it for 24
hours and check that it has not gone down.


 owner's manual")