10
3DISON PRO User Manual V.1
Display Menu Introduction
1. Create from SD : To load a le from SD Card
2. Preheat : To preheat the hot-end(nozzle)
- Extruder : by setting On/O you can start preheating of the extruder
- Platform : by setting On/O you can start preheating of the print bed
3. Utilities : It will lead to 12 dierent options for hardware. You do not want to change the
settings without any specic explanation because they are only for developers or after-
sales service
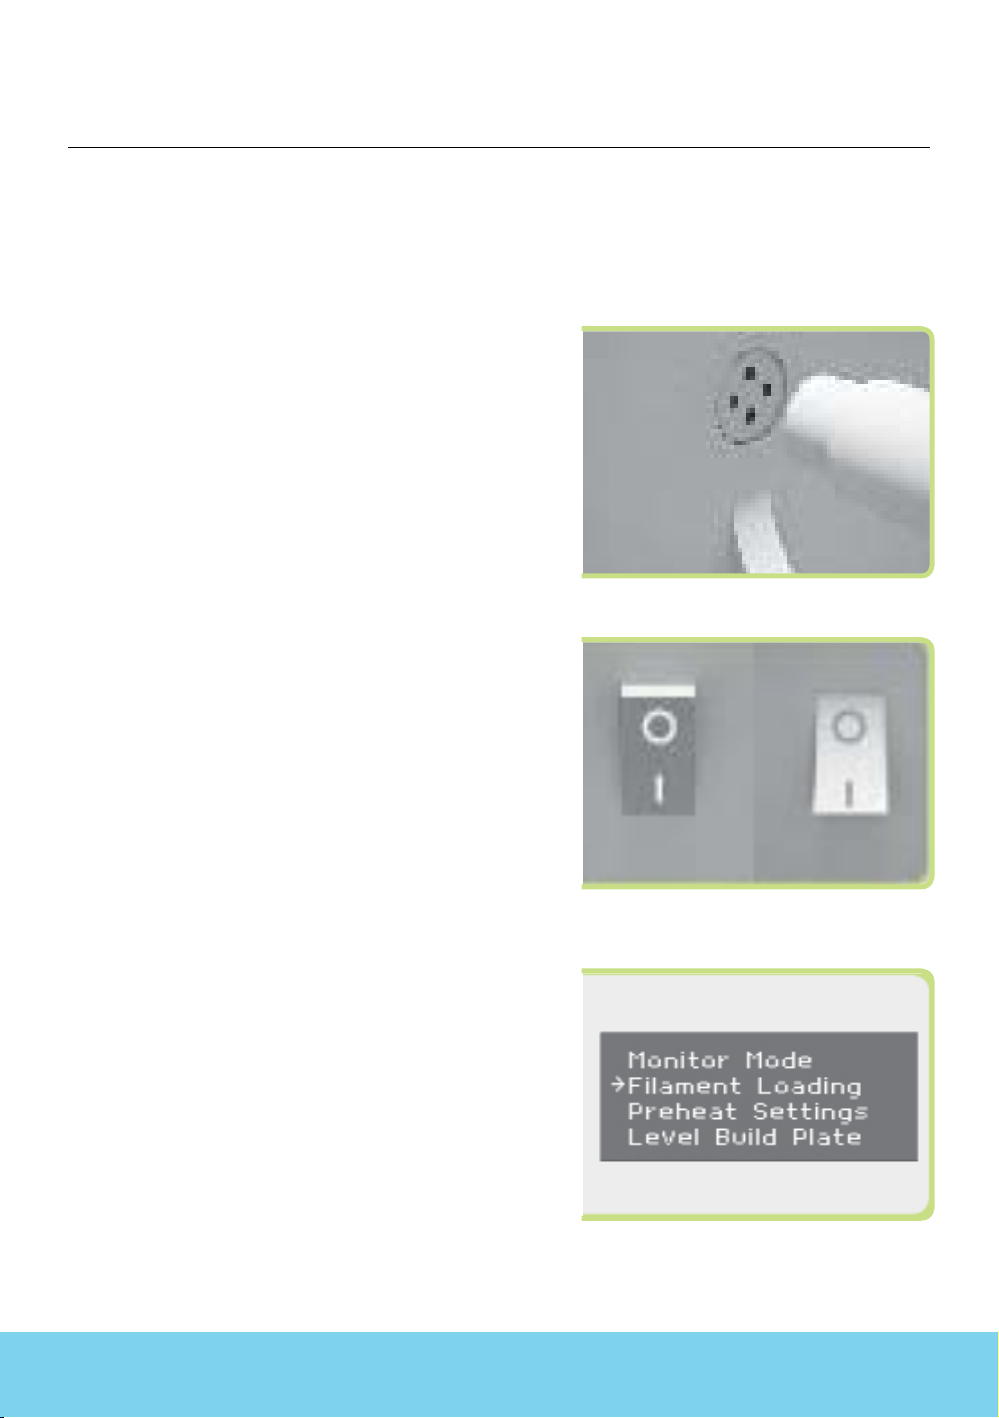
- Monitor mode : it shows current temperature of the extruder and printing status
- Filament loading : to put the lament into the extruder or pull it out of the extruder
- Preheat settings : to set up temperature and the printing bed
- Level Build Plate : to manually level the printing bed
- Pre-leveling : to level the printing bed before starting Auto-leveling
- Home Axes : To default the position of X, Y, Z axis
- Bot Statistics : Shows the operation time spent printing.
- Life Time: Total operation time of 3DISON PRO
- Last Print: Last build time
- Filament: Total amount of filament used (in meter)
- Fil. Trip: Amount of filament used for the last build (in meter)
- Filament Odometer : Not only this shows the lament information, but also you can de
fault the trip value here.
- Life: Total amount of filament used (in meter, unable to reset)
- Trip: Amount of filament used for the last build (in meter)
- General Settings : To congure sound, LED color or etc
- Ditto Printing Off
- Override GCTemp OFF
- Pause with heat OFF
- Sound ON/OFF
- Heat LEDs ON/OFF
- LED Color :to change LED colors.
- Accelerate : To accelerate the extruder speed
- Extruders : To choose SINGLE or DOUBLE depending on 3DISON PRO
- Extruder Hold ON/OFF
- HBP Installed NO
- Tool Offset Sys NEW
- Check SD Reads YES
- P-Stop Control OFF
- Prole
- Home Osets
- Jog Mode : To control manually the location of the extruder and the build platform
* Press the 3D button to go back to the main menu
- Disable Steppers : To stop the motor.
- Enable Steppers : To start the motor.
- Blink LEDs : To make LED lamp ickering
- Calibrate Nozzles
- Restore Settings :To initialize 3DSION PRO
- Eeprom
- Version Information : It shows the rmware version.
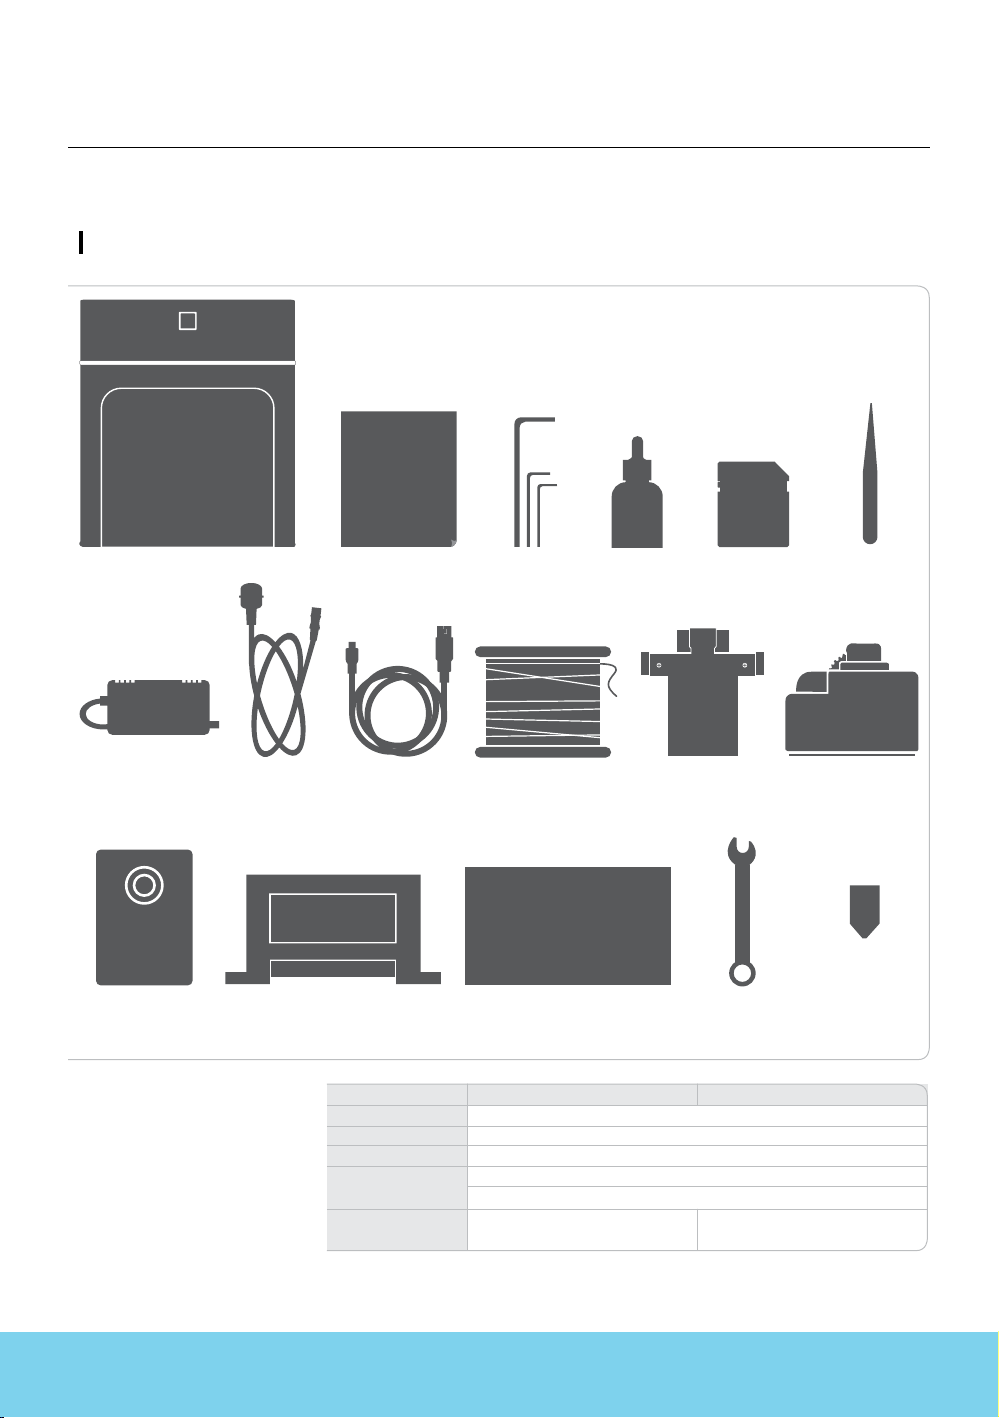
C.UnpackingandSettingup∃DISONPRO