Rokit EDISON S User manual
USER MANUAL
This user manual is described in detail to help you start your experience with 3DISON S.
We want to show you how to simply and easily use this amazing 3D printer. It is essen-
tial that you perfectly utilize 3DISON S. Thus, carefully read and follow this manual.

2
3DISON S User Manual
Safety Information
Specications
Product Function
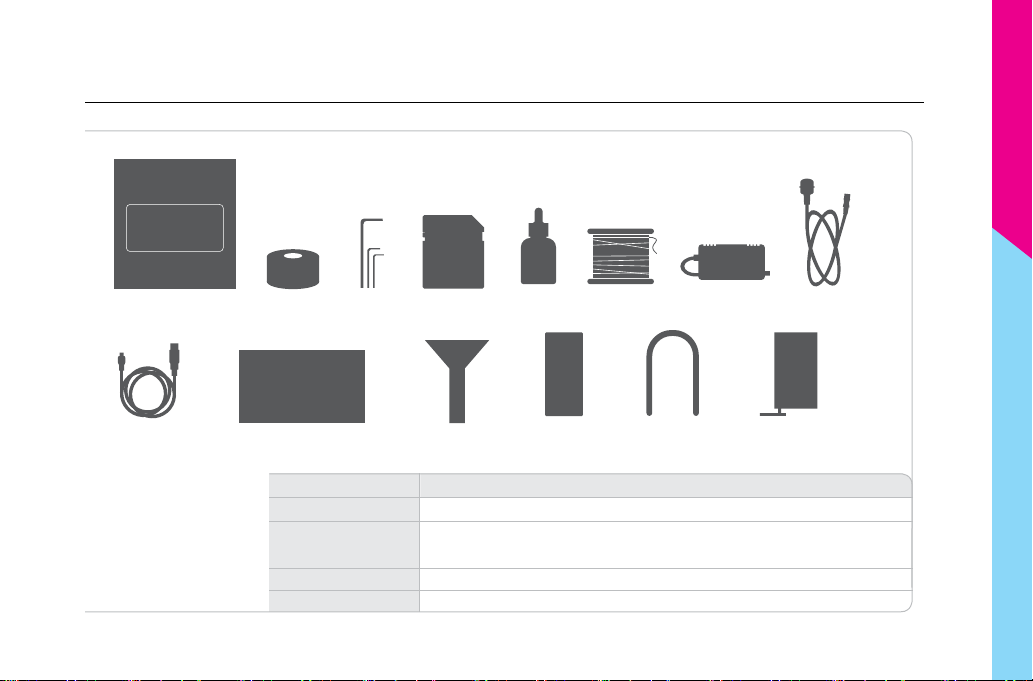
What’s in the Box
Printer Overview
How to Use 3DISON S
1) Unpacking your 3DISON S
2) Filament Loading and Unloading
3) Leveling the Printing Bed
4) Display Menu Introduction
5) Start 3D Printing
Additional Function
1) Youniverse 3D
FAQ
Product Warranty
Certication Mark
3
4
5
6
7
8
9
11
12
14
15
17
19
20
Contents

3
3DISON S User Manual
KC Certification - 3DISON S is certificated by KC, which indicates that 3DISON S meets the
requirements of customer protection on safety, health, and environment in Korea.
WARNING
1. The 3DISON S generates high temperatures and includes moving parts
that can cause injury. Thus, don’t put your hands in the machine while
printing. After the printing is completed, wait until the temperature inside the
printer goes down.
2. Never reach inside the 3D printer while it is operation.
Safe Information

4
3DISON S User Manual
Specications
Printing
Maximum Build Size
Printing Speed
Hot-End(Nozzle) Size
Layer Resolution
Positioning Precision
Printing Material
4.3ℓ(215 X 140 X 145 mm)
40 mm/sec ~ 200 mm/sec
0.4 mm
0.025 ~ 0.3 mm
X,Y: 11 micron, Z: 2.5 micron
PLA(12color), Nylon(3color),
Flexible(2color), HIPS, PVA, Wood,
Stone, Heat-Resisting PLA(6color)
Hardware
Extruder
Shaft Thickness
Belt/ Pulley
Internal LED Lighting
3D Printing with Wireless
Auto-Leveling
Installation Front Door
Pause/Unpause
Material Change While
Operation
Frame Dimension
Product Weight
Storage Temperature
Extruder Temperature
Single Extruder System
X , Y, Z : 8mm
S2M Belt / Pulley
O
O
O
O
O
O
454mm X 300mm X 454mm
10.8kg
10℃ ~ 40℃
195℃ ~ 250℃
Electronic
Input
Output
190 ~ 220 v, 50/60 Hz, 3.0 A
24 v, 5.0 A
Software
Control Program
Operating System
Compatible File Format
Creator K
Windows, Mac OS X
STL, OBJ

5
3DISON S User Manual
About 3DISON S
● 3DISON S is the FFF(Fused Filament Fabrication) type desktop 3D Printer and the Best-Seller in Korea. 3DISON S
is the best performance desktop 3D printer which has 25 micron layer resolution in Z axis and mobile wifi monitoring
function.
※ FFF Method : This method works by laying down consecutive layers of material at high temperatures allowing the
adjacent layers to cool and bond together before the next layer is deposited.
● 3DISON S uses filament materials in principle and this guide is prepared for the basic operation of 3DISON S. For more
details, refer to the additional manual for S/W.
Product Function
1. Auto-Leveling: When printing, the Auto-Leveling sensor reads the gap between the printing bed and the Hot-End
and level the printing bed without manually adjustment.
2. Auto-Cleaning: Cleaning inside of the Hot-End for stable printing.
3. Auto-Printing: Instant print without detailed settings such as infill, speed or temperature.
4. Mobile Wi-Fi: Apply wireless connection and you can directly print out any 3D content on the website.
(Adjust the settings on the website)
5. Monitoring: You can be monitoring the printing in real time once start printing.
Product Function
6
3DISON S User Manual
Printer Body SD Card 4GB
Quick Guide
Mini USB Cable
Hex Wrench
White Tape
Removal Tool
Power CableGrease Filament Power Supply
What’s in the Box
Tool Bag Filament Cradle
Guide Tube
3DISON S Printer
Welcome Box
Filament Box
Accessories
3DISON S
Printer Body
Mini USB USB Cable, Hex Wrench, SD Card 4GB, Removal Tool,
Grease, Tool Bag, Quick Guide
Filament 700g
White Tape, Power Supply, Power Cable, Guide Tube, Filament Cradle

7
3DISON S User Manual
Printer Overview
Door LCD Display Arrows and OK Buton
Extruder Printing Bed SD Card Slot
USB 2.0 Ethernet Power Switch
Power Socket Mini USB Port
1
6
78
10 11
9
3
4 5
2
1 2 3
4
5
6
7 9 10 11
8
8
3DISON S User Manual
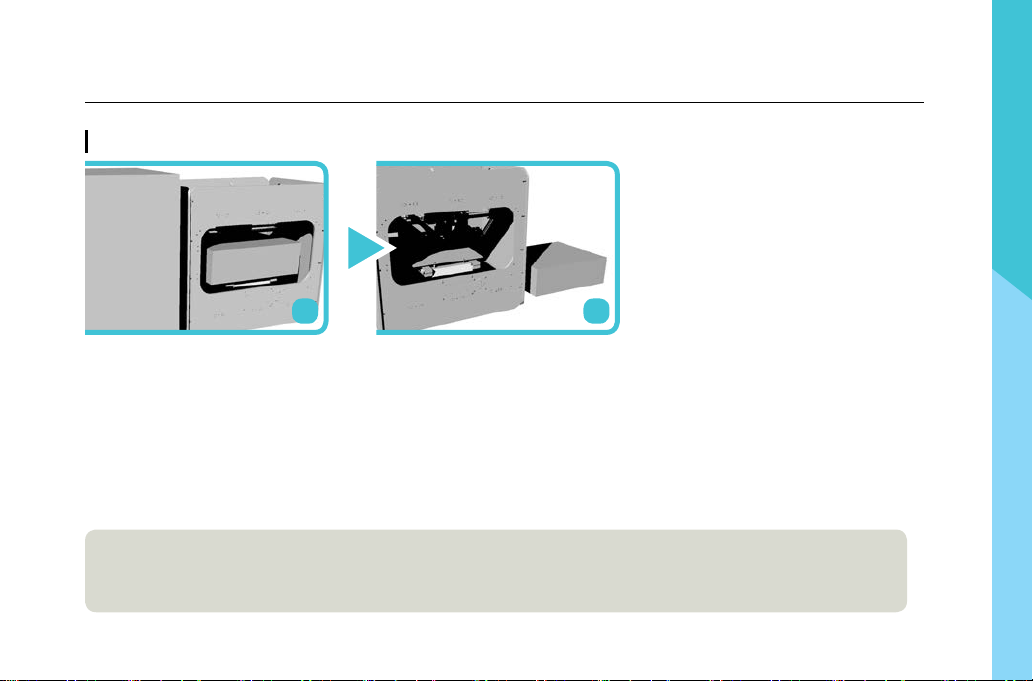
Do not discard the box and the packing buffers. Save These - They will be handy if you ever
need to transport the printer in the future.
Unpacking your 3DISON S
First, open the box and remove
Welcome box. Carefully take out
the 3DISON S from the box and put
it on a sturdy table.
After removing the packing buffers
surrounding 3DISON S, check the
component set.
1 2
How to use 3DISON S

9
3DISON S User Manual
OK
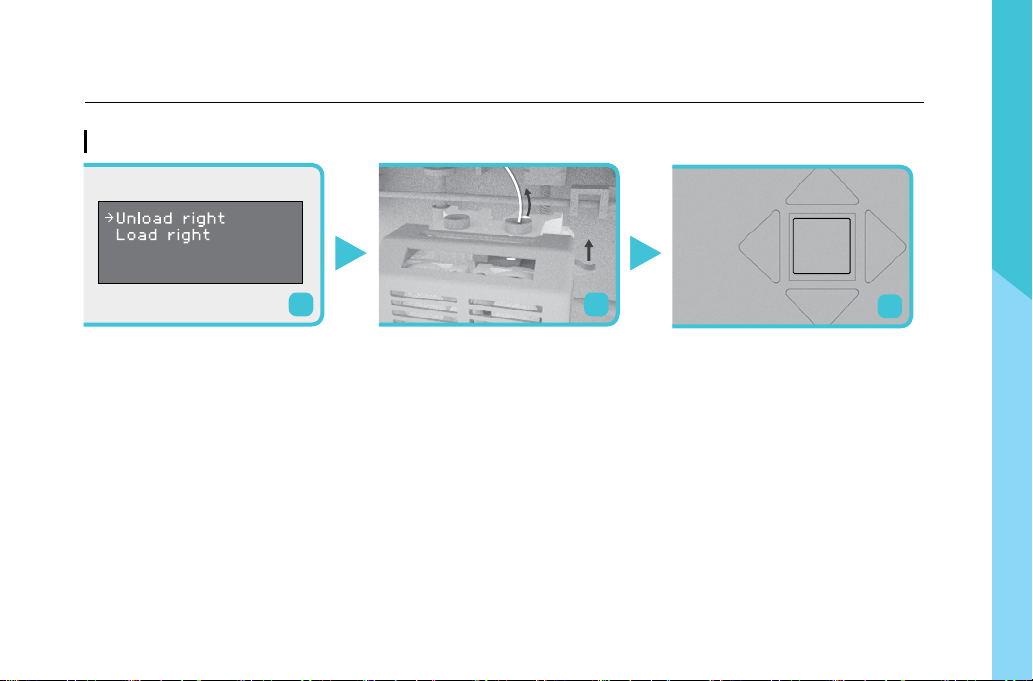
Check if the filament is built up
normally in circle shape.
(this process goes on for about
30 seconds).
Press OK button to stop loading.
5 6
Loading Filament
Select Load right. Then the ex-
truder will start preheating.
Go to the LCD panel and select
Utilities > Filament Loading.
Once locate a filament roll and
the guide tube on the back side
of the 3DISON S printer, hang a fil-
ament roll up the Filament Cradle.
When the extruder is completely
heated with the alarm, pass a
filament through the guide tube
to insert the filament into the ex-
truder.
1 2 3 4
How to use 3DISON S
10
3DISON S User Manual
Unloading Filament
To remove the filament from the ex-
truder, select Utilities > Filament Loading
and select Unload Right.
When the extruder is completely heated
with an alarm, locate the extruder to the
middle. Pull the filament out of the ex-
truder with the spring block pressed.
1 2
Press the OK button to stop unloading.
OK
3
How to use 3DISON S
Table of contents
Other Rokit 3D Printer manuals


