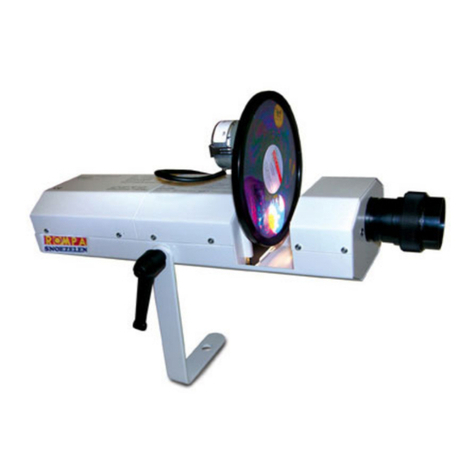
Rompa 100 LED Mini Projector User manual

1. Product Name
100 LED (Mini Projector)
2. Product Code
21206
3. Colour
White
4. Brief Description
This compact, portable small projector is useful for use in smaller areas. It has low heat
and low noise and is economical to run.
5. Contents
1 x Mini Projector
1 x 85mm lens (attached)
1 x 12V DC Transformer with 2 metre lead
6. Snoezelen® Stimulations
Sight

7. Best Use
This product looks most effective in a smaller, darkened environment. Projections can be
made even more visually striking when used with compatible products.
8. Compatible ROMPA® Products
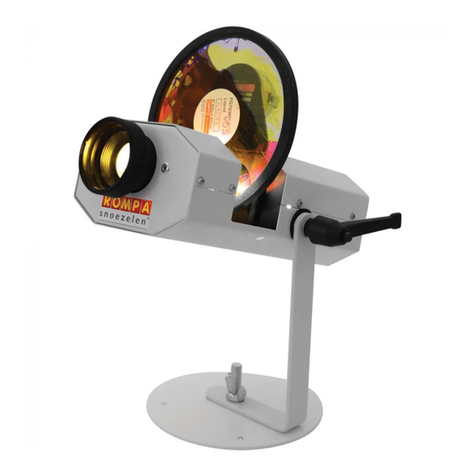
The LED Projector must be used with an accessory in the rear gate, typically a Wheel
Rotator:
13170 Wheel Rotator –1 revolution in 2 minutes
16570 Wheel Rotator –1 revolution in 6 minutes
20685 Wheel Rotator –5 revolutions in 1 minute
An Effect Wheel must be used in the Wheel Rotator e.g. 13342 Deep, 20507 Sensory …
Please see www.rompa.com for our extensive range of themed Effect Wheels.
Further accessories may be used with the Effect Wheels to move or multiply the effects
e.g. 21153 Distortion Wheel (which require another wheel rotator), 14024 Panoramic
Rotator, Clip on Prism 19934.
Please see www.rompa.com for our extensive range of accessories
9. Starting Up
Choose a suitably safe location.
Install securely using appropriate fixings.
Plug in.
Plug in power cord.
Switch on –the appliance power switch has the symbols “O” for off and “I” for on.
10. Detailed Description
Compact, portable and ideally suited to the home. Perfect for bedrooms or smaller
Snoezelen® rooms. 20W LED-lit so low heat, low noise and minimal maintenance. Bright
yet economical to run. Requires a Wheel Rotator (two if using a Distortion Wheel) and
an effects wheel. Compatible with Clip-on Prism, Panoramic Rotator, Wheel Rotators and
Solar Multi Mirror. The integral 20W LED lamp provides bright, white light and typically
lasts 100,000 hours.

11. Safety
Please check the item carefully for any damage that may have occurred during
shipping. If the carton appears damaged, carefully check the shipping carton for
damage and be sure all accessories necessary to operate the unit have arrived intact.
In case of any difficulties, please contact ROMPA.
The projector should be used in dry indoor environments only - do not expose to
rain, moisture or liquid or place near fabrics or combustible materials.
Mount the projector in a safe and stable manner in an area that allows proper
ventilation.
Do not block the air opening of the product or drop/insert anything into this
opening.
The appliance should be situated away from heat sources such as radiators, heat
registers, stoves or other appliances (including amplifiers) that produce heat.
Make sure the cables do not represent a tripping hazard.
Power supply cords should be routed so that they are not pinched by items placed
upon or against them, also avoid sharp bends, pinches and contact with hot surfaces,
paying particular attention to the point that they exit from the unit.
Do not attempt to operate this unit if the power cord is frayed or broken or if the
appliance has been dropped or damaged or in the unlikely event of product
failure/malfunction.
Always supervise the use of this product.
Do not dismantle. Take it to a qualified repairer when servicing is required.
To avoid the possibility of inadvertent resetting the thermal cut-out, this appliance
must not be supplied via an external switching device, such as a timer or connected
to a circuit that is regularly switched on or off.

12. Technical Specification
Size: 21.5L x 12.5W x 8cmH (27cmH with bracket)
Power Consumption: 24 Watts maximum
Voltage: 100 –240V adapter
Output: 12V ~ output current: 750mA maximum
Light: 20W LED Module
Average LED Module life 100,000+ hours
Weight: Projector 1.67kg, projector and transformer 1.85kg, packed: 2.4kg
Lumens: 1400 lumens from LED; 600 lumens (on screen) with new module
Colour : Colour temperature 3000° K
Standard lens: 3 element 85mm f2.8 42.5mm Helical Focus Groove
Operating: Ambient temperature 10 to 35°C
Relative humidity 80%rH max.
13. Installation
Choose a suitable location for the projector, bearing in mind the following:
Install indoors in dry environments only.
This product requires one electrical socket.
Make sure the projection will be onto a suitable surface –a surface free of objects
and that is white or pale in colour.
The projector is a visual product and should not be handled. However, you may
wish to access the projector periodically to change effects.
There must be unrestricted airflow around the projector, especially around the air
inlet grille.
If an extension cord is necessary, a cord with a current rating at least equal to that
of the appliance must be used. Cords rated for less amperage than the appliance
may overheat.
The projector must always be connected to a grounded (earthed) electricity supply.
Only connect to a power supply with a voltage corresponding to that printed on the
projector.
Do not use the projector at an angle of more than 90° from horizontal as this may
cause an effect or effect accessory to separate from the projector, fall and break
which may also cause injury.
Consider the following projection distances:

Use the projector’s bracket to mount the projector in any of the following ways:
Ensure that the projector is secured to a surface or structure able to bear the weight
of the projector and accessories, via the bracket fitted using suitable central bolt
(minimum: 14mm M10 x 20mm), washers and attachments.
A safety chain or cable must be fitted to the projector and secured to an immovable
object.
The mounting point must be able to support the weight of the projector should it fall.
Adjust the angle and position of the effects projector using the knob which
connects the bracket to the unit. Loosen the securing lever and move bracket to
the desired position. Tighten lever securely. To adjust the position of the lever
press the central button, pull lever away from the projector, turn to the desired
position and release.
Place a suitable accessory in the projector e.g. Wheel Rotator with an Effect
Wheel. Slide the Wheel Rotator into the rear gate runners (the main effect goes into the
rear gate runners, with Distortion Wheels etc in the front gate runners). Once the effects
are in place, connect these to the 12V~ sockets on the side of the Projector.
Plug in the main 12V~ transformer into a mains socket
and switch on if necessary. Next, plug the other end of
the lead into the 12V ~ socket on the rear panel. Then
turn the projector on by the mains switch to the “I” (ON)
position.
Focus the projected image by twisting the lens in and out until the desired focus is
achieved. During focusing beware of rotating the projection lens too far out as this
can cause the lens to separate from the projector and may drop and break or cause
injury.

14. Care and Maintenance
The fixture should only be cleaned with a dry cloth, ensuring the fans are
free from dust.
Use a soft tissue or lens cloth with a little methylated spirit or pure alcohol.
After six months (or 1000hrs) usage the optical system might need cleaning. Switch off
the projector, disconnect from the mains.
Remove the four cover plate screws and remove the cover plate. There is no need to
remove the mounting bracket.
Use a soft tissue or lens cloth with a little methylated spirit or pure alcohol to clean the lenses.
Do not touch the LED module, it may fail if touched.
Carefully re-fit the cover and replace all four screws.
15. Troubleshooting
Problem: The Clip On Prism (or other accessory) will not fit on the front lens of the projector
• Check that the ‘click-clack’has not been removed. This is a cylindrical piece that sits inside
the lens (shown below). Check that this is not still attached to the accessory that has
previously been removed from the projector. Reattach this part to fit an accessory onto the
front lens in order to attach an accessory.
In the unlikely event of product failure, please contact us.
Further copies of these instructions can be downloaded at www.rompa.com
We hope you find our instructions invaluable. If you have any suggestions for improving
them further your comments will be greatly received –please contact us at
100LED (Mini Projector) 21206, May 2016
Copyright ROMPA® Ltd

1. Produit
LED100 Projecteur (Mini Projecteur)
2. Code
21206
3. Couleur
Blanc
4. Brève Description
Compact, portable en idéal pour la maison. Parfait pour dans la chambre of dans une
petite salle Snoezelen. Eclairage LED 20 Watt, dégagement faible de chaleur et de bruit et
pratiquement sans entretien.
5. Contenu
1 x LED100 Projecteur
1 x lentille 85mm (attaché)
1 x transformateur 12V DC avec un fil de 2 mètres
6. Stimulations Snoezelen®
Vue

7. Usage
Pour l’usage dans le noir. La projection est plus efficace sur un mur/plafond blanc ou
pâle et sans motif, et avec les accessoires compatibles.
8. Produits Compatibles de ROMPA®
Il faut se servir d’un accessoire avec ce projecteur, typiquement une Roue Rotative dans la
porte d’arrière:
13170 Roue Rotative –1 révolution chaque minute
16570 Roue Rotative –1 révolution chaque 6 minutes
20685 Roue Rotative –5 révolutions chaque minute
Il faut une Roue à Effets dans la Roue Rotative ex. 13342 ‘Profondeurs’, 20507 ‘Les sens’ …
Voir www.rompa.com pour nos Roues
On peut se servir des autres accessoires pour créer des autres effets ex. 21153 ‘Roue de
Déformation’, 14024 ‘Rotateur Panoramique’ etc. Voir www.rompa.com pour cette gamme
d’accessoires.
9. Fonctionnement
Choisissez un lieu sûr et convenable.
Installez de façon sûre avec des fixations convenables.
Branchez.
Reliez le fil d’alimentation.
Allumez –sur ce bouton, “O” indique ‘Eteint’; “I” indique ‘Allumé’.
10. Description
Compact, portable en idéal pour la maison. Parfait pour dans la chambre of dans une
petite salle Snoezelen. Eclairage LED 20 Watt, dégagement faible de chaleur et de bruit et
pratiquement sans entretien. Faible consommation d’énergie, mais suffisamment
efficace. Nécessite une roue rotative (deux pour une l’utilisation d’une roue de
déformation) et un disque à effet. A utiliser avec un prisme à 3 faces, le rotateur
panoramique, roues rotatives et le miroir à multi-faces. 12 Volts. Poids : 1.85 kg.

11. Sûreté
Prière de vérifier ce produit dès qu’il arrive chez vous. Cherchez des endommages,
et contactez-nous si vous en trouvez.
Pour l’usage à l’intérieur, au sec. Ne pas exposer ce projecteur à la pluie, liquide etc.
Ne pas le placer tout près des tissus ou les choses combustibles.
Installez le projecteur de façon sûre et stable, dans un lieu qui permet la ventilation
autour du projecteur.
Ne pas bloquer l’ouverture d’air du projecteur. Ne pas laisser tomber des objets
dans cette ouverture.
Ne pas installer ce projecteur tout près des sources de chaleur ex. les radiateurs, les
fours, les autres appareils (comme les amplificateurs) qui se chauffent.
Vérifiez que les fils soient hors de la portée pour éviter les accidents.
Ne pas coincer ou plier le fil d’alimentation. Ne pas mettre des objets lourds sur le
fil. Evitez les objets pointus et tranchants, aussi que les surfaces chaudes. Surtout,
prenez soin du fil ou point où il sort du projecteur.
Ne pas se server du projecteur si le fil d’alimentation soit endommagé, ou en cas peu
probable de panne. Ne pas se server du projecteur si on l’a laissé tomber.
Il faut toujours surveiller l’usage de ce produit.
Il faut toujours laisser refroidir le projecteur avant de le manier. Les parties
constituantes peuvent se chauffer.
Ne pas démonter ce projecteur. Si vous nécessitez un raccommodage, consultez
quelqu’un convenablement qualifié.
Ne pas vous servir des appareils de contrôle (il n’est pas conseillable d’allumer et
d’éteindre ce produit de façon répétitive).

12. Caractéristiques Techniques
Dimensions : 21,5 x 12,5 x 8 cm hauteur (27 cm avec support de fixation)
Consommation
d’alimentation: 24 Watts maximum
Voltage: 100 –240V adapteur
Sortie: 12V ~ 750mA maximum
Lumière: 20W LED
Vie en moyen du LED 100,000+ heures
Poids: Projecteur 1.67kg, projecteur et transformateur 1.85kg,
emballé: 2.4kg
Lumens: 1400 lumens du LED; 600 lumens (sur écran) avec une nouvelle LED
Couleur : Température de la couleur 3000° K
Lentille courant: 3 élément 85mm f2.8 42.5mm ‘Helical Focus Groove’
Fonctionnement: Température ambiente 10 à 35°C
Humidité relative 80%rH max.
13. Installation
Choisissez un lieu sûr et convenable, se tenant compte des conseils suivants :
Installez à l’intérieur, au sec.
Il faut une prise femelle électrique.
La projection est plus efficace sur un mur/plafond blanc ou pâle et sans motif, et hors
des obstacles.
Le projecteur est un produit visuel et on ne devrait pas le manier. Quand-même, de
temps en temps il faut accéder au projecteur pour changer l’effet/l’accessoire.
Permettez la ventilation autour du projecteur, surtout près de la grille de ventilation.
Si vous nécessitez une rallonge électrique, servez-vous d’une rallonge convenable –
des mêmes caractéristiques de l’appareil. Les rallonges avec moins d’intensité de
courant peuvent se réchauffer.
Il faut toujours connecter ce projecteur à une source d’alimentation mise à terre.
Tenez-vous compte du voltage. Branchez dans une prise du voltage correcte.
Ne pas utiliser ce projecteur à un angle de plus de 90° de l’horizontale. Sinon, on
risque faire tomber un accessoire du projecteur.
Tenez-vous compte des distances de projection suivantes :
Servez-vous du support du projecteur pour monter le projecteur :
Vérifiez que le projecteur soit bien attaché à votre surface et que votre
mur/plafond/surface puisse soutenir le poids du projecteur et ses accessoires. Le
support nécessite un boulon centrale (minimum: 14mm M10 x 20mm), rondelles et
fixations.
Attachez une chaîne ou un câble de sécurité au projecteur et relié à un objet
immobile.
Le point de montage devrait être capable de soutenir le poids du projecteur en cas
peu probable qu’il tombe.
Réglez l’angle et la position du projecteur en vous servant du bouton qui relie le
support au projecteur. Desserrez la manette et déplacez le support à la position
voulue. Serrez bien la manette. Pour régler la position de la manette, appuyez
sur le bouton centrale, tirez la manette hors du projecteur, tournez-la, et puis la
relâchez.
Mettez une accessoire convenable dans le projecteur ex. une Roue Rotative avec une Roue
à Effets. Introduisez la Roue Rotative dans la porte d’arrière (mettez l’effet principale dans
la porte d’arrière ; mettez la Roue de Déformation dans la
porte de devant). Dès que les effets soient en position,
connectez ces accessoires aux prises femelles de 12V~
dans le côté du Projecteur.
Attachez le fil du transformateur au projecteur (à
l’arrière). Branchez le transformateur de 12V~ et allumez
(réglez le bouton à “I” (ON / allumé).
Mettez le projecteur au point en tournant la lentille. Prenez soin de ne pas trop
tourner la lentille. Sinon on risque séparer la lentille du projecteur.
suspendu
attaché au mur
avec le support
au-dessous
debout

14. Soin et Entretien
Nettoyez le projecteur avec un tissu sec, prenant soin d’enlever la
poussière des ventilateurs.
Après six mois (ou 1000 heures) d’usage, il est probable qu’on devrait
nettoyer le système optique. Éteignez le projecteur et débranchez.
Laissez refroidir le projecteur.
Enlevez les quatre vis qui tiennent le couvercle, et enlevez ce couvercle. Ne pas
enlever le support de montage.
Servez-vous d’un tissu doux ou une toile d’objectif et un peu de l’alcool pour nettoyez
les objectifs.
Ne pas toucher le LED –sinon on risque l’endommager.
Prenant soin, repositionnez le couvercle et remplacez tous les vis.
15. En cas de problèmes
Problème: Le Prisme (ou un autre accessoire) ne se met pas sur l’objectif au-devant du
projecteur
• Vérifiez que le ‘click-clack’soit toujours sur l’objectif. Cette partie est visible dans l’image
suivante. Vérifiez que cette partie n’est pas toujours dans l’accessoire détaché après l’usage
antérieur. Attachez cette partie de nouveau pour attacher un autre accessoire.
En cas peu probable de problèmes, prière de nous contacter.
100LED Projecteur (Mini Projecteur) 21206, mai 2016
Copyright ROMPA® Ltd
This manual suits for next models
1
Table of contents
Languages:
Other Rompa Projector manuals

Rompa
Rompa Super Solar 100C User manual

Rompa
Rompa 23008 User manual

Rompa
Rompa 20997 User manual

Rompa
Rompa 22126 User manual

Rompa
Rompa 20063 User manual

Rompa
Rompa 20777 User manual

Rompa
Rompa LED100 User manual

Rompa
Rompa Rainbow User manual

Rompa
Rompa Aura Projector User manual

Rompa
Rompa 19548 User manual