Rothenberger ROSCOPE i2000 User manual

ROSCOPE i2000
ROSCOPE i2000
DE Bedienungsanleitung
EN Instructions for use
FR Instruction d’utilisation
ES Instrucciones de uso
IT Istruzionid’uso
NL Gebruiksaanwijzing
PT Instruções de serviço
DA Brugsanvisning
SV Bruksanvisning
NO Bruksanvisning
FI Käyttöohje
PL Instrukcja obslugi
CS Návod k používání
TR Kullanim kilavuzu
HU Kezelési útmutató
EL Οδηγίες χρήσεως
RU Инструкция по использованию
www.rothenberger.com

Intro
EU-KONFORMITÄTSERKLÄRUNG
WirerkläreninalleinigerVerantwortung,dassdieses
ProduktmitdenangegebenenNormenundRichtlinien
übereinstimmt.
EU-DECLARATION OF CONFORMITY
Wedeclareon oursoleaccountabilitythatthisproduct
conforms to thestandards and guidelines stated.
DECLARATION EU DE CONFORMITÉ
Nous déclarons sous notre propre responsabilité que
ce produit est conforme aux normes et directives
indiquées.
DECLARACION DE CONFORMIDAD EU
Declaramos, bajo nuestra responsabilidad exclusiva,
queesteproductocumpleconlasnormasydirectivas
mencionadas.
DICHARAZIONE DI CONFORMITÀ EU
Dichiariamo su nostra unica responsabilità, che questo
prodotto è conforme alle norme ed alle direttive
indicate.
EU-KONFORMITEITSVERKLARING
Wij verklaren in eigen verantwoordelijkheid dat dit
productovereenstemtmetdevantoepassingzijnde
normen en richtlijnen.
DECLARAÇÃO DE CONFORMIDADE EU
Declaramos, sob responsabilidade exclusiva, que o
presenteprodutoestáconformecomasNormase
Directivas indicadas.
EU-KONFORMITETSERKLÆRING
Vierklærersomeneansvarlig,atdetteprodukt
er i overensstemmelse med anførte standarder,
retningslinjer og direktiver.
EU-FÖRSÄKRAN
Viförsäkrarpåegetansvaratt dennaproduktuppfyller
de angivna normerna ochriktlinjerna.
2014/30/EU, 2014/35/EU,
2014/53/EU, 2011/65/EU,
EN 300-328-1V1.8.1,
EN301-489-1V1.9.2,
EN 60065
Herstellerunterschrift
Manufacturer /
authorized representative signature
EU-SAMSVARSERKLÆRING
Vierklærerpåegetansvarat detteproduktetstemmer
overens med de følgende normer eller normative
dokumenter.
TODISTUS EU-STANDARDINMUKAISUUDESTA
Todistammetätenjavastaammeyksinsiitä,että
tämä tuote on allalueteltujen standardien ja
standardomisasiakirjojen vaatimusten mukainen.
DEKLARACJA ZGODNOŚCI EU
Oświadczamy z pełną odpowiedzialnością, że produkt
ten odpowiada wymaganiom następujących norm i
dokumentów normatywnych.
EU-PROHLÁŠENÍ O SHODÌ
Sevšízodpovìdnostíprohlašujeme,že tentovýro-
bekodpovídánásledujícímnormámanormativním
dokumentům.
EU UYGUNLUK BEYANI
Teksorumlu olarak bu ürünün yönetmelik hükümleri
uyarýncaaþaðýdakinormlaravenormdokümanlarýna
uygunluðunu beyan ederiz.
EU-AZONOSSÁGI NYILATKOZAT
Teljesfelelősségünktudatábankijelentjük,hogyjelen
termék megfelel a következő szabványoknak vagy
szabványossági dokumentumoknak.
ΔΗΛΩΣΗ ΠΙΣΤΟΤΗΤΑΣ ΕU
Δήλώνουμε με αποκλειστική μας ευθύvη, ότι αυτό
το προϊόv αvταποκρίvεται στα ακόλουθα πρότυπα ή
έγγραφα τυποποίησης.
ДЕКЛАРАЦИЯ О СООТВЕТСТВИИ
СТАНДАРТАМ EU. Мы заявляем что этот продукт
соответствует следующим стандартам.
ppa. Thorsten Bühl Kelkheim, 22.02.2016
Director Corporate Technology
Technische Unterlagen bei / Technical file at:
ROTHENBERGER Werkzeuge GmbH
Spessartstasse 2-4
D-65779 Kelkheim/Germany
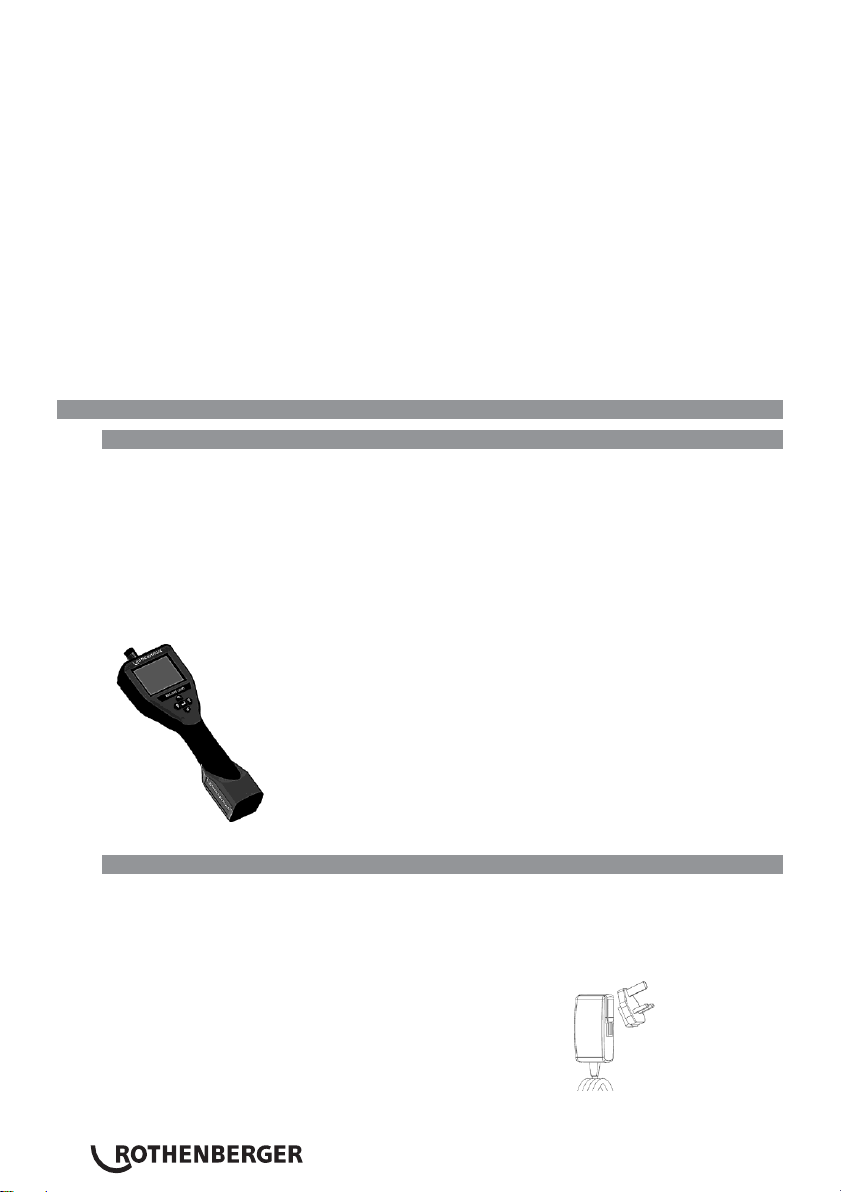
No. 1500000696 ROSCOPE i2000 + Modul TEC

1
Intro
DEUTSCH Seite 2
Bedienungsanleitung bitte lesen und aufbewahren! Nicht wegwerfen!
Bei Schäden durch Bedienungsfehler erlischt die Garantie! Technische Änderungen vorbehalten!
ENGLISH - OriginalUser Manual page 21
Pleasereadand retainthese directionsfor use.Donotthrowthem away! Thewarrantydoes notcover
damage caused by incorrect use of the equipment! Subject to technical modifications!
FRANÇAIS page 38
Lire attentivement le mode d’emploi et le ranger à un endroit sûr! Ne pas le jeter
!
La garantie est
annuléelorsdedommagesdûsàunemanipulationerronée
!
Sousréservedemodificationstechniques!
ESPAÑOL página 56
¡Porfavor,lea yconserve elmanualdeinstrucciones! ¡Nolotire! ¡En casodedañosporerrores de
manejo, la garantía queda sin validez! Modificaciones técnicas reservadas!
ITALIANO Pagina 74
Perfavoreleggereeconservareleistruzioni perl´uso! Nongettarlevia! Incasodi dannidovuti ad errori
nell´uso, la garanzia si estingue! Ci si riservano modifichetecniche!
NEDERLANDS bladzijde 92
Lees de handleiding zorgvuldig door en bewaar haar goed! Niet weggooien! Bij schade door
bedieningsfoutenkomtdegarantieverleningtevervallen!Technischewijzigingenvoorbehouden!
PORTUGUES pagina 110
Queiramlereguardaromanualdeinstruções! Nãodeitarfora! Emcasodeavarias por utilização
incorrecta, extingue-se a garantia! Reservado o direito de alterações técnicas!
DANSK side 128
Læsbetjeningsvejledningen,oggem dentil senerebrug! Smiddenikkeud! Skader,som måtteopståsom
følgeafbetjeningsfejl,medfører,atgarantienmistersin gyldighed! Rettiltekniskeændringerforbeholdes!
SVENSKA sida 145
Läsigenom bruksanvisningen ochförvaradenväl! Kastainte bortden! Garantinupphör omapparaten
har använts eller betjänats på ett felaktigt sätt! Med reservation för tekniska ändringar!
NORSK side 162
Lesbruksanvisningenogoppbevardenvel!Ikkekastden!Oppstårskaderpågrunnavbetjeningsfeil
opphører garantiens gyldighet! Tekniske forandringer forbeholdes!
SUOMI sivulta 179
Lue ja säilytä tämä käyttöohje! Älä heitä pois!
Takuu ei kata käyttövirheistä aiheutuvia vahinkoja! Oikeudet teknisiin muutoksiin pidätetään!
POLSKI strony 196
Instrukcjê obslugi prosze przeczytac i przechowac! Nie wyrzucac!
Przy uszkodzeniach wynikajacych z blêdów obslugi wygasa gwarancja! Zmiany techniczne zastrzezone!
CESKY Stránky 214
Navod k obsluze si prosim přečtěte a uschovejte jej! Nevyhazujte jej!
V pripade poškozeni zpusobenem chybnou obsluhou zanika zaruka! Technicke změny jsou vyhrazeny!
TÜRKÇE sayfa 233
Kullanim açiklamalarini lütfen dikkatlice okuyunuz ve bir yerde muhafaza ediniz! Çöpe atmayiniz!
Kullanimindayapilanhatalar,garantininsilinmesinenedenolur!Teknikdeðiþiklikleryapmahakkimizsaklidir!
MAGYAR oldaltól 250
Kérjük, olvassa el és őrizze meg a kezelési utasítást! Ne dobja el!
A helytelen kezelésből származó károsodások esetén megszûnik a jótállás! Mûszaki változtatások fenntartva!
ΕΛΛΗΝΙΚΑ Σελίδα 268
Οδηγίες χειρισμού παρακαλείσθε να τις διαβάσετε και να τις φυλάσσετε! Μην τις πετάξετε!
Σε ζημιες από σφάλματα χειρισμού παυει να ισχύει η εγγύηση! Με επιφύλαξη για τεχνικές αλλαγές!
PУCCKИЙ Страница 287
Прочтите инструкцию по эксплуатации и сохраняйте её для дальнейшего использования! B случае поломки инструмента
из-за несоблюдения инструкции клиент теряет право на обслуживание по гарантии! Bозможны технические изменения!

2
DEUTSCH

ENGLISH
21
Contents Page
1 Safety Notes
23
1.1 General Safety Rules
23
1.2 Safety Instruction
24
2 Technical Data / Specification
25
3 Function of the unit
26
3.1 Description
26
3.2 Standard Equipment
26
3.3 Charging the ROSCOPE i2000
27
3.4 Installing the Imager Head Cable
27
3.5 Installing the Camera Accessories
28
3.6 Installing the SD Memory Card
29
4 On-Screen Navigation
30
5. Navigation Buttons
30
6. On-Screen Icons / Settings and Navigation
31
6.1 Live Screen Display
31
6.2 Tools / Menu
31
6.3 Saved Pictures and Video
32
6.4 Playback Stil Image / Adding an Audio Annotation
33
7. Touch Screen Navigation / Settings
34
8. Wireless Transfer of Images / Video
34
9. Transferring Images to a computer
35
10. How to update
35
11. Operation of the ROSCOPE i2000 App
36
12. Cleaning Instruction
36
13 Storage
36
14. Troubleshooting
37
15. Accessories
37
16. Disposal
37
17. Customer service
37

22
ENGLISH
Markings in this document:
Danger!
This sign warns against the danger of personal injuries.
Caution!
Thissign warnsagainstthedangerofpropertydamageanddamagetothe
environment.
➔Call for action
This product is covered by U.S. Patents: 7,384,308; 7,431,619 B2; 7,581,988 B2;
7,584,534; Chinese Patents: ZL200620147826.1; ZL200620147827.6; ZL2007200004596.8;
and other patents pending.
USA
Thisdevicecomplieswith Part 15 of theFCCRules.Operationissubjecttothefollowingtwo
conditions:(1)Thisdevicemaynotcauseharmfulinterference,and(2)Thisdevicemustaccept
anyinterference received, including interference that may cause undesired operation.
FCC RF Radiation Exposure Statement:
This equipment complies with FCCradiation exposurelimits set forth foran uncontrolled en-
vironment.EndusersmustfollowthespecificoperatinginstructionsforsatisfyingRFexposure
compliance. This transmittermust not beco-located oroperatingin conjunction withany other
antennaortransmitter,exceptinaccordancewithFCCmulti-transmitterproductprocedures.
This equipment has been testedandfoundtocomply with the limits forClass A digital devices,
pursuanttoPart15of theFCCrules.Theselimitsaredesignedtoprovidereasonableprotec-
tion against harmful interference in a residential installation. This equipment generates uses
and can radiate radio frequency energy and, if not installed and used in accordance with the
instructions, may cause harmful interference to radio communications. However, there is no
guarantee that interference will not occur in a particular installation. If this equipment does
causeharmfulinterferencetoradioor televisionreception,whichcanbe determinedbyturning
the equipment off and on, the user is encouraged to try to correct the interference by one or
more of the following measures:
•
Reorient or relocate the receiving antenna.
•
Increase the separation between the equipment and receiver.
•
Consult the dealer for help.
Useofshieldedcableis requiredtocomplywithClassA limitsinSubpartBofPart15of theFCC
rules.
Canada
This device complies with Industry Canada license-exempt RSS standard(s). Operation is subject
tothefollowingtwoconditions:(1)This devicemay notcauseharmfulinterference,and (2) This
devicemustacceptanyinterferencereceived,includinginterferencethatmaycauseundesired
operation.
LeprésentappareilestconformeauxCNRd‘IndustrieCanadaapplicablesauxappareilsradioex-
emptsdelicence.L‘exploitation estautoriséeauxdeuxconditionssuivantes:(1)l‘appareil nedoit
pasproduiredebrouillage,et (2)l‘utilisateur del‘appareil doitacceptertoutbrouillageradioélec-
trique subi, même si le brouillage est susceptible d‘en compromettre le fonctionnement.
NOTE:
Changesormodificationsnotexpressivelyapprovedbythepartyresponsibleforcompliancecould
void the user‘s authority to operate the equipment.

ENGLISH
23
1 Safety Notes
1.1 General Safety Rules
It is recommended to read the entire manual before operating the ROSCOPE i2000:
WARNING! Read all instructions. Failure to follow all instructions listed below may result
in electric shock, fire and/or serious injury. The term „power tool“ in all of the warnings
listed below refers to your mains operated (corded) power tool or battery operated
(cordless) power tool.
SAVE THESE INSTRUCTIONS.
1)
Work area
a)
Keep work area clean and well lit. Cluttered and dark areas invite accidents.
b)
Do not operate power tools in explosive atmospheres, such as in the presence of
flammable liquids, gases or dust. Power tools create sparks which may ignite the dust or
fumes.
c)
Do not expose to corrosive chemicals.
d)
The imager is water-proof to 9 m depth however the use of the handheld device
should be limited to dry environments (as it is not waterproof).
e)
Keep children and bystanders away while operating a power tool. Distractions can
cause you to lose control.
2)
Electrical safety
a)
Power tool plugs must match the outlet. Never modify the plug in any way. Do
not use any adapter plugs with earthed (grounded) power tools. Unmodified plugs and
matching outlets will reduce risk of electric shock.
b)
Avoid body contact with earthed or grounded surfaces such as pipes, radiators,
ranges and refrigerators. Thereisanincreasedriskof electricshock if yourbodyis earthed
or grounded.
c)
Do not expose power tools to rain or wet conditions. Water entering a power tool will
increase the risk of electric shock.
d)
Do not abuse the cord. Never use the cord for carrying, pulling or unplugging the
power tool. Keep cord away from heat, oil, sharp edges or moving parts. Damagedor
entangled cords increase the risk of electricshock.
e)
When operating a power tool outdoors, use an extension cord suitable for outdoor
use. Use of a cord suitable for outdoor use reduces the risk of electric shock.
3)
Personal safety
a)
Stay alert, watch what you are doing and use common sense when operating a
power tool. Do not use a power tool while you are tired or under the influence of
drugs, alcohol or medication.A moment of inattention while operating power tools may
result in serious personal injury.
b)
Use safety equipment. Always wear eye protection. Safetyequipment such as dustmask,
nonskid safety shoes, hard hat, or hearing protection used for appropriate conditions will
reduce personal injuries.
c)
Do not overreach. Keep proper footing and balance at all times. This enables better
control of the power tool in unexpected situations.
d)
Dress properly. Do not wear loose clothing or jewelry. Keep your hair, clothing and
gloves away from moving parts. Loose clothes, jewelry or long hair can be caught in
moving parts.
4)
Power tool use and care
a)
Do not force the power tool. Use the correct power tool for your application. The
correct power tool will do the job better and safer at the rate for which it was designed.
b)
Do not use the power tool if the switch does not turn it on and off. Any power tool
that cannot be controlled with the switch is dangerous and must be repaired.
c)
Store idle power tools out of the reach of children and do not allow persons

24
ENGLISH
unfamiliar with the power tool or these instructions to operate the power tool. Power
tools are dangerous in the hands of untrained users.
d)
Maintain power tools. Check for misalignment or binding of moving parts, breakage
of parts and any other condition that may affect the power tools operation. If
damaged, have the power tool repaired before use. Manyaccidents arecaused by poorly
maintained power tools.
e)
Use the power tool, accessories and tool bits etc., in accordance with these
instructions and in the manner intended for the particular type of power tool, taking
into account the working conditions and the work to be performed. Use of the power
tool for operations different from those intended could result in a hazardous situation.
f)
Do not place tool into anything or anywhere that may contain a live electrical charge.
5)
Battery tool use and care
a)
Recharge only with the charger specified by the manufacturer. A charger that is suitable
for one type of battery pack may create a risk of fire when used with another battery pack.
b)
Use power tools only with specifically designated battery packs. Use of anyother
battery packs may create a risk of injury andfire.
c)
Under abusive conditions, liquid may be ejected from the battery; avoid contact. If
contactaccidentallyoccurs,flushwithwater.Ifliquidcontactseyes,additionallyseekmedical
help. Liquid ejected from the battery may cause irritation orburns.
6)
Service
Have your power tool serviced by a qualified repair person using only identical
replacement parts. This will ensure that the safety of the power tool is maintained.
7)
Battery is designed to be serviceable by a trained technician (service center), and
should not be removed in the field.
1.2 Safety Instruction
A/C Power Supply Safety
•
Do not probe A/C power supply with conductive objects. Shorting of battery terminals may
cause sparks, burns and/or electricalshock.
•
DonotusetheA/C powersupplyifdamaged.AdamagedA/Cpowersupplyincreasesthe
risk of electrical shock.
•
Useanappropriate powersource.Do not attempttouseastep-up transformeroran engine
generator.DoingsomaycausedamagetotheA/CpowersupplyortheROSCOPEi2000
resulting in electrical shock, fire or burns.
•
Do not allow anything to cover the A/C power supply while in use. Proper ventilation is
required for correct operation of the A/C power supply. Allow a minimum of 4” (10 cm) of
clearance around the charger for proper ventilation.
•
UnplugtheA/Cpowersupply when not inuse. Reduces the risk of injuryto children and
untrained persons.
•
Unplug the A/C power supply from outlet before attempting anymaintenance orcleaning.
Reduces the risk of electrical shock.
•
Donot usetheA/C powersupplyina damp, wet or explosive environment. Donot expose
to rain, snow or dirt. Contaminants and moisture increasethe risk of electrical shock.
•
DonotopentheA/CpowersupplyorROSCOPEi2000housings.Haverepairsperformed
only at authorized locations.
•
Do not carry the A/C power supply by the power cord. Reduces the risk of electricalshock.
Battery Safety
•
ThebatteryintheROSCOPEi2000isNOTdesignedtobeuserreplaceable.CallyourService
Center if you believe the ROSCOPE i2000 battery is in need of service.
•
Properly dispose of the ROSCOPE i2000. Exposure to high temperatures can cause the
battery to explode, so do not dispose of in a fire. Some countries have regulations
concerning battery disposal. Please follow all applicable regulations.

ENGLISH
25
•
Charge battery in temperatures above 32°F (0°C) and below 113°F (45°C). Store ROSCOPE
i2000intemperatures above-4°F(-20°C)and below140°F(60°C).Storageforalongtime
attemperatures above95°F(35°C)willreducethecapacityoftheROSCOPEi2000.It is
recommendedtostoretheROSCOPEi2000at77°F(25°C)tomaximizebatterylife.Proper
care will prevent serious damage to the battery. Improper care of the battery may result
battery leakage, electrical shock and burns.
•
Ifthe ROSCOPE i2000is damaged, donot plugtheA/Cpower supply into it. Do not
attempt to charge.
•
Neveruseahome-madeorincompatiblebatterypack.Thismayresultindamagetounit
and/or cause injury.
•
Never disassemble the ROSCOPE i2000 unit. There are no user-serviceable parts inside.
DisassemblingtheROSCOPEi2000maycauseelectricalshockorpersonalinjury.
•
AvoidcontactwithfluidsleakingfromtheROSCOPEi2000unit.Fluidsmaycauseburnsor
skin irritation. Thoroughly rinse with water in case of accidental contact with fluid. Consult
doctor if fluid comes into contact with eyes.
Figure No. 1 - Power Supply
2 Technical Data / Specification
Viewable Distance ............... 5 cm –30 cm (2” to 12”)
A/C Power Supply ............ (See Figure No. 1 –Power Supply)
Input voltage 100 - 240 VAC, 50 - 60 Hz, 0.3 Amp
Maximum inrush current 15 A @ 115VAC, 30 A@ 230 VAC
5V DC 1.2 Amp Max Output voltage
No Load Standby power < 0.3 W
OperatingTemperature32°Fto104°F(0°Cto40°C)
StorageTemperature-4°Fto140°F(-20°Cto60°C)
Relative Humidity 20% to 80%non-condensing
The charger is supplied with a selection of adaptors for use in
multiplecountries.Beforefirstuse,selecttheappropriateadaptor
for your country and attach it to the charger.
Internal Li-Ion Battery ..… 3.7V, 5200 mAh, 19.24 watt-hours
Estimated run time 3 - 5 hours* of continuous use (* actual battery
life will vary depending onthe intensityof the ImagerLEDsandthe
usageoftheExteriorHandheldDeviceLights).Batterychargetime
approximately 5 hours when units is turned off. (Note - Actual
charge time will be considerably longer if unit is turned on while
charging).
Weight ................................ 0.95 kilograms
Dimensions:
Length ................................ 35 cm (13.80“)
Width ..................................10.8 cm (4.25“)
Height ................................. 7 cm (2.75“)

26
ENGLISH
Display:
Resolution ........................... 320 x 240 RGB
Screen Type ......................... 3.5“ TFT LCD with touch panel
Operating Environment:
Temperature ........................ 0°C to 40°C (32°F to 104°F)
Humidity ............................. Maximum of 95% non-condensing (display unit)
Storage Temperature............ –20°C to 60°C (-4°F to 140°F)
Water Resistance ................. Imager head and extensions to 9m (30‘) water depth
(When properly assembled.)
NOTE: Hand-held unit is not moisture and water proof!
Cable Length .......................1.2 m (4‘) up to 9.7 m (32’) with Optional Extensions
ImageResolution.................720x480
VideoResolution.................640x480
Memory..............................SDcardprovidedformemorystorage
Computer Interface .............USB (Cable Included)
3 Function of the unit
3.1 Description
TheROSCOPEi2000,ahandheldinspectiondevice,displayslivecolorvideofromanimaging
source.Thisdeviceis designedasaremoteinspectiontooltolookintohardtoreachareas such
as home inspection, cable routing and plumbing inspections. It allows the user to capture still-
images and full-motion video, along with audio. This device is equipped with an imaging and
lightingsourcethat featuresself-leveling,imagerotation(with respectto gravity),zoom andLED
lightadjustment.Thesefeaturesensureadetailedandaccuratevisualinspection.Thisunitisalso
equippedwith thecapabilitytowirelesslytransmiteitherimagesorvideoto asecondary(local)
handhelddevice,such as aWi-Fienabledsmartphoneortablet,throughtheuseof asimpleapp
whichcanbedownloadedfromtheinternet.Accessories(mirror,hook,magnet,soldseparately–
see Figure No. 8 / Figure No. 9).
Figure No.2 -ROSCOPE i2000
3.2 Standard Equipment
The ROSCOPE i2000 inspection device comes with the following items (Figure No. 2):
•
Handheld unit
•
Internal Rechargeable Li-Ion Battery
•
Charger - supplied with a selection of adaptors for use inmultiple countries (Figure No. 3)
•
USB Cable
•
1.2 m (4’) Imager (Connector Style A, Black Color)
•
Manual, CD & SD card
•
Blow Mold Case
Figure No. 3 - Power Supply

ENGLISH
27
3.3 Charging the ROSCOPE i2000
OpensiliconcoveronhandheldunitandinsertExternalPowerSupplyintotheminiUSBsocket
(Figure No. 4).
Figure No. 4 - USB Socket
NOTE: TheROSCOPEi2000willonlychargethebatteryifthetemperatureis between0°Cand
40°C(32°Fand113°F).OutsideofthistemperaturerangetheROSCOPEi2000maycontinueto
operate but the batteries will not charge and the Charge Status LED will be off.
1.
Makesurethechargeris unplugged. Inspectthe power cord, chargerand battery for
damageormodifications, orbroken, worn, missing,misaligned orbindingparts.If any
problemsarefound,donotusechargeruntilthepartshavebeenrepairedorreplaced.
2.
Cleananyoil, greaseor dirtfromtheequipmentas describedin the Maintenancesection,
especiallyhandlesandcontrols.Thishelpspreventtheequipmentfromslippingfromyour
grip and allows proper ventilation.
3.
ChecktoseethatallwarninglabelsanddecalsontheROSCOPEi2000andA/CPower
Supply are intact and readable.
4.
Select the appropriate location for the A/C Power Supply before use. Check work area for:
-
Adequate lighting.
-
Flammable liquids, vapors or dust that may ignite. If present, do not work in area until
sourceshavebeenidentifiedandcorrected.Thechargerisnotexplosionproofandcan
cause sparks.
-
Do not use the device in wet or damp areas.
5.
With dry hands, plug the charger into the appropriate powersource.
6.
When the battery is fully charged, the LED indicator will change from red to green.
-
Oncethebatteryis charged,theROSCOPEi2000mayremainpluggedintothecharger
untilitis ready tobe used.There is no risk of over-chargingthebattery.Whenthebattery
has been fully charged, the charger automatically switches to retention charging.
NOTE: Internal Battery delivered with partial charge. It is recommended that the battery
be fully charged for at least 5 hours before initial use.
NOTE: Any service or replacement of the internal battery pack should be done by an
authorized ROTHENBERGER service facility.
3.4 Installing the Imager Head Cable
Onlyone imagershouldbeconnectedtotheunitat atime.Alwaysmakesuretheunitis
off when installing or removing an imager.
TousetheROSCOPEi2000inspectiondevice,theimagerheadcablemustbeconnectedtothe
handhelddevice.Toconnectthecabletothehandhelddevice,makesurethekeyandslot(Figure
No. 6 ) are properly aligned. Once they are aligned, hand-tighten the knurled nut to hold the
connectioninplace.Note–TheROSCOPEi2000isequippedwith(2)differentstyleconnectors,
making backward compatible with a variety of ROTHENBERGER imagers.

28
ENGLISH
Slot
Key
Figure6-CableConnections(ConnectorStyle“A”, Black9-PinStyleConnector)
(For use with standard Imager provided with i2000 and with Module25/16 Imager)
Connector Style „B“
Figure 7 –Cable Connections (Connector Style “B”, Silver 5-Pin Style Connector)
(ConnectorStyle“B”isusedtoattachpreviousversionsofROSCOPEImagerCabletothe
ROSCOPE i2000)
NOTE: 1.2m(4’) cableextensionsareavailable,forConnectorStyle
“A”
imageronly,toincrease
the length of your cable up to 9.7 m (32’) in length. Toinstall an extension, first remove the
imagercable fromthe handhelddevicebylooseningthe knurlednut.Connect the extension(s)
tothehandhelddeviceas describedabove(Figure6).Thekeyedendoftheimagerhead cable
connects to the slotted end of the extension.
3.5 Installing the Camera Accessories
(Figure No. 8) shows a mirror, hook and magnet (accessories sold separately). Each accessory
attaches to the (provided) Connector Style
“A”
Imager Head the same way.
Figure 8 –Connector Style
“A”
accessories (sold separately)
Toattachanaccessory,holdtheimagerheadasshownin(FigureNo.8).Slipthesemicircleendof
theaccessoryovertheflatsoftheimagerheadasshowninFigure8.Thenrotatetheaccessorya
1/4 turn so the long arm of the accessory is extending out as shown (Figure No. 9).

ENGLISH
29
Figure 9 –Installing an Accessory on the Connector
“A”
imager
3.6 Installing the SD Memory Card
Locatethe tab onthe port cover (Figure No. 10), lift andpull to removethecover and exposethe
SDcardslot.(SDcardis included).InserttheSDcardintotheslot(FigureNo.11)makingsurethe
contacts are facing towards you and the angled portion of the card is facing down.
Silicon Cover
Power Button
Figure 10 –Port Cover and Power Button
Mini USB Port
SD Card Slot
Video Out Port Power Button
Figure No. 11 –Unit Inputs / Outputs

30
ENGLISH
4 On-Screen Navigation
WhentheROSCOPEi2000inspectiondeviceispoweredon,thefirstscreenthatisdisplayedis
referredtoasthesplashscreen(FigureNo.12).Thisscreentellsyouthedeviceisbootingup.
Oncethe productis fully powered up, the screenwill automatically switch tothe live screen.
Figure No. 12 –Start-up / Splash Screen –Indicates Current Firmware Version on the Handheld
Unit
5. Navigation Buttons
CapturePictureorVideo(on/off)
LED Brightness +/-
Zoom Image

ENGLISH
31
6. On-Screen Icons / Settings and Navigation
6.1 Live Screen Display
Capture Mode Indicator and Button (Touch screen to select camera or video)
Tools/Menu Button (Touch screen to access Tools Menu)
NOTE -Alliconswillappear whentheusertouchesthe screenorpressesa hardwarebutton and
will disappear after 3 seconds.
Video Capture Mode Selected
ImageCaptureModeSelected(DefaultSetting)
Image LED intensity
Zoom level
Wi-Fi Connection established
Battery level
IndicatestheamountofmemoryremainingontheinstalledSDcard
Indicator that the SD card is write-protected
No icon will appear when there is no SD card installed (SD card required for memory storage).
(Touch screen to access saved files)
NOTE - Actuating the power button while video is recording, may corrupt the SD card.
6.2 Tools / Menu
NOTE -Alliconswillappear whentheusertouchesthe screenorpressesa hardwarebutton and
will disappear after 3 seconds.

32
ENGLISH
BackButton(TouchscreentoreturntoLiveImage)
Firmware version
Set Time and Date (Touch screen forsettings)
Auto-off Timer Function (Touch screen to select)
-
Disabled
-
Device will turn off after 30minutes
-
Device will turn off after 20minutes
-
Device will turn off after 10minutes
ROSCOPE “Headlight” Function (Touch screen to turn headlights on/off)
Wi-Fi Connection (Touch screen to turn on/off)
NOTE - To save the battery, turn off when not in use.
Up-is-UpFunction(Touchscreentoturnself-levelingon/off)
Black and White/Color (Touch screen to select)
Format SD Card
Add Time and Date to picture (Touch screen for on/off feature)
6.3 Saved Pictures and Video
NOTE - All icons will appear when the user touches the screen or presses a hardware button and
will disappear after 3 seconds.
SelectingaThumbnailwillopentheimage/videotofull-screenmode(Touchscreentoselect)
Back Button (Touch screen to return to LiveImage)
Indication of a video file/audio file
Move to the previouspage
Move to the next page

ENGLISH
33
6.4 Playback Stil Image / Adding an Audio Annotation
NOTE - Sound-Bite can be recorded on live video. / It cannot be added to saved video.
NOTE - All icons will appear when the user touches the screen or presses a hardware button and
will disappear after 3 seconds.
BackButton(TouchscreentoreturntoLiveImage)
Video or audio playback progressbar
IndicatestheamountofmemoryremainingontheinstalledSDcard
Indicator that the SD card is write-protected
Audio Notation Functions (Touch screen for choice of following commands)
Record an audio notation
Playanaudionotationif oneis present
Pause playing an audionotation
Stop the recording of an audio notation or a playing audio notation
Status Indicators
Zoom level
Battery level
Wi-Fi Connection established
Delete current image orvideo
Delete both image and video notation (Touch screen to delete)
Deletejusttheaudionotation(Touchscreentodelete)
Touch screen to confirm deleting or cancelselection:
yes
no

34
ENGLISH
7. Touch Screen Navigation / Settings
FigureNo.13-ToolsMenuScreen Figure No. 14 - Tools MenuScreen
Touchscreen(TouchToolsicon/lowerleftcorner-FigureNo. 13)to entertheinterac-
tive menu (Figure No. 14).
Touch the date & time icon (top left) to set date and time
-
Tapeachindividualentrytoselect
-
Tapup / down arrows repeatedly to desired entry
-
Tap“Back” arrow to main menu
Touch “Auto Time-Out” icon (top center) to select feature:
-
10 minute time-out
-
20 minute time-out
-
30 minute time-out
-
No time-out / unit must be manually turned off
Touch head lights icon (top right) to turn lights on / tap again to turn lights off
Touch to turn the Wi-Fi Connection on/off
Touch patented “Up-is-Up” self-leveling feature icon (bottom left) to turn feature on/
tap again to turn feature off.
NOTE: Youmaywitnessblackregionsaroundthe perimeterastheliveimagerotates
within the LCD. This is a normal result of the format of the imager, zooming in on the
live image will reduce this.
Touchthe black & white / color icon (bottom center) to switch between black & white
and color modes.
TouchSD card (bottom right) -confirm yes/noto clear“ALL” SDcardmemorystorage
(100%).
Touchto turn feature for the time/date stamp on/off
8. Wireless Transfer of Images / Video
TheROSCOPEi2000hastheabilitytowirelesslytransfersavedimagesandvideofromthehand-
held device to a secondary Wi-Fi enabled smart phone, such that you can share data.
NOTE-RadiointerferenceandtherangebetweenROSCOPEi2000andexternaldevicescan
impact the transfer of data.
Gotowww.rothenberger.comforcompletedetailsandaFREEfirmwaredownloadorsearchApp-
store.

ENGLISH
35
9. Transferring Images to a computer
Mini USB Port
SD Card Slot
Video Out Port Power Button
Figure No. 14 –USB Connection for Transfer
1.
Use the Mini USB cable to connect the ROTHENBERGER handheld device to the computer
(Figure No. 14).
2.
PowerthedeviceON,asplashscreensaying“USB Connected” willappearontheLCD
screen-followtheappropriate prompts from your computer (platforms and/ or versions
may vary)
3.
Youmay also remove the SD Card memory storage device and load directly into your
computer - follow the appropriate prompts from your computer (platforms and / or versions
may vary).
10. How to update
Periodically check for the latest version of firmware on www.rothenberger.com.
Step 1
Copy folder DCIM on an empty SD card.
Step 2
Insert SD card and start the unit. Make sure that battery level is at least 50%.
Step 3

36
ENGLISH
Step 4
Do not press the power button when the “hour glass“ is
on the screen! The firmware is updating (45 seconds).
Firmware updated successfully, OK to turn power off and remove SD card.
11. Operation of the ROSCOPE i2000 App
Use of the app with an iOSdevice:
➔Switch on the ROSCOPE i2000, select the Extras/Menu button and activate the WLAN.
➔Activate the WLAN (RO2K……) on the iOS device over Settings.
Settings:
Autom. connection ON
IP address:
Static
IP-address 192.168.10.241 (iOS device)
Subnetmask 255.255.0.0
Router 192.168.10.240 (ROSCOPE i2000)
➔PresstheHome buttonontheiOS devicetwiceandremovetheprogramme(s)runninginthe
background. Press the Standby On/Off button twice to close all connections.
➔RestartROSCOPEi2000andopentheappontheiOSdevice.
Theconnectionis createdand LivePicture is now available.
Use of the app with the Android device:
➔Set up a “Hotspot“ (mobile WLAN) on the Android device over Settings:
-
Further settings
-
Tethering and mobile hotspots
-
Activate/select a mobile WLAN hotspot
-
Click Configure in order to navigate to the hotspotsettings.
-
Establish the name of the hotspot and the password for the mobile network.
➔SwitchontheROSCOPEi2000,selecttheExtras/MenubuttonandactivatetheWLAN(IP
address of the ROSCOPE i2000 visible under the hotspot name).
Then connect with the mobile WLAN hotspot (the Android device):
➔OpentheappontheAndroiddevice,selectLivePictureandentertheIPaddressof the
ROSCOPE i2000 and then confirm.
The connection is created and Live Picture is now available.
12. Cleaning Instruction
1.
Alcohol wipes or mild detergent and water to remove dirt and grease from the product.
2.
Recommend soft optical cloth for cleaning the LCDwindow.
3.
Recommend cotton cloth for cleaning imager head.
4.
Allow appropriate drying time before operating handheld device.
13 Storage
1.
It is good practice to clean the unit prior to long term storage.
2.
It is best to store the unit in a cool dry location.
This manual suits for next models
1
Table of contents
Other Rothenberger Analytical Instrument manuals

Rothenberger
Rothenberger Modul Pipe 25/16 User manual

Rothenberger
Rothenberger ROCAM Plus User manual

Rothenberger
Rothenberger Modul 25/16 User manual

Rothenberger
Rothenberger ROSCOPE mini User manual

Rothenberger
Rothenberger ROSCOPE mini User manual

Rothenberger
Rothenberger ROCAM mini HD AMPShare User manual

Rothenberger
Rothenberger ROCAM 3 Multimedia Use and care manual