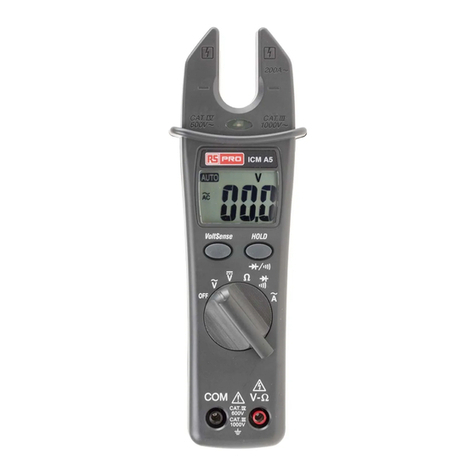
RS PRO ICM 20 User manual

Instruction Manual
ICM 20
Clamp Meter
EN DE ES IT FR

2
Safety Information
For safe operation of this instrument, read
these instructions completely before you
use it and comply with them fully.
Failure to observe these warnings can
result in severe injury or death.
-If possible, do not work alone, so
assistance can be given if required.
- Do not use the instrument if it is damaged.
- Do not use the instrument if it is not
operating correctly, or if it is wet.
- If this instrument is used in a manner not
specified in these Operating Instructions,
the protection provided by the instrument
may be impaired.
- Use extreme caution and wear Personal
Protective Equipment when taking
measurements where Hazardous Live
parts could be Accessible.
-Use caution when measuring or working
near voltages above 30 V ac rms, or
60 V dc. These voltages may cause a
shock.
-Do not allow fingers to protrude beyond
the Tactile Barrier when fitting or removing
the instrument from around a Hazardous
Live conductor, as this may cause a shock.
Symbols as marked on the Tester
and instructions
Caution, Risk of electric shock
Cauton, Risk of danger - Refer to
operating instructions.
7Equipment protected throughout by
double or reinforced insulation
<Battery
Earth
Conforms to applicable EU
directives
Application around and removal
from Hazardous Live conductors is
permitted

3
Caution
If this instrument is used in the vicinity of
equipment which generates electromag-
netic interference, the display may become
unstable or the measurements shown may
be subject to large errors.
TEST EQUIPMENT RISK ASSESSMENT
Users of this equipment and/or their
employers are reminded that Health and
Safety Legislation requires them to carry
out a valid risk assessments of all electrical
work, so as to identify potential sources of
electrical danger and risk of electrical injury
such as from inadvertent short circuits.
Cleaning, Maintenance and Repair
To clean the instrument, wipe the case with
a damp cloth and detergent; do not use
abrasives or solvents.
Remove the batteries if the instrument is to
be stored for a long period.
Maintenance not covered in this Instruction
Manual should only be performed by
qualified personnel. To maintain accuracy,
this instrument should be calibrated at least
yearly, or if it is suspected of being
inaccurate.
Repairs should only be performed by
qualified personnel. For maintenance,
repair and calibration, contact your local
distributor or RS Components; the address
is given at the end of these instructions.
Battery Replacement
When the low-battery indicator “<”
appears in the display, there is not
sufficient power in the battery to perform
an accurate measurement. Replace the
battery as follows :

4
Caution: Remove the instrument
from around any conductor before remov-
ing the battery compartment cover. Do not
attempt to take measurements with the
battery compartment cover removed.
1. Turn the instrument off.
2. Use a screwdriver to loosen the screw
from the battery compartment cover.
3. Remove the battery compartment
cover. Retain the cover and screw.
4. Remove the exhausted battery from
the battery compartment.
5. Fit a new battery into the instrument
observing correct polarity.
6. Refit the battery compartment cover
and secure with the screw.
7. Turn the instrument on and check for
correct operation.
8. Dispose of the exhausted battery in
accordance with local regulations.

5
Power On / Off
Data Hold

6
ACA 20A
1.3V ~ 750.0V
MAX Hold

7
ACA 200A

8
AC A 400A
Specifications
1-1 General Specifications
LCD display digits :
2000 digit large scale LCD readout.
Measuring rate : 2.5 times / sec.
Overrange display :
“OL” is displayed for “20A” and “200A”
range, shows the real value
when bigger than “400A” range.
Low battery indicator :
<is displayed. Replace the battery when
the indicator <appears in the display.
Power requirement : 9V battery.
Battery type and life :
ALKALINE PP3, 9V 580 hours.

9
1-2 Environmental Conditions
Indoor Use.
Calibration :
One year calibration cycle.
Operating temperature :
0°C ~ 30°C (≦80% RH)
30°C ~ 40°C (≦75% RH)
40°C ~ 50°C (≦45%RH)
Storage temperature :
-20 to +60°C, 0 to 80% RH (batteries not
fitted).
Operating altitude : 2000m (6562 ft)
Overvoltage category :
IEC 61010-1 600V CAT.Ⅲ,
CAT.Ⅲequipment is designed to protect
against the transients in the
equipment in fixed installations, such as
distribution panels, feeders
and short branch circuits and
lighting systems in large buildings.
Conductor Size : 27mm diameter.
Pollution degree : 2
EMC : EN 61326-1
Shock vibration :
Sinusoidal vibration per MIL-T-28800E
(5 ~ 55 Hz, 3g maximum).
Dimensions (W x H x D) :
56mm x 180mm x 32mm
Weight : 250g including battery.
Accessories : Battery (installed),
Carrying case and User manual.
1-3 Electrical Specifications
Accuracy is ± (% reading + number of
digits) at 23°C ±5°C < 80%RH.
Temperature coefficient :
0.2 x (Specified accuracy) / °C, < 18°C, >
28°C.
AC Current
Function Range Accuracy
A
(50~60Hz)
0 ~19.99A ±(3.0% + 0.05 A)
20.00~199.9A ±(2.0% + 0.5 A)
200~400A ±(2.0% + 5 A)

10
Limited Warranty
This instrument is warranted to the original
purchaser against defects in material and
workmanship for 3 year from the date of
purchase. During this warranty period, RS
Components will, at its option, replace or
repair the defective unit, subject to verifica-
tion of the defect or malfunction. This
warranty does not cover fuses, disposable
batteries, or damage from abuse, neglect,
accident, unauthorized repair, alteration,
contamination or abnormal conditions of
operation or handling.
Any implied warranties arising from the sale
of this product, including but not limited to
implied warranties of merchantability and
fitness for a particular purpose, are limited to
the above. The manufacturer shall not be
liable for loss of use of the instrument or
other incidental or consequential damages,
expenses, or economic loss, or for any claim
or claims for such damage, expense or
economic loss.
Some states or countries laws vary, so the
above limitations or exclusions may not
apply to you. For full terms and conditions,
refer to the current RS Catalogue.

Africa
RS Components SA
P.O. Box 12182,
Vorna Valley, 1686
20 Indianapolis Street,
Kyalami Business Park,
Kyalami, Midrand
South Africa
www.rs-components.com
Asia
RS Components Pte Ltd.
31 Tech Park Crescent
Singapore 638040
www.rs-components.com
China
RS Components Ltd.
Suite 23 A-C
East Sea Business Centre
Phase 2
No. 618 Yan'an Eastern Road
Shanghai, 200001
China
www.rs-components.com
Europe
RS Components Ltd.
PO Box 99, Corby,
Northants. NN17 9RS
United Kingdom
www.rs-components.com
Japan
RS Components Ltd.
West Tower (12th Floor),
Yokohama Business Park,
134 Godocho, Hodogaya,
Yokohama, Kanagawa 240-0005
Japan
www.rs-components.com
U.S.A
Allied Electronics
7151 Jack Newell Blvd. S.
Fort Worth, Texas 76118
U.S.A.
www.alliedelec.com
South America
RS Componentes Limitada
Av. Pdte. Eduardo Frei M. 6001-71
Centro Empresas El Cortijo
Conchali, Santiago, Chile
www.rs-components.com

12

Strommesszange
ICM 20
Bedienungsanleitung
DE

14
Sicherheitshinweise
Lesen Sie vor der Verwendung dieses
Geräts die nachfolgenden Anweisungen
sorgfältig durch, und beachten Sie diese.
Die Nichtbeachtung dieser Warnungen
kann schwere Verletzungen oder den
Tod zur Folge haben.
-Arbeiten Sie nach Möglichkeit nicht
alleine, so dass im Bedarfsfall Hilfe zur
Verfügung steht.
- Das Gerät bei Beschädigung nicht
verwenden.
- Das Gerät bei fehlerhaftem Betrieb oder
im nassen Zustand nicht verwenden.
- Bei nicht bestimmungsgemäßem
Gebrauch und bei Nichtbeachtung der
Bedienungshinweise können die integri-
erten Schutzfunktionen des Geräts
unwirksam werden.
- Seien Sie extrem vorsichtig, und tragen
Sie persönliche Schutzausrüstung, wenn
Sie Messungen in der Nähe von leicht
berührbaren stromführenden Teilen
durchführen.
-Fassen Sie nicht über den Grif -
schutzkragen, wenn Sie das Gerät an
einen stromführenden Leiter mit gefähr-
licher Spannung anschließen oder davon
trennen, da sonst die Gefahr eines
Stromschlags besteht.
Symbole auf dem Gerät und der
Anweisungskarte
Warnung vor gefährlicher
elektrischer Spannung
Warnung vor potenzieller Gefahr
(siehe Bedienungsanleitung)
7Das Gerät ist durch eine doppelte
oder verstärkte Isolierung geschützt
<Batterie
Erdungszeichen
Entspricht den Richtlinien der Eu-
ropäischen Union
Anlegen und Lösen der Zange von
gefährlichen stromführenden Leitern
erlaubt

15
Achtung
Wenn die Strommesszange in der Nähe
einer elektromagnetischen Störquelle
verwendet wird, kann dies zu einer
instabilen oder falschen Anzeige der
Messwerte führen.
RISIKOBEURTEILUNG VON
PRÜ FGERÄ TEN
Benutzer dieses Geräts und/oder ihre
Arbeitgeber werden darauf hingewiesen,
dass sie nach den geltenden Gesetzen
zur Sicherheit am Arbeitsplatz verpflichtet
sind, bei allen elektrischen Arbeiten
Risikobeurteilungen durchzuführen.
Nur so können potenzielle elektrische
Gefahrenquellen und mögliche
Verletzungsgefahren durch Elektrizität,
beispielsweise durch zufällige
Kurzschlüsse, erkannt und beurteilt
werden.
Reinigung, Wartung und Reparatur
Wischen Sie zum Reinigen des Geräts
das Gehäuse mit einem feuchten Tuch
und Reinigungsmittel ab. Keine Scheuer-
oder Lösungsmittel verwenden.
Entfernen Sie die Batterien aus dem
Gerät, wenn es über einen längeren
Zeitraum nicht verwendet wird.
Wartungsarbeiten, die in der vorliegenden
Anleitung nicht aufgeführt sind, sollten nur
von entsprechend geschultem Fachper-
sonal durchgeführt werden. Um eine
gleichmäß ig hohe Messgenauigkeit zu
gewährleisten, sollte dieses Gerät minde-
stens einmal jährlich kalibriert werden
oder bei Verdacht auf Messfehler.
Reparaturarbeiten sollten nur von
entsprechend geschultem Fachpersonal
durchgeführt werden. Wenden Sie sich für
Wartungs-, Reparatur- und Kalibrierar-
beiten an den nächstgelegenen Distribu-
tor oder an RS Components. Die entspre-
chenden Adressen finden Sie am Ende
dieser Anleitung.

16
Batteriewechsel
Wenn im Display die Batterieanzeige “<”
erscheint, ist die Batterie zu schwach, um
eine genaue Messung durchführen zu
können. Ersetzen Sie die Batterie wie folgt:
Achtung : Lösen Sie das Gerät vom zu
messenden Leiter, bevor Sie die Batterie-
fachabdeckung entfernen. Führen Sie
keinen Messungen bei geöffnetem
Batteriefach durch.
1. Schalten Sie das Gerät aus.
2. Lösen Sie mit einem Schraubendreher
die Schraube der Batteriefachabdeckung.
3. Entfernen Sie die Batteriefachab-
deckung. Bewahren Sie Abdeckung und
Schraube auf.
4. Entfernen Sie die leere Batterie aus dem
Batteriefach.
5. Legen Sie eine neue Batterie ein, und
achten Sie auf korrekte Polung.
6. Bringen Sie die Batteriefachabdeckung
wieder an und befestigen Sie sie mit der
Schraube.
7. Schalten Sie das Gerät ein und über-
prüfen Sie die einwandfreie Funktion.
8. Entsorgen Sie die leere Batterie gemäß
den einschlägigen Vorschriften.

17
Ein-/Ausschalter
Data Hold(Messwertspeicherung)

18
AC A 20A
1.3V ~ 750.0V
MAX Hold
(Maximalwertspeicherung)

19
AC A 200A

20
AC A 400A
Technische Daten
1-1 Allgemeine technische Daten
LCD-Display, Digits :
Großes LCD-Display mit 2000 Digits
Messfolge : 2,5 Messungen pro Sekunde
Bereichsüberschreitungsanzeige :
“OL“ wird für die Bereiche “20A“ und
“200A“ angezeigt, der tatsächliche Wert
wird bei Ü berschreitung des Bereichs
„400A“ angezeigt
Symbol für schwache Batterie :
“2“ wird angezeigt
Stromversorgung : 9-V-Batterie
Batterietyp und -lebensdauer :
9-V-Alkalibatterie, Typ PP3 (6LR61) oder
gleichwertig, typische Lebensdauer 580
Stunden.
Table of contents
Languages:
Other RS PRO Measuring Instrument manuals

RS PRO
RS PRO LCR-6000 Series User manual

RS PRO
RS PRO RSSA3000X User manual

RS PRO
RS PRO RS-128M User manual

RS PRO
RS PRO RS-326 User manual

RS PRO
RS PRO RS-1360A User manual

RS PRO
RS PRO RS-96 User manual

RS PRO
RS PRO RS-72H User manual

RS PRO
RS PRO RS 1107-UT User manual

RS PRO
RS PRO RS-1361C User manual

RS PRO
RS PRO ILM 1335 User manual

RS PRO
RS PRO IPM 3600N User manual

RS PRO
RS PRO 236-9298 User manual

RS PRO
RS PRO RS-3381 User manual

RS PRO
RS PRO ISA-730 User manual

RS PRO
RS PRO RS-1340 User manual

RS PRO
RS PRO HS-608 User manual

RS PRO
RS PRO RS-8880 User manual

RS PRO
RS PRO RS-1150 User manual

RS PRO
RS PRO RS-92 User manual

RS PRO
RS PRO RS 155B User manual