manuals.online logo
Brands
  1. Home
  2. •
  3. Brands
  4. •
  5. Ruckus Wireless
  6. •
  7. Wireless Access Point
  8. •
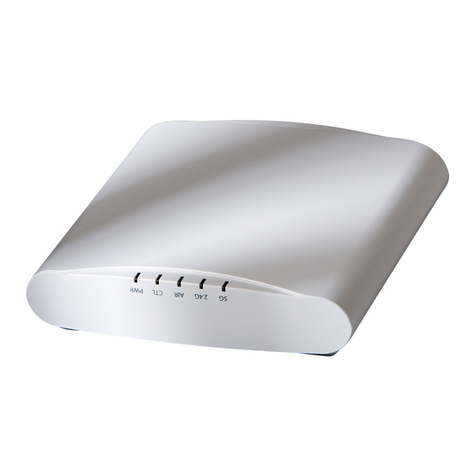
  9. Ruckus Wireless R610 User manual

Ruckus Wireless R610 User manual

Copyright © 2017 Ruckus Wireless, Inc. Page 1 of 4
Published September 2017, Part Number 800-71495-001 Rev C
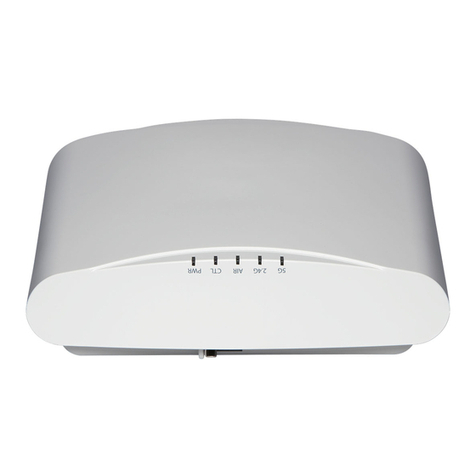
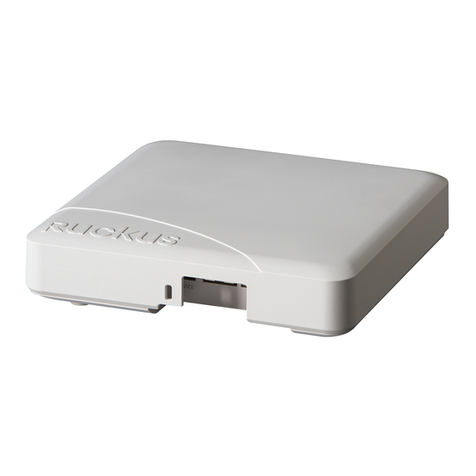
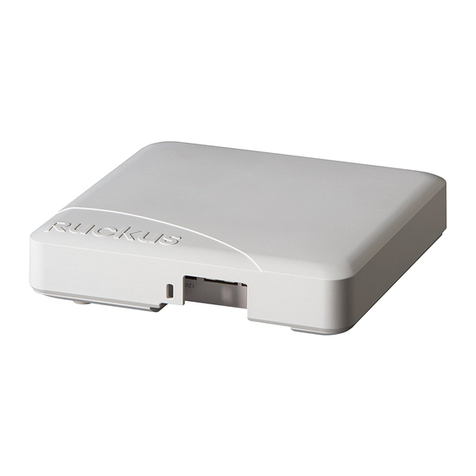
Unleashed R610 Access Point
Quick Setup Guide
This Quick Setup Guide provides step-by-step
instructions on how to set up your Ruckus Wireless
Unleashed R610 Dual Band 802.11ac Multimedia Wi-Fi
Access Point (AP).
For detailed information on configuration and
administration of your Unleashed R610, refer to the
Unleashed Online Help, available from https://
docs.ruckuswireless.com/unleashed/200.4/index.html.
This Guide in Other Languages
•请从以下网站获得该指南的简体中文版
https://support.ruckuswireless.com.
• Vous trouverez la version française de ce guide à
l'adresse suivante https://support.ruckuswireless.com.
•こ の ガ イ ド の⽇本語版は https://support.ruckuswireless.com
でご覧く ださい。
•이가이드의 한국어 버전은 웹사이트
(https://support.ruckuswireless.com)에서 확인하시기 바랍니다 .
• Veja a versão em português (Brasil) deste guia em
https://support.ruckuswireless.com.
• Puede ver la versión en español (América Latina) de
esta guía en https://support.ruckuswireless.com.
Before You Begin
Before deploying Ruckus Wireless products, please
check for the latest software and the release
documentation.
• User Guides and Release Notes are available at
http://support.ruckuswireless.com/documents.
• Software Upgrades are available at
http://support.ruckuswireless.com/software.
• Open Source information is available at
http://opensource.ruckuswireless.com.
• Software License and Limited Warranty are available
at
http://support.ruckuswireless.com/warranty.
Package Contents
• R610 Access Point
• One wall-mount anchor kit, including two 1" No. 8
steel panhead Phillips sheet metal screws, one 5mm
M2.5 x 1.06 Torx security screw, and wall-mount
anchors
•OneexternalT-bar bracket (two unassembled parts)
• One unit removal pin
• Regulatory flyer
• Product warranty statement
• Declaration of Conformity, if required
•ThisQuick Setup Guide
Step 1: Collect Tools and Setup Requirements
• A computer running Windows 7, 8, 10 or Mac OS X
(procedures for other OS’s are similar)
• Two Cat 5e Ethernet cables
• No. 2 Phillips screwdriver and T8 Torx driver for wall
mounting anchor kit
• An AC power adapter (sold separately), or
• An 802.3af or 802.3at -compliant Power over
Ethernet (PoE) switch or PoE injector
• When mounting the R610 to a truss or pole, two
customer-supplied cable ties
Step 2: Connect the AP to Power and Your
Network
Figure 1: Top view
1After removing your Unleashed AP from its package,
connect it to your network switch or router using an
Ethernet cable.
2Using an AC adapter (sold separately), connect the
AP 12VDC port to a protected power source.
Alternatively, connect the 10/100/1000 POE In port to
a PoE injector or switch for both power and network
connectivity.
3Verify that the Power LED on the external enclosure is a
steady green.
Figure 2: Bottom view
STEP 3: CONFIGURE YOUR UNLEASHED NETWORK
Unleashed can be deployed using either a Mobile App, available for both iOS and
Android, or using your PC’s web browser. Refer to the relevant section depending on
which method you prefer to use:
•Step 3a: Setup Using the Unleashed Mobile App
•Step 3b: Setup Using a Web Browser
Step 3a: Setup Using the Unleashed Mobile App
To perform setup using the Unleashed Mobile App, download the iOS or Android app
from the app store.
1As soon as the Unleashed AP is powered on and connected
to the local network, it boots up and begins broadcasting a
temporary unencrypted WLAN named “Configure.Me-
[xxxxxx]” from both radios.
2Using your client’s Wi-Fi connection settings, select and
associate to the “Configure.Me-[xxxxxx]” WLAN.
3Launch the app, and follow the on-screen instructions to
configure your Unleashed network(s).
Figure 3. Unleashed Mobile App for iOS and Android
Copyright © 2017 Ruckus Wireless, Inc. Page 2 of 4
Published September 2017, Part Number 800-71495-001 Rev C
Figure 4. Configuring Unleashed from the Mobile App
Step 3b: Setup Using a Web Browser
1As soon as the Unleashed AP is powered on and connected
to the local network, it boots up and begins broadcasting a
temporary unencrypted WLAN named “Configure.Me-
[xxxxxx]” from both radios.
2Using your client’s Wi-Fi connection settings, select and
associate to the “Configure.Me-[xxxxxx]” WLAN.
3Launch a web browser and enter the following into the
browser’s URL bar: unleashed.ruckuswireless.com, and press
Enter.
4You will be redirected to the Setup Wizard. Complete the
steps in the Setup Wizard and click Finish.
Figure 5. Complete the Setup Wizard to set up your Unleashed network
5Once the Setup Wizard is finished, a “Configuring system
settings and rebooting” progress screen appears. Wait until
the process is complete.
6Connect to the WLAN that you configured in the Setup
Wizard, and click OK to reconnect. You will be redirected to
the Unleashed login screen.
7Enter your Admin Name and Password to login.
Figure 6. The Login page
8Upon successful login you will be presented with the
Unleashed Dashboard, which displays an overview of your
Ruckus Unleashed network.
Figure 7. The Unleashed Dashboard
9Click OK to save your changes.
Your changes are put into effect immediately. Continue with Step 4: Customize Your
Wireless LANs.
Step 4: Customize Your Wireless LANs
Once the Unleashed Master AP has been initialized, you
can fine-tune the settings of your first WLAN (that you
created during the setup wizard), and create any
additional WLANs needed prior to attaching additional
Unleashed member APs. Then, when you deploy
additional member APs in whatever order you prefer,
they will automatically retrieve all WLAN configuration
settings (and any other settings you have configured)
from the Unleashed Master AP.
1From the Dashboard, click anywhere in the WiFi
Networks section to expand the display of your
deployed WLANs.
2On the left side of the screen, select the WLAN box
for the WLAN you would like to configure, and click
the Edit button to edit the configuration; or click
Create to create a new WLAN.
3If you made any changes to the original WLAN, you
will be disconnected and will need to reconnect once
the changes have been deployed on the AP radios.
Congratulations! Your Unleashed network is now
configured and ready for use. You may now proceed to
Step 5: Deploy Additional Unleashed Access Points.
Step 5: Deploy Additional Unleashed Access
Points
Deploying additional Unleashed member APs is simply a
matter of connecting them to the same Layer 2 network
(subnet) and providing power. They will discover the
Unleashed Master and join automatically. No additional
steps are necessary.
(Optional) Mounting Instructions
The R610 can be mounted to a T-bar, wall or ceiling a
using the enclosed mounting kits. Refer to the following
sections:
•Mounting on a Flat Surface
•Mounting on a Recessed Drop-Ceiling T-Bar
•Mounting on a Flush Drop-Ceiling T-Bar
•Mounting on a Truss or Pole
Mounting on a Flat Surface
1Use the Mounting Template on the last page of this
Quick Setup Guide as a template to mark the
locations for drill holes on the mounting surface.
2Use a 5mm drill bit to drill holes approximately 25mm
into the mounting surface (Figure 8).
3Insert the anchors and mounting screws into the mount-
ing surface, leaving approximately 1/4” (6 mm) of the
screw heads protruding for the AP enclosure.
4To remove the AP, insert the unit removal pin into the
hole on the top of the AP to unlock, then push the AP up
to release the AP enclosure from the mounting screws.
Figure 8. Flat surface mounting
Copyright © 2017 Ruckus Wireless, Inc. Page 3 of 4
Published September 2017, Part Number 800-71495-001 Rev C
Mounting on a Recessed Drop-Ceiling T-Bar
The enclosed T-bar bracket supports mounting to recessed
drop ceiling T-bars.
•Mounting an AP using the External Bracket
•Removing an External Bracket from a T-Bar
•Removing the External Bracket from the AP
Mounting an AP using the External Bracket
1Position the studs on the bottom of the T-bar bracket (B
in Figure 9) in the mounting holes on the R610 enclosure,
and then slide the T-bar bracket until the studs are in the
narrow parts of the R610 mounting keyholes.The mount-
ing bracket locks in place on the AP enclosure.
Figure 9. Attaching the external bracket to the AP
2Attach the locking tab (C in Figure 9) to one side of the T-
bar and the bracket (B in Figure 9) to the other side of the
T- b a r.
3Slide the locking tab (C) into the bracket (B) so that it
locks in place around the T-bar (Figure 10). Make sure that
both clasps are gripping the T-bar.
Figure 10. Attaching the external bracket to the T-bar
Removing an External Bracket from a T-Bar
1Move the ceiling tiles out of the way.
2Slide the locking tab away from the T-bar to release
the AP-bracket assembly from the T-bar.
3The R610-and-T-bar bracket assembly comes away
from the T-bar.
Figure 11. Removing the external bracket from the T-bar
Removing the External Bracket from the AP
1Insert the unit removal pin into the hole on the front of
the AP to unlock the mounting bracket from the AP
enclosure.
2Slide the mounting bracket (Figure 12) toward the
Ethernet ports on the R610 until it detaches from the
R610.
Figure 12. Removing the external bracket from an AP
Mounting on a Flush Drop-Ceiling T-Bar
Mounting an AP using the Integrated T-bar clips
1Orient the AP so that the T-bar is positioned between
the T-bar clips as shown in Figure 13, then rotate the AP
until the third T-bar clip catches the T-bar and the
latch locks the T-bar in place (Figure 14).
Figure 13. Attaching the AP to the T-bar
Figure 14. Locking the AP to the T-bar
2Insert the Torx security screw into the hole near the
latch to lock the AP in place.
Removing an AP Integrated Bracket from a T-Bar
1To remove the AP from a T-bar, first remove the
security screw, then depress the latch while rotating
the AP so that the T-bar clips disengage the T-bar.
Mounting on a Truss or Pole
1Feed the customer-supplied cable ties through the
four slots on the back of the R610.
Figure 15 Cable tie slots
2Fasten the R610 to the truss or pole using the cable
ties.
Note: This mounting bracket can also be used on a flush
drop-ceiling T-bar, so the four rubber feet on the
bottom of the AP minimize ceiling tile displacement.
Note: The built-in mounting clips on the bottom of the
AP are designed to accommodate 15/16 T-bar widths
only.
Copyright © 2017 Ruckus Wireless, Inc.
Published September 2017, Part Number 800-71495-001 Rev C
Mounting Template
(Page 4 of 4)

Other Ruckus Wireless Wireless Access Point manuals

Ruckus Wireless SmartZone 300 User manual

Ruckus Wireless

Ruckus Wireless SmartZone 300 User manual

Ruckus Wireless T610s User manual

Ruckus Wireless

Ruckus Wireless T610s User manual

Ruckus Wireless ZoneFlex R710 User manual

Ruckus Wireless

Ruckus Wireless ZoneFlex R710 User manual

Ruckus Wireless SmartCell Gateway 200 User manual

Ruckus Wireless

Ruckus Wireless SmartCell Gateway 200 User manual

Ruckus Wireless ZoneFlex 2741 User manual

Ruckus Wireless

Ruckus Wireless ZoneFlex 2741 User manual

Ruckus Wireless T710 User manual

Ruckus Wireless

Ruckus Wireless T710 User manual

Ruckus Wireless ZoneFlex R700 User manual

Ruckus Wireless

Ruckus Wireless ZoneFlex R700 User manual

Ruckus Wireless zoneflex t301n User manual

Ruckus Wireless

Ruckus Wireless zoneflex t301n User manual

Ruckus Wireless ZoneFlex 2925 User manual

Ruckus Wireless

Ruckus Wireless ZoneFlex 2925 User manual

Ruckus Wireless ZoneFlex 7352 User manual

Ruckus Wireless

Ruckus Wireless ZoneFlex 7352 User manual

Ruckus Wireless ZoneFlex 2741 User manual

Ruckus Wireless

Ruckus Wireless ZoneFlex 2741 User manual

Ruckus Wireless C110 User manual

Ruckus Wireless

Ruckus Wireless C110 User manual

Ruckus Wireless C110 User manual

Ruckus Wireless

Ruckus Wireless C110 User manual

Ruckus Wireless ZoneFlex 7025 User manual

Ruckus Wireless

Ruckus Wireless ZoneFlex 7025 User manual

Ruckus Wireless ZoneFlex 7762-S User manual

Ruckus Wireless

Ruckus Wireless ZoneFlex 7762-S User manual

Ruckus Wireless R350 User manual

Ruckus Wireless

Ruckus Wireless R350 User manual

Ruckus Wireless ZoneFlex 901-T504-US31 User manual

Ruckus Wireless

Ruckus Wireless ZoneFlex 901-T504-US31 User manual

Ruckus Wireless MediaFlex 2900 User manual

Ruckus Wireless

Ruckus Wireless MediaFlex 2900 User manual

Ruckus Wireless ZoneFlex R600 User manual

Ruckus Wireless

Ruckus Wireless ZoneFlex R600 User manual

Ruckus Wireless ZoneFlex 7441 User manual

Ruckus Wireless

Ruckus Wireless ZoneFlex 7441 User manual

Ruckus Wireless R560 User manual

Ruckus Wireless

Ruckus Wireless R560 User manual

Ruckus Wireless ZF2925 User manual

Ruckus Wireless

Ruckus Wireless ZF2925 User manual

Ruckus Wireless T300 Installation instructions manual

Ruckus Wireless

Ruckus Wireless T300 Installation instructions manual

Ruckus Wireless ZoneFlex 7341 802.11n User manual

Ruckus Wireless

Ruckus Wireless ZoneFlex 7341 802.11n User manual

Popular Wireless Access Point manuals by other brands

Hamlet HNWS111 user guide

Hamlet

Hamlet HNWS111 user guide

LevelOne WAB-3003 Specifications

LevelOne

LevelOne WAB-3003 Specifications

Alfa Network AWAP02O-86 Specifications

Alfa Network

Alfa Network AWAP02O-86 Specifications

RouterBOARD HAP Quick setup guide

RouterBOARD

RouterBOARD HAP Quick setup guide

Tonze aw 6660 Quick installation guide

Tonze

Tonze aw 6660 Quick installation guide

Browan BW1253S user guide

Browan

Browan BW1253S user guide

Ferimex Wireless 802.11g Multi-mode AP user manual

Ferimex

Ferimex Wireless 802.11g Multi-mode AP user manual

Ubiquiti AmpliFi MeshPoint HD quick start guide

Ubiquiti

Ubiquiti AmpliFi MeshPoint HD quick start guide

Ceragon FA4800 user manual

Ceragon

Ceragon FA4800 user manual

Feit Electric SYNC/WIFI Use and care guide

Feit Electric

Feit Electric SYNC/WIFI Use and care guide

EnGenius M2000 quick start guide

EnGenius

EnGenius M2000 quick start guide

D-Link Rangebooster N 650 Access Point DAP-1353 Quick install guide

D-Link

D-Link Rangebooster N 650 Access Point DAP-1353 Quick install guide

Edimax HP-8501APg Quick installation guide

Edimax

Edimax HP-8501APg Quick installation guide

Buffalo AirStation WZR-600DHP user manual

Buffalo

Buffalo AirStation WZR-600DHP user manual

ZyXEL Communications WAP3205 user guide

ZyXEL Communications

ZyXEL Communications WAP3205 user guide

NETGEAR WG602 - 54 Mbps Wireless Access Point user guide

NETGEAR

NETGEAR WG602 - 54 Mbps Wireless Access Point user guide

3Com 3CRWE91096A - Wireless LAN Building-to-Building... datasheet

3Com

3Com 3CRWE91096A - Wireless LAN Building-to-Building... datasheet

LevelOne WAP-6010 user manual

LevelOne

LevelOne WAP-6010 user manual

manuals.online logo
manuals.online logoBrands
  • About & Mission
  • Contact us
  • Privacy Policy
  • Terms and Conditions

Copyright 2025 Manuals.Online. All Rights Reserved.