Runwin ZHQ2096-S-N User manual

Bedienungsanleitung
Elektro-Terrassenstrahler
Modell: ZHQ2096-S-N
Lesen Sie diese Anweisungen sorgfältig durch, bevor Sie
den neuen Halogenstrahler einsetzen.
Packen Sie den Halogenstrahler aus und stellen Sie sicher,
dass alle Teile vorhanden sind, sich keine Teile mehr in der
Kiste befinden und dass der Kopf des Strahlers von allen
Verpackungsmaterialien befreit wurde.
Anhand der Detailzeichnung können Sie die einzelnen Schritte
zur Montage des Halogenstrahlers absolvieren.
Schliessen Sie das Netzkabel des Halogenstrahlers erst nach
der vollständigen Montage des Strahlers an die Steckdose an.
Schliessen Sie das Netzkabel des Halogenstrahlers nicht an die
Steckdose an, wenn Teile des Netzkabels beschädigt sind.
Im Zweifelsfall sollten Sie Ihren Händler kontaktieren.
WARNHINWEIS: Dieser Strahler verfügt über keine Vorrichtung
zur Regelung der Raumtemperatur. Der Strahler darf nicht in
kleinen Räumen eingesetzt werden, sofern sich in diesen
Räumen Menschen aufhalten, die den Raum nicht selbständig
verlassen können, und keine ständige Aufsicht anwesend ist.
Kinder unter 3 Jahren sollten von dem Strahler ferngehalten
werden, wenn keine ständige Aufsicht vorhanden ist.
ACHTUNG: Einige Teile dieses Produkts können sehr heiss
werden und Verbrennungen verursachen. Es ist insbesondere
sorgsam vorzugehen, wenn Kinder und anfällige Menschen vor
Ort vorhanden sind.

Achtung
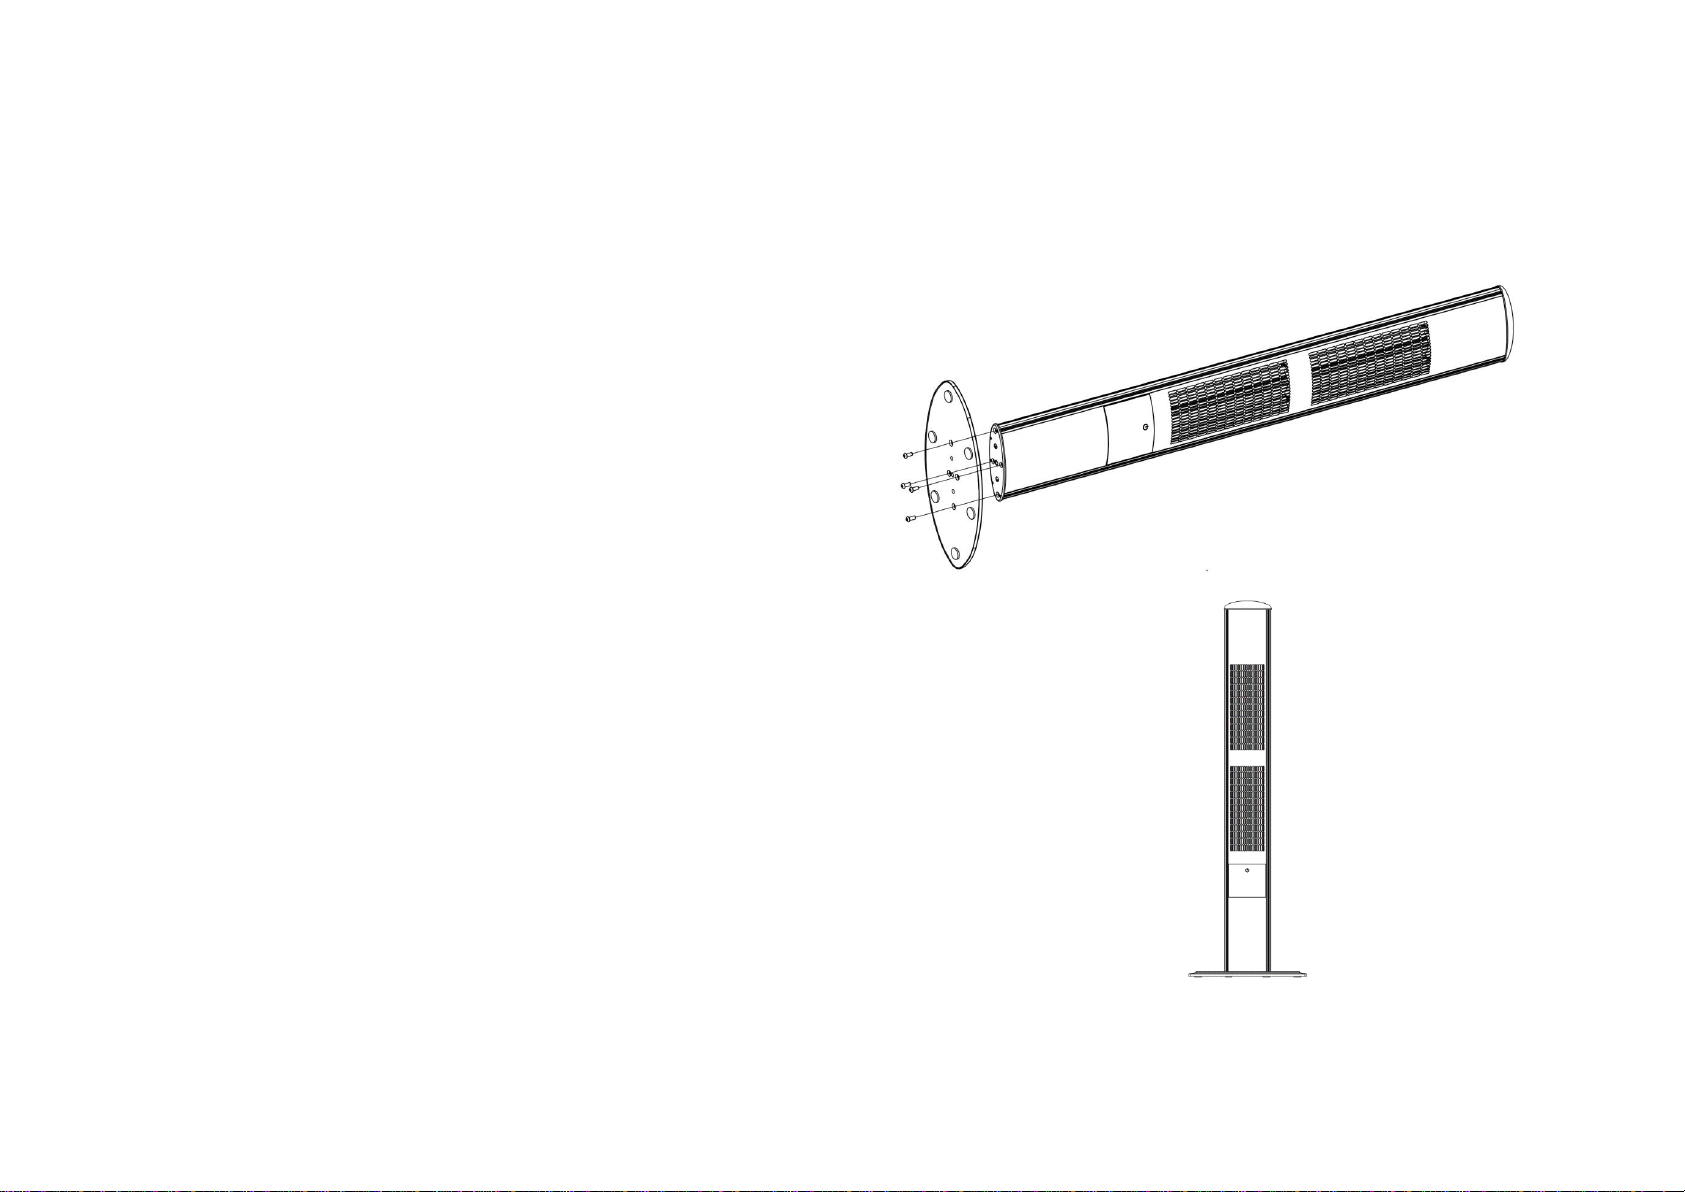
Der Halogenstrahler darf nur auf einer festen, massiven und
ebenen Fläche eingesetzt werden und muss stabil stehen.
(Wenn der Strahler geneigt ist oder umfällt, wird der
automatische Abschalter aktiviert.)
1. Dieser Elektro-Terrassenstrahler darf nicht von Menschen
(einschliesslich Kindern) mit eingeschränkten physischen,
sensorischen oder mentalen Fähigkeiten oder solchen
Menschen verwendet werden, denen die entsprechende
Erfahrung und das Wissen fehlt, sofern sie den Strahler nicht
unter Aufsicht einsetzen oder Anweisungen bezüglich der
sicheren Bedienung des Geräts von Menschen erhalten
haben, die für ihre Sicherheit verantwortlich sind.
2. Kinder im Alter zwischen 3 und 8 Jahren dürfen den Strahler
nur ein-/ausschalten, sofern dieser in seiner vorgesehenen
normalen Betriebsposition platziert oder installiert wurde und
die Kinder beaufsichtigt werden oder Anweisungen bezüglich
der sicheren Verwendung des Strahlers erhalten haben und
ihnen die Gefahren im Zusammenhang mit dem Betrieb
bewusst sind. 3 bis 8 Jahre alte Kinder dürfen den Strahler
nicht anschliessen, bedienen, reinigen oder
Wartungsmassnahmen durchführen.
3. Dieser Strahler verfügt über keine Vorrichtung zur Regelung
der Raumtemperatur. Der Strahler darf nicht in kleinen
Räumen eingesetzt werden, sofern sich in diesen Räumen
Menschen aufhalten, die den Raum nicht selbständig
verlassen können und keine ständige Aufsicht vorhanden ist.
4. Kinder unter 3 Jahren sollten von dem Strahler ferngehalten
werden, wenn keine ständige Aufsicht anwesend ist.
5. Kinder dürfen nicht mit dem Strahler spielen.
6. Die Reinigung und Wartung des Strahlers darf von Kindern nur
unter Aufsicht durchgeführt werden.
7. Platzieren Sie den Strahler nicht in der Nähe von entzündlichen
oder brennbaren Materialien.
8. Wenn das Netzkabel beschädigt ist, sollte dieses vom
Hersteller, dem zuständigen Händler oder ähnlich qualifizierten
Fachleuten ausgetauscht werden, um Risiken
auszuschliessen.
9. Der Strahler darf nicht unmittelbar unter einer Steckdose
platziert werden.
10.Der Strahler ist mindestens 1,8 m über dem Boden zu
installieren.
11.Platzieren Sie den Strahler im Freien oder auf einer grossen
offenen Fläche und in ausreichender Entfernung von
Behinderungen, wie z.B. Zweigen, bzw. so, dass sich der
Strahler nicht in der Nähe von Gegenständen befindet, die
durch Wärme beschädigt werden können, wie z.B. Möbel,
Vorhänge oder andere entzündliche Gegenstände
(Mindestabstand: 1 Meter).
12.Kinder sollten beaufsichtigt werden, um sicherzustellen, dass
sie nicht mit dem Strahler spielen.
13.Ziehen Sie keine Gegenstände durch das Heizgitter des
Strahler Kopfes und blockieren bzw. bedecken Sie das
Heizgitter nicht.
14.Bewegen Sie den Strahler nicht, solange sich das Netzkabel in
einer Steckdose befindet, und warten Sie stets, bis der
Terrassenstrahler abgekühlt ist, bevor Sie ihn wegräumen.
15.Der Strahler darf während des Betriebs nicht berührt werden.
Die Anzeige der unterschiedlichen Schalterpositionen sollte in
einem Abstand von 1 Meter sichtbar sein.
16.Der Strahler ist in einem Abstand von 100 cm zur Wand zu
platzieren.

17.Das Netzkabel am Strahler darf nicht verdreht werden.
18.Der Strahler ist mit Vorsicht zu bedienen, es sind
Erschütterungen oder Schläge zu vermeiden.
19.Der Strahler wurde ausschliesslich für eine Nutzung im
Haushalt konzipiert. Sein Einsatz auf Baustellen, in
Gewächshäusern, Schuppen oder Ställen, in denen es zu
entzündlichem Staub kommen kann, ist untersagt.
20.Der Kopf des Strahlers wird während des Betriebs sehr heiss.
Das Netzkabel des Strahlers ist aus der Steckdose zu ziehen
und abzuwarten, bis der Strahler abgekühlt ist, bevor
Reinigungsmassnahmen durchgeführt werden dürfen.
21.Der Strahler darf nicht an solchen Orten eingesetzt werden, an
denen die Luft ätzend oder flüchtig ist, d.h. Staub, Dampf, Gas,
etc. vorhanden ist.
22.Der Strahler darf nicht als Trockner für Kleidung oder
Handtücher verwendet werden.
23.Der Strahler darf nicht an Orten eingesetzt werden, an denen
sich Tiere befinden bzw. aufgezogen werden. (Ställe, Gehege,
ect.)
24.Der Strahler darf zur Reinigung nicht in Wasser eingetaucht
werden.
25.Das Netzkabel des Strahlers sollte an eine Steckdose
angeschlossen werden, die sichtbar und erreichbar ist.
26.Während der ersten Minuten nach dem Einschalten kann ein
dunkler Punkt an der Oberfläche der Heizelemente sichtbar
sein. Dies ist normal und beeinträchtigt die Leistung des
Strahlers nicht.
27.Der Strahler sollte nicht zusammen mit einer Programmier-
vorrichtung, einem Timer oder anderen Gerät genutzt werden,
die den Strahler automatisch einschalten -> Brandgefahr !,
wenn der Strahler abgedeckt oder falsch positioniert wird.
Montage
Für die vorschriftsmässige Montage des Strahlers ist der
mitgelieferte Montageschlüssel (oder ein eigener Schlüssel) zu
verwenden. Fixieren Sie den unteren Sockel und das Gehäuse
des Strahlers mit 4 Schrauben des Typs M8*20.
Ansicht des Strahlers im vollständig montierten Zustand
ACHTUNG: Brandgefahr - Der Strahler darf nicht ohne Sockel in
Betrieb genommen werden.

Betrieb
Verbinden Sie das Netzkabel mit einer Steckdose mit einer
Leistung von 13 A, die sich einem sicheren und trockenen
Bereich befindet.
Der Netzschalter auf der Rückseite des Strahlers dient zur
Regelung der Leistung.
Der Schalter am Bedienfeld des Strahlers dient zur
Einstellung der zwei Heizstufen.
A. Schalter 1x drücken: das untere Heizelement schaltet ein.
900 W.
B. Schalter ein weiteres Mal drücken: das obere Heizelement
schaltet ein. 900 W.
C. Schalter 3x drücken: beide Heizelemente arbeiten
gleichzeitig. 1800 W.
Die Fernbedienung
A. Knopf oben: Einstellung Heizelement unten, 900 W.
B. Knopf unten: Einstellung Heizelement oben, 900 W.
C. Beiden Knöpfe gleichzeitig in Stellung "EIN":
gesamte Heizleistung 1800 W.
AUFBEWAHRUNG
Der Strahler ist an einem kühlen, trockenen Ort aufzubewahren, wenn
er nicht benutzt wird. Bewahren Sie den Strahler in seiner
ursprünglichen Verpackung auf, um Ansammlungen von Staub und
Schmutz zu verhindern.
WARTUNG
Ziehen Sie das Netzkabel aus der Steckdose und lassen Sie den
Strahler vollständig abkühlen.
Reinigung des Aussengehäuses nur mit weichem, feuchtem Tuch.
Nur mildes Reinigungsmittel verwenden. Danach den Strahler mit
einem weichen Tuch abreiben.
Verwenden Sie keine Scheuerpulver, Möbelpolituren, Alkohol,
Benzin, oder raue Bürsten um Beschädigungen oder
Beeinträchtigungen der Oberfläche des Strahlers zu vermeiden.
Obwohl zugelassen für den Einsatz im Freien hat, darf der Strahler
zu keinem Zeitpunkt in Wasser eingetaucht werden.
Vor nächster Verwendung, vollständig trocken lassen.
FEHLERSUCHE
Wenn der Strahler nicht vorschriftsmässig funktioniert, sind folgende
Reparatur- oder Wartungsmassnahmen durchzuführen:
Überprüfen Sie, ob das Netzkabel in eine Steckdose eingesteckt
wurde. Wenn dies nicht der Fall ist, sollte der Stecker in die
Steckdose gesteckt werden.
Überprüfen Sie, ob die Stromzufuhr funktioniert.
Stellen Sie sicher, dass der Netzschalter eingeschaltet ist, wenn dies
nicht der Fall ist, sollte eine gewünschte Einstellung ausgewählt
werden. TECHNISCHE DATEN
Leistungswerte: 220-240 V ~ 50 Hz
Stromverbrauch: 900/1800 W
Höhe: 157 cm
Nettogewicht: 16.4 kg
Isolierung: Klasse I
Schutz IP55
WEEE
Der defekte oder nicht mehr verwendete Artikel ist in
einer offiziellen Stelle oder einem Recyclinghof zu
entsorgen. Informieren Sie sich allenfalls im Fachhandel.

Manuel d’instructions
Chauffage électrique de patio
ZHQ2096-S-N
Veuillez lire attentivement ces instructions avant d'utiliser
votre nouveau chauffage halogène.
Déballez l'appareil de chauffage en veillant à que tous les
éléments soient présents et qu'il ne reste plus de composants
dans la boîte et que la tête de l'appareil de chauffage est
exempte de tout matériau d'emballage.
Utilisez le dessin détaillé pour suivre les étapes d’assemblage
de votre chauffage.
Ne branchez pas l'appareil de chauffage à l'alimentation
électrique tant que le montage n'est pas terminé.
Ne branchez pas l'appareil de chauffage à l'alimentation
électrique si l'un des composants ou le cordon d'alimentation
est endommagé de quelque façon que ce soit.
En cas de doute, contactez votre fournisseur.
AVERTISSEMENT : ce chauffage n'est pas équipé d'un
thermostat ambiant. N’utilisez pas ce chauffage dans des
petites pièces lorsqu'elles sont occupées par des personnes
incapables de quitter la pièce par elles-mêmes, à moins qu'une
surveillance constante ne soit assurée.
Les enfants de moins de 3 ans doivent rester éloignés, à moins
qu'ils ne soient surveillés en permanence.
ATTENTION —Certaines parties de ce produit peuvent
devenir très chaudes et causer des brûlures. Une attention
particulière est de mise quand des enfants et des personnes
vulnérables sont présents.

Attention
N'utiliser le chauffage que sur une surface horizontale solide et ferme où
tous les pieds de la base sont en contact avec le sol. (En cas d'inclinaison ou
de chute de l'appareil de chauffage, le contacteur d'arrêt automatique
s'activera)
1. Cet appareil n'est pas destiné à être utilisé par des personnes (y
compris les enfants) ayant des capacités physiques,
sensorielles ou mentales réduites ou un manque d'expérience et
de connaissances sauf si une personne responsable de leur
sécurité les surveille ou leur a donné les instructions pour utiliser
l'appareil en toute sécurité.
2. Les enfants âgés de 3 ans à moins de 8 ans ne doivent
allumer/éteindre l'appareil que s'il a été placé ou installé dans sa
position normale de fonctionnement prévue et s'ils sont
surveillés ou ont reçu des instructions pour utiliser l'appareil en
toute sécurité et comprennent les dangers impliqués. Les
enfants âgés de 3 ans à moins de 8 ans ne sont pas autorisés à
brancher, régler et nettoyer l'appareil ou effectuer l'entretien
réservé à l’utilisateur.
3. Cet appareil n'est pas équipé d'un thermostat d’ambiance. Ne
pas utiliser pas ce chauffage dans des petites pièces
lorsqu'elles sont occupées par des personnes incapables de
quitter la pièce par elles-mêmes, à moins qu'une surveillance
constante ne soit assurée.
4. Les enfants de moins de 3 ans doivent rester éloignés, à moins
qu'ils ne soient surveillés en permanence.
5. Il est interdit aux enfants de jouer avec l'appareil.
6. Le nettoyage ou la maintenance ne seront pas confiés à des
enfants sans une supervision.
7. Ne jamais fixer ni placer l'appareil de chauffage près de
matériaux inflammables ou combustibles.
8. Si le cordon d’alimentation est endommagé, il doit être remplacé
par le fabricant, son représentant ou une personne qualifiée afin
d’éviter toute situation dangereuse.
9. Le chauffage ne doit pas être placé directement sous une prise
électrique.
10.L'appareil doit être installé à au moins 1,8 m du sol.
11.Installer l'appareil de chauffage à l'extérieur ou dans un grand
espace dégagé et bien à l'écart de tout obstacle comme les
branches ou à proximité d'objets pouvant être affectés par la
chaleur, comme les meubles, les rideaux ou autres objets
inflammables (distance minimale de 1 mètre).
12.Les enfants doivent être surveillés pour éviter qu’ils ne jouent
avec l’appareil.
13.Ne pas pousser d'objets, ne pas obstruer ni couvrir la grille de la
tête du chauffage.
14.Ne pas le déplacer lorsqu’il est branché à une source
d'alimentation électrique et toujours attendre que le chauffage
de patio ait refroidi avant de le ranger.
15.Ne pas toucher le chauffage en cours d’utilisation.

16. L'indication des différentes positions des interrupteurs doit être
visible à une distance de 1 m.
17. L'appareil doit être placé à une distance de 100 cm du mur.
18. Ne pas enrouler le cordon d'alimentation sur l'appareil.
19. L'appareil doit être manipulé avec précaution et éviter les vibrations
ou les chocs.
20. L’appareil est destiné à un usage domestique uniquement. Il est
dangereux de l'utiliser sur un chantier de construction, une serre,
une grange ou une étable où il y a de la poussière inflammable.
21. La tête de l'appareil est à haute température pendant le
fonctionnement. Débrancher l'appareil et attendre qu'il refroidisse
avant de le nettoyer.
22. Ne pas utiliser cet appareil dans un endroit où il existe une causticité
ou de l'air volatile ou de la poussière, de la vapeur, du gaz, etc.
23. Ne pas utiliser cet appareil comme sèche-linge ou sèche-serviettes.
24. Ne pas utiliser cet appareil dans des endroits où des animaux se
reproduisent et sont élevés.
25. Ne pas plonger l'appareil dans l'eau pour le nettoyage.
26. L'appareil doit être branché dans une prise de courant facilement
visible et accessible.
27. Un point sombre peut exister sur la surface des éléments chauffants
pendant les premières minutes après la mise sous tension. Ceci est
normal et n'affectera pas les performances de l'appareil.
28. Ne pas utiliser ce chauffage avec un programmateur, une minuterie,
un système de commande à distance séparé ou tout autre dispositif
qui allume automatiquement le chauffage, car il existe un risque
d'incendie si l’appareil est recouvert ou mal positionné.
Processus d’assemblage
Pour assembler correctement ce chauffage, vous avez besoin de
la clé de montage fournie (ou l'une des vôtres).
Fixez la base inférieure et le corps de chauffe à l'aide de 4 boulons
M8*20.
Vue entièrement assemblée
ATTENTION :
Risque d'incendie - Ne pas utiliser si la base n'est pas fixée.

Utilisation
Connectez le câble d'alimentation à une source d'alimentation de
13 ampères située dans un endroit sûr et sec.
L'interrupteur d'alimentation à l'arrière de l'appareil sert à contrôler la
puissance de l'appareil.
Le bouton du panneau de commande du chauffage serve à
contrôler les deux niveaux de chauffage.
A. Pressez 1x : l’élément chauffant inférieur s’allume. 900W.
B. Pressez 2x : l’élément chauffant supérieur s’allume, 900W.
C. Pressez 3x : les deux éléments travaillent ensemble. 1800W.
D.
Télécommande.
A. Bouton sur le dessus : l'élément chauffant inférieur, 900W.
B. Bouton sur le dessous : l'élément chauffant supérieur, 900W.
C. Si les 2 boutons sont sur "ON" en même temps, la puissance
totale du chauffage est de 1800W.
RANGEMENT
Lorsque l'appareil n'est pas utilisé, rangez-le dans un endroit frais
et sec. Pour éviter l'accumulation de poussière et de saleté, utilisez
l'emballage d'origine pour remballer cet appareil.
MAINTENANCE
Débranchez l'appareil et laissez-le refroidir complètement.
Pour garder cet appareil propre, la coque extérieure peut être
nettoyée avec un chiffon doux et humide. Utilisez que de
détergent doux si nécessaire. Après le nettoyage, séchez la
machine avec un chiffon doux.
N’utilisez PAS d'alcool, d'essence, de poudres abrasives, de
cire pour meubles ou de brosses dures pour nettoyer le
chauffage. Ils pourraient endommager ou détériorer la surface
du chauffage.
Bien que ce chauffage soit approuvé pour l'extérieur, ne
l’immergez pas dans l'eau pour votre sécurité.
L'appareil doit être complètement sec avant de l'utiliser.
DÉPANNAGE
Si cet appareil ne fonctionne pas correctement, veuillez vérifier ce
qui suit avant de faire réparer l'appareil :
Vérifiez si le cordon d'alimentation est branché dans une prise
électrique, sinon, branchez-le.
Vérifiez s’il y a du courant au niveau du fusible principal.
Assurez-vous que les interrupteurs d'alimentation sont allumés.
Sinon, choisissez un réglage.
SPECIFICATIONS TECHNIQUES
Puissances : 220-240V ~ 50Hz
Consommation électrique : 900/1800 W
Hauteur : 157 cm
Poids net : 16.4 kg
Classe d’isolation I
Protection IP55
WEEE
L’appareil est à recycler conformément
selon législation en vigueur dans en point de recyclage.
Informez-vous peut-être chez un commerce spécialisé.

Instruction Manual
Electric Patio Heater
ZHQ2096-S-N
Please read these instructions carefully before using your
new halogen heater
Unpack the heater making sure that all the items are present
and that there are no components left in the box and that the
heater head is free from any packing material.
Using the detailed drawing and follow the steps to assemble
your heater.
Do not connect the heater to the electrical supply until all the
assembly is complete.
Do not connect the heater to the electrical supply if any of the
components or the power cord is damaged in any way.
If in doubt contact your supplier.
WARNING: This heater is not equipped with a device to
control the room temperature.Do not use this heater in small
rooms when they are occupied by persons not capable of
leaving the room on their own, unless constant supervision is
provided.
Children of less than 3 years should be kept away unless
continuously supervised.
CAUTION —Some parts of this product can become very
hot and cause burns. Particular attention has to be given where
children and vulnerable people are present.

Caution
Only use the heater on a firm solid horizontal area where all the
feet on the base are in contact with the floor. (Should the heater
be tilted or fall over the auto cut off switch will activate)
1. This appliance is not intended for use by persons
(including children) with reduced physical, sensory or
mental capabilities, or lack of experience and knowledge,
unless they have been given supervision or instruction
concerning use of the appliance by a person responsible
for their safety.
2. Children aged from 3 years and less than 8 years shall
only switch on/off the appliance provided that it has been
placed or installed in its intended normal operating
position and they have been given supervision or
instruction concerning use of the appliance in a safe way
and understand the hazards involved. Children aged from
3 years and less than 8 years shall not plug in, regulate
and clean the appliance or perform user maintenance.
3. This heater is not equipped with a device to control the
room temperature. Do not use this heater in small rooms
when they are occupied by persons not capable of leaving
the room on their own, unless constant supervision is
provided.
4. Children of less than 3 years should be kept away unless
continuously supervised.
5. Children shall not play with the appliance.
6. Cleaning and user maintenance shall not be made by
children without supervision.
7. Never fix or place heater near flammable or combustible
materials.
8. If the supply cord is damaged, it must be replaced by the
manufacturer, its service agent or similarly qualified
persons in order to avoid a hazard.
9. The heater must not be located immediately below a
socket outlet.
10.The heater must be installed at least 1,8 m above the floor
11.Site the heater outside or in a large open area and well
away from any obstructions such as branches or where
the heater is near any objects that can be effected by heat,
such as furniture, curtains or other inflammable objects
(minimum distance 1 meter).
12.Children should be supervised to ensure that they do not
play with the appliance.
13.If the supply cord is damaged, it must be replaced by the
manufacturer, its service agent or similarly qualified
persons in order to avoid a hazard.
14.Do not push any items through, obstruct or cover the grill
of the heater.
15.Suggest follow the standard statement: The heater must
not be located immediately below a socket outlet.
16.Do not move when connected to an electrical supply and
always wait for the patio heater to cool down before
storing away.
17.Do not touch the heater when in use.
18.The indication of the different positions of switches shall
be visible from a distance of 1m.
19.The unit must be placed with the clearance of 100cm to
the wall.

20.Don’t wrap the power supply cord on the unit.
21.The unit must be handled with care, and avoid vibration or
hitting.
22.The unit is for household use only. It is not safe to use on
a building site, greenhouse, barn or stable where there’s
flammable dust.
23.The head of the unit is at high temperature during
operation. Unplug the unit and wait till it cools before
cleaning.
24.Don’t use this unit in place where causticity or volatile air
exists, i.e. dust, steam, gas, etc.
25.Don’t use this unit as a cloth drier or towel drier.
26.Don’t use this unit in place of animal propagating and
raising.
27.Don’t immerse this unit into water for cleaning.
28.The unit should be plugged in a socket, which is easily
visible and reachable.
29.One dark point may exist on the surface of the heating
elements during the first few minutes after it is turned on.
This is normal, and will not affect the performance of the
unit.
30.Do not use this heater with a programmer, timer, separate
remote-control system or any other device that switches
the heater on automatically, since a fire risk exist if the
heater is covered or positioned incorrectly.
Assembling Process
To properly assemble this heater, you need the supplied
assembly wrench (or one of your own).
Fix the Bottom base and heat body using 4pcs M8*20 bolts.

Full assembled view
CAUTION: Risk of Fire –Do Not Operate Without Base
Attached.
Operation
Connect the power cable to a 13 amp supply that is located
in a safe, dry area.
The power switch on the back of the unit is used to control the
power of the appliance.
The button on the heater control panel is used to control
the two heating levels.
A. To touch the button once on the control panel is to
control the heating element on the bottom side,
900-Watt.
B. To touch the button on the control panel again is to
control the heating element on the top side 900-Watt.
C. To touch the button three times on the control panel, the
total heater power is 1800-watt.
The remote control.
A. To press the button “ ” is to control the heating
element on the bottom side, 900W-watt.
B. To press the button “ ” is to control the heating
element on the top side 900W-watt.
C. If pressing the 2 buttons are at the same time, the total
heater power is 1800W-watt.

MAINTENANCE
Unplug the unit and let it cool completely.
To keep this unit clean, the outer shell may be cleaned with
a soft, damp cloth. You may use a mild detergent if
necessary. After cleaning, dry the unit with a soft cloth.
DO NOT use alcohol, gasoline, abrasive powders, furniture
polish, or rough brushes to clean the heater. This may
cause damage or deterioration to the surface of the heater.
Although this heater is outdoor approved, DO NOT immerse
the heater in water for your safety.
Wait until the unit is completely dry before use.
STORAGE
When not in use, store this unit in a cool, dry location. To
prevent dust and dirt build-up, use the original packaging to
repack this unit.
TROUBLE SHOOTING
If this unit does not operate properly, please check the following
before repair or service:
Check if the power cord is plugged into an electrical outlet, if
not, plug in.
Check if electricity to the main fuse is working.
Make certain the power switches are turned on. If not,
choose a setting.
TECHNICAL SPECIFICATIONS
Ratings: 220-240V 50~ 60Hz
Power consumption: 900/1800 W
Height: 157cm
Net weight: 16.4kg
Insulation: class I
WEEEThis symbol on the product or in the instructions means that
your electrical and electronic equipment should be disposed at
the end of its life separately from your household waste. There
are separate collection systems for recycling in the EU. For
more information please contact the local authority or your retailer where
you purchased the product.
Table of contents
Languages:
Other Runwin Patio Heater manuals
Popular Patio Heater manuals by other brands

Charmglow
Charmglow 82300 owner's manual

SunGlo
SunGlo A270 quick start guide

Wood Pellet Products
Wood Pellet Products WPPHBT1.9LS owner's manual

CRX
CRX CRX8015 instruction manual

Infrared Dynamics
Infrared Dynamics Sunpak S25S Installation, operation and maintenance instructions

Creda
Creda CSP2 instructions