Rydeen BSS2 User manual

Owner’s Manual BSS2
Microwave Radar Blind Spots System
Version 2.1

1
Table of Contents
I. Items List ............................................................................................................................2
II. Technical Specification........................................................................................3
III. Installation Diagram............................................................................................4
IV. Wire Connection Diagram...................................................................................4
V. Installation Guide................................................................................................5
VI. Alert Conditions ..................................................................................................9
VII. How does it alert...............................................................................................10
VIII. Troubleshooting ................................................................................................11
IX. Technical Support Info. .....................................................................................11
X. Limited Warranty ..............................................................................................12
XI. To Obtain Warranty Service ..............................................................................12

2
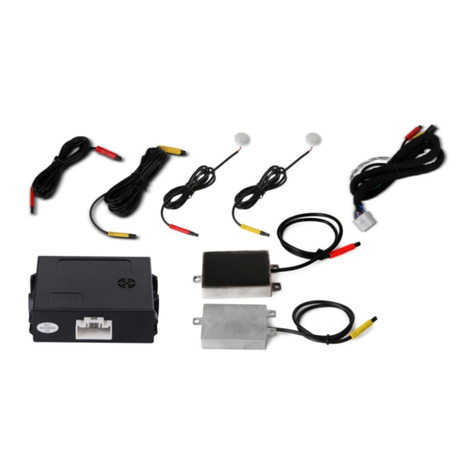
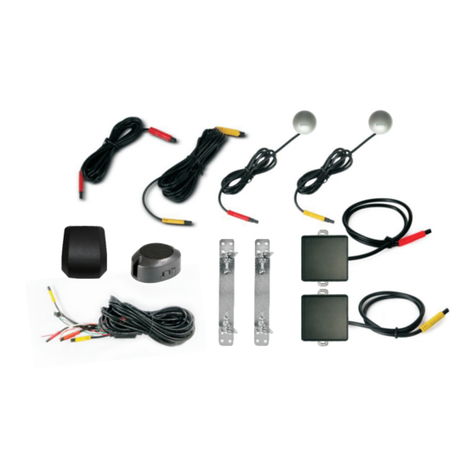
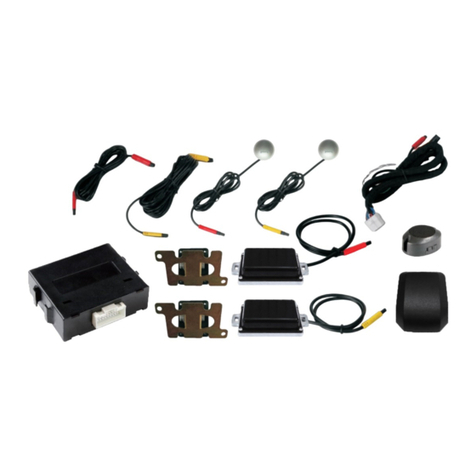
I. Items list
Number
Item Name
Quantity
Picture
1
Main Unit
1PCS
2
Main Harness
+ Extension Cable
1SET
3
Radar Sensor
2PCS
4
LED Indicator (BLACK LED’S?)
2PCS
5
GPS Antenna
1PCS
6
Buzzer
1PCS
8
Puck Bracket
2PCS
9
Installation Angle Tool
1PCS

3
II. Technical specification
Sensor Operating Frequency
24GHz
Transmit Power
15dbm
Detection Area Range
1feet - 35 feet
Detection Ability
5 targets can be detected at the same time
Detection Speed Range
0.5mph---137mph
Speed Accuracy
< 0.5mph
Speed Restriction
1. There are 4 speed restriction options; 5 mph, 10 mph, 15
mph, 20 mph. Default is 20 mph.
Please see below (1-4 switch, it could control 4 speed
restriction) switch 1 =5 mph, switch 2=10 mph, switch 3=15
mph, Switch 4=20 mph
2. If no GPS signal is detected or satellites not found, the
system will be active at any speed
Direction of Movement
Approached or overtaken by vehicles
Operating Voltage
9---18V
Waterproof (Radar Sensor)
Radars: IP67 / Cables: NOT waterproof
Working Current
< 200mA
Working Temperature
-20℃ --- +70℃
Installation Angle
20°(Horizontal)
Gain
12k
Dip switch aligns with the
casing and use QC pass
sticker to cover it.

4
III. Installation Diagram
IV. Wire Connection Diagram

5
V. Installation Guide
Radar Pucks Installation
Installation requirements: sensors should be adhered to the inner corner of the bumper with
supplied Velcro. The angle should be between 20 to 25 degrees with the height ranging from
13-35 inches. (Fig.1-Fig.2)
OR use provided mounting bracket for vehicle side installation. (Page. 7)
Fig.1 Fig.2
Step1: Measuring method: Measure the rear bumper using the angle gauge to locate the 20 to 30
Degrees angle. (Fig.3-Fig.4)
The microwave sensors are only intended for plastic bumpers vehicles.
Please note the BSS2 is NOT applicable metal bumpers.
Fig.3
Fig.4
The angle of the
Microwave radar
sensors is between
20 to 25 Degrees.

6
Step2: Locate the desired position for the radar pucks. (Fig.5 - Fig.6)
Step3: Remove the rear bumper to clean the surface for the radar pucks. (Fig.7)
Fig7
Step4: Place the provided Velcro (To Help Absorb Vibration) on the surface of the
sensors (black side) and the desired location on the bumper (See image below).
Fig.8 Fig.9
Fig.5
Fig.6
Make sure the surface is
clean before Velcro
placed with sensors.

7
Mounting Radar Pucks with Provided Adjustable Brackets
Use Angle Tool to Set Proper Angle

8
Installation of the left and right turn signals. (Please make sure not shared with Brake Lamp)
Step 5. Using the voltage multi-meter, locate the left and right turn signal trigger wires behind the
tail lamp. Once verified, connect the left and right signal wires of the BSS2 wire harness to the
correct signal wires. (Fig10, Fig11, Fig12) (Please make sure not shared with Brake Lamp)
Fig10 Fig11 Fig12
LED indicator installation:
Step 6. Place the LED indicators where it is visible for the driver. Ideally on the A-pillar of vehicle.
Fig.13 Fig.14
Adjustable Speaker Installation
Step 7. While installing the speaker, make sure not to obstructed Speaker by any panels. There is
a low, high, and off setting. (Fig.15)
Fig.15

9
VI. Alert conditions:
1. When the vehicle is on, the system would start detecting objects in the blind area in the lane
next to and behind your vehicle at 35 feet. (Fig.16)
2. When vehicles are approaching, and their speed is faster than our own speed.
Fig.16
Note
Illumination of the LED indicator on the control box:
1. The LED comes on solid when the system is first powered up;
2. The LED blinks slowly while GPS module is connected to the satellites;
3. The LED blinks quickly while sensing moving objects that are approaching in the blind spot
(same frequency as to the alarm LED indicators & the buzzer);
4. The LED maintains the last blinking status after the alerts have ended (the last blinking status of
alarming is off / on randomly)

10
VII. How does it alert?
A. Blind Spot detection on right side:
1. R-LED indicator will be activated, and indicator will glow when there is an object approaching
to the right-side blind area of your vehicle at speed over 20 mph.
2. If the right turn signal of your vehicle is triggered at the same time, the R-LED indicator will
blink, and the buzzer will be beeping as well (with the same frequency) if speed is over 20 mph.
B. Blind Spot detection on left side:
1. L-LED indicator will be activated, and indicator will glow when there is an object approaching
to the left side blind area of your vehicle at speed over 20 mph.
2. If the left turn signal of your vehicle is triggered at the same time, the L-LED indicator will be
blink, and the buzzer will be beeping as well (with the same frequency) if speed is over 20 mph.
C. The LED and buzzer will not glow (no activity) if there is no object approaching to the blind
area of your vehicle.
D. When in reverse, the buzzer will beep to give warning to the driver and the LED will indicate
the direction of incoming vehicles (or objects) approaching.

11
VIII. Troubleshooting:
NO.
Issue
Reason
Solution
1
LED light does not
illuminate
Incorrect connection or pins
not making contact
Check the harness and make
sure connection is correct
LED light is broken
Replace LED light
2
Opposite LED
indicator
Microwave sensor or LED
indicators are plugged in to the
opposite connector
Make sure RED is driver side and
YELLOW is passenger side.
3
Buzzer does not work
Wrong connection or pins not
making contact
Check the harness and make
sure connection is correct
Defective buzzer speaker
Replace buzzer
4
Sensors or GPS does
not work
Sensors or GPS module are
covered by the metal bumper
or other metal obstruction
Find the best location where the
GPS antenna cannot be blocked
by any metal, clear shot of sky
5
Unit does not work
after GPS is
connected
Blind spot system does not
trigger the sensors if the speed
is less than 20mph
Normal behavior in this case.
The GPS needs to detect
+20mph to trigger the sensors
IX. Technical Support Contact Info.
•Telephone:
1-877-777-8811
(within USA only)
•Email: tech1@rydeenmobile.com
•Web Address: www.rydeenmobile.com
X. Limited Warranty
Rydeen North America Inc. (a manufacturer of “Rydeen" products) warrants this product (BSS2) only
to the original purchaser as described following:

12
Warranty Coverage
This warranty covers all defects in material and workmanship for (1) year except as specified below.
1. Installation by anyone other than an authorized Rydeen Mobile Retailer may void the warranty.
2. Any products distributed outside of the USA by Rydeen North America Inc. (Rydeen) or which is
not purchased in the USA or Canada
3. Any product(s) which are purchased from an unauthorized retailer (in-store or online).
4. Any products in which the serial number label or the model number label are removed, torn,
modified or replicated.
5. Any damage defects or malfunctions resulting from any of following:
a) When defect occurs during shipment of product (freight carrier's responsibility).
b) Installation or removal of product.
c) Accidents, act of nature, misuse, abuse, neglect, unauthorized product modification or
failure to follow product owner's manual instructions.
d) Any repair or attempt to repair without RYDEEN authorization.
e) Any other cause which is not related to product defect.
f) Any cosmetic damages due to normal wear and tear.
g) Any consumable items (such as fuse or batteries).
If any problems develop with your Rydeen products during or after the Limited Warranty Period, or
if you have any questions regarding the operation or installation of the product, you should
contact your Rydeen retailer.
XI. To Obtain Warranty Service
If warranty service is required for your Rydeen product:
1. Please call Rydeen Customer Service Department at 1-877-777-8811 (within the USA only),
Monday–Friday between 9:00 AM to 4:00 PM Pacific Standard time and obtain a Return
Authorization Number (“RA”) Number.
2. Please pay for any shipping charge to Rydeen Customer Service Department.
Rydeen will pay the return shipping charge, if the repair or service was performed during
the warranty period. Rydeen will ship freight collect
(Recipient is responsible for shipping charge) if Rydeen determine the service was performed
outside of warranty period or exclusions described above. Rydeen will not accept warranty
service requests from outside of the U.S.A. even if product was purchased in the USA.
3. Please include a copy of your original purchase receipt including Rydeen
Product model number, purchase date, retailer name/address and a RA Number
whenever your product is sent for warranty service.
4. Shipping address for Rydeen Customer Service Department is following:
Rydeen North America Inc 2701 Plaza Del Amo, Unit 705, Torrance, California 90503, USA

13
rydeenmobile.com
Rydeen North America Inc. Dba
Rydeen
Mo
bil
e Electronics
2701 Plaza Del Amo, Suite 705, Torrance, California 90503
Phone: 1-877-777-8811 Fax: 1-310-943-3778
Copyright © 2018 Rydeen North America Inc. All Rights Reserved.
RYDEEN ® is a registered trademark of Rydeen North America Inc.
These materials are protected by copyright law and international treaties. Any
unauthorized use, reproduction or distribution of these materials,
or
any portion herein,
will result in severe civil and criminal penalties and fines. Violators will fully be
prosecuted of the law.
Table of contents
Other Rydeen Automobile Accessories manuals
Rydeen
Rydeen BL-422P User manual

Rydeen
Rydeen MV311S User manual

Rydeen
Rydeen MD4BT User manual

Rydeen
Rydeen DG240 Instruction Manual

Rydeen
Rydeen CM-T1000P User manual

Rydeen
Rydeen MV332S User manual
Rydeen
Rydeen MV437FL User manual

Rydeen
Rydeen BP1 User manual

Rydeen
Rydeen BSS3 User manual

Rydeen
Rydeen MV311T User manual

Rydeen
Rydeen BM500S User manual
Rydeen
Rydeen SV747HD User manual

Rydeen
Rydeen BB-400PM User manual

Rydeen
Rydeen CM-AHD1 User manual

Rydeen
Rydeen BF-450PM User manual

Rydeen
Rydeen 360 VIEW User manual

Rydeen
Rydeen PSR4000D User manual
Rydeen
Rydeen MV432T User manual

Rydeen
Rydeen TOMBO ProKit User manual

Rydeen
Rydeen BSS1 User manual