manuals.online logo
Brands
  1. Home
  2. •
  3. Brands
  4. •
  5. Ryobi
  6. •
  7. Flashlight
  8. •
  9. Ryobi CFP180L User manual

Ryobi CFP180L User manual

OPERATOR’S MANUAL
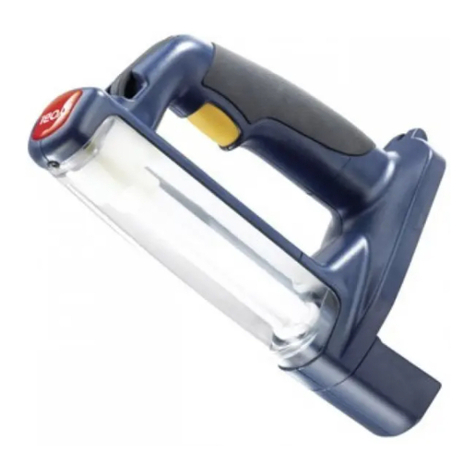
CORDLESS FLUORESCENT LIGHT
CFP180L
SAVE THIS MANUAL FOR FUTURE REFERENCE
Your Fluorescent Light has been engineered and manufactured to Ryobi’s high standard for dependability, ease of operation
and operator safety. When properly cared for, it will give you years of rugged, trouble-free performance.
WARNING: To reduce the risk of injury, the user must read and understand the operator's manual before using
this product.
Thank you for buying a Ryobi product.
BATTERIES AND CHARGERS
SOLD SEPARATELY
2
GENERAL SAFETY RULES
Use only with recommended battery pack (ABP1801/
ABP1802) and charger (ACR1800) (both sold separately).
CAUTION!
Read and follow all Safety Rules and Operating Instruc-
tions before first use of this product.
READ ALL INSTRUCTIONS
n KNOW YOUR FLUORESCENT LIGHT.
Read operator’s manual carefully. Learn its applications
and limitations as well as the specific potential hazards
related to this fluorescent light.
n REMOVE BATTERY PACK FROM FLUORESCENT
LIGHT BEFORE REPLACING BULB OR PERFORM-
ING ANY ROUTINE MAINTENANCE OR CLEANING.
n DO NOT DISASSEMBLE YOUR LIGHT.
n DO NOT PLACE FLUORESCENT LIGHT OR BATTERY
PACK NEAR FIRE OR HEAT.
They may explode. Also,
n DO NOT dispose of a worn out battery pack by inciner-
ating. Do not incinerate the battery, even if it is severely
damaged or completely worn out. The battery may ex-
plode in fire.
n DO NOT STORE YOUR FLUORESCENT LIGHT IN A
DAMP OR WET LOCATION. ALSO, DO NOT STORE
IN LOCATIONS WHERE THE TEMPERATURE MAY
REACH OR EXCEED 40°C (104°F).
For example, outside sheds, vehicles or metal buildings
in the summer.
n DO NOT PERMIT CHILDREN TO USE FLUORESCENT
LIGHT UNSUPERVISED.
It is not a toy. The temperature of the bulb can become
hot after being on for an extended period of time. This
hot temperature may cause burn injury if touched.
n KEEP WORK AREA CLEAN.
Cluttered areas and benches invite accidents.
n AVOID DANGEROUS ENVIRONMENT.
n KEEP LIGHT DRY, CLEAN AND FREE FROM OIL AND
GREASE.
Always use a clean cloth when cleaning. Never use brake
fluids, gasoline, petroleum-based products or any strong
solvent to clean your light.
n CHECK DAMAGED PARTS.
Before further use of this light, a part that is damaged
should be carefully checked to determine that it will op-
erate properly and perform its intended function. Do not
use fluorescent light if it does not function properly.
n SAVE THESE INSTRUCTIONS.
Review them frequently and use them to instruct others
who may use this light. If you loan someone this light,
loan them these instructions also.
SAFETY RULES FOR FLUORESCENT LIGHT
WARNING
Do not operate fluorescent light or charger near flam-
mable liquids or in gaseous or explosive atmosphere.
Internal sparks may ignite fumes.
WARNING
Lens and bulb become hot during use.
n During or immediately after use, don’t lay fluorescent light
flat on lens surface.
n Handle fluorescent light with care around any flammable
surface.
n If bulb has been lit, let fluorescent light cool for several
minutes before changing bulb.
n Do not use or permit use of fluorescent light in bed or
sleeping bags. A burn injury could result.
OPERATION
TO INSTALL/REMOVE BATTERY PACK (NOT
INCLUDED)
n Begin with a fully charged battery pack.
n TO INSTALL: Align raised ribs on battery pack with
grooves on bottom of uorescent light, then install
battery pack to uorescent light as shown in gure 1.
Make sure the latch on battery pack snaps in place
and battery pack is secured to uorescent light before
beginning operation.
n TO REMOVE: Depress latch located on front of battery
pack (1) to remove battery pack.
Pull on battery pack (2) to remove from uorescent
light.
WARNING
During the change of lamp.
3
OPERATION
Fig. 1
Fig. 2
Fig. 3
BATTERY PACK
(NOT INCLUDED)
GROOVES
TO REMOVE: DEPRESS
LATCH TO RELEASE
BATTERY PACK
TO
LOWER
SWITCH
TRIGGER
TO RAISE HANGER
SCREW RUBBER
CUSHION
PULL LENS COVER
FORWARD TO REMOVE
LENS COVER
FLUORESCENT TUBE
(9W U-TYPE TUBE)
FLUORESCENT TUBE
SOCKET AREA
CAUTION
When placing battery pack in your fluorescent light, be
sure raised ribs on battery pack aligns with groove inside
light handle and latches snap in place properly. Improper
assembly of battery pack can cause damage to internal
components.
SWITCH
See Figure 2.
To turn your light on and off, depress switch trigger.
HANGING / STORAGE FEATURE
See Figure 2.
On top of the housing is a hook in which you can use to
hang the light up. This is a good feature for storing light
when not in use and also to keep light out of the reach of
children. To use, simply lift up on hook.
TUBE REPLACEMENT
See Figure 3.
WARNING
During the change of lamp the battery has to be not
contacted with the luminaire.
Use only with above listed fluorescent tube, other type of
fluorescent tubes will result in a risk of electric shock.
TO REPLACE FLUORESCENT TUBE
n Remove battery pack from uorescent light.
n Remove screw to release lens cover. Remove lens cover
by pulling forward and lifting from the housing.
n To remove old uorescent tube from spring, gently
grasp the lower edge of the rubber cushion and sides of
bulb. Carefully work tube in a side-to-side motion while
easing tube forward and up until tube is free from the
spring. Do not pull uorescent tube straight out from its
center, as this increases chance of breakage. Remove
rubber cushion from old uorescent tube and place on
top of new tube, rounded edge facing outward.
n Insert new uorescent tube in spring by aligning prongs
on tube with holes in tube socket area. Gently push
down on base of new tube until fully engaged. Do not
force tube into place.
n Replace lens cover by sliding lower edge into housing.
Align screw holes at top. With a screwdriver, tighten
screw.
n Replace battery pack.
WARNING
Do not attempt to disassemble the battery pack. Fire or
injury may result.
RYOBI TECHNOLOGIES AUSTRALIA PTY.LTD.
GUARANTEE
RYOBI TECHNOLOGIES AUSTRALIA PTY. LTD.
A.B.N. 98 002 277 509
SYDNEY: 359-361 Horsley Road, Milperra, N.S.W. 2214.
Contact during normal business hours.
RYOBI NEW ZEALAND PTY. LTD.
AUCKLAND:
27 Clemow Drive, Mt Wellington, N.Z.
Contact during normal business hours.
Subject to the guarantee condition below, this Ryobi tool
(hereinafter called “the product”) is guaranteed by Ryobi
(hereinafter called “the Company”) to be free from
defects in material or workmanship for a period of 24
months from the date of original purchase covering
both parts and labour. Under the terms of this
guarantee, the repair or replacement of any part shall
be the opinion of the Company or its authorised agent.
Should service become necessary during the warranty
period, the owner should contact the RYOBI HELPLINE
1300 361 505 or contact the retailer from whom the
product was purchased.
In order to obtain guarantee service, the owner must
present the sales docket and Guarantee Certificate
to confirm date of purchase. This product is sold by the
dealer or agent as principal and the dealer has no
authority from the Company to give any additional
guarantee on the Company’s behalf except as herein
containedorhereinreferred to.
Guarantee Conditions
This guarantee only applies provided that the Product
has been used in accordance with the manufacturer’s
recommendations under normal use and reasonable
care (in the opinion of the Company) and such
guarantee does not cover damage, malfunction or
failure resulting from misuse, neglect, abuse, or used
for a purpose forwhich it was not designed or is not
suited and no repairs, alterations or modifications
have been attempted by other than an Authorised
Service Agent.This guarantee will not apply if the tool is
damagedbyaccident or if repairs arise from normal
wear and tear.
The Company accepts no additional liability pursuant to
this guarantee for the costs of travelling or
transportation of the Product or parts to and from the
service dealer or agent - such costs are not included in
this guarantee.
Certain legislation, including the Trade Practices Act,
1974 (as amended) and other state and territorial laws
give rights to the buyer and impose liability on the seller in
certain circumstances. Nothing herein shall have the effect
of excluding, restricting or modifying any condition,
guarantee, right or liability imposed, to the extent only
that such exclusion, restriction or modification
would render any term herein void.
BRISBANE : All enquiries Tel : 1300 361 505
TOWNSVILLE: All enquiries Tel : 1300 361 505
MELBOURNE: 960 Stud Road, Rowville,Vic. 3178
Tel : (03) 9764 8656
HOBART: All enquiries Tel : 1300 361 505
ADELAIDE: All enquiries Tel : 1300 361 505
PERTH: 33-35 Sorbonne Cres. Canning Vale, W.A. 6155
Address Of Dealer
Present This Form With Your Purchase Docket When Guarantee Service Is Required.
Tel: (02) 9792 9800 - Fax: 1800 807 993 - www.ryobi.com.au
Tel: (09) 573 0230 - Free Call: 0800 279 624 - Fax: (09) 573 0231 - www.ryobi.co.nz
For your record and to assist in establishing date of purchase (necessary for in-guarantee service)
please keep your purchase docket and this form completed with the following particulars.
This Guarantee Form Should Be Retained By The Customer At All Times
Date Model No Serial No
Tel : (08) 9455 7775

Other Ryobi Flashlight manuals

Ryobi RP4470 User manual

Ryobi

Ryobi RP4470 User manual

Ryobi FL1800 User manual

Ryobi

Ryobi FL1800 User manual

Ryobi RP4410 User manual

Ryobi

Ryobi RP4410 User manual

Ryobi RP4450LK User manual

Ryobi

Ryobi RP4450LK User manual

Ryobi R18T User manual

Ryobi

Ryobi R18T User manual

Ryobi RFL180M User manual

Ryobi

Ryobi RFL180M User manual

Ryobi RFP1801 User manual

Ryobi

Ryobi RFP1801 User manual

Ryobi ONE Plus RLF18 User manual

Ryobi

Ryobi ONE Plus RLF18 User manual

Ryobi FL96 User manual

Ryobi

Ryobi FL96 User manual

Ryobi P705 User manual

Ryobi

Ryobi P705 User manual

Ryobi RCL4 User manual

Ryobi

Ryobi RCL4 User manual

Ryobi P716 User manual

Ryobi

Ryobi P716 User manual

Ryobi CFP-180SM User manual

Ryobi

Ryobi CFP-180SM User manual

Ryobi RFL180M User manual

Ryobi

Ryobi RFL180M User manual

Ryobi R18T User manual

Ryobi

Ryobi R18T User manual

Ryobi CFP-180FM User manual

Ryobi

Ryobi CFP-180FM User manual

Ryobi RP4400 User manual

Ryobi

Ryobi RP4400 User manual

Ryobi RLF18 User manual

Ryobi

Ryobi RLF18 User manual

Ryobi RFL180M User manual

Ryobi

Ryobi RFL180M User manual

Ryobi LFP-1802S Operation manual

Ryobi

Ryobi LFP-1802S Operation manual

Ryobi RFL180M User manual

Ryobi

Ryobi RFL180M User manual

Ryobi RP4400 User manual

Ryobi

Ryobi RP4400 User manual

Ryobi FL1200 User manual

Ryobi

Ryobi FL1200 User manual

Ryobi RP4400 User manual

Ryobi

Ryobi RP4400 User manual

Popular Flashlight manuals by other brands

Larson Electronics SLEDB-110V-M instruction manual

Larson Electronics

Larson Electronics SLEDB-110V-M instruction manual

Steren LAM-250 instruction manual

Steren

Steren LAM-250 instruction manual

Pro-4 Tactical Tactical Survival Set instruction manual

Pro-4 Tactical

Pro-4 Tactical Tactical Survival Set instruction manual

Pelican 2745 LED instructions

Pelican

Pelican 2745 LED instructions

KRAUSMANN LT40140 Operation manual

KRAUSMANN

KRAUSMANN LT40140 Operation manual

Launch WL3130 user manual

Launch

Launch WL3130 user manual

Pelican Little ED 3610 LED user manual

Pelican

Pelican Little ED 3610 LED user manual

ESAB W-17 instructions

ESAB

ESAB W-17 instructions

Astro Pneumatic 50SLMAX quick start guide

Astro Pneumatic

Astro Pneumatic 50SLMAX quick start guide

Hitachi BSL18UA instruction manual

Hitachi

Hitachi BSL18UA instruction manual

Worldwide FLEX CK18 manual

Worldwide

Worldwide FLEX CK18 manual

Bosch Professional GLI 10,8 V-LI Original instructions

Bosch

Bosch Professional GLI 10,8 V-LI Original instructions

Xtralite NiteSafe Duo XL20733 instruction manual

Xtralite

Xtralite NiteSafe Duo XL20733 instruction manual

NCT HK11045W manual

NCT

NCT HK11045W manual

Lumapower Signature Tactical LX user manual

Lumapower

Lumapower Signature Tactical LX user manual

Perel EFL04 user manual

Perel

Perel EFL04 user manual

First Light T-MAX user manual

First Light

First Light T-MAX user manual

Nature Power Powerful CREE 20013 instruction manual

Nature Power

Nature Power Powerful CREE 20013 instruction manual

manuals.online logo
manuals.online logoBrands
  • About & Mission
  • Contact us
  • Privacy Policy
  • Terms and Conditions

Copyright 2025 Manuals.Online. All Rights Reserved.