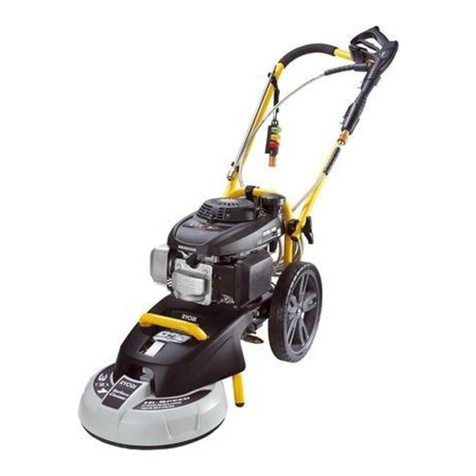
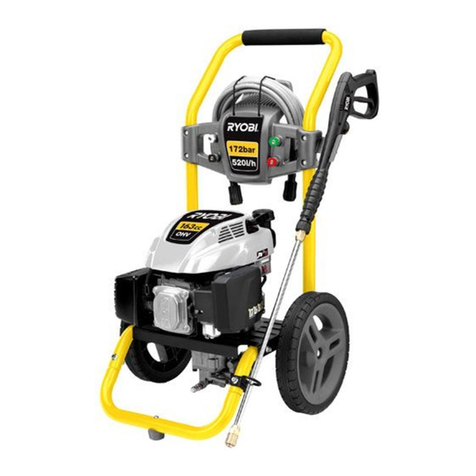
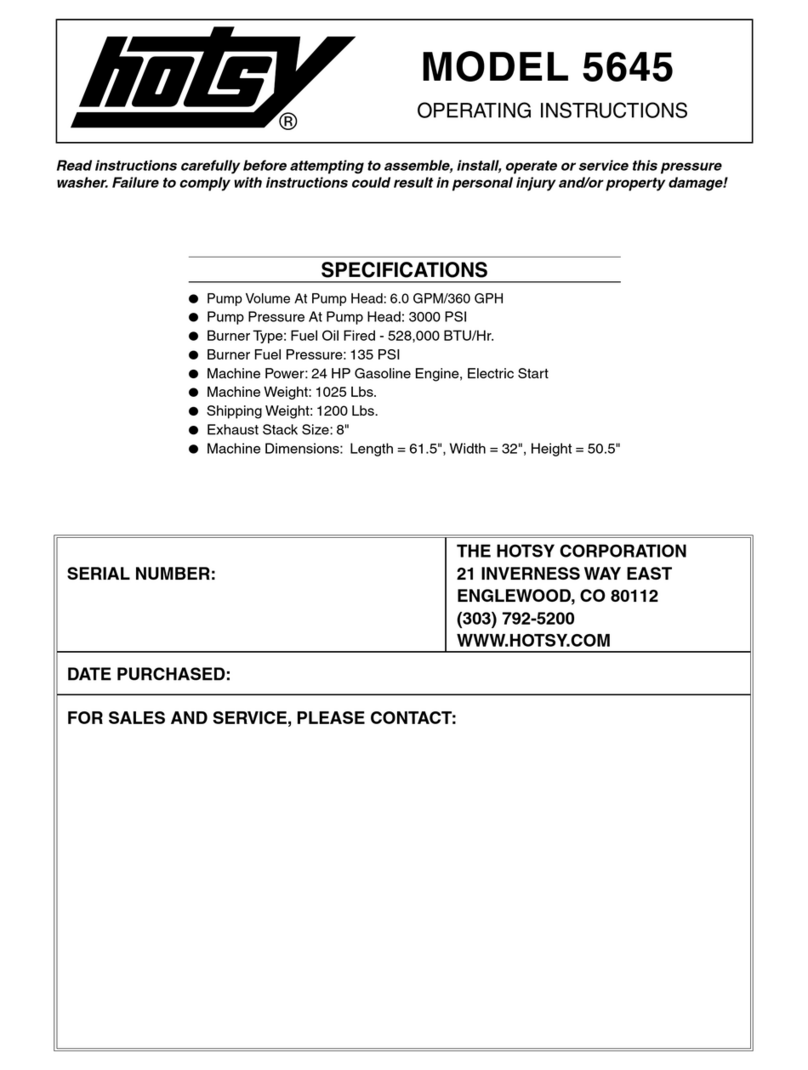
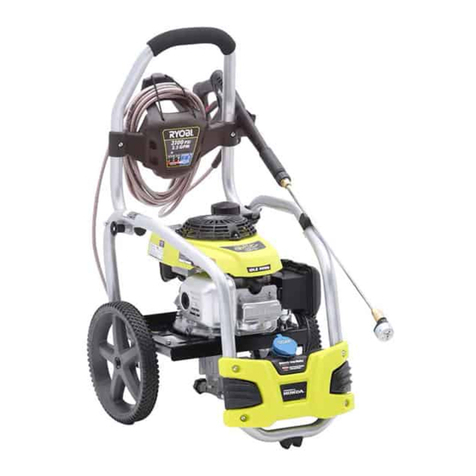
Ryobi RBC36X26E User manual

RBC36X26E
RBC36X26E
ORIGINAL INSTRUCTIONS
Petrol High
Pressure
Cleaner
RPW3200Y

Important!
It is essential that you read the instructions in this manual before assembling,
operating, and maintaining the product.
Subject to technical modification.

1
Safety, performance, and dependability have
been given top priority in the design of your
petrol high pressure cleaner.
INTENDED USE
The petrol high pressure cleaner is only
intended for use outdoors. For safety reasons,
the product must be adequately controlled by
using two-handed operation.
The product is designed for home or domestic
use. It is intended to clean machines, vehicles,
buildings, oors, tools, facades, terraces, and
concrete walkways by removal of stubborn
dirt using clean water with or without cleaning
detergent.
It should be used in well-illuminated conditions.
Do not use the product for any other purpose.
WARNING
The product is designed for use with a neutral
cleaning agent supplied or recommended by
the manufacturer. The use of other cleaning
agents or chemicals may adversely affect
the safety of the product.
GENERAL SAFETY WARNINGS
CAUTION
The product must not be used on the drinking
water supply without a backow preventer
being installed. Water owing through a
backow preventer is considered non-
drinkable. Always observe the regulations
of your local water utility company when
connecting the product to a water supply
line.
WARNING
Read all safety warnings and all
instructions. Failure to follow the warnings
and instructions may result in electric shock,
re, and/or serious injury.
■The product is not intended for use by
children or persons with reduced physical,
sensory, or mental capabilities, or lack
of experience and knowledge. Children
should be adequately supervised to ensure
they do not play with the product.
■Wear a complete personal protective
equipment when operating the product,
such as boots, safety gloves, safety
helmets with visor, and hearing protection.
Use high-impact visors only with liquid
splash protection.
WARNING
Do not use the product when people are
within range, unless they wear protective
clothing.
■To reduce the risk of injury, keep children
and visitors away. All visitors should wear
safety glasses and be kept at a safe
distance from the work area.
■Inspect the safety devices, such as safety
valves, flow switches, and pressure
switches to check if they are in good
working condition. Make sure all safety
devices are operating properly before each
use. The trigger lock out locks the trigger
and prevents unintentional opening of the
high-pressure jet.
■Do not use the product if the important
parts are damaged, such as safety devices,
high-pressure hoses, or trigger gun.
■Exercise caution when operating the
trigger. Hold the trigger handle firmly with
two hands to avoid injury when the trigger
handle kicks back.
WARNING
During use of high pressure cleaners,
aerosols may be formed. Inhalation of
aerosols can be hazardous to health.
WARNING
Depending on the application, shielded
nozzles can be used for high-pressure
cleaning, which will reduce the emission
of hydrous aerosols. However, not all
applications allow the use of such a device.
If shielded nozzles are not applicable for the
protection against aerosols, a respiratory
mask of class FFP 2 or equivalent may
be needed, depending on the cleaning
environment.
■Always stop the product when you leave it
unattended.
■High pressure jet is dangerous if misused.
Do not direct the jet to people, live electrical

2
equipment, or the product itself.
■To avoid a risk of explosion, do not spray
flammable liquids.
■Do not direct the jet against yourself or
others in order to clean clothes or footwear.
■High-pressure hoses, fittings, and couplings
are important for the safety of the product.
Use only hoses, fittings, and couplings
recommended by the manufacturer.
■Do not use the product indoors unless
adequate ventilation is assessed by the
national labour authorities of your country.
■Do not start the engine in a confined
space where dangerous carbon monoxide
fumes can collect. Carbon monoxide is a
colourless, odourless, and dangerous gas.
It can cause unconsciousness or death.
■Use the product only in a well-ventilated
area, and make sure exhaust gases are
properly discharged. Ensure that any
exhaust emissions are not in the vicinity of
air intakes.
■Only use fuels specified by the
manufacturer. The use of inappropriate
fuels may increase the risk of explosion.
ADDITIONAL SAFETY WARNINGS
■Some regions have regulations that restrict
the use of the product in some operations.
Check with your local authority for advice.
■Before each use, check for damage.
A damaged high-pressure hose must
be replaced immediately. Ensure all
connections, such as high-pressure hose
and nozzle, are secure. Unwind the hose
properly so they will not get twisted or
kinked.
■Do not allow children or untrained
individuals to use the product.
■Before starting any cleaning operation,
close doors and windows to prevent water
from entering. Clear the area to be cleaned
of debris, toys, outdoor furniture, or other
objects that could create a hazard.
■Never pick up or carry the product while the
engine is running.
■Do not use or store the product in
temperatures below 0°C.
■Do not use acids, alkalines, solvents,
flammable material, bleaches, or industrial
grade solutions in the product. These
products can cause physical injuries to the
operator and irreversible damage to the
product.
■Always operate the product on a level
surface. If the engine is on an incline, it
could seize due to improper lubrication,
even if the lubricant is at a maximum level.
WARNING
High-pressure jet can be dangerous if
subject to misuse. The jet must not be
directed to people, animals, electrical
devices, or the product itself.
■Hold the trigger handle securely with both
hands. Expect the trigger handle to move
when the trigger is pulled due to reaction
forces. Failure to do so could cause loss
of control and injury to yourself and others.
■Make sure the air in the hose and pump
is released before you turn on the product.
To remove the air in the hose and pump,
connect the water supply to the pump
using a garden hose, connect the trigger
handle to pump using the high-pressure
hose, disengage the trigger handle lock,
and press the trigger until there is a steady
flow.
■Exercise caution to avoid slipping or falling.
■Keep firm footing and balance. Do not
overreach. Overreaching can result in loss
of balance.
■Only use accessories that are
recommended by the manufacturer. The
use of improper accessories may cause
injury.
■Never leave the product running
unattended. Turn the product off. Do
not leave the product until it comes to a
complete stop.
■Be familiar with the controls. Know how to
stop the product and bleed the pressure
quickly.
■Stay alert and exercise control. Watch what
you are doing and use common sense.
■Do not use the product when you are tired,
ill, or under the influence of drugs, alcohol,
or medication. A moment of inattention
while operating the product may result in
serious personal injury.
■Do not use the product if the switch does not
turn it on and off. Any product that cannot
3
be controlled with a switch is dangerous
and must be repaired.
■Keep a minimum distance of 30 cm when
cleaning vehicles. The high-pressure jet
may damage or burst vehicle tires and/or
tire valves.
■Keep cooling air intake (recoil starter area)
and muffler side of the engine at least 1 m
(3 ft.) away from buildings, obstructions,
and other combustible objects.
■Keep the engine away from flammables
and other hazardous materials.
■Keep away from hot parts. The muffler and
other engine parts become very hot. Use
the product with caution.
■Keep the exhaust pipe free of foreign
objects.
■Do not touch the spark plug and the ignition
cable when starting and operating the
engine.
■Disconnect the spark plug wire and keep
the wire away from the plug to prevent
accidental starting. Avoid dangerous
environments.
CAUTION
Water blasting any asbestos-containing
material, including asbestos oil, is illegal.
FUEL AND REFUELLING
■Add fuel before starting the engine. Never
remove the cap of the fuel tank or add fuel
while the engine is running or when the
engine is hot.
■Always refuel outdoors. Never refuel
indoors or in a poorly ventilated area.
■If the fuel tank has to be drained, do this
outdoors.
■To reduce the risk of fire and burn injury,
handle the fuel with care. It is highly
flammable.
■Do not smoke while handling fuel.
■Loosen the fuel cap slowly to release
pressure and to keep the fuel from escaping
around the cap.
■Replace all fuel tank and container caps
securely.
■Wipe spilled fuel from the product. Move 9
m (30 feet) away from refuelling site before
starting engine.
■If fuel is spilled, do not attempt to start the
engine. Move the product away from the
area of spillage and avoid creating any
source of ignition until fuel vapours have
dissipated.
■Store fuel in a cool, dry, and well-ventilated
area, safely away from spark and/or
flame-producing equipment. Store fuel in
containers specifically designed for this
purpose.
■After stopping the engine, always pull the
trigger on the trigger handle to relieve
stored pressure in the high-pressure hose.
Failure to do so could result in serious
personal injury.
TRANSPORTATION AND STORAGE
CAUTION
Mind the weight of the product when
selecting the storage location and during
transportation to prevent accidents or
injuries.
■Store the engine and allow the product to
cool down. Disconnect the product from the
water supply before storing or transporting.
Never place the product in any position
other than upright.
■Drain all fuel from the tank into a container
approved for petrol. Remember to properly
replace and tighten the fuel cap.
■Run the engine until it stops. This will
remove all fuel that could become stale and
leave varnish and gum in the fuel system.
■Remove water from all hoses and the
pump, and empty the detergent tank before
storing the product.
■Clean all foreign materials from the product.
Store it in a cool, frost-free, dry, and well-
ventilated place that is inaccessible to
children. Keep away from corrosive agents
such as garden chemicals and de-icing
salts. Do not store outdoors.
■For transportation in a vehicle, secure the
product against movement or falling to
prevent injury to persons or damage to the
product.
■Never carry or transport the product while
the engine is running.
■Abide all government and local regulations
for the safe storage and handling of petrol.

4
MAINTENANCE
WARNING
Use only original manufacturer’s
replacement parts, accessories, and
attachments. Failure to do so can cause
possible injury and poor performance, and
may void your warranty.
WARNING
Servicing requires extreme care and
knowledge and should be performed only by
a qualied service technician. For service,
have the product serviced by an authorised
service centre. When servicing, use only
original replacement parts.
■Stop the engine and allow the product to
cool down. Disconnect the product from
the water supply and relieve store pressure
in the high-pressure hose before:
●cleaning the product
●changing accessories
●maintaining the product
●replacing spare parts
■You may make adjustments or repairs
described in this manual. For other repairs,
contact an authorised service centre.
■Regularly inspect and maintain the high-
pressure cleaner for safe operation. RYOBI
recommends inspecting the product every
3 months.
■Check all nuts, bolts, and screws at frequent
intervals for proper tightness to ensure the
product is in safe working condition. Any
part that is damaged should be properly
repaired or replaced by an authorised
service centre.
RESIDUAL RISKS
Even when the product is used as prescribed,
it is still impossible to completely eliminate
certain residual risk factors. The following
hazards may arise in use and the operator
should pay special attention to avoid the
following:
■Injury caused by the high-pressure jet
–Avoid pointing the high-pressure jet to
people, animals, and to yourself.
■Injury caused by kickback
–Always hold the trigger handle or the
trigger wand firmly with your two hands.
■Injury caused by inhalation of poisonous
gas and aerosols.
–Wear appropriate respiratory mask.
■Injury caused by exposure to noise
–Wear ear protection.
RISK REDUCTION
It has been reported that vibrations from
handheld tools may contribute to a condition
called Raynaud’s Syndrome. Symptoms may
include tingling, numbness, and blanching of
the ngers, usually apparent upon exposure
to cold. Hereditary factors, exposure to cold
and dampness, diet, smoking, and work
practices are all thought to contribute to the
development of these symptoms. There are
measures that can be taken by the operator to
possibly reduce the effects of vibration:
■Keep your body warm in cold weather.
When operating the product, wear gloves
to keep the hands and wrists warm.
■After each period of operation, exercise to
increase blood circulation.
■Take frequent work breaks. Limit the
amount of exposure per day.
If you experience any of the symptoms of this
condition, immediately discontinue use and
see your physician.
WARNING
Injuries may be caused, or aggravated, by
prolonged use of a tool. When using any
tool for prolonged periods, ensure you take
regular breaks.
FEATURES
KNOW YOUR PRESSURE WASHER
See page 15.
The safe use of this product requires an
understanding of the information on the tool
and in this operator’s manual as well as a
knowledge of the project you are attempting.
Before use of this product, familiarize yourself
with all operating features and safety rules.

5
NOZZLE KIT
Soap nozzle, 0 DEG, 25 DEG, and 40 DEG
spray nozzle.
FUEL TANK
This fuel tank has a maximum capacity of 1.2L
(0.32 US gal). Use unleaded automotive fuel
in the engine.
FUEL VALVE
The fuel valve must be open to start the
engine and should always be closed before
storing the machine.
HOSE STORAGE
Once the high pressure hose is rolled, hang
it on the back of the machine using the hook-
and-loop strap to secure in place.
ON/OFF SWITCH
The on/off switch is used in combination with
the starter grip and rope to start the engine. It
is also used to turn the engine off.
STARTER GRIP WITH ROPE
The starter grip with rope is pulled to start the
machine.
SPARK ARRESTOR
This engine is factory equipped with a spark
arrestor. In some areas it is illegal to operate
an engine without a spark arrestor.
THERMAL RELIEF VALVE
This pump feature will prevent water
temperatures from reaching harmful levels by
releasing a small amount of water. Once the
water has drained, the thermal relief valve will
reset itself.
TRIGGER HANDLE
The trigger handle has a gripping surface that
provides added control of the spray wand and
helps reduce fatigue.
TRIGGER WITH LOCK OUT
Squeezing the trigger releases a stream of
water for high pressure cleaning. The lock out
provides protection against unauthorised use.
ASSEMBLY
UNPACKING
The product requires assembly. Carefully
remove the product and the accessories from
the box. Make sure that all items listed in the
"What's in the box" section are included.
WARNING
Do not use the product if any parts in the
"What's in the box" section are already
assembled to your product when you unpack
it. The parts on the list are not assembled to
the product by the manufacturer and require
customer installation. Use of a product that
may have been improperly assembled could
result in serious personal injury.
NOTE: The product is heavy. To avoid back
injury, lift the product with your legs, not with
your back, and get help when needed.
■Inspect the product carefully to make sure
no breakage or damage occurred during
shipment.
■Do not discard the packing material
until you have carefully inspected and
satisfactorily operated the product.
WHAT'S IN THE BOX
See page 14.
■High pressure cleaner x 1
■Trigger handle x 1
■Nozzle kit x 1
■Spray wand x 1
■Trigger handle holder x 1
■Spray wand holder x 1
■Hose storage x 1
■Screw (1/4-20 x 2.1 in., Phillips head) x 1
■Screw (1/4-20 x 1.85 in., Phillips head) x 2
■Hex nut (1/4-20 in.) x 3
■Flat washer x 1
■High-pressure hose 10.6 m (35 ft.) x 1
■Operator’s manual x 1
TOOLS NEEDED
The following tools are not included in the
package but are needed for the assembly:
■7/16 in. wrench
■Phillips head screwdriver

6
WARNING
If any part is damaged or missing, do not
operate the product until the part is replaced.
Using the product with damaged or missing
parts could result in serious personal injury.
WARNING
Do not attempt to modify the product or
create accessories not recommended for
use with the product. Such alteration or
modication is a misuse and could result in
a hazardous condition leading to possible
serious personal injury.
WARNING
To prevent accidental starting that could
cause serious personal injury, always
disconnect the engine spark plug wire from
the spark plug when assembling parts.
OPERATION
WARNING
Do not allow familiarity with the product
to make you careless. Remember that a
careless fraction of a second is sufcient to
inict serious injury.
WARNING
Always wear eye protection with side
shields marked to comply with EN 166.
Failure to do so could result in objects being
thrown into your eyes resulting in possible
serious injury.
WARNING
Do not use any attachments or accessories
not recommended by the manufacturer
of the product. The use of attachments or
accessories not recommended can result in
serious personal injury.
WARNING
Never direct a water stream toward people
or pets, or any electrical device. Failure to
heed this warning could result in serious
injury.
ADDING LUBRICANT TO THE ENGINE
See page 17 (step 11).
NOTE: You must add lubricant to the engine
before starting it for the first time.
WARNING
Any attempt to start the engine without
adding lubricant will result in engine failure.
NOTE: The lubricant level is checked without
screwing the dipstick in. The engine has a
total lubricant capacity of 0.6 L (20 oz.).
ETHANOL-BLENDED FUELS
Do not use E85 fuel. It will void your warranty.
NOTE: Fuel system damage or performance
problems resulting from the use of an
oxygenated or ethanol-blended fuel containing
more than the percentages of oxygenates
stated below are not covered under warranty.
Petrol containing up to 10% ethanol by volume
(commonly referred to as E10) is acceptable.
E85 is not.
ADDING PETROL TO THE FUEL TANK
See page 17 (step 12).
WARNING
Petrol and its vapours are highly ammable
and explosive. To prevent serious personal
injury and property damage, handle the
gasoline with care. Handle the fuel outdoors,
keep it away from ignition sources, do not
smoke while adding fuel, and wipe up spills
immediately.
WARNING
Always shut off the engine before refuelling.
Never add fuel to a product with a running
or hot engine. Move at least 9 m (30 ft.) from
the refuelling site before starting the engine.
Do not smoke, and stay away from open
flames and sparks. Failure to follow these
instructions could result in serious personal
injury.
When adding petrol to the high pressure
cleaner, make sure the product is sitting on
a at, level surface. If the engine is hot, let
the high pressure cleaner cool before adding
petrol. Always ll the fuel tank outdoors with
the product turned off.

7
NOTE: Use unleaded 91 or higher petrol only.
Do not mix lubricant with petrol.
FUEL FILTER
The fuel supplied to the engine is passed
through a lter to remove any contaminants
from entering the engine. Contaminants in the
fuel can cause poor performance and damage
to the engine.
The fuel lter is a non-serviceable item and, if
needed, should be replaced by an authorised
service centre.
STARTING/STOPPING THE ENGINE
See page 21.
WARNING
Do not run the high pressure cleaner
pump without water supply connected and
turned on, as this may damage the high
pressure seals and decrease the pump
life. Completely unwind the hose from its
reel or coil and make sure the hose is not
being restricted by tires, rocks, or any other
objects that may lessen or prevent water
flow to the high pressure cleaner.
WARNING
If the engine does not start after each pull,
squeeze the trigger to relieve water pressure
before attempting to start the engine again.
WARNING
Hold the handle and wand securely with
both hands. Expect the trigger handle
to move when the trigger is pulled due to
reaction forces. Failure to do so could cause
loss of control and injury to yourself and
others.
WARNING
While operating and storing, keep at least
1m (3 feet) of clearance on all sides of
the product, including overhead. Allow a
minimum of 30 minutes of “cool down” time
before storage. Heat created by mufer and
exhaust gases may be hot enough to cause
serious burns and/or ignite combustible
objects.
INSTALLING/REMOVING NOZZLES
See page 23 - 30.
WARNING
Never change nozzles or spray patterns
without locking the lock out on the trigger
handle. Never point the wand to yourself or
other persons. The quick-connect feature
contains small springs that could eject the
nozzle with some force. Failure to heed this
warning could cause personal injury.
USING THE SPRAY NOZZLE AND SOAP
NOZZLE
See pages 23 - 30.
For the most effective cleaning, the spray
nozzle should be between 200 mm (8 in.)
and 600 mm (24 in.) from the surface to be
cleaned. If the spray is too close it can damage
the cleaning surface.
Nozzle Application
0o
Spot cleaning of high, hard-to-
reach areas
■Removing caked-on mud from
heavy construction, farm, or
lawn equipment
■Cleaning tar, glue, or stubborn
stains from concrete
■Cleaning overhead areas
■Removing rust from steel and
oxidation from aluminum
25o
For general purpose or large
surfaces
■General cleaning of dirt, mud,
and grime
■Cleaning roofs, gutters, and
downspouts
■Removing light mildew stains
■Removing algae and bacteria
build-up from pools
■Rinsing surfaces in
preparation for painting
40o
For wide-angle rinsing
■Light cleaning and washing
■Washing and rinsing of
painted surfaces and boats
■Cleaning roofs, windows,
patios, and driveways

8
Soap
short
range
For short range detergent
applications
■Driveways, walkways, decks
and patios, vehicles, fences,
paint prep, patio furniture, and
lawn equipment
USING THE HIGH-PRESSURE HOSE
The high-pressure hose features an outer
covering that provides strength to the hose.
If the outer covering becomes damaged,
the hose must be replaced immediately. Do
not use a high-pressure hose if the outer
covering is damaged.
To prevent damage to the outer covering:
■Inspect the hose before every use.
■Fully unwrap and straighten the hose
before use.
■Do not allow the high-pressure hose to be
kinked.
■Keep the hose away from hot surfaces and
sharp edges.
■Do not pull the product by using the high-
pressure hose.
■Do not allow the hose to be crushed or
wrapped around objects.
WASHING WITH DETERGENT
See page 31.
Use only detergents designed for high
pressure cleaners. Household detergents,
acids, alkalines, bleaches, solvents,
ammable material, or industrial grade
solutions can damage the pump. Many
detergents may require mixing prior to use.
Prepare the cleaning solution as instructed on
the solution bottle.
NOTE: Spray the detergent on a dry surface
using long, even, overlapping strokes. To
prevent streaking, do not allow detergent to
dry on the surface.
Before shutting off the engine:
■Remove the soap nozzle, and install the
40 DEG spray nozzle. See the "Installing/
removing nozzles" section.
■Flush for 1 - 2 minutes (spray clear water
through the spray wand).
■Shut off the engine.
NOTE: Shutting off (O) the engine will not
relieve pressure in the system. Squeeze the
trigger to release the water pressure.
RINSING WITH THE HIGH PRESSURE
CLEANER
■Turn off the high pressure cleaner and shut
off the water supply. Squeeze the trigger to
release water pressure.
■Engage the lock out on the trigger handle
by pushing up on the lock out until it clicks
into the slot.
■Install the spray nozzle with either the
[40º], [25º], or [0º] setting depending on
the job. Refer to the chart in the "Using the
spray nozzle and soap nozzle" section to
determine which setting is correct for your
application.
■When using these settings, test a small
area first to avoid surface damage.
■Start at the top of the area to be rinsed and
work down, overlapping the strokes.
MOVING THE HIGH PRESSURE CLEANER
See page 32.
NOTE: Never lift or carry the product using
the handle and never place it in any position
other than upright on its wheels.
MAINTENANCE
GENERAL MAINTENANCE
Avoid using solvents when cleaning plastic
parts. Most plastics are susceptible to damage
from various types of commercial solvents
and may be damaged by their use. Use clean
a cloth to remove dirt, dust, lubricant, and
grease.
WARNING
Do not at any time let brake uids, gasoline,
petroleum-based products, and penetrating
lubricants come in contact with plastic parts.
Chemicals can damage, weaken or destroy
plastic which may result in serious personal
injury.
Only the parts shown on the parts list are
intended to be repaired or replaced by the
customer. All other parts should be replaced
at an authorised service centre.
Before running the engine, perform the
following steps:
■Check to ensure that all nuts, bolts, and
other fasteners, are securely tightened.

9
■Make sure the air filter is clean.
■Check both the engine lubricant level and
the fuel tank level. Refill as needed.
■Inspect the work area for hazards.
■If there is excessive noise or vibration, stop
the product immediately.
NOZZLE MAINTENANCE
Excessive pump pressure (a pulsing sensation
felt while squeezing the trigger) may be the
result of a clogged or dirty nozzle.
■Turn off the high pressure cleaner and shut
off the water supply. Squeeze trigger to
release water pressure.
■Remove the nozzle from the spray wand.
NOTE: Never point the spray wand to
yourself and others.
■Using a straightened paper clip or nozzle
cleaning tool (not provided), free any
foreign materials clogging or restricting the
nozzle.
■Using a garden hose, flush debris out of the
nozzle by back flushing (running the water
through the nozzle backwards or from the
outside to the inside).
■Reconnect the nozzle to the spray wand.
■Turn on the water supply and start the
engine.
CLEANING THE AIR FILTER
See pages 33-34.
A dirty air lter will cause starting difculty,
loss of performance, and shorten the life span
of the engine. Check the air lter monthly. For
best performance, replace the air lter at least
once a year.
REPLACING THE SPARK PLUG
See page 35.
■Clean the area around the base of the
spark plug before removing to keep dirt
and debris out of the engine. Remove
spark plug.
■Clean the carbon deposits on the spark
plug electrode using a plug cleaner or wire
brush. Replace the plug if worn. To replace
the spark plug, see page 34. Use spark
plug model BPR7HS (NGK) or equivalent.
■Check electrode gap. The gap should be
0.7- 0.8 mm (0.03 in.). Adjust the gap, if
necessary, by carefully bending the ground
electrode.
■Reinstall spark plug and tighten securely.
CHANGING THE ENGINE LUBRICANT
See page 36.
NOTE: Drain the lubricant while the engine
is still warm but not hot. Warm lubricant will
drain quickly and more completely.
NOTE: Consult hazardous waste management
guidelines in your area for the proper way of
used lubricant disposal.
PUMP LUBRICATION
The pump used in the high pressure cleaner
was lubricated with a sufcient amount of high
grade lubricant for the life of the product under
normal operating conditions. Therefore, no
further lubrication is required.
SYMBOLS ON THE PRODUCT
Safety alert
Read and understand
all instructions before
operating the product, follow
all warnings and safety
instructions.
Wear full eye and ear
protection.
To reduce the risk of injury
from kickback, hold the spray
wand securely with both
hands when the product is on.
Never point the spray wand to
people, animals, the machine
body, power supply, or any
electric appliances.
The product is not suitable
for connection to the drinking
water mains.
Burst hazard
To reduce the risk of injury
from high-pressure injection,
do not direct spray at people
or animals.
Failure to use in dry conditions
and to observe safe practices
can result in electric shock.

10
Petrol products emit carbon
monoxide, an odourless,
colourless, and poisonous gas.
Breathing carbon monoxide
can cause nausea, fainting, or
death.
Fuel and its vapours are
extremely ammable and
explosive. Fire can cause
severe burns or death.
To reduce the risk of injury or
damage, avoid contact with
any hot surface.
Do not mix lubricant with petrol.
Use only petrol with 0 to 10%
ethanol.
Release the handle.
Check the engine oil level.
Never use bleach or solvent-
based detergent.
120 :
SOAP
+=Detergent dilution ratio
Do not use the product indoors
940871011-01
Add engine oil here.
Regulatory Compliance
Mark (RCM). This product
meets applicable regulatory
requirements.
111 dB
94.5
dB
The guaranteed sound
pressure level is 94.5 dB. The
guaranteed sound power level
is 111 dB.
Waste electrical products
should not be disposed of
with household waste. Please
recycle where facilities exist.
Check with your local authority
or retailer for recycling advice.
SYMBOLS IN THIS MANUAL
Parts or accessories sold
separately
Note
Warning
Wear non-slip, heavy-duty
gloves.
The following signal words and meanings
are intended to explain the levels of risk
associated with the product.
DANGER
Indicates an imminently hazardous
situation, which, if not avoided, will result in
death or serious injury.
WARNING
Indicates a potentially hazardous situation,
which, if not avoided, could result in death
or serious injury.
CAUTION
Indicates a potentially hazardous situation,
which, if not avoided, may result in minor or
moderate injury.
CAUTION
Without safety alert symbol
Indicates a situation that may result in
property damage.

11

12
MAINTENANCE SCHEDULE
Before each
use
After rst
month or
20 hours of
operation
Every 3
months or
50 hours of
operation
Every year
or 100 hours
of operation
Every 2
years
Check for leakage and loose parts ■
Clean engine and check nuts and bolts ■
Check and rell engine lubricant ■
Check water inlet lter placement ■
Change engine lubricant (initial change) ■
Change engine lubricant ■
Check spark plug ■
Clean air lter ■
Replace air filter element ■
Clean and adjust spark plug and
electrodes ■
Replace spark plug ■
Clean spark arrester ■
Remove carbon from cylinder head** ■
Check and adjust valve clearance ** ■
Clean and adjust carburetor ** ■
Check fuel lines ■
Replace fuel lines ■
Check fuel tank cap ■
Replace fuel tank cap ■
** As for the procedures for these items, consult your nearest YAMAHA authorised service centre.
NOTES:
■Initial lubricant change should be performed after first 20 hours of operation. Thereafter, change lubricant every 50 hours.
■If the water inlet filter is missing or damaged, it must be replaced.
■If you are not sure how to perform any of the maintenance items listed above, take the product to an authorised service centre to have the
maintenance item performed.
■Maintenance should be performed more frequently when the product is used in dusty areas.

13
TROUBLESHOOTING
Problem Possible cause Solution
Engine fails to start.
No fuel in the tank. Fill the tank.
The spark plug shorted or fouled. Replace the spark plug.
The spark plug is broken (cracked
porcelain or electrodes broken).
Replace the spark plug.
The spark plug wire is shorted, broken,
or disconnected from spark plug.
Replace the spark plug wire or attach it
to the spark plug.
Ignition is inoperative. Contact an authorised service centre.
Wrong fuel in tank Only use unleaded 91 or higher petrol.
Engine ooded Shut off fuel line, wait 15 min. for fuel
to dry.
Engine is hard to start.
There is water in the gasoline. Drain entire fuel system and rell with
fresh fuel.
Weak spark at spark plug Contact an authorised service centre.
Engine lacks power. Dirty air lter Clean or replace the air lter.
Detergent fails to mix with spray The detergent injection hose is not
properly submerged.
Insert the injection hose into detergent
container.
The pump does not produce
pressure.
Inadequate water supply Provide an adequate water ow.
The trigger handle or spray wand
leaks.
Check connections and/or replace the
trigger handle or spray wand.
The nozzle is clogged Clean the nozzle.
Pump is faulty Contact an authorised service centre
Air in the hose Squeeze trigger on trigger handle to
remove the air from the hose.
The product does not reach high
pressure.
Diameter of garden hose is too small Replace the hose with a 3/4 in. garden
hose.
Water supply is restricted Check the garden hose for kinks, leaks,
and blockages.
Not enough inlet water Open water source at maximum.

14
x 1
x 1
x 1
x 1
x 1
x 1
x 1 x 1 x 1
x 2
x 1
x 3 x 1
x 1
x 1
x 1
1/4-20 x 1.85 in
1/4-20 x 2.1 in
WHAT'S IN THE BOX

15
24
25
1 2 3
4
5
6
7
8
9
10
11
12
131415
16
17
18
19
20
21
22
23
KNOW YOUR PRODUCT
1. Handle
2. High-pressure hose storage
3. Trigger handle holder
4. Fuel cap
5. Spray wand holder
6. Fuel tank
7. Choke
8. On/off switch
9. Fuel valve
10. Air filter cover
11. Wheel
12. High-pressure hose (10.6 m)
13. Spray wand
14. Trigger lock out
15. Trigger handle
16. Plastic Soap nozzle
17. 0 DEG Spray Nozzle
18. 25 DEG Spray Nozle
19. 40 DEG Spray Nozzle
20. Detergent tank
21. Detergent tank cap
22. Muffler
23. Spark plug boot
24. Starter grip
25. Lubricant cap/dipstick

16
2
1
1 2
1
2
30 sec
10
1. To raise the handle, pull the handle release knob out . 2.
Pull the handle up until the handle release knob snaps into
locking position.
Wear full eye and ear protection, substantial footwear, and
long trousers at all times while operating the product. Do
not operate the product when barefoot or wearing open
sandals.
1. Push up the lock out until it clicks into the slot. 2.
Squeeze the trigger to relieve air pressure; hold the trigger
until a steady stream of water appears.
NOTE: Always shut off the engine before refuelling. Never
add fuel to a product with a running or hot engine.
GETTING STARTED

17
2
3
1
12
1
2
3
4
2
1
65
2
1
START
x4x4
30 sec
RUN
1
2
13 14 15 16 17 18
1
2
7
1
2
89
2
1
3
1/4-20 x 1.85 in
4
GETTING STARTED GETTING STARTED GETTING STARTED GETTING STARTED
1
2
3
11
1
2
3
4
5
1/4-20 x 1.85 in
1/4-20 x 2.1 in
3
1. Turn the on/off switch to the ON position. 2. Turn the fuel
valve to the ON (horizontal) position.
Pull choke to START position. Grasp the starter grip and pull slowly until you feel the
resistance. Give the starter grip a short, brisk pull to start
the engine.
Let the engine run for several seconds, then gradually slide
the choker lever fully toward the RUN position.
Push choke into the RUN position. 1. Push up the lock out until it clicks into the slot. 2. Squeeze
the trigger to operate the high pressure cleaner.
1. Place hose storage onto handle. 2. Align holes in the hose storage with holes in the handle. Insert screw (1/4-20 x 1.85
in.) through holes in the left side. Insert screw (1/4-20 x 2.1 in.) through holes in the right side. 3. Place nut onto the screw
(left) and tighten. 4. Place trigger handle holder onto the screw (right). 5. Place washer and nut onto the screw and tighten.
1. Place spray wand holder onto frame. 2. Align holes in
both spray wand holder and frame. Insert screw (1/4-20 x
1.85 in.) through holes. 3. Place nut onto screw and tighten.
1. Pull back the quick-connect collar. 2. Push the desired
nozzle into the quick-connect collar until it clicks into place
and is secured properly.
1. Connect threaded end of spray wand to the trigger
handle. 2. Turn connector clockwise to secure spray wand.
3. Connect high-pressure hose to trigger handle inlet
coupler. 4. Turn the hose collar counterclockwise to secure
hose.
1. Connect collar of the high-pressure hose to threaded
nipple on the pump. 2. Turn the collar clockwise to tighten
the hose securely to the pump.
1. Connect threaded hose coupler to the high-pressure
cleaner water intake and tighten. 2. With the garden tap
completely off, attach the end of the garden hose adapter
(not supplied) to hose coupler.
Turn on the water supply.
1. Turn the dipstick counterclockwise to open. 2. Remove
the dipstick. 3. Fill the engine with 4-stroke engine lubricant
(SAE 10W-30) until the fluid level rises to the upper portion
of the hatched area on the dipstick. Replace the dipstick
and tighten securely.
NOTE: Check the engine oil. When the dipstick oil cap is
placed inside the filler, do not re-thread. The oil should be
visible between the minimum and maximum marks.
1. Turn the fuel cap counterclockwise to open. 2. Remove
the fuel cap. 3. Insert a clean funnel into the fuel tank then
slowly pour the fuel into the tank (1.2 L) to approximately 40
mm (1-1/2 in.) below the top of the tank neck.
NOTE: Check the fuel. Always use fresh, unleaded (91 or
higher) fuel. Fuel without fuel stabiliser added to it begins to
turn stale from 30 days onwards.

18
Other manuals for RBC36X26E
2
Table of contents
Other Ryobi Pressure Washer manuals

Ryobi
Ryobi DUALCLEAN RPW105DM User manual

Ryobi
Ryobi RY802925 User manual

Ryobi
Ryobi RY140PWA-P User manual

Ryobi
Ryobi RY802900 User manual

Ryobi
Ryobi AJP-2200GQ Operation manual

Ryobi
Ryobi RY80533 SERIES User manual

Ryobi
Ryobi OWS1880 User manual

Ryobi
Ryobi RY14122 User manual

Ryobi
Ryobi RACPWS4 User manual

Ryobi
Ryobi RY80588A User manual

Ryobi
Ryobi RY80533 SERIES User manual

Ryobi
Ryobi RY80940B User manual

Ryobi
Ryobi RPW120S User manual

Ryobi
Ryobi RACPWS22 User manual

Ryobi
Ryobi AJP-1623 Operation manual

Ryobi
Ryobi RPW140-G User manual

Ryobi
Ryobi RPW150XRB User manual

Ryobi
Ryobi RY141900VN User manual

Ryobi
Ryobi EHP-4011 User guide

Ryobi
Ryobi RY100PWA User manual