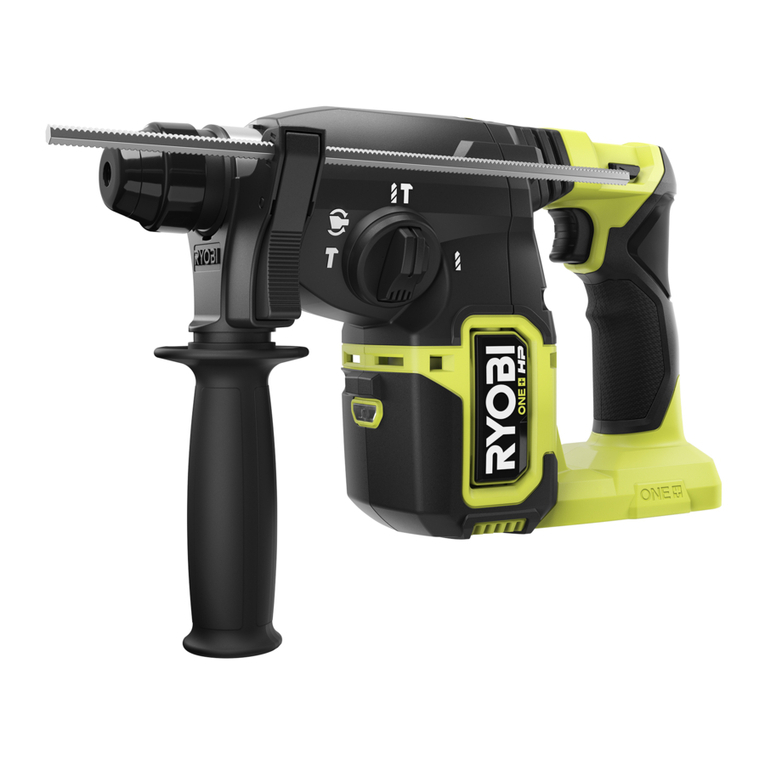
Ryobi CRH1801 Operation manual

CRH1801
18V SDS ROTARY HAMMER
OWNER’S OPERATING MANUAL
CRH1801_SAA-v5.indd A1CRH1801_SAA-v5.indd A1 8/31/09 3:27:36 PM8/31/09 3:27:36 PM

DESCRIPTION
1. Dust Protection Cap
2. SDS Chuck
3. Clamp Collar
4. Mode Selector
5. Trigger Switch
6. Rotation Selector
(Forward / Reverse / Center lock)
7. Auxiliary Handle
8. Depth Gauge Rod
9. Battery Pack (not included)
10. Latches
11. To Tighten
12. To Loosen
13. Drilling Depth
14. Drill bit (not included)
15. Reverse Rotation
16. Forward Rotation
17. 35mm Chuck Adaptor
(not included)
18. Screwdriver Bit (not included)
19. SDS Bit (not included)
1
234
5
6
7
8
8
9
10
11
12
13
8
15
16
6
5
17
Fig.1 Fig.2
Fig.3 Fig.4
Fig.5 Fig.6
7
14
18
19
33
1717
CRH1801_SAA-v5.indd A2CRH1801_SAA-v5.indd A2 8/31/09 3:27:36 PM8/31/09 3:27:36 PM

Important!
It is essential that you read the instructions in this manual before
operating this machine.
Subject to technical modifications.
CRH1801_SAA-v5.indd A3CRH1801_SAA-v5.indd A3 8/31/09 3:27:45 PM8/31/09 3:27:45 PM

1
English
GENERAL POWER TOOL SAFETY WARNINGS
WARNING
Read all safety warnings and all instructions.
Failure to follow the warnings and instructions
may result in electric shock, fire and/or serious
injury.
Save all warnings and instructions for future reference.
The term “power tool’’ in the warnings refers to your mains-
operated (corded) power tool or battery-operated (cordless)
power tool.
WORK AREA SAFETY
■Keep work area clean and well lit. Cluttered or dark
areas invite accidents.
■Do not operate power tools in explosive
atmospheres, such as in the presence of
flammable liquids, gases, or dust. Power tools
create sparks which may ignite the dust or fumes.
■Keep children and bystanders away while
operating a power tool. Distractions can cause you
to lose control.
ELECTRICAL SAFETY
■Power tool plugs must match the outlet. Never
modify the plug in any way. Do not use any
adapter plugs with earthed (grounded) power
tools. Unmodified plugs and matching outlets will
reduce the risk of electric shock.
■Avoid body contact with earthed or grounded
surfaces, such as pipes, radiators, ranges and
refrigerators. There is an increased risk of electric
shock if your body is earthed or grounded.
■Do not expose power tools to rain or wet
conditions. Water entering a power tool will increase
the risk of electric shock.
■Do not abuse the cord. Never use the cord for
carrying, pulling or unplugging the power tool.
Keep the cord away from heat, oil, sharp edges or
moving parts. Damaged or entangled cords increase
the risk of electric shock.
■When operating a power tool outdoors, use an
extension cord suitable for outdoor use. Use of
a cord suitable for outdoor use reduces the risk of
electric shock.
■If operating a power tool in a damp location is
unavoidable, use a residual current device (RCD)
protected supply. Use of an RCD reduces the risk
of electric shock.
PERSONAL SAFETY
■Stay alert, watch what you are doing and use
common sense when operating a power tool. Do
not use a power tool while you are tired or under
the influence of drugs, alcohol or medication. A
moment of inattention while operating power tools
may result in serious personal injury.
■Use personal protective equipment. Always wear
eye protection. Protective equipment such as dust
mask, non-skid safety shoes, hard hat, or hearing
protection used for appropriate conditions will reduce
personal injuries.
■Prevent unintentional starting. Ensure the switch
is in the off-position before connecting to power
source and/or battery pack, picking up or carrying
the tool. Carrying power tools with your finger on the
switch or energising power tools that have the switch
on invites accidents.
■Remove any adjusting key or wrench before
turning the power tool on. A wrench or a key left
attached to a rotating part of the power tool may result
in personal injury.
■Do not overreach. Keep proper footing and balance
at all times. This enables better control of the power
tool in unexpected situations.
■Dress properly. Do not wear loose clothing or
jewellery. Keep your hair, clothing and gloves away
from moving parts. Loose clothes, jewellery or long
hair can be caught in moving parts.
■If devices are provided for the connection of dust
extraction and collection facilities, ensure these
are connected and properly used. Use of dust
collection can reduce dust-related hazards.
POWER TOOL USE AND CARE
■Do not force the power tool. Use the correct power
tool for your application. The correct power tool will
do the job better and safer at the rate for which it was
designed.
■Do not use the power tool if the switch does not
turn it on and off. Any power tool that can not be
controlled with the switch is dangerous and must be
repaired.
■Disconnect the plug from the power source and/or
the battery pack from the power tool before making
any adjustments, changing accessories, or storing
power tools. Such preventive safety measures reduce
the risk of starting the power tool accidentally.
■Store idle power tools out of the reach of children
and do not allow persons unfamiliar with the power
tool or these instructions to operate the power tool.
Power tools are dangerous in the hands of untrained
users.
■Maintain power tools. Check for misalignment or
binding of moving parts, breakage of parts and
any other condition that may affect the power
tool's operation. If damaged, have the power tool
repaired before use. Many accidents are caused by
poorly maintained power tools.
CRH1801_SAA-v5.indd 1CRH1801_SAA-v5.indd 1 8/31/09 3:27:46 PM8/31/09 3:27:46 PM

2
English
GENERAL POWER TOOL SAFETY WARNINGS
■Keep cutting tools sharp and clean. Properly
maintained cutting tools with sharp cutting edges are
less likely to bind and are easier to control.
■Use the power tool, accessories and tool bits etc.,
in accordance with these instructions and in the
manner intended for the particular type of power
tool, taking into account the working conditions
and the work to be performed. Use of the power tool
for operations different from intended could result in a
hazardous situation.
BATTERY TOOL USE AND CARE
■Recharge only with the charger specified by the
manufacturer. A charger that is suitable for one type
of battery pack may create a risk of fire when used
with another battery pack.
■Use power tools only with specifically designated
battery packs. Use of any other battery packs may
create a risk of injury and fire.
■When the battery pack is not in use, keep it away
from other metal objects, like paper clips, coins,
keys, nails, screws, or other small metal objects
that can make a connection from one terminal to
another. Shorting the battery terminals together may
cause burns or a fire.
■Under abusive conditions, liquid may be ejected
from the battery; avoid contact. If contact
accidentally occurs, flush with water. If liquid
contacts eyes, additionally seek medical help.
Liquid ejected from the battery may cause irritation or
burns.
■This applianceisnotintendedforusebyyoungchildren
or infirm persons unless they have been adequately
supervisedby a responsible person toensurethat they
do not play with the appliance.
■Keepchildrenandvisitorsaway.Visitorsshouldwear
safetyglassesandbekeptasafedistance from thework
area. Do not let visitors contact the tool or extension
cord.
■Complies with AS/NZS 60745.
SERVICE
■Have your power tool serviced by a qualified
repair person using only identical replacement
parts. This will ensure that the safety of the power tool
is maintained.
SPECIAL SAFETY RULES
■Use the auxiliary handle supplied with the tool.
Loss of control can cause personal injury.
■Wear ear protection with rotary hammers. Exposure
to noise can cause hearing loss.
■Wear a face mask or dust mask if the drilling
operation generates dust.
INSTRUCTIONS FOR SAFE HANDLING
■Make sure that the tool is only connected to the
voltage marked on the name plate.
■Never use the tool if its cover or any bolts are missing.
If the cover or bolts have been removed, replace them
prior to use. Maintain all parts in good working order.
■Always secure tools when working in elevated
positions.
■Never touch the blade, drill bit, grinding wheel or
other moving parts during use.
■Never start a tool when its rotating component is in
contact with the work piece.
■Never lay a tool down before its moving parts have
come to a complete stop.
■ACCESSORIES: The use of accessories or
attachments other than those recommended in this
manual might present a hazard.
■REPLACEMENT PARTS: When servicing use only
identical replacement parts.
SPECIFICATIONS
Voltage 18 V
No load speed 0-1000 min-1
Hammer blows (Blows per minute) 0-4000 min-1
Impact energy 1.5J
Maximum Drill Capacity:
Wood 16 mm
Steel 13 mm
Concrete (Hammer drilling) 12 mm
Recommended hammer drilling range 4-12 mm
Bit Connection type SDS-plus
Weight - not incl.battery pack 2.2 Kg
MODEL BATTERY
PACK
(not included)
COMPATIBLE
CHARGER
(not included)
CRH1801
BPL-1820
BPL-1815 BCL-1800
BCS618
ABP1801
ABP-1815
BCL-1800
BCS618
ACR1800
260022029
CRH1801_SAA-v5.indd 2CRH1801_SAA-v5.indd 2 8/31/09 3:27:46 PM8/31/09 3:27:46 PM
3
English
OPERATION
WARNING
Do not allow familiarity with products to make you
careless. Remember that a careless fraction of a
second is sufficient to inflict serious injury.
WARNING
Always wear safety goggles or safety glasses with
side shields when operating products. Failure to
do so could result in objects being thrown into your
eyes, resulting in possible serious injury.
WARNING
Do not use any attachments or accessories not
recommended by the manufacturer of this product.
The use of attachments or accessories not
recommended can result in serious personal injury.
APPLICATIONS
You may use this product for the purposes listed below:
■Drilling in all types of wood products (lumber, plywood,
panelling, composition board, and hard board)
■Drilling in ceramics, plastics, fiberglass, and laminates
■Drilling in metals
■Hammer Drilling in concrete
This product will accept Ryobi One+ 18 V lithium-ion
battery packs and Ryobi One+ 18 V nickel-cadmium
battery packs.
WARNING
Always remove the battery pack from your drill
when you are assembling parts, making adjust-
ments, assembling or removing bits, cleaning,
or when not in use. Removing the battery pack
will prevent accidental starting that could
cause serious personal injury.
BATTERY PROTECTION FEATURES
Ryobi 18 V lithium-ion batteries are designed with
features that protect the lithium-ion cells and maximise
battery life. Under some operating conditions, these
built-in features may cause the battery and the tool it is
powering to act differently from nickel-cadmium batteries.
During some applications, the battery electronics may
signal the battery to shut down, and cause the tool to
stop running. To reset the battery and tool, release the
trigger and resume normal operation.
NOTE: To prevent further shut down of the battery, avoid
forcing the tool.
If releasing the trigger does not reset the battery and tool,
the battery pack is depleted. If depleted, the battery pack
will begin charging when placed on a lithium-ion charger.
TO INSTALL A BATTERY PACK
See Figure 2.
Follow these steps to install the battery pack:
■Place the rotation selector in the centre lock position.
■Insert the battery pack into the product as shown.
■Make sure the latches on each side of the battery
pack snap in place and that the battery pack is
secured in the product before beginning operation.
TO REMOVE BATTERY PACK
Follow these steps to remove the battery pack:
■Depress the latches on each side of the battery pack.
■Remove the battery pack from the drill.
WARNING
Battery products are always in operating
condition. Therefore, the switch should always be
locked when not in use or carrying at your side.
ADJUSTING THE AUXILIARY HANDLE
See Figure 3.
Follow these steps to adjust the auxiliary handle:
■Loosen the auxiliary handle by turning the knob
counterclockwise (12).
■Rotate the auxiliary handle to the desired location.
■Tighten the auxiliary handle securely by turning the
knob clockwise (11).
ADJUSTING THE DEPTH GAUGE ROD
See Figure 4.
Follow these steps to adjust the depth gauge rod:
■Lock the trigger switch by placing the rotation selector
in the center position.
■Loosen the auxiliary handle by turning the knob
counterclockwise (12).
■Adjust the depth gauge rod so that the drill bit extends
beyond the end of the rod to the required drilling
depth.
■Tighten the auxiliary handle by turning the knob
clockwise (11).
TRIGGER SWITCH
See Figure 5.
To turn the drill ON, depress the trigger switch. To turn it
OFF, release the trigger switch.
CRH1801_SAA-v5.indd 3CRH1801_SAA-v5.indd 3 8/31/09 3:27:46 PM8/31/09 3:27:46 PM

4
English
OPERATION
SWITCH LOCK
See Figure 5.
The trigger switch can be locked in the OFF position.
This feature can be used to prevent the possibility of
accidental starting when not in use. To lock the trigger
switch, place the rotation selector (Forward / Reverse
Selector) in the center position.
Note: When the selector is in center position, trigger
switch is locked.
REVERSE
See Figure 5.
This tool has the feature of reversible rotation, that is
controlled by a selector located above the trigger switch
(6).
■Clockwise rotation: set the selector lever to the left
position (16).
■Anti-clockwise rotation: set the selector lever to the
right position (15).
MODE SELECTOR
■For drilling, place the selector in the position.
■For hammer drilling, set to .
The switch-over can best be performed at a standstill.
Only after the switch is actuated and the machine starts
does the gear box shift to the selected mode.
Note: Hammer drilling mode will damage the tool’s
mechanism when used for fastening or drilling by a
non-SDS plus bit. Select the drill mode only for such
purposes.
When hammer drilling, use exclusively bits with hard
metal and SDS-Plus shaft only. The use of commercially
available masonry bits with cylindrical by means of the
drill adapter is impossible.
HAMMER DRILLING
When hammer drilling, you do not need to apply
too much pressure. The performance is not
increased in this manner. Too much pressure will
place unnecessary load on the motor.
Check the drill bits regularly. Re-sharpen or
replace blunt drill bits.
For hammer drilling, work only with protective glasses,
hearing protection and the auxiliary handle.
FITTING AND CHANGING SDS BITS
See Figure 6.
This tool is equipped with an SDS-plus connection
system.
■Clean the bit and grease it with machine grease
before inserting it into the chuck (2).
■Pull back the clamp collar (3) and hold it.
■Push and rotate the bit into the bit holder as far as it
will go.
■Release the clamp collar to lock the bit.
■Check that bit has locked by pulling on it.
REMOVING THE BIT FROM THE SDS-PLUS
SYSTEM
Pull back the clamp collar and remove the bit.
35mm CHUCK ADAPTOR (NOT INCLUDED)
See Figure 6.
For drilling work in metal , wood and plastic with drill
bits that have a Non SDS Plus shaft, the drill adaptor is
available.
PRACTICAL TIPS
Check the area of work before drilling in case of hidden
electrical lines or gas and water pipes.
SLIP CLUTCH
If the tool becomes jammed or gets caught, the slip clutch
releases.
Remove the load from the machine immediately by
pulling back the drilling tool.
Always hold the machine tightly with both hands
and assume a secure stance.
MAINTENANCE
WARNING:
When servicing, use only identical Ryobi
replacement parts. Use of any other parts may
create a hazard or cause product damage.
Avoid using solvents when cleaning plastic parts. Most
plastics are susceptible to damage from various types of
commercial solvents and may be damaged by their use.
Use clean cloths to remove dirt, dust, oil, grease, etc.
CRH1801_SAA-v5.indd 4CRH1801_SAA-v5.indd 4 8/31/09 3:27:46 PM8/31/09 3:27:46 PM

5
English
MAINTENANCE
WARNING
Do not at any time let brake fluids, gasoline,
petroleum based products, penetrating oils, etc.,
come in contact with plastic parts. Chemicals can
damage, weaken or destroy plastic which may
result in serious personal injury.
WARNING
Do not abuse power tools. Abusive practices can
damage the tool as well as your workpiece.
WARNING
Do not attempt to modify this tool or create
accessories not recommended for use with this
tool. Any such alteration or modification is misuse
and could result in a hazardous condition leading
to possible serious personal injury.
CRH1801_SAA-v5.indd 5CRH1801_SAA-v5.indd 5 8/31/09 3:27:46 PM8/31/09 3:27:46 PM

CRH1801_SAA-v5.indd 6CRH1801_SAA-v5.indd 6 8/31/09 3:27:46 PM8/31/09 3:27:46 PM
Other manuals for CRH1801
1
Table of contents
Other Ryobi Rotary Hammer manuals

Ryobi
Ryobi RBC36X26E User manual

Ryobi
Ryobi P223K1 User manual

Ryobi
Ryobi ED-400 Operation manual

Ryobi
Ryobi SDS60K User manual

Ryobi
Ryobi ERH-600V User manual

Ryobi
Ryobi SDS60K Quick setup guide

Ryobi
Ryobi ED-382NP User manual

Ryobi
Ryobi XRH-2020 Operation manual

Ryobi
Ryobi rsds680 User manual

Ryobi
Ryobi CRH1801 User manual