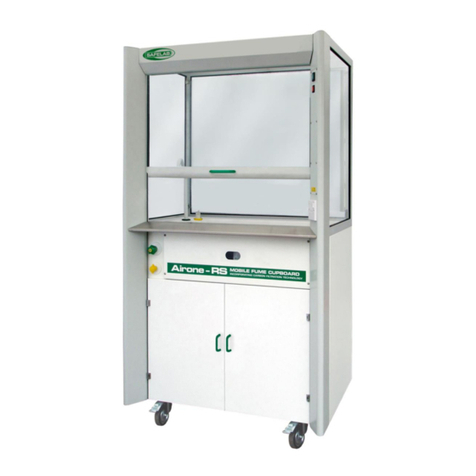
Safelab Airone Class II Operating instructions

Rev N
Airone Class II
Microbiological Safety Cabinet Range
Operating and maintenance manual
(Software V 0.79 onwards)

2

3
Contents
Section 1 ........................................................................................5
Description of the cabinet..................................................................................... 5
Working principal .................................................................................................. 5
Features.................................................................................................................. 5
Specifications ........................................................................................................ 6
Normal environmental conditions........................................................................ 6
SECTION 2 ......................................................................................7
Installation.............................................................................................................. 7
Important handling procedures............................................................................ 7
Location.................................................................................................................. 7
Ducting connection (optional).............................................................................. 7
Electrical connection and services...................................................................... 7
Auxiliary switched connection............................................................................. 7
Testing and certification....................................................................................... 7
SECTION 3 ......................................................................................8
Operating instructions.......................................................................................... 8
Basic operations.................................................................................................... 8
Cabinet overview................................................................................................... 8
Startup.................................................................................................................... 9
Controls................................................................................................................ 10
Home screen........................................................................................................ 10
Sliding sash operation........................................................................................ 11
Standby ................................................................................................................ 12
Switching the cabinet off.................................................................................... 12
Lighting ................................................................................................................ 13
Auxiliary power sockets...................................................................................... 13
Cleaning and disinfection................................................................................... 14
Surface cleaning and disinfection ..................................................................... 14
Glass front cleaning and disinfection................................................................ 14
UV Disinfection.................................................................................................... 14
Decontamination with Formaldehyde –Unit without the optional carbon
exhaust filter kit (CEF)......................................................................................... 15
Preparation prior to decontamination................................................................ 15
Decontamination with Formaldehyde –When using the optional carbon
exhaust filter kit (CEF)......................................................................................... 17
Preparation prior to decontamination................................................................ 17
Decontamination with VHP (Vaporised Hydrogen Peroxide)........................... 19
Preparation prior to decontamination................................................................ 19
SECTION 4 ....................................................................................20
Supervisor settings............................................................................................. 20
Airflow Display..................................................................................................... 21
Auto Start ............................................................................................................. 21
Auto Standby ....................................................................................................... 22
Cabinet access .................................................................................................... 23
Power Sockets..................................................................................................... 23
Keypad Sounds ................................................................................................... 23
Audible Alarm ...................................................................................................... 24

4
Set Time................................................................................................................ 24
Reset UV............................................................................................................... 24
Select Language.................................................................................................. 25
Change Access Code.......................................................................................... 20
SECTION 5 ....................................................................................26
Calibration and maintenance.............................................................................. 26
Maintenance......................................................................................................... 26
Information screen .............................................................................................. 26
Replacing the UV tube......................................................................................... 27
Replacing the main HEPA filter.......................................................................... 27
Replacing the outlet HEPA filter......................................................................... 27
Replacing the outlet safety HEPA filter ............................................................. 28
Spares and consumables ................................................................................... 28
Servicing .............................................................................................................. 28
SECTION 6 ....................................................................................29
Service settings................................................................................................... 29
Calibration............................................................................................................ 29
Set Fan Speeds.................................................................................................... 30
Airflow Sensors ................................................................................................... 30
Sash Calibration .................................................................................................. 30
Screen Calibration............................................................................................... 30
Airflow alarm settings......................................................................................... 30
Log Service Visit.................................................................................................. 31
This manual is intended to provide information about the product.
Safelab systems ltd assumes no liability whatsoever for the accuracy of any information contained
herein, as products can be subject to improvement changes at any time.
The contents may not be distributed, shared or commercially exploited in any form or by any means,
redistributed or reproduced in entirety or in part in any form, for individual or third party use,
photocopied or stored on any form of electronic retrieval system or linked to any other website, without
the prior express written permission of Safelab Systems Limited.
For permission requests, please contact:
Safelab Systems ltd
Airone Building
8 Beaufighter Road
Weston-Super-Mare
BS24 8EE
Email: enquiries@safelab.co.uk
Tel: +44(0)1934 421 340
This system must be used in compliance with these instructions and any repairs or
maintenance carried out by qualified personnel. For parts or service information please
contact Safelab Systems Ltd: +44 (0) 1934 421 340

5
Section 1
Description of the cabinet
Working principal
Class II Microbiological Safety Cabinets are designed to provide a high level of protection for the
operator, environment and sample. The cabinets work on a recirculating principal with
approximately 70% of the air drawn from the working area being recirculated. The remaining 30% is
exhausted via single or double HEPA filters back to the laboratory. An inflow velocity of
approximately 0.7m/sec. at the working aperture provides operator protection. The recirculated air
at a downward velocity provides sample protection from the laboratory environment and cross
contamination between samples.
Features
ISO Class 4 clean air
Compliant to BS EN 12469:2000
Advanced electronic control and monitoring system
Double or single outlet HEPA filter on recirculating version
HEPA filters with integral diffuser/laminator
Electrically operated sliding sash with integrated obstruction detection safety system
Timed start-up feature –Cabinet can be optionally set to start up unattended
Timed standby feature –Cabinet can be optionally set to standby unattended
Passcode protected start-up/shut down –Prevents unauthorised cabinet operation
Easy clean glass system
Toughened glass side windows
Internal auxiliary electrical appliance sockets
Low energy LED lighting
Stainless steel removable worksurface trays
Low overall height –fits most rooms
Ports for connection of VHP systems
UV decontamination lamp
Cabinets can be provided with a range of options, such as Gas, CO2 and Water supplies, Formalin
vaporisers/neutralisers, additional HEPA filters and Carbon outlet filter for use on formalin
decontamination and base stands. For any non-standard requirements we can provide modifications
to the existing models.

6
Specifications
Cabinet
MSCT800
MSCT1200
MSCT1800
Type
Recirculating
External dims
W 800mm x D 750mm x H
2195mm incl base stand
(1330mm without) +66mm
for optional outlet safety
filter
W 1200mm x D 750mm x
H 2195mm incl base
stand (1330mm without)
+66mm for optional outlet
safety filter
W 1800mm x D 750mm x H
2195mm incl base stand
(1330mm without) +66mm for
optional outlet safety filter
Internal working dims
W 707mm x D 500mm x H
690mm
W 1107mm x D 500mm x
H 690mm
W 1707mm x D 500mm x H
690mm
Weight
170 Kg
240 Kg
Inflow m/sec (typ.)
0.77 m/sec
0.77 m/sec
0.77
Downflow m/sec (typ.)
0.35 m/sec
0.35 m/sec
0.30
Electrical requirements
230v / 50/60Hz –T.10A HBC
Maximum power
1700W
1900W
2200W
Nominal power - Cabinet
150W
250W
320W
Nominal power –Aux
Sockets
2 x 700W
Auxiliary Electrical
sockets
2 x sockets IP55 (700W Max per socket)
Lighting
LED >850 lux at work surface
Filters
H14 HEPA
Construction
Zintec steel/Aluminium, Epoxy powder coated outer casing with toughened glass side
windows and Laminated safety glass sliding sash. Stainless steel base and removable
worksurface trays.
Normal environmental conditions
Indoor use only
Temperature
-5°C to 40°C
Relative humidity
Max humidity 80%
Overvoltage category
Overvoltage category II
Pollution degree
Pollution category II
Altitude
Up to 2000m
Mains supply voltage fluctuations
230V -6%+10%

7
SECTION 2
Installation
Important handling procedures
The cabinet should be handled with care during the transportation and siting process. The
cabinet is shipped with foam blocks and tape to secure and protect it during transit. These should be
removed once finally sited and before turning the cabinet on for the first time. To remove, open the
front cover. The sash will rise slightly and enable the foam to be removed.
Location
The cabinet should be sited in a draught-free location i.e. away from door entrances, corridors,
ventilation supply points etc. which will affect the airflow within the work zone as recommended in
BS5726:2005. The cabinet should be fully tested and commissioned by suitably qualified persons
before being put into service.
If the cabinet is moved or relocated it should be recommissioned.
Ducting connection (optional)
The cabinet can be supplied or fitted with an integral Anti-blowback device c/w Ø200mm spigot for
connection to extract ductwork. It is recommended that the duct system flow rate is adjustable to
match the cabinet and can provide extraction at a volume/rate of at least 800m³/hr (1200) and
1300m³/hr (1800). It is recommended that a thimble connection is used within the duct to maintain
stable and balanced airflow.
Electrical connection and services
The cabinets are shipped with a 2m IEC lead terminated with a standard domestic plug (type
dependant on region). The lead plugs into the top, right hand side towards the rear. The IEC inlet
socket is protected by a fuse. This should only be replaced with a fuse of same type and rating.
Auxiliary switched connection
A volt-free switching contact facility is provided on the cabinet fitted with anti-blowback devices for
connection to external devices (eg. Duct fan). This changes state whenever the cabinet is operational
(fan running). Connection is via a supplied 3 pin plug and is wired as follows:
Terminal pin
Connection
E
N/O
N
Common
L
N/C
Testing and certification
The Cabinet should be fully tested and commissioned by suitably qualified persons before being put
into service. Safelab have a nationwide team of service engineers who can take care of your
installation, commissioning and service requirements. Please contact our service department for
further information.

8
SECTION 3
Operating instructions
Basic operations
Cabinet overview
Power inlet
Power switch
Control panel
Electronically
controlled
sliding sash
VHP/services ports
Front panel
(Gas strut assisted
for service access)
Removable
worksurface trays
Outlet filter

9
Startup
The main switch is positioned on the upper right-hand side of the front cover.
Upon switching the unit on it will display the welcome screen for a few seconds
The system will then run a system check and display the user access code screen**
Press “0127”then “Enter” to start the cabinet. The screen will automatically open the sash to its
normal working position, the fans will start and the lighting will illuminate.
During this time the following screen will be displayed:
Once the sash has reached its normal operating position and for the duration of normal day-to-day
operation, the “Home” screen will be displayed and the cabinet is ready for use.
** “Keypad cabinet access” feature can be disabled in “Supervisor settings”

10
Controls
The cabinet is equipped with a touch-screen control system.
It provides complete control of the cabinet and displays all the operating parameters in an easy to
understand touch screen interface.
Home screen
This is displayed whilst the cabinet is operating normally in its day-to day operation.
Key of features:
1. System status display area –Displays the Airflow velocity in real time.
2. Standby –Closes the sash and puts the unit to into “sleep mode”.
3. Sash up –Press and hold to raise the sash to the desired level for access, cleaning or
maintenance.
4. Working height –Resets the sash to its normal working position.
5. Menu –Access to other features such as general cabinet info, decontamination cycle and
cabinet settings.
6. UV –Access the setup and operation of the UV disinfection cycle.
7. Lighting –Access control to set the brightness or to turn the light on/off.
8. Socket 1 –Turns the Upper auxiliary power socket control on/off.
9. Socket 2 –Turns the Lower auxiliary power socket control on/off.
Note –When turned on, the relevant socket icon is indicated with a red border.
5
6
7
8
9
4
3
2
1

11
Sliding sash operation
The cabinet is equipped with an electrically actuated glass sliding sash.
It has one pre-set position this is its normal operating position.
In addition, there is an integrated safety system that detects obstructions within the opening and
automatically prevents the sash from closing. A warning is displayed in the event of the system
detecting an obstruction:
Remove the obstruction and press “OK”. This will reset the system and the sash will close.
In addition to the pre-set position the sash may also be fully raised to enable access for cleaning or
positioning of apparatus within the enclosure.
To raise the sash, select and hold the “Sash up”arrow icon (3). The sash will continue to rise until the
icon is released or when it reaches the upper limit stop.
WARNING: It should be noted that containment or product protection is NOT effective if the sash is
raised above its normal working height.
Should the screen be moved above its normal working height position, the main display will show
“SASH HIGH” warning the user.
To return the sash to its normal position, press the “Working height” icon (4)
The sash can be also fully closed by putting the cabinet into standby –see section below for details.

12
Standby
Standby is a status where the cabinet is closed, the lighting is turned off and the fans are stopped.
The control system is still operational.
To put the cabinet into standby, first ensure any items or obstructions are removed from the front
edge of the worksurface then press the “Standby”icon (2).
If the “Keypad cabinet access” option is active, the user will be prompted to enter the access code
(0127).
A warning screen is displayed with a 5 second countdown advising that the screen will shortly close
(Pressing “Abort shut down”will stop the countdown and the cabinet will resume normal operation).
Once the sash has closed, the fans and lights will switch off and the standby screen is displayed.
Touching the screen will wake the cabinet , open the sash, start the fans and resume operation.
Switching the cabinet off
Once the cabinet is in standby mode it can be safely turned off at the power switch.
The cabinet should not be switched off with the sash in the open position as containment will be
affected.

13
Lighting
The cabinet is equipped with low energy LED lighting.
The lighting levels can be adjusted or turned by pressing the “Lighting”icon on the home screen (7).
This expands to reveal the following options:
By pressing the “Up” or “Down” arrows you can adjust the brightness. Pressing the “Lighting”icon
will turn the light off. Pressing the icon again will turn the light on.
The screen will return to the home page after 3 seconds if no icon is pressed.
Auxiliary power sockets
As standard, the cabinet is equipped with 2 auxiliary power outlet sockets for connection of ancillary
equipment/apparatus.
The sockets are fuse protected and rated at 3A (700W) each–DO NOT EXCEED THE STATED LOAD.
The socket outlets are switched by pressing the corresponding icon on the home screen (8/9).
Once activated, the relevant icon is illuminated with a red border to indicate it is switched on.
By default the sockets are left on whilst the cabinet is in standby mode. They can be set so they
automatically turn off when the cabinet goes into standby mode –this option is set in the “Supervisor
settings” page (See section 4)
Increase brightness
On/Off
Decrease brightness

14
Cleaning and disinfection
Surface cleaning and disinfection
Cleaning should be carried out with a non-corrosive disinfectant solution. The worksurface may be
removed if required.
Glass front cleaning and disinfection
WARNING: DO NOT ATTEMPT TO OPEN THE FRONT COVER WITHOUT EITHER FULLY RAISING OR
CLOSING THE SLIDING SASH –POTENTIAL GLASS BREAKAGE MAY OCCUR IF THIS INSTRUCTION IS NOT
FOLLOWED.
With the sash fully raised (see sash operation section) open the front panel, the entire internal
surface of the sash may be cleaned.
With the sash fully closed (see sash operation section), the front panel can be raised to allow for
cleaning of the front surface of the sash.
UV Disinfection
The cabinet is equipped with a ultraviolet germicidal lamp for additional disinfection purposes. The
lamp is UV-C (254nm) 30w.
Note - For the UV lamp to be effective, the target MUST be in direct line of sight with the light
source. It is the user’s responsibility to satisfy themselves whether it is suitable for the intended
process.
The feature is accessed by pressing the corresponding icon on the home screen (6).
This will access the “UV Disinfection”screen.
Follow the on-screen prompts to set cycle duration and delayed start time.
Pressing “Next” will close the sash, turn the fans off and start the UV cycle or put the cabinet into
standby if a delay time has been set.
Note - You can select the “Home” icon at any time to abort the setup screen and return to the Home
screen.
“Home”
“Next”

15
The following section should be read in conjunction with annex J of BS12469:2000 to gain full
understanding of recommendations for decontamination, cleaning and fumigation of
Microbiological Safety Cabinets and filters.
Decontamination with Formaldehyde –Unit without the optional carbon
exhaust filter kit (CEF)
Safelab Sytems Ltd can supply a suitable Formalin vaporiser and neutraliser for use with the cabinet.
The vaporiser simply plugs into the electric socket inside the cabinet and the entire disinfection
process runs under the control of the cabinet.
PLEASE THOROUGHLY READ THE VAPORISER MANUAL PROVIDED BEFORE RUNNING A
DECONTAMINATION CYCLE.
Preparation prior to decontamination
Place the vaporiser inside the cabinet and prepare it in accordance with the user manual.
Plug the unit into the lower electric socket outlet of the cabinet.
Ensure socket is turned off before plugging the unit in.
From the Home screen, press “Menu”icon and select “Form”
Follow the on-screen instructions:
Seal glazing and front cover surrounds with suitable self-adhesive tape.
Fit the supplied outlet cover plate to seal the cabinet outlet. It is also recommended that this
cover is sealed with suitable self-adhesive tape to provide a secondary seal.
Press “Next” to proceed to the next page to set cycle parameters.

16
Cycle delay time is used to delay the start time, for example if you wish for the cycle to begin
early next morning. To start immediately, set to zero.
Select cycle duration accordance with vaporiser manufacturer’s instructions.
Note - During the course of the cycle, the fans will occasionally run to aid circulation of the
vapour.
Towards the end of the cycle, follow the instructions displayed on screen:
At the end of the cycle, the following screen is displayed:
Decontamination complete / aborted

17
Decontamination with Formaldehyde –When using the optional carbon
exhaust filter kit (CEF)
This is a factory order option that consists of a specially formulated carbon filter and quick-release
mounting kit that fits to the top of the cabinet. This can be used whenever the decontamination
cycle is run and allows for the safe and effective removal of residual formaldehyde fumes following
the cycle.
Due to the specific grade of activated Carbon this option is only suitable for use with
Formaldehyde and is only for use on the decontamination cycle –it is NOT for general day-to-day
operational usage.
The setup sequence is similar to a non-filtered cabinet but with additional instructions displayed at
the appropriate time.
Preparation prior to decontamination
Place the vaporiser inside the cabinet and prepare it in accordance with the user manual.
Plug the unit into the lower electric socket outlet of the cabinet.
Ensure socket is turned off before plugging the unit in.
From the Home screen, press “Menu” icon and select “Form”
Follow the on-screen instructions:
Seal glazing and front cover surrounds with suitable self-adhesive tape.
Fit the Carbon filter and retaining frame to the top of the cabinet outlet. Lock into place with
the spring catches.
Press “Next” to proceed to the next page to setup cycle time parameters.

18
Select duration for post cycle purge.
Select cycle delay time /cycle duration accordance with vaporiser manufacturer’s
instructions.
During the course of the cycle, the fans will occasionally run to aid circulation of the vapour.
At the end of the cycle, follow the instructions displayed on screen:
Decontamination complete / aborted

19
Decontamination with VHP (Vaporised Hydrogen Peroxide)
The cabinet is suitable for VHP decontamination.
Connection ports used with apparatus, on the side glazing and the exhaust cover plate.
Refer to manual provided with your VHP equipment before running a decontamination cycle.
Preparation prior to decontamination
The cabinet is provided with a cover plate to seal the cabinet outlet, the cover is also
equipped with a VHP connection port. It is recommended that this cover is sealed with
suitable self-adhesive tape to provide a secondary seal.
Close the sash by putting the cabinet into standby and seal the sash and cabinet with suitable
self-adhesive tape.
Remove tape prior to restarting the cabinet.

20
SECTION 4
Supervisor settings
This passcode protected menu page allows supervisors to set cabinet and cycle specific preferences
that regular users cannot access or change.
It is accessed from the home screen by selecting “Menu” then the “Settings” icon.
This opens the password protected access screen
Enter the passcode to access the supervisor settings screen.
Change Access Code
Allows the supervisor to change the access PIN code (Note –once changed, the default codes will no
longer work!)
Select the options as required and select the “Return” icon to save and return to the password
screen. Select the “Home” icon to return to the Home screen.
Other options on this screen allow the supervisor to set the date and time and reset the UV tube
hours (when tube is replaced –see section 5 –“Calibration and maintenance” for details).
This manual suits for next models
3
Table of contents
Other Safelab Laboratory Equipment manuals
Popular Laboratory Equipment manuals by other brands

BlueCatBio
BlueCatBio BlueWasher quick start guide

CLIMET INSTRUMENTS
CLIMET INSTRUMENTS CI-154 user manual

Supelco
Supelco Spectroquant NOVA 60A operating manual

Alliance Bio Expertise
Alliance Bio Expertise MIXWEL user manual

Agilent Technologies
Agilent Technologies Cary 630 FTIR user guide

Northwest Marine Technology
Northwest Marine Technology Multishot instruction manual