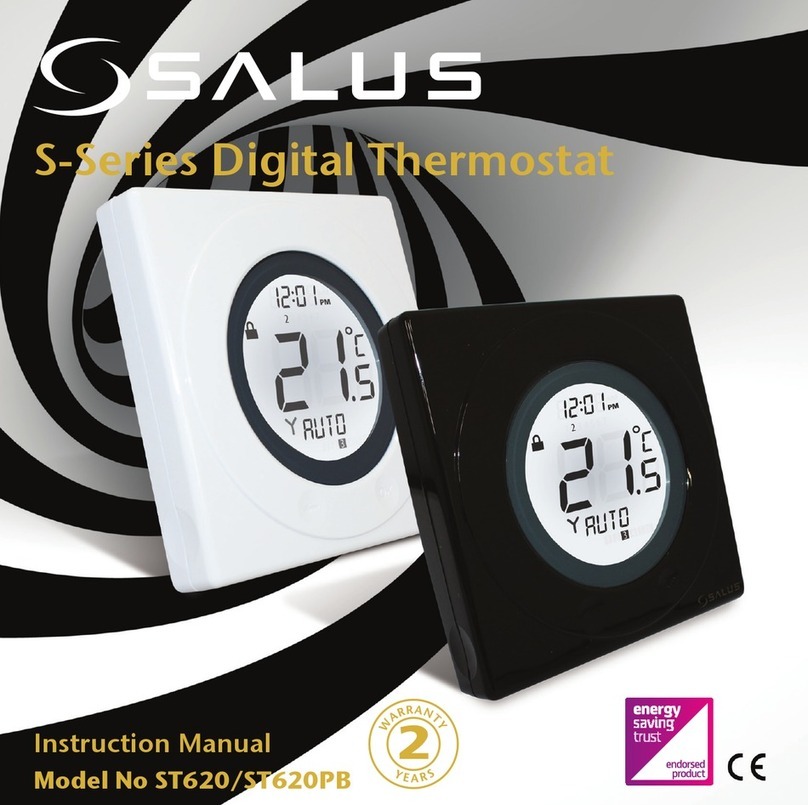
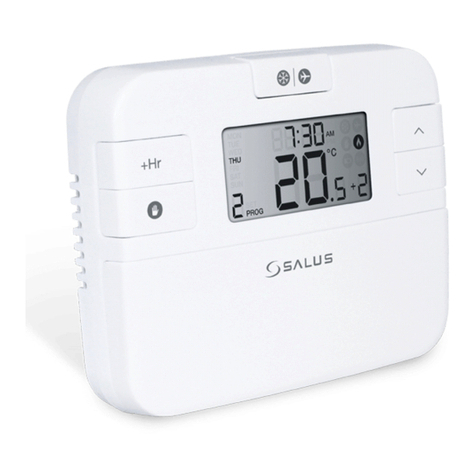
Salus ST621TX User manual

The ST621TX can be used with any of these receivers
868MHz
RXBC605
RXST625
RXRT505
RXVBC605
RXWBC605
ST621TX
Digital Room
Thermostat

ST621TX INSTRUCTION MANUAL2
PRODUCT COMPLIANCE
This product complies with the essential requirements of the following EC Directives:
•Electro-Magnetic Compatibility directive 2004/108/EC
•Low Voltage Directive 2006/95/EEC
•EC Marking directive 93/68/EEC
SAFETY INFORMATION
These instructions are applicable to the SALUS Controls model stated on the front cover of
this manual only, and must not be used with any other make or model. These instructions
are intended to apply in the United Kingdom only, and should be followed along with any
other statutory obligations. When tting batteries don’t mix old and new batteries together.
Do not use rechargeable batteries. Please leave these instructions with the end user where
they should be kept in a safe place for future reference.

3ST621TX INSTRUCTION MANUAL
INTRODUCTION
A programmable thermostat is a transmitter that
combines the functions of both a room thermostat and
heating controller into a single unit. The programmable
thermostat is used to switch the heating system by
means of time and temperature change. This unit is
not like a standard programmer. It works by controlling
the temperature according to a series of programmed
settings that take effect at different times of the day. The
ST621TX from SALUS Controls is a stylish and accurate
5/2 or 7 day programmable electronic thermostat with
a large, easy to read Liquid Crystal Display (LCD). The
thermostat provides the user interface and temperature
sensing / control. The thermostat and RF receiver are
linked together by a Radio Frequency (RF) signal. The
use of the revolutionary Touch Ring technology makes for simple usage, and is coupled with
a unique, smart design. The LCD display will show the current room temperature and the
‘one touch’ operation makes the ST621TX easy to operate.
FEATURES
•Touch Ring Technology
•Large LCD with White Backlight
•Stylish Casing
•Intelligent Communication Technology
•Battery Powered with Replacement Indicator
•Frost Protection
•Burner on Symbol
•Radio Controlled Clock (RCC)
•Manual Time / Date Setting Option
•Holiday Function
•Service Function
• Six Time / Temperature Settings / day
•Secure RF Transmission
(one million unique RF address codes)

ST621TX INSTRUCTION MANUAL4
1. INSTALLATION
ST621TX Programmable Room Thermostat
Getting Started…….
Installing the ST621TX Batteries
To open the case of the ST620, undo the securing screw
on the bottom.
Now pull the screw down until it stops, then carefully separate
the two halves of the case by gently pulling out an upwards
direction. You will now see the battery compartments on the
rear of the front fascia as shown.
Ensure that the batteries are inserted correctly and check the
polarity.

5ST621TX INSTRUCTION MANUAL
Powering up the ST621TX for the rst time
As soon as the batteries have been inserted, the ST621TX will power up for the rst
time and behave in the following way:
All the segments on the display along with the display backlight will be turned
on as shown.
After two seconds, the software version number will be briey on the screen.
The ST621TX will now prompt you to choose a language. If you require ENGLISH
press OK. If you require a different Language use the touch ring to scroll through
the language options then press OK.
The ST621TX at this point will be in AUTO and at factory default settings.
Changing default settings will be explained on page 15. You will also notice that
the time at the top of the LCD is ashing. This will continue to ash until the unit
picks up the RCC (Radio Controlled Clock) signal and displays the correct time.
More information on the RCC can be found on page 24.
Now put the ST621TX front fascia in a safe place so you can mount the ST620
back plate. The back plate is easily xed to the wall and uses industry standard
mounting positions. We recommend that you continue with the back plate
mounting before starting to program the ST621TX.

ST621TX INSTRUCTION MANUAL6
Note: If you do not wish to mount the ST621TX on the wall, use the stand
provided and assemble the ST621TX front and back housing. Remember to
tighten the screw at the bottom.
Wall Mounting Guidelines
The ST621TX should be mounted in a location where the thermostat is accessible,
reasonably lit and free from extremes of temperature and draughts. Do not
mount the thermostat on an outside wall, above a radiator or in a location where
it may be subjected to direct sunlight.
The ST621TX should be mounted in a location where it will not come into contact with moisture or
condensation as this can affect the Touch Ring operation.
To ensure trouble free reception for both the Radio Controlled Clock (RCC) and the Radio Frequency (RF)
signal. Always ensure that the programmable thermostat is mounted away from any possible sources of
interference (such as radios, TV sets, computers, etc.), and is not mounted on or in close proximity to large
metal objects. Installing the ST621TX in enclosed areas such as cellars and basements is not recommended.
NOTE: The ideal position to locate the ST621TX is about 1.5m above oor level.
RF Transmission
The receiving range between ST621TX and the RF Boiler Control is around 100 metres in open air, however
many factors can affect the RF transmission and shorten the operating distance, e.g. shielding by thick walls,
foil back plasterboard, metal objects such as ling cabinets, general RF interference, and so on.
The operating range is generally around 30 metres, which is large enough for most household applications.
Mounting the Back plate
Use the screws and anchors supplied to mount the ST621TX back plate
in your chosen position. Now attach the ST621TX front fascia to the back
plate. Remember to tighten the securing screw
SURFACE MOUNT STAND SUPPLIED

7ST621TX INSTRUCTION MANUAL
Indicator Description Function
Clock Display Displays the day and time
Temperature indicator Displays set or measured temperature
Alphanumeric Display Displays menu and other status messages
Programme Number Displays the number of the
indicator active (selected) programme
Output indicator Indicates output is turned on.
Holiday indicator Indicates Holiday operation mode is selected
Battery Status Indicates battery is low
RF Signal indicator Indicates the unit is transmitting
a wireless signal
RCC indicator Indicates the status of the Radio Controlled Clock
Service indicator Indicates Service function is active
Frost Mode indicator Indicates frost setting is turned on
Touch Lock indicator Indicates touch lock is activated

ST621TX INSTRUCTION MANUAL8
There are few user controls for the ST621TX, making
the programmable thermostat very easy to operate.
The controls are a Touch Ring (which surrounds the
user display), two touch sensitive buttons, a reset
button and a slide operated switch mounted on the
side of the thermostat.
USER CONTROL FUNCTION SUMMARY:
Key / Operation Functions
Touch Ring (move clockwise) Increases the selected setting and scrolls
down the menu selection
Touch Ring (move anti- clockwise) Decreases the selected setting and
scrolls up the menu selection
OK Key Enters Menu or conrms a menu selection
Arrow (Back) Key Single touch – sets the unit back one step.
Hold for two seconds sets the unit back to NORMAL mode
Reset Button Resets the programmable thermostat to default (original factory)
settings except Service setting (when Service is on)
Slide Switch Activates and deactivates the key lock function
(prevents accidental changes)

PAIRING THE THERMOSTAT AND THE RECEIVER
It is important to correctly pair both the receiver and thermostat to ensure that the RF
address codes are matched and that reliable communication is established between the
units. Please follow the instructions below to ensure that the units are congured correctly.
On the receiver:
Press and hold the sync button on the receiver to put the receiver into pairing mode*.
9ST621TX INSTRUCTION MANUAL
RXBC605RXRT505
LOCATION OF SYNC BUTTONS ON THE RECEIVERS
RXST625RXVBC605 RXWBC605
For full instructions on
the receiver pairing refer
to the RXBC605 manual.
For full instructions on
the receiver pairing
refer to the RXRT505
manual. See page 7.
*Please note this
receiver does not
have a sync button.
Switching it on
automatically puts it
into pairing mode.
For full instructions on the
receiver pairing refer to the
RXST625 manual. See page 9.
For full instructions on the
receiver pairing refer to the
RXBC605 manual. See page 16.
For full instructions on the
receiver pairing refer to
the RXWBC605 manual.
See page 23.
Sync
Button Sync
Button Sync Button
Sync Button
Press reset
button rst

On the Thermostat:
The Arrow key is not active when the ST621TX is in NORMAL mode. To access the Menu
screens, press the OK key twice. The rst menu displayed is the PROGRAM menu:
Use the Touch Ring to scroll through the Menus, and press the OK key to select the menu
you want to use:
You can scroll through the menus in either direction (forwards or backwards) depending
on the direction you move your nger around the Touch Ring. The menus are displayed in
the order shown in the picture above.
Pressing the Arrow key will return the ST621TX to NORMAL mode. The thermostat will also
return to NORMAL mode after 10 seconds if no Key is pressed or if no movement is detected
on the Touch Ring.
ST621TX INSTRUCTION MANUAL
10

After selecting the PAIR Menu, PAIR
and the RF icon are displayed.
Press the OK key to start sending the RF address code to the receiver.
The ST621TX display will change to show a rundown timer:
The unit counts down for a period of 10 minutes, with the RF Signal indicator ashing while
the signal is being transmitted. The RF address code will be generated randomly and the
thermostat will transmit the signal every second for the full 10 minutes until:
• The Arrow key is pressed to return to the previous display
• The OK key is pressed to return to NORMAL mode
• The 10 minute timer runs out
Note that the receiver must be already in learning mode BEFORE attempting to access the
PAIR menu. If the Red LED changed state after 10 minutes, repeat the whole pairing process.
11ST621TX INSTRUCTION MANUAL

Replacing the thermostat batteries will not affect the RF code setting. Pressing and holding
the SYNC button on the receiver will not clear the RF address code saved into the internal
memory, and switch the receiver into learning mode, as previously described.
TESTING THE RF TRANSMISSION
It is important to site both the receiver and thermostat in locations where the RF signal
cannot be interrupted. The receiving range between thermostat and receiver is 100 metres
in open air, however many factors can affect the RF transmission and shorten the operating
distance, e.g. shielding by thick walls, foil back plasterboard, metal objects such as ling
cabinets, general RF interference, and so on.
The operating range is generally around 30 metres, which is large enough for most
household applications, but it is advisable to test the RF transmission from the intended
thermostat location to the receiver location before xing the thermostat to the wall.
The RF communication is one way, from the thermostat to the receiver – the receiver does
not send any signal back to the thermostat. The RF signal indicator only ashes once
when a signal is being transmitted.
The thermostat will transmit only when there is a need to control the heating system. Will
transmit once every twelve minutes.
ST621TX INSTRUCTION MANUAL12

13ST621TX INSTRUCTION MANUAL
OPERATION
The ST621TX is congured and adjusted by the
use of an innovative and stylish Touch Ring, and
two touch sensitive buttons. The Touch Ring
surrounds the programmable thermostat display,
and is operated very easily by moving your nger
around the ring.
The backlit Liquid Crystal Display (LCD) gives a
highly visible, easily readable indication of the
programmable thermostat status.
ACCESSING THE MENUS
The Arrow key is not active when the ST621TX is in NORMAL
mode. To access the Menu screens, press the OK key twice.
The rst menu displayed is the PROGRAM menu:

ST621TX INSTRUCTION MANUAL14
Use the Touch Ring to scroll through the Menus, and press the OK key to select the menu you want
to use:
You can scroll through the menus in either direction (forwards or backwards) depending on the
direction you move your nger around the Touch Ring. The menus are displayed in the order
shown in the picture above. Pressing the Arrow key will return the ST621TX to NORMAL mode. The
programmable thermostat will also return to NORMAL mode after 10 seconds if no Key is pressed or
if no movement is detected on the Touch Ring.

15ST621TX INSTRUCTION MANUAL
PROGRAMMING THE ST621TX
The ST621TX offers great versatility with its
programming options, allowing the user
to programme the ST621TX to operate
on an individual, 5/2 or 7 day control
cycle. The programmable thermostat has
a default set of Programmes that have
been designed to meet the needs of most
users. If these default programmes are
not suitable for your particular situation,
reprogramming the ST621TX with your
own settings is a very straightforward
operation.
To start programming the ST621TX, press
the OK key when in NORMAL mode. This
will by default select the PROGRAM menu
- press the OK key once more to start the
programming process.
Initially, the Weekdays will be selected
and ashing – you can scroll through all
the various options for day selection (Weekdays, Weekend, 7 days, or individual days) by using the
Touch Ring. As usual, pressing the OK key will select the desired option.

ST621TX INSTRUCTION MANUAL16
After correct selection of the day option,
the ST621TX display will change to the next
programming screen. These screens allow
you to set the required time and temperature
settings to provide optimum control for your
heating system.
The hour setting will be the rst setting that
needs to be adjusted, and this will easily be
seen because the ‘hours’ section of the time
will be ashing. Using the Touch Ring, scroll
up or down to adjust the hour to the required
setting and then press the OK key to conrm.
After conrming this setting the ‘minutes’
section of the time will then start to ash.
Change this setting using the Touch Ring
in the same way that you changed the hour
setting, confirming your setting with the
OK key. Finally, set the desired temperature
setting by scrolling with the Touch Ring and
again conrm with the OK key.
Following this sequence you will have set up Programme 1 – the ST621TX display will then move
on to Programme 2. Continue to add your desired settings for each of the programmes through to
Programme 6 in the same way as Programme 1 (hour, minutes, and temperature).
If you decide to enter settings for individual days rather than Weekdays or Weekends, the ST621TX
also offers a time saving COPY function that allows the user to copy settings from one day to another.

17ST621TX INSTRUCTION MANUAL
After entering the settings in Programmes 1 to 6 for Monday, the ST621TX display will change to
display a COPY TO screen. On this screen, scroll to the day that you want to copy the settings to using
the Touch Ring, and then conrm this by pressing the OK key. The ST621TX will then move to the next
day and ask if you would like to copy again.
In the example here, Monday has been programmed, and the next day that has not been programmed
is Tuesday. Once the settings for Tuesday have been programmed by copying, the settings can then
be copied to Wednesday, and so on.
Pressing the Arrow key at any time will return the ST621TX to the previous screen. Once all the days
have been programmed, the ST621TX will revert to NORMAL mode.
Please be aware that each of the programme time settings must be in sequence: for example,
Programme 3 cannot be set with a time earlier than Programme 2. If this situation occurs, then the
ST621TX may operate in an unpredictable way. The programmable thermostat will return to NORMAL
mode after 10 seconds if no Key is pressed or if no movement is detected on the Touch Ring. In this
case, the Programmes will not be updated

ST621TX INSTRUCTION MANUAL18
HOLIDAY OVERRIDE MODE
Entering the HOLIDAY menu allows you to turn the holiday override mode of
the ST620 on. The HOLIDAY mode allows the user to override all the current
Programme settings with a specic temperature setting that is active between
two dates entered by the user. When the holiday start date arrives, the
HOLIDAY indicator turns on and the HOLIDAY mode is switched on. As long as
the ST621TX is in HOLIDAY mode the FROST protection mode will be disabled.
When the holiday end date is reached, the HOLIDAY mode will be turned off
automatically and the ST621TX will operate in AUTO mode. The HOLIDAY
mode indicator will be displayed on all the HOLIDAY menu screens.
To start entering the Holiday Override settings, press the OK key once. ‘S_DAY’ will appear on the
display. Use the Touch Ring to scroll to set the date and conrm the choice using the OK button.
The month setting (‘S_MONTH’)
will then be selected – change
this setting in the same way
using the Touch Ring, and
conrm the setting using the
OK button. Finally, set the
year (‘S_YEAR’) – this is done
in exactly the same way as
previously described for the
date and month.
After conrming the year setting by pressing the OK key, the display will then change to display the
rst screen for entering the holiday end date (‘E_DAY’, ‘E_MONTH’ and ‘E_YEAR’)

19ST621TX INSTRUCTION MANUAL
Use the Touch Ring to
enter the date in exactly
the same way as for the
holiday start date.
By default, the HOLIDAY
mode start and end
dates are set to the
current date. Make sure
that the end date is
after the start date – if not, the HOLIDAY mode will be disabled.
The nal setting to be entered is the protection temperature you want set
while HOLIDAY mode is active.
Use the Touch Ring to set the preferred temperature and conrm the
choice using the OK button. Once the temperature setting is conrmed,
the HOLIDAY mode will be activated. While in this mode the HOLIDAY
mode indicator will be shown on the display, but there will not be
any MANUAL or AUTO indication.
Pressing the Touch Ring will change the display to show the current
temperature setting, but this setting cannot be adjusted while in this
mode.

ST621TX INSTRUCTION MANUAL20
CANCELLING HOLIDAY OVERRIDE MODE
When in HOLIDAY mode, pressing the OK key will make the display change between CANCEL and
HOLIDAY every 0.5 seconds as shown below:
Pressing the OK key will
cancel HOLIDAY mode
and return the ST621TX
to AUTO mode. Pressing
the Arrow key leaves the
programmable thermostat
in HOLIDAY mode.
REVIEWING THE SET TEMPERATURE
NORMAL mode is when the thermostat is displaying the room temperature;
if you press the Touch Ring anywhere except the OK and Arrow keys when
the ST621TX is in NORMAL mode you can check the set temperature setting.
This will display the current set temperature. The set temperature will be
displayed for two seconds before the LCD changes to display the room
temperature again.
The ST621TX will go back to NORMAL mode without changing the set
temperature after 10 seconds of inactivity, or after pressing the Arrow key.
Table of contents
Other Salus Thermostat manuals

Salus
Salus HTR24 User guide

Salus
Salus ERT30 User manual

Salus
Salus RT500RF User manual

Salus
Salus VS35W User manual

Salus
Salus VS05 User manual

Salus
Salus WBNTSQ61024 Quantum User manual

Salus
Salus ST910WZ CA User manual

Salus
Salus VS35W User manual

Salus
Salus RT510WBC User manual

Salus
Salus RT500 User manual

Salus
Salus CT100 User manual

Salus
Salus 091FLRF User manual

Salus
Salus RT520RF User manual

Salus
Salus RT520 User manual

Salus
Salus QUANTUM SQ610RF User manual

Salus
Salus FT100 Owner's manual

Salus
Salus HTR2420 User manual

Salus
Salus RT500ROF User manual

Salus
Salus 091FLRF User manual

Salus
Salus ERT20RF User manual