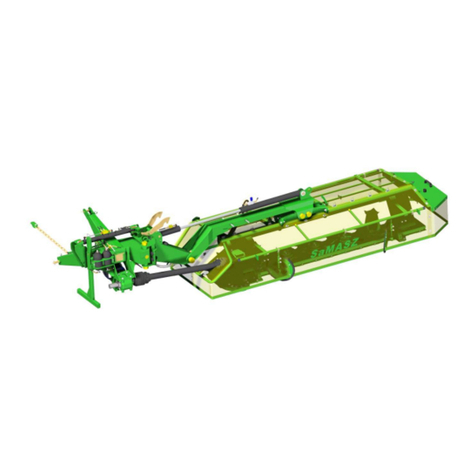
SaMASZ KDT 180 User manual

Firma SaMASZ
Firma SaMASZFirma SaMASZ
Firma SaMASZ
inŜ. Antoni Stolarski
Poland, 15-161 Białystok, ul. Trawiasta 30
Rok załoŜenia – 1984
NIP PL-542-010-21-58
tel. (+48) (85) 654 45 84
654 45 82
664 70 31
fax (+48) (85) 664 70 41
e-mail: samasz@samasz.pl
www.samasz.pl
OPERATOR’S MANUAL
REAR DISC MOWER
KDT 180 - 1,8 m -
From serial number: 00033
KDT 220 - 2,2 m -
From serial number: 00018
KDT 220 W - 2,2 m -
From serial number: 00001
KDT 220 S - 2,2 m -
From serial number: 00001
KDT 260 - 2,6 m -
From serial number: 00137
KDT 260 W - 2,6 m -
From serial number: 00006
KDT 260 S - 2,6 m -
From serial number: 00027
KDT 300 - 3,0 m -
From serial number: 00045
KDT 340 - 3,4 m -
From serial number: 00013
IN221EN002
05.12.2007
EDITION NR 2

DO NOT
TURN THE DRIVE ON
IF THE MOWER IS NOT IN
WORKING POSITION
DO NOT
LIFT THE MOWER
BEFORE THE MOWING
DISCS HAVE COME TO
COMPLETE STANDSTILL
DO NOT
OPERATE WHEN ANY
PERSON REMAINS IN THE
DANGER AREA OF 50 m
Written and translated by: Łukasz Łapiński
Technical advice: mgr inŜ. Sławomir Rabiczko
Approved by: mgr inŜ. Andrzej Łapiński
Optimum inclination towards the ground is 4 ÷ 5° to
the mowing direction
It is allowed to work in horizontal position.
Different inclination may damage the mower.

Operator’s manual
Rear disc mowers
KDT 180;KDT 220 S/W;KDT 260 S/W;
KDT 300;KDT 340
- 1 -
Contents page
1. IDENTIFYING THE MACHINE....................................................................................2
2. INTRODUCTION..............................................................................................................
2
3. PROPER USE....................................................................................................................
3
3.1. Technical data..................................................................................................................................4
3.2. Design and working principle..........................................................................................................5
3.3. Standard equipment and spare parts................................................................................................6
4. SAFETY ADVICE.............................................................................................................
8
4.1. Safety rules and regulations.............................................................................................................8
4.2. Transport……………......................................................................................................................9
4.2.1.Putting the mower onto another vehicle for transport..................................................................... 9
4.3. Working components….......……..................................................................................................10
4.4. PTO shaft....................................................................................................................................... 10
4.5. Residual risk...................................................................................................................................10
4.6. Warning decals and their meaning.................................................................................................12
4.7. Design and operation of safety brekaway device.......................................................................... 17
5. OPERATION....................................................................................................................
17
5.1. Attaching the mower to the tractor................................................................................................17
5.2. Preparing the mower for transport.................................................................................................18
5.3. Preparing the mower for transport on public roads.......................................................................19
5.4. Mounting PTO shaft......................................................................................................................19
5.5. Switching from transport to working position...............................................................................20
5.6. Preparing the mower for work.......................................................................................................20
5.7. Operation (mowing)...................................................................................................................... 21
5.7.1.Essential information concerning mowing.................................................................................... 21
5.7.2.Taking turns over swaths............................................................................................................... 23
6. MOUNTING AND ADJUSTMENTS.............................................................................
23
6.1. Mounting and timing of the knives............................................................................................... 23
6.2. Replacing the knives......................................................................................................................23
6.3. Adjusting the cutterbar.................................................................................................................. 24
6.4. Adjusting the cutting height.......................................................................................................... 25
6.5. 3-point linkage support chain........................................................................................................25
6.6. Adjusting the space between tine conditioner's mask and its shaft...............................................26
6.7. Replacing the conditioner's tines................................................................................................... 26
6.8. Adjusting force of the pressure of roller conditioners...................................................................27
6.9. Maintenance and service................................................................................................................27
6.9.1.Checking the knives and knife holders..........................................................................................27
6.9.2.Checking the V-belts tension.........................................................................................................28
6.9.3.Checking the tension of tine conditioner's driving chain...............................................................28
6.9.4.Daily maintenance......................................................................................................................... 29
6.9.5.After-season maintenance..............................................................................................................29
7. LUBRICATION...............................................................................................................
29
7.1. Cutterbar........................................................................................................................................ 29
7.2. Intersecting axis gear..................................................................................................................... 30
7.3. Roller conditioner's gearbox..........................................................................................................30
7.4. Bearings and joints.........................................................................................................................31
8. DEFECTS AND THEIR REPAIRS…………………………………………………...
32
9. DISASSEMBLY AND WITHDRAWAL FROM USE.................................................
33
10. WARRANTY CARD...................................................................................................................33
11. WARRANTY TERMS.....................................................................................................
34

Operator’s manual
Rear disc mowers
KDT 180;KDT 220 S/W;KDT 260 S/W;
KDT 300;KDT 340
- 2 -
11.1. Warranty claims procedures.......................................................................................................... 34
11.2. Warranty repairs record................................................................................................................. 35
1. IDENTIFYING THE MACHINE
Data plate is mounted to the mower’s main frame in the place shown below (Fig.1)
Fig.1 Data plate place. Fig. 2. Data plate.
Data plate includes:
- name of the manufacturer, - weight,
- mower’s number, - quality management sign,
- mower’s type, - CE sign
- manufacturing date, - MADE IN POLAND sign
CAUTION:
For more detailed information concerning the mower ask your dealer
or manufacturer.
2. INTRODUCTION
This operator’s manual should be considered as the basic mower’s equipment. If the mower is
handed over to another operator, it should be in working condition and given away along with
operator’s manual and it’s other basic equipment.
Operator’s manual is attached to every machine in order that the operator can familiarize himself
with design, working principles, service and adjustment of the mower. The user of the mower
should be familiar with common safety rules and procedures.
The mower is manufactured according to international safety rules.
Compliance with the warnings in this operator’s manual will ensure safe operation.
Please contact your dealer if you have any queries relating to the operation and service of the
mower.
Operator’s manual remains part of mower’s equipment.
GENERAL WARNING
When operating the mower please comply with the warnings
and safety regulations shown throughout this manual by this
safety alert symbol.

Operator’s manual
Rear disc mowers
KDT 180;KDT 220 S/W;KDT 260 S/W;
KDT 300;KDT 340
- 3 -
CAUTION:
Operation of the mower before reading the operator’s manual carefully as
well as operating by the unauthorized staff, especially by children, is
strictly forbidden.
3. PROPER USE
a) mower without conditioner
SaMASZ rear disc mower is designed for mowing standing grass on meadows and in stone free fields.
It is a machine for hay and green fodder production. When the high grass prevails, the first and the
second cut should be mowed at the height level - 6-7 cm, but when the grass grows low – at the height
level - 5 cm. The last cut should be mowed a little bit higher – 7-8 cm above the ground.
b) mower with tine/roller conditioner
SaMASZ rear disc mower with tine/roller conditioner is designed for mowing standing grass on
meadows and in stone free fields. It particularly concerns mowers with roller conditioner, because they
tolerate stones only up to few centimeters. If a mower comes across a bigger stone, tractor-mower set
must be stopped and the stone removed, because it may lead to serious damage. It is a machine for hay
and green fodder production. Tine/roller conditioner provides effective conditioning and accelerates
drying of the forage. Roller conditioner is recommended in case of fragile crops like lucerne (alfalfa).
It reduces leaf loss to an absolute minimum. When the high grass prevails, the first and the second cut
should be mowed at the height level - 6-7 cm, but when the grass grows low – at the height level - 5
cm. The last cut should be mowed a little bit higher – 7-8 cm above the ground.
CAUTION:
Use of the mower for other purposes than the above mentioned
is forbidden. Different use than the above mentioned will be considered
as improper and may lead to revoking of the warranty. Mower should be
used, operated and repaired only by people familiarised with its detailed
specifications and with safety rules and regulations. Wilful changes of the
mower will lead to revoking of the warranty.
Mower KDT 180 works properly with tractors (class 0,6 and power from 30 HP)
.
Mower KDT 220
works properly with tractors (class 0,6 and power from 48 HP)
.
Mower KDT 260 works properly with
tractors (class 0,9 and power from 70
KM).
Mower KDT 300 works properly with tractors (class 1,4
and power 90 HP)
.
Mower KDT 340 works properly with tractors (class 2,0 and power from 100 HP)
.
Mower KDT 220 S works properly with tractors (class 2,0 and power from 60 HP)
.
Mower KDT 220
W works properly with tractors (class 2,0 and power from 60
HP).
Mower KDT 260 S works properly
with tractors (class 2,0 and power from 90
HP).
Mower KDT 260 W works properly with tractors
(class 2,0 and power from 90
KM).

Operator’s manual
Rear disc mowers
KDT 180;KDT 220 S/W;KDT 260 S/W;
KDT 300;KDT 340
- 4 -
3.1. Technical data
Tab. 1. Specifications
Model: KDT 180 KDT220 KDT260 KDT300 KDT340
Working width 1.80 m 2.20 m 2.60 m 3.00 m 3.40 m
Number of knives [pcs.] 8 (2 x 4) 10 (2 x 5) 12 (2 x 6) 14 (2 x 7) 16 (2 x 8)
Tractor PTO rpm 540 rpm
Tractor power required 22 kW
(30 HP) 35 kW
(48 HP) 50 kW
(70 HP) 65 kW
(90 HP) 75 kW
(100 HP)
Tractor class 0,6 0,6 0,9 1,4 2,0
Working capacity ~ 2 ha/h ~ 2,5 ha/h ~ 2,9 ha/h ~ 3,4 ha/h ~ 3,9 ha/h
Transport length 1200 mm
Transport width 1850 mm 2150 mm 2150 mm 2150 mm 2150 mm
Working width 3500 mm 4200 mm 4600 mm 5100 mm 5500 mm
Transport height - - - 3750 mm 4200 mm
Weight 530 kg 640 kg 690 kg 755 kg 800 kg
PTO shaft with overrunning clutch
requirement 400 Nm 540 Nm
Cutting speed of the knife 91 m/s
Disc rpm 3250 rpm
Noise level L
pA
101 ± 1 dB
L
Amax
113 ± 1 dB
L
Cpeak
116 ± 1 dB
S – Mower with tine conditioner W – Mower with roller conditioner
L
pA
– noise level related to 8 hour working time. Averaged in time acoustic pressure level
corrected by frequency characteristic A.
L
Amax
– maximum value corrected by frequency characteristic A of acoustic pressure level.
L
Cpeak
– peak level of acoustic pressure corrected by frequency characteristic C.
Model KDT 220 S KDT 260 S KDT 220 W KDT 260 W
Working width 2.20 m 2.60 m 2.20 m 2.60 m
Number of knives [pcs.] 10 (2 x 5) 12 (2 x 6) 10 (2 x 5) 12 (2 x 6)
Tractor PTO rpm 540 rpm
Tractor power required 44 kW
(60 HP) 66 kW
(90 HP) 44 kW
(60 HP) 66 kW
(90 HP)
Tractor class 2,0 2,0 2,0 2,0
Working capacity ~ 1,3 ha/h ~ 2,8 ha/h ~ 2,3 ha/h ~ 3,5 ha/h
Transport length 1600 mm 1200 mm 1500 mm 1500 mm
Transport width 2150 mm 2150 mm 2150 mm 2150 mm
Working width 4200 mm 4600 mm 4200 mm 4600 mm
Weight - 880 kg - 998 kg
PTO shaft with overrunning clutch
requirement 400 Nm 540 Nm 400 Nm 540 Nm
Cutting speed of the knives 91 m/s
Disc rpm 3250 rpm
Noise level L
pA
98 ± 1 dB 97 ± dB
L
Amax
109 ± dB 109 ± dB
L
Cpeak
112 ± dB 112 ± dB

Operator’s manual
Rear disc mowers
KDT 180;KDT 220 S/W;KDT 260 S/W;
KDT 300;KDT 340
- 5 -
3.2. Design and working principle
Fig. 3a. Parts of SaMASZ rear disc mower.
3-point linkage frame 1enables attachment of the mower to tractor’s 3-point linkage. Drive from
tractor’s rpm is transmitted through drive unit 3on the cutterbar 4. Hydraulic cylinder 2is used to
adjust the mower to working position. It is supplied from outer hydraulics of the tractor. Main frame,
on which the cutterbar is situated, is supported by the springs. Swath discs 5are mounted on the main
frame.
Fig. 3b. Parts of SaMASZ rear disc mower with tine conditioner.
5
1 – 3-point linkage frame
2 – Hydraulic cylinder with support
springs
3 - Drive unit
4 – Cutterbar
5 – Swath discs
6 – Safety curtain
6
5
5
1 – 3-point linakge frame
2 - Hydraulic cylinder with support
springs
3 – Tine conditioner
4 – Cutterbar
5 - Swath guides
6 – Safety guard
7 – Intersecting axis gear
8 – Drive unit
9 – Tine conditioner drive shaft
10 – Support legs
9
2
3
4
7
1
8
10
10
2
3
1
4
6
5

Operator’s manual
Rear disc mowers
KDT 180;KDT 220 S/W;KDT 260 S/W;
KDT 300;KDT 340
- 6 -
3-point linkage frame 1enables attachment of the mower to tractor’s 3-point linkage. Drive from
tractor’s rpm is transmitted through drive unit 8on the cutterbar 4. On the cutterbar, there are discs
with two knives each. Apart from that, drive from tractor’s rpm through intersecting axis gear 7and
PTO shaft 9is transmitted to tine conditioner 3. Hydraulic cylinder 2is used to adjust the mower to
working position. It is supplied from outer hydraulics of the tractor. Main frame, on which the
cutterbar is situated, is supported by the springs. Swath guides 5are mounted on the main frame.
Fig. 3c. Parts of SaMASZ rear disc mower with tine conditioner.
3-point linkage frame 1enables attachment of the mower to tractor’s 3-point linkage. Drive from
tractor’s rpm is transmitted through drive unit 8on the cutterbar 4. On the cutterbar, there are disco
with two knives each. Apart from that, drive from tractor’s rpm through intersecting axis gear 7and
PTO shaft 9is transmitted to roller conditioner 3. Hydraulic cylinder 2is used to adjust the mower to
working position. It is supplied from outer hydraulics of the tractor. Main frame, on which the
cutterbar is situated, is supported by the springs. Swath guides 5are mounted on the main frame.
Well-proven design with thousands of machines in regular use in many countries and quality materials
ensure high durability and reliability of SaMASZ mowers.
3.3. Standard equipment and spare parts
The mowers are sold with the following standard equipment:
warranty card,
operator’s manual with spare parts list,
cutting knives: additional set,
mounting lever for quick-knife changing.
8
9
10
2
7
1
5
4
5
6
10
1 – 3-point linakge frame
2 – Hydraulic cylinder with support
springs
3 – Roller conditioner
4 – Cutterbar
5 - Swath guides
6 – Safety guard
7 – Intersecting axis gear
8 – Drive unit
9 – Roller conditioner driver shaft
10 – Support legs
3

Operator’s manual
Rear disc mowers
KDT 180;KDT 220 S/W;KDT 260 S/W;
KDT 300;KDT 340
- 7 -
Optional extra equipment:
PTO shaft with overrunning clutch,
warning plate with combined lights and reflectors
warning triangle,
Tab.2 PTO shaft for rear disc mower. Manufacturer-Weasler
Model Power
Length Moment
Symbol Clutch Notes
HP mm Nm
KDT180;
KDT220;KDT260;
KDT300;KDT340;
KDT220S/W;
KDT260S/W
36 860-1319
836 904-00366 Overrunning right Slide lock
KDT 180
KDT 220 21 860-1319
493 902-00919 Overrunning right Can be used
Fig.4. PTO shaft lubrication points. Mounting directions.
CAUTION:
Lubricate the PTO shaft with high quality multi-purpose grease every 8
shaft operating hours. If access holes are available, lubricate fittings
through access holes. E-kits need lubrication every 50 hours. See decal
on guard if applicable.
PTO shafts of other brands with equivalent parameters could be used afer SaMASZ permission.
CAUTION:
Optional extra equipment should be ordered separately.
The mower is equipped with such elements as holders and brackets used to mount warning lights and
plates. Combined lights and reflectors are mounted on the warning plates.
We congratulate you on the purchase of your new SaMASZ mower and wish you much pleasure and
the very best work results through the years to come.
PTO shaft’s end without
clutch – To be mounted
on the tractor’s side.
PTO shaft’s end with
overrunning clutch –
To be
mounted on mower’s side.
8h
8h
8h
8h

Operator’s manual
Rear disc mowers
KDT 180;KDT 220 S/W;KDT 260 S/W;
KDT 300;KDT 340
- 8 -
4. SAFETY ADVICE
4.1. Safety rules and regulations
Front axis of the tractor should be weighted to keep the balance. If need be, use front wheel
weights.
Any operation with the hydraulic lift lever should be done from the operator’s seat; DO NOT
move the lever from outside of the tractor.
In case of tractors equipped with EHR, operating with hydraulic lift is done by the buttons
mounted outside the tractor’s cabin. When operating be extremely careful.
When switching from working to transport position unmount the whole or at least one end (from
tractor’s PTO) of PTO shaft.
Operation without safety guards as well as with the damaged or raised guards is not allowed
(danger of the stones, etc. being thrown out).
Start mowing only when the tractor’s PTO reaches its normal 540 rpm.
DO NOT exceed 600 PTO rpm.
Nobody is allowed to remain within the danger area of at least 50 m. Particular caution is
necessary when operating near roads and in stoney areas.
Any maintenance and adjustment work should only be done after the drive has been disconnected
and when the cutting discs have come to the complete standstill.
Always check the mower before starting work, in particular for damaged, missing and/or worn
knives and knife holders. Damaged or worn parts must be replaced.
When driving on public roads always comply with local traffic regulations, especially concerning
warning lights.
CAUTION:
All service and repair operations must be done only after the tractor
engine has been stopped, all rotating parts have come to the complete
standstill and the cutterbar is on the ground.
CAUTION:
Be certain that children and animals are at a safe distance away from the
machine. Never allow anyone to ride on a machine or tractor.
When the mower is lifted for repair on the 3-point linkage, it should be secured against
falling by a mechanical support or by chain.
The bolts and other fasteners have to be periodically checked and, if necessary, tightened or
replaced. DO NOT work with damaged or worn fasteners.
Never lift the mower on tractor linkage when the drive is on and the cutting discs are rotating.
When operating the mower, the tractor should always be equipped with the cabin.
Mower should not be operated when the tractor-mower set is not balanced.
Never start the mower when it is lifted.
Never start the mower, when people or animals are near the machine.
Never lift the safety guard before the rotating parts have come to the complete standstill. Tractor’s
engine must be stopped.
Always comply with the safety decals describing hazards, and warning signs placed on the
machine.
Before you start the tractor make sure that every other drives are turned off and the levers steering
hydraulics are in neutral position.
Never leave the tractor’s engine running without supervision. Before you leave the tractor, turn off
the engine and put off the key from tractor’s ignition switch,

Operator’s manual
Rear disc mowers
KDT 180;KDT 220 S/W;KDT 260 S/W;
KDT 300;KDT 340
- 9 -
It is forbidden to operate the mower when driving backwards,
Never get on the mower,
Never lift the mower on tractor’s 3-point linkage when the drive is on and the discs are rotating,
Permissible inclination of the slope when working and during transport is 8°,
Never stand between tractor and mower, before tractor-mower set is secured against moving by the
tractor’s brake,
Every maintenance work and regulations can be done only when the mower is on the ground,
If any maintenance work or regulation under lifted mower is needed, it must be secured against
falling,
When the parts of the mower need replacement, use only the original spare parts according to spare
parts list,
Pay particular attention to PTO shaft’s guards and mower’s and tractor’s spline shaft guards. Never
work with damaged guards,
Hydraulic hoses should be peridically checked and if any damage occur or they expire, replace
with new ones. Expiry period should not exceed 5 years,
Never use scotch tape to repair hydraulic hoses,
When connecting hydraulic hoses to tractor’s hydraulic connectors make sure, that either tractor’s
or mower’s hydraulic system is without pressure,
When operating hydraulic system, always wear protective gloves and glasses. Leaking under
pressure hydraulic oil (16 MPa) may permeate through the skin and cause infection. If it happens,
immediately visit a doctor,
The mower should be stored under roofed places and in the way that it will not harm people or
animals.
4.2. Transport
Every position change of the mower can only be done when there is nobody around (pay particular
attention to children).
For the transport period put warning plate with combined lights and reflectors and warning triangle
on the mower.
During transport always put the mower to transport position. See chapter 5.2.
Before putting the mower to transport position make sure, that the tractor’s PTO is turned off and
all the rotating parts have come to complete standstill.
Driving speed should always be adjusted to road conditions.
Permissible speed is 25 km/h and it cannot be exceeded.
4.2.1.Putting the mower onto another vehicle for transport
The driver and the carrier are responsible for mower’s transport safety. Equipment and parts must be
secured during transport.

Operator’s manual
Rear disc mowers
KDT 180;KDT 220 S/W;KDT 260 S/W;
KDT 300;KDT 340
- 10 -
To put the mower onto another vehicle in a safe way, please obey the following rules:
Seize the mower by any lifting devices only in the places indicated by the hook sign (Fig.5)
Fig 5. Transport holders.
For mower lifting use only lifting devices with hoisting capacity bigger than mower’s weight
shown in data plate. It also concerns ropes and chains used for lifting.
Collapsible parts should be blocked in transport position.
During putting the mower onto another vehicle it is forbidden for anybody to remain in transport
area.
On the vehicle’s trailer the machine should be secured against moving.
CAUTION:
Securing manouvering area and transport of the mower is the
responsibility of a person who does it.
4.3. Working parts
Before operating the mower check knife’s and knife holder’s condition.
Worn or damaged knives or knife holders should be immediately replaced with new one.
4.4. PTO shaft
Use only PTO shafts recommended by mower’s manufacturer
4.5. Residual risk
Despite the fact, that company SaMASZ Białystok – the manufacturer of the mower takes the
responsibility for design and manufacturing of the mower, in order to eliminate dangerous situations,
certain risk during mower operation is unavoidable.
Transport holders

Operator’s manual
Rear disc mowers
KDT 180;KDT 220 S/W;KDT 260 S/W;
KDT 300;KDT 340
- 11 -
1. Danger of catching
This kind of risk occurs during changing the position of a mower, operation near rotating parts,
working without safety guards.
During operation, maintenance and reulations always wear protective gloves, shoes and clothes
without loose parts, belts and so on. Always comply with safety decals placed on the mower.
2. Danger of injury
This kind of risk occurs during replacement of working parts with sharp edges. During any
maintenance work always use safety gloves.
3. Danger of liquid ejection out of hydraulic system
During connection of hydraulic hoses to hydraulic connectors make sure, that either tractor’ or
mower’s hydraulic system is without pressure.
During operation of hydraulic system always wear protective glasses and gloves. Check regularly
hydraulic hoses.
CAUTION:
Residual risk always results from incorrect behaviour of mower’s
operator.
4. Bans
Please bear in mind the following bans during mower’s operation:
Never unblock the mower, make any regulations or repairs of the mower while it is in motion.
Never change the order of operation and maintenance activities described in operator’s manual.
Never operate the mower when it is not in working order or has damaged safety guards.
Never get your hands and legs close to rotating parts of the mower.
During repair and maintenance of the mower always comply with the descriptions included in
operator’s manual. Always do these activities when the tractor’s drive is off.
Before you start any activities, focus your attentionon on them.
Never operate the mower under the influence of alcohol, drugs, or strong medicines.
Your clothes should not be too loose, or too tight. Too loose cloth parts may be pulled in by the
rotating parts of the mower.
The mower cannot be operated by children or by handicaped people.
When describing residual risk, the mower is treated as a machine, that up to the moment of its putting
in motion it had been designed and manufactured according to technology level actual till the day of
mower’s manufacture.
CAUTION:
Residual risk occurs in case of not complying with described instructions
and bans.
When the risk of exposing to noise cannot be avoided or eliminated by any
group protective means or organization of work, employer (farmer) must:
1) provide the operator with individual means of noise protection, if the noise
level in work place exceeds 80 dB.
2) provide the operator with individual means of noise protection and supervise
the correctness of its usage, if the noise level in work place reaches or
exceeds 85 dB.

Operator’s manual
Rear disc mowers
KDT 180;KDT 220 S/W;KDT 260 S/W;
KDT 300;KDT 340
- 12 -
4.6. Warning decals and their meaning
CAUTION:
a) all warning decals should be clean and legible,
b) lost or damaged decals must be replaced,
c) please order new decals from your dealer or supplier.
Warning decal Meaning Id. Nr.
Read the operator’s manual
before putting the mower
into operation.
1
N-3
While making repairs the
machine must be stopped.
2
N-4
CAUTION: rotor
3
N-9

Operator’s manual
Rear disc mowers
KDT 180;KDT 220 S/W;KDT 260 S/W;
KDT 300;KDT 340
- 13 -
Warning decal Meaning Id. Nr.
Operating is forbidden
when any person is within
the danger area of 50 m.
4
N-7
Be extremely careful when
PTO shaft is rotating.
5
N-1
CAUTION: belt
transmission, be extremely
careful
6
N-5

Operator’s manual
Rear disc mowers
KDT 180;KDT 220 S/W;KDT 260 S/W;
KDT 300;KDT 340
- 14 -
Warning decal Meaning Id. Nr.
CAUTION: pulling-in
parts
7
N-6
CAUTION: cutting knives.
Approach during operation
is forbidden
.
8
N-2
Never stand near tractor’s
3-point linkage while
steering tractor’s lift.
9
N-49

Operator’s manual
Rear disc mowers
KDT 180;KDT 220 S/W;KDT 260 S/W;
KDT 300;KDT 340
- 15 -
Warning sign Meaning Id. Nr.
Do not stay in the swinging
area of mower’s parts
10
N-50; N-51
Signs indicating transport
holders
11
N-40
Wear protective gloves
12
N-52
Watch out: power lines
13
N-54
14. P-2 15. N-8
WORKING WITHOUT GUARDS
IS FORBIDDEN
DANGER OF THE STONES, ETC.
BEING THROWN OUT

Operator’s manual
Rear disc mowers
KDT 180;KDT 220 S/W;KDT 260 S/W;
KDT 300;KDT 340
- 16 -
16. N-53 17. N-31
18. N-35
19. N-32
Optimum work parameters
1. Inclination towards the front 4÷5 degrees which stands for 6÷7 cm of
mowing height .
2. Operation speed ≥10 km/h.
3. PTO rpm = 480÷540 rpm. PTO rpm > 540 may cause stripes of uncut grass
between the discs.
4. Tractor’s rpm (max. moment – economical fuel consumption1600÷1800
rpm). High and inclined grass.
5. Highten the cutterbar’s inclination to – H = about 4 cm.
6. Operation without cutterbar’s inclination may cause winding of grass on the
forming drums .
7. Speed up to V ≥12 km/h. (the faster – the better)
8. Do not take turns in the mowed grass.
CLEAN THE MOWER EACH
DAY AFTER WORKING,
especially between discs and the
cutterbar, because grass with mud
may damage bearings in the disc
module.
11
16
13
10
4
8
7
2
1
6
19
15
11
9
5
18
17
14
12
12
3
4
2
17
8
11
14
16
7
1
4
3
10
5
6
19
15
11
5
9
18
Fig. 6a.Warning decals
placed on the mower
without conditioner.
Fig. 6b.Warning decals placed
on the mower with
tine/roller conditioner.

Operator’s manual
Rear disc mowers
KDT 180;KDT 220 S/W;KDT 260 S/W;
KDT 300;KDT 340
- 17 -
CAUTION:
Any spare part used for repair of the mower should have all warning
decals provided by the manufacturer.
4.7. Design and and operation of safety breakaway device.
In the event of hitting an immovable obstacle one of the safety device flat bars slides out and
disconnects the safety device. After that the mower folds back about 34 degrees (Fig.8). The operator
has time to shut off the tractor and protect the mower. Safety device spring is adjustable (Fig. 7),
therefore changing the force needed to make safety device work.
Recommended length of safety device spring (R on Fig. 7) should be R=112 mm. If the safety device
breaks away too easily, tighten up the spring approximately 1-2 mm. DO NOT tighten up too much,
because you may prevent the safety device from working and damage the mower.
5. OPERATION
5.1. Attaching the mower to the tractor.
Mower KDT 180 works properly with tractors (class 0,6 and power from 30 HP)
.
Mower KDT 220
works properly with tractors (class 0,6 and power from 48 HP)
.
Mower KDT 260 works properly with
tractors (class 0,9 and power from 70
KM).
Mower KDT 300 works properly with tractors (class 1,4
and power 90 HP)
.
Mower KDT 340 works properly with tractors (class 2,0 and power from 100 HP)
.
Mower KDT 220 S works properly with tractors (class 2,0 and power from 60 HP)
.
Mower KDT 220
W works properly with tractors (class 2,0 and power from 60
HP).
Mower KDT 260 S works properly
with tractors (class 2,0 and power from 90
HP).
Mower KDT 260 W works properly with tractors
(class 2,0 and power from 90
KM).
The mower is connected to the tractor’s 3-point-linkage (Fig. 9). After the mower has been attached,
adjust (on the flat ground) the mower’s position by means of top Sand lower Wlinks (Fig. 9). The
cutterbar should lean towards the driving direction (see page 1). Lower links W should be connected
to 3-point linkage frame pins A. Support chain L holds up mower’s linkage frame.
Connect hydraulic hose to tractor’s hydraulic connector.
After the mower has been attached to tractor, check the balance and steerability of tractor-mower set.
To do it, weigh the set and after that drive on the weigher with only the front axis of the tractor (the
mower must be in transport position – lifted upwards). If the pressure on the front axis is at least 20%
of the whole set’s pressure, it means the set is stable. If not, the front axis should be balanced.
Fig. 7. Safety device. Fig. 8. The mower breaks back when the
safety device operates.
R

Operator’s manual
Rear disc mowers
KDT 180;KDT 220 S/W;KDT 260 S/W;
KDT 300;KDT 340
- 18 -
Fig. 9. Connecting the mower to the tractor. Fig. 10 a) 1 - pin, 2 - bush, 3 – hole in the bar
b) Z - lock.
CAUTION:
Before disconnecting the mower put the pin 1 (Fig. 10a) into the hole 3
in the bar (Fig. 10a) to secure the linkage against falling. When the
mower is connected the pin should be in the bush 2 (Fig. 10a) on the
middle bar.
5.2. Preparing the mower for transport
To prepare the mower for transport and to meet safety precautions, please do the following:
lift the mower with tractor hydraulic lift until the lower lift pins of the mower 3-point linkage
frame raise about 50 cm above the ground (Fig. 12),
remove the pin 1and put it into the bush 2(Fig. 10a),
lift the cutterbar by hydraulic cylinder vertically until the pawl Zlocks in (Fig. 10b),
secure the cutterbar against falling by the shut-off valve (Fig. 11b.) placed on the mower’s
hydraulic cylinder.
CAUTION:
During transport the shut-off valve of mower hydraulic lift should always
be closed – the valve lever in Z position (Fig. 11). It protects the mower
against incidental falling in case of hydraulic failure.
Fig 11. Shut-off valve position: a) open(work), b) closed(transport).
S
W
A
L
Z
b
1
2
3
A
a
a
O
b
Z
Other manuals for KDT 180
4
This manual suits for next models
8
Table of contents
Other SaMASZ Tractor Accessories manuals