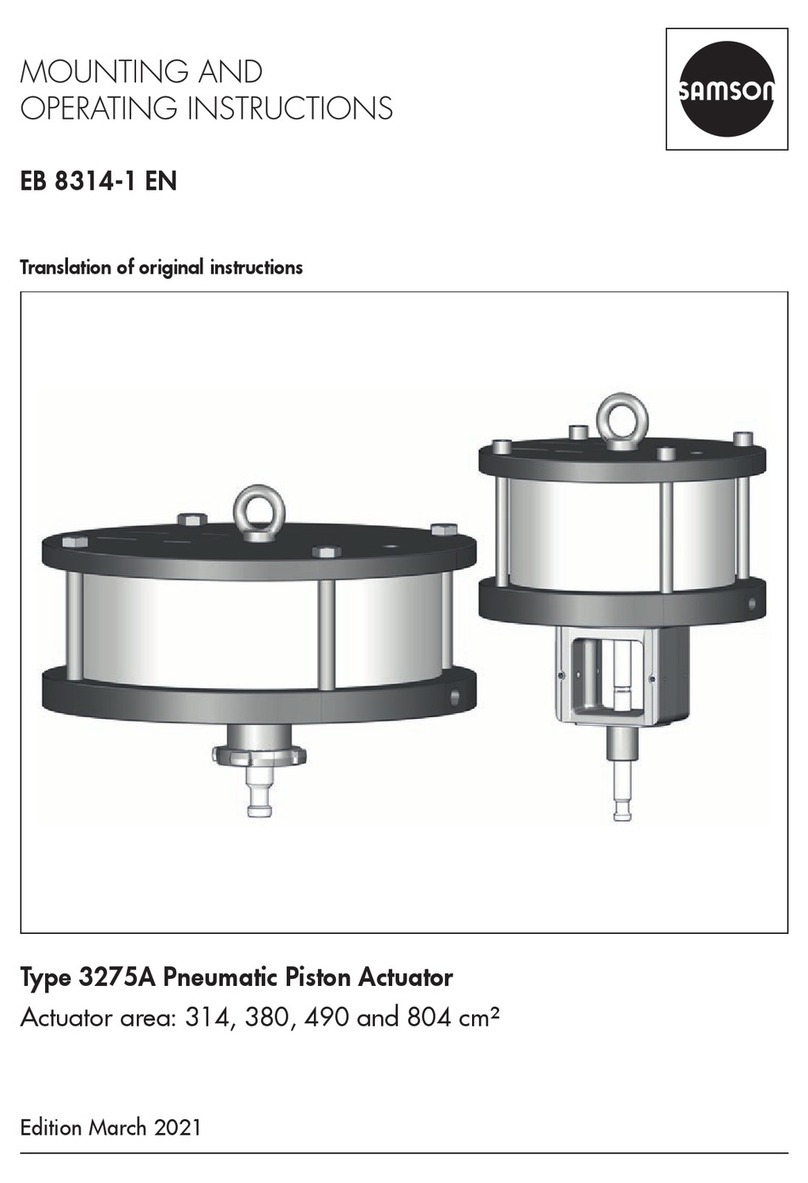
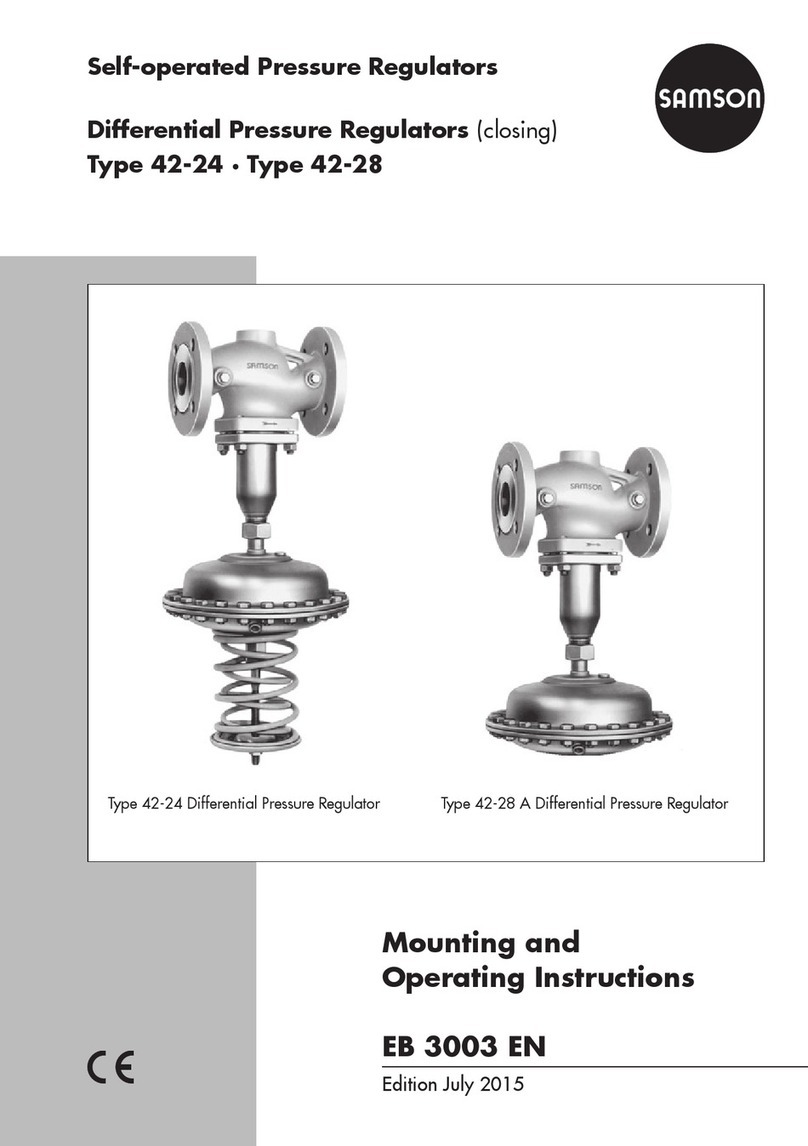
manuals.online logo
Brands
  1. Home
  2. •
  3. Brands
  4. •
  5. Samson
  6. •
  7. Controllers
  8. •
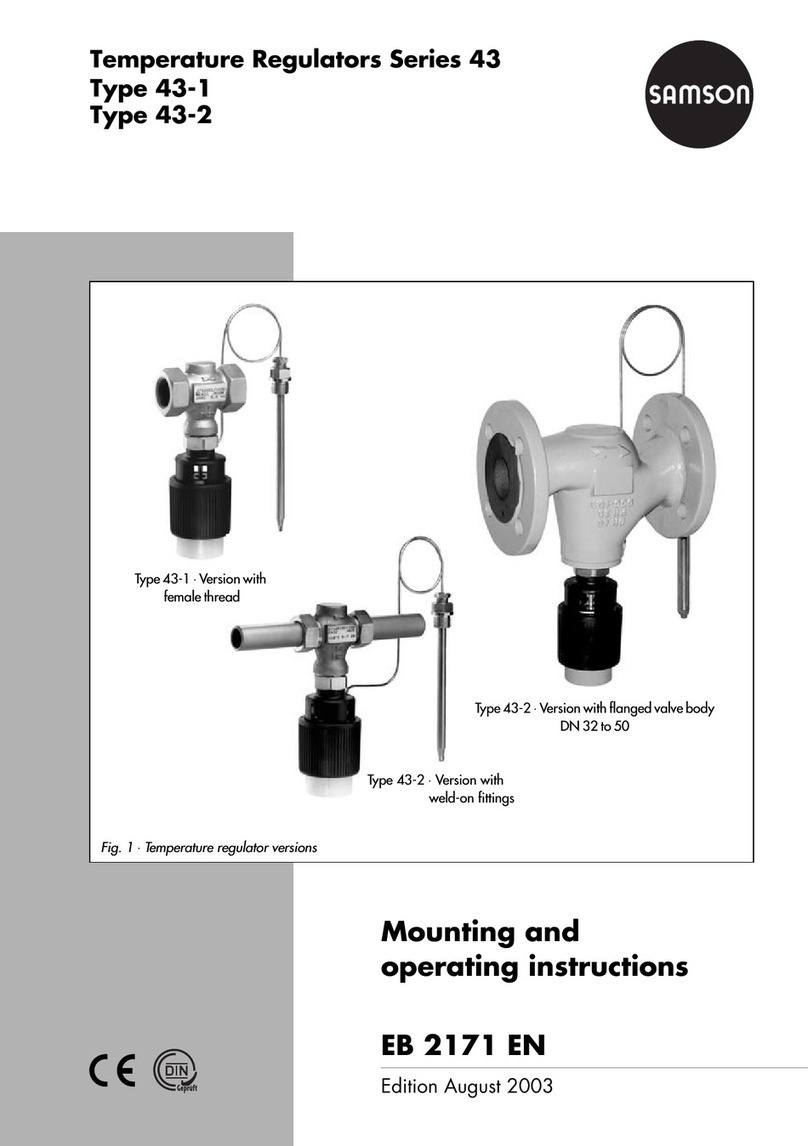
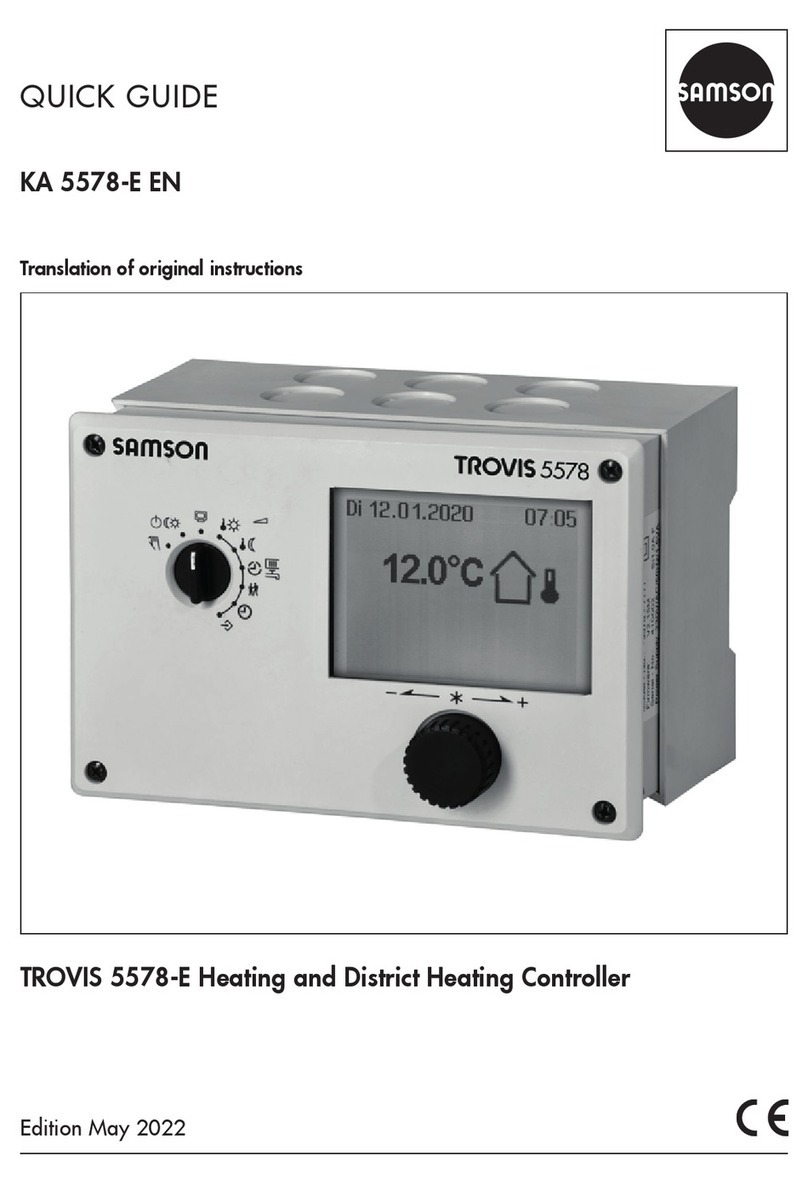
  9. Samson foundation 3787 Service manual

Samson foundation 3787 Service manual

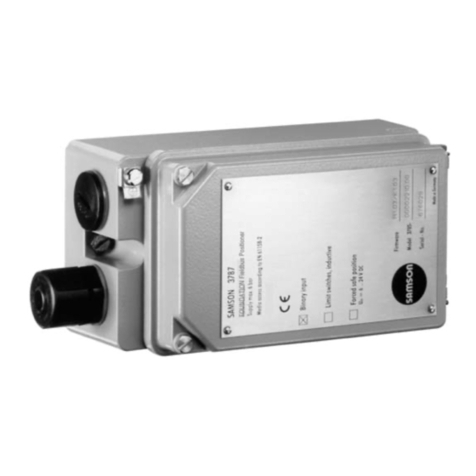
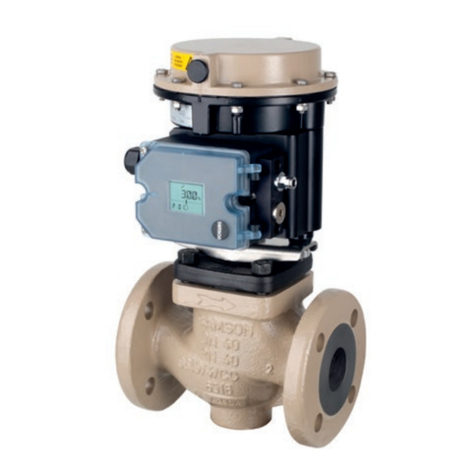
FOUNDATIONTM FIELDBUS Positioner
Type 3787
Fig. 1 ⋅Type 3787
Mounting an
Operating Instructions
EB 8383-1 EN
Firmware R 1.4x/K 1.4x
Edition November 2004
Contents Page
1 Design and principle of operation . . . . . . . . . . . . . . . . . . . . . . 8
1.1 Optional limit switches . . . . . . . . . . . . . . . . . . . . . . . . . . . . 8
1.2 Communication . . . . . . . . . . . . . . . . . . . . . . . . . . . . . . . 8
2 Attachment to the control valve . . . . . . . . . . . . . . . . . . . . . . . 10
2.1 Direct attachment to Type 3277 Actuator . . . . . . . . . . . . . . . . . . . 10
2.2 Attachment acc. to I C 60534-6 . . . . . . . . . . . . . . . . . . . . . . . 14
2.2.1 Mounting sequence . . . . . . . . . . . . . . . . . . . . . . . . . . . . . 14
2.2.2 Presetting the valve travel . . . . . . . . . . . . . . . . . . . . . . . . . . . 16
2.3 Attachment to rotary actuators . . . . . . . . . . . . . . . . . . . . . . . . 17
2.3.1 Mounting the lever with feeler roll . . . . . . . . . . . . . . . . . . . . . . . 18
2.3.2 Mounting the intermediate piece . . . . . . . . . . . . . . . . . . . . . . . 18
2.3.3 Aligning and mounting the cam disk . . . . . . . . . . . . . . . . . . . . . 20
2.3.4 Reversing amplifier for double-acting actuators . . . . . . . . . . . . . . . . 22
2.4 Fail-safe action of the actuator . . . . . . . . . . . . . . . . . . . . . . . . 22
3 Connections . . . . . . . . . . . . . . . . . . . . . . . . . . . . . . . . . 24
3.1 Pneumatic connections . . . . . . . . . . . . . . . . . . . . . . . . . . . . 24
3.1.1 Pressure gauge . . . . . . . . . . . . . . . . . . . . . . . . . . . . . . . 24
3.1.2 Supply air pressure . . . . . . . . . . . . . . . . . . . . . . . . . . . . . 25
3.2 lectrical connections . . . . . . . . . . . . . . . . . . . . . . . . . . . . 25
3.2.1 stablishing communication . . . . . . . . . . . . . . . . . . . . . . . . . 28
4Operation
. . . . . . . . . . . . . . . . . . . . . . . . . . . . . . . . . . 29
4.1 L Ds . . . . . . . . . . . . . . . . . . . . . . . . . . . . . . . . . . . . . 29
4.2 Write protection and simulation switches . . . . . . . . . . . . . . . . . . . 30
4.3 Activate/deactivate forced venting function . . . . . . . . . . . . . . . . . . 30
4.4 Default setting . . . . . . . . . . . . . . . . . . . . . . . . . . . . . . . . 30
4.4.1 Adjusting mechanical zero . . . . . . . . . . . . . . . . . . . . . . . . . . 30
4.4.2 Initialization . . . . . . . . . . . . . . . . . . . . . . . . . . . . . . . . . 31
4.5 Operation via TROVIS-VI W . . . . . . . . . . . . . . . . . . . . . . . . . 33
4.5.1 Initialization . . . . . . . . . . . . . . . . . . . . . . . . . . . . . . . . . 33
4.5.2 Testing the control valve . . . . . . . . . . . . . . . . . . . . . . . . . . . 34
4.6 Setting the inductive limit switches . . . . . . . . . . . . . . . . . . . . . . 34
Contents
2EB 8383-1 EN
5 Maintenance . . . . . . . . . . . . . . . . . . . . . . . . . . . . . . . 35
6 ervicing explosion-protected versions . . . . . . . . . . . . . . . . . . . 35
7 Parameter description . . . . . . . . . . . . . . . . . . . . . . . . . . . 36
7.1 General . . . . . . . . . . . . . . . . . . . . . . . . . . . . . . . . . . 36
7.2 Device Description (DD) . . . . . . . . . . . . . . . . . . . . . . . . . . 36
7.3 Notes on the parameters . . . . . . . . . . . . . . . . . . . . . . . . . . 36
7.3.1 Legends assigned to the parameters . . . . . . . . . . . . . . . . . . . . . 37
7.3.2 Notes on parameter storage classes S, N and D . . . . . . . . . . . . . . . 37
7.4 Block structure . . . . . . . . . . . . . . . . . . . . . . . . . . . . . . . 38
7.4.1 Resource Block . . . . . . . . . . . . . . . . . . . . . . . . . . . . . . 40
7.4.2 Transducer Block . . . . . . . . . . . . . . . . . . . . . . . . . . . . . . 46
7.4.3 Function Blocks . . . . . . . . . . . . . . . . . . . . . . . . . . . . . . 57
7.4.3.1 Analog Output Function Block . . . . . . . . . . . . . . . . . . . . . . . 57
Parameters of the Analog Output Function Block . . . . . . . . . . . . . . . 59
7.4.3.2 PID Function Block (PID controller) . . . . . . . . . . . . . . . . . . . . . . 65
Parameters of the PID Function Block . . . . . . . . . . . . . . . . . . . . 67
7.5 Other parameters . . . . . . . . . . . . . . . . . . . . . . . . . . . . . 78
7.5.1 Stale counter . . . . . . . . . . . . . . . . . . . . . . . . . . . . . . . . 78
7.5.2 Link objects . . . . . . . . . . . . . . . . . . . . . . . . . . . . . . . . 78
7.5.3 LAS capabilities . . . . . . . . . . . . . . . . . . . . . . . . . . . . . . 78
8Diagnostic messages
. . . . . . . . . . . . . . . . . . . . . . . . . . . . 79
8.1 Messages of the XD_ RROR_ XT parameter (Transducer Block) . . . . . . . 79
8.2 Messages of the XD_ RROR parameter (Transducer Block) . . . . . . . . . . 80
8.3 Messages of the S LF_CALIB_STATUS parameter (Transducer Block) . . . . . 81
Dimensional drawing . . . . . . . . . . . . . . . . . . . . . . . . . . . 82
C Type xamination Certificate . . . . . . . . . . . . . . . . . . . . . . 83
CSA/FM certification . . . . . . . . . . . . . . . . . . . . . . . . . . . . 90
Contents
EB 8383-1 EN 3
Safety instructions
The device may only be assembled, started up, and operated by experienced
personnel familiar ith this product.
In these mounting and operating instructions, the term "experienced person-
nel" refers to individuals ho are able to evaluate the responsibilities assigned
to them as ell as recognize potential hazards due to their specialized train-
ing, kno ledge, and experience as ell as their special kno ledge of the rele-
vant standards.
Explosion-protected versions of this device may only be operated by person-
nel ho have undergone special training or instructions, or ho are auth-
orized to ork on explosion-protected devices in hazardous areas.
Any hazards hich could be caused by the process medium, the operating
pressure, the signal pressure and moving parts of the control valve, must be
prevented by means of appropriate measures.
Should inadmissible motions or forces be produced in the pneumatic actuator
as a result of the level associated ith the supply air pressure, these must be
restricted by means of a suitable pressure reducing station.
Proper shipping and appropriate storage of the device are assumed.
Note: Devices ith the CE mark meet the requirements specified in the Directive
94/9/EC and the Directive 89/336/EEC.
The Declaration of Conformity can be vie ed and do nloaded from the
SAMSON ebsite at .samson.de.
Modifications of positioner firmware in comparison to previous versions
Previous New
Positioner R 1.41 R 1.42
Correction in the zero calibration activated over software
communication
4EB 8383-1 EN
Firmware modifications
Communication
K1.00 K1.20
Version compatible with user interface software version number:
Fisher-Rosemount DeltaV in version 5.1 or higher
National Instruments Fieldbus Configurator in version 2.3 or
higher.
All host systems certified by the Fieldbus Foundation
Alteration to default values of the following parameters:
AO Function Block CHANN L, PID Function Block GAIN,
PID Function Block R S T, PID Function Block BYPASS
Resource Block parameter extended:
BLOCK_ RROR, page 40
Transducer Block parameters changed/extended:
BLOCK_ RR, page 46.
Communication
K 1.00 K1.31
The output parameters of the function blocks can be
interconnected within a device and with blocks in other devices at
the same time. In the previous version, it was only possible to
either interconnect function blocks within a device or with blocks
in other devices.
An Output Failure in BLOCK_ RR of the AO Function Block
generates a Block Alarm.
The automatic resetting control loop monitor (previously not
automatic resetting) is evaluated for the control loop error
indication via L D or the message "Calibration rror". This means
this alarm or message is automatically reset as soon as the control
loop monitor cannot find an error anymore.
Communication
K 1.31 K1.40
The default value for R S T in the PID Block has been changed
from 0 to 3402823466 x 1038 (maximum possible value). The
integral-action component of the PID is ineffective at this value as
well as at 0. On switching over the operating mode from MAN to
AUTO, a smooth switchover is achieved.
EB 8383-1 EN 5
Tec nical data
Positioner
Travel
Direct attachment to Type 3277
Attachment acc. to I C 60534-6
Adjustable
5 to 30 mm
5 to 255 mm or 30 to 120° for rotary actuators
Bus connection Fieldbus interface as per I C 61158-2, bus-powered
Physical Layer Class: 113 (not explosion-protected version) and 111 ( x-version)
Field device according to FM 3610 entity and FISCO.
Permissible operating voltage 9 to 32 V DC; The specifications in the C Type xamination Certificate additionally
apply for explosion-protected devices. Power supply over bus cable
Max. operating current 13 mA
Additional current in case of fault 0 mA
Supply air Supply air from 1.4 to 6 bar (20 to 90 psi);
Air quality as per ISO 8573-1: Max. particle size and density: Class 4;
Oil contents: Class 3; Pressure dew point: Class 3
Signal pressure (output) 0 bar up to the pressure of the supply air
Characteristic, adjustable
Deviation
Globe valve: linear, equal percentage, reverse equal percentage,
SAMSON butterfly valve: linear, equal percentage
V T C plug rotary valve: linear, equal percentage
≤1 %
Dead band
(based on rated travel/angle
Adjustable from 0.1 to 10.0 % , default 0.5 %
Resolution (internal measurement) < 0.05 %
Transit time required For valve transit time up to 75 s
Set point ramp for exhaust and supply air separately adjustable
Operating direction Reversible, setting by software
Air consumption Independent of supply air <90l
n
/h
Air supply Actuator filled: when Δp = 6 bar 9.3 m
n3
/h, when
Δp = 1.4 bar 3.5 m
n3
/h
Actuator vented: when Δp = 6 bar 15.5 m
n3
/h, when Δp = 1.4 bar 5.8 m
n3
/h
Permissible ambient temperature 40 to 80 °C
The specifications in the C Type xamination Certificate additionally apply for
explosion-protected devices
ffects Temperature: ≤0.15 %/10 K, supply air: none,
Vibrations: none up to 250 Hz and 4 g
Degree of protection IP 65 using filter check valve included
lectromagnetic compatibility Requirements acc. to N 61000-6-2, N 61000-6-3 and
NAMUR Recommendations N 21 are met
Binar y input Internal power supply 5 V DC, R
i
= 100 kΩ for alarm function
Forced venting
(activated over an internal switch)
Input 6 to 24 V DC, R
i
approx. 6 kΩ at 24 V DC (depending on voltage)
Switching point for "1" signal
≥ 3 V, switching point for "0" signal only at 0 V,
K
V
0.17
6EB 8383-1 EN
Versions
Accessories
Inductive limit switches Two Type SJ 2 SN Proximity Switches for connection to a switching amplifier acc. to
N 60947-5-6
Communication
Data transmission In accordance with FOUNDATION
TM
Fieldbus specification
Communication Profile Class: 31 PS, 32: Interoperability Test System (I TS) Revision 4.0
Materials
Case Die-cast aluminum, chromized and plastic-coated
xternal parts Stainless steel 1.4571 and 1.4301
Weight Approx 1.3 kg
Versions of the positioner
Model 3787 - XXX0X3X
xplosion protection Without
II 2 G x ia IIC T6/
II 2 D IP 65 T 80 °C acc. to AT X
x ia FM/CSA
II 3 G x ia IIC T6/
II 3 D IP 54 T 80 °C acc. to AT X
0
1
3
8
Accessories Limit switches Without
2 inductive
0
22
Forced venting Without (deactivated)
With (activated)
0
12
Pneumatic
connections
NPT 1/4- 18
ISO 228/1-G 1/4
1
2
lectric connections Cable gland M20 x 1.5
Nickel-plated brass
Quantity: 1
2
1
2
EB 8383-1 EN 7
1 Design and principle of operation
The digital positioner compares the refer-
ence variable, which is cyclically trans-
mitted over the FOUNDATIONTM Fieldbus,
with the travel or opening angle of the con-
trol valve. It then delivers a corresponding
signal pressure. It is suitable for attachment
to linear and rotary actuators.
The Type 3787 Positioner communicates as
per FOUNDATIONTM Fieldbus specification
with field devices, programmable logic con-
trollers and process management systems.
An integrated PID Function Block allows the
control of required process variables di-
rectly in the field.
The travel of the control valve is picked up
by the inductive displacement sensor (1)
and supplied to the microcontroller (2) via a
converter.
The microcontroller compares the travel
with the reference variable and controls the
two pneumatic 2/2-way on-off valves (3, 4)
when a system deviation occurs. The on-off
valves fill (3) or vent (4) the pneumatic actu-
ator via corresponding amplifiers corre-
sponding to the system deviation.
Two L Ds on the inside of the cover indicate
the operating status of the positioner.
The positioner is equipped with a standard
binary input over which any process infor-
mation can be signaled via the FOUNDA-
TIONTM Fieldbus.
The write protection switch (6) located on
the inside of the cover prevents stored con-
figuration data from being overwritten.
Forced venting:
The positioner is controlled over a 6 to 24 V
signal which causes the corresponding sig-
nal pressure to be applied to the actuator. If
the voltage signal drops, the signal pressure
is shut off and the actuator is vented. The
control valve moves to its fail-safe position
regardless of the output variable issued by
the microcontroller.
1.1 Optional limit switches
Limit switches can be retrofitted to the stand-
ard positioner.
Two proximity switches can be used for fail-
safe circuits to indicate the valves end posi-
tions.
1.2 Communication
The positioner is completely controlled via
digital signal transmission according to the
FOUNDATIONTM Fieldbus specification
based on the N 50170/A1 draft. Data
is transmitted as bit synchronous current
modulation at a transmission rate of
31.25 kbit/s over twisted pairs according
to I C 61158-2.
Configuration with TROVI -VIEW
The positioner can be configured using the
SAMSON Configuration and Operator In-
terface, TROVIS-VI W.
To configure the positioner, connect its addi-
tional ERIAL INTERFACE to the RS-232 in-
terface of a PC using an adapter cable.
After adapting the positioner to the process
requirements, TROVIS-VI W enables the
process to be controlled online.
8EB 8383-1 EN
Design and principle of operation
Configuration with NI-FBU TM Configurator
The positioner can also be configured using
the NI-FBUSTM Configurator from National
Instruments.
An interface card installed in a PC is re-
quired to connect it to FOUNDATIONTM
Fieldbus.
The NI-FBUSTM Configurator can be used to
configure the whole FOUNDATIONTM
Fieldbus network.
Fig. 2 ⋅Functional diagram
ep
3
4
2
9
7
8
61
G
μC
&
IEC 61158-2
ep
G
Fieldbus
Foundation
8
TROVIS
VIEW
11 10
1
12
u
13
Forced
venting
Binary
input
Supply
air
xhaust
air
Serial Interface
1 Inductive displacement sensor
2 Microcontroller
3 On-off valve for supply air
4 On-off valve for exhaust air
5 Microcontroller
6 Switches for write protection and
simulation mode
7 Binary input
8 Forced venting
9 I C 61158-2 interface module
10 Actuator stem
11 Lever
12 Clamp
13 Configuration interface
EB 8383-1 EN 9
Design and principle of operation
2 Attachment to the control valve
The positioner can be attached either di-
rectly to a SAMSON Type 3277 Actuator
or to control valves with cast yokes or rod-
type yokes according to I C 60534-6
(NAMUR).
In connection with an intermediate piece,
the positioner can also be attached to rot-
ary actuators.
Since the standard positioner is delivered
without accessories, please refer to the
tables for required mounting parts and their
order numbers.
Note!
For fast control valves ith small travel vol-
umes (transit time < 0.6 sec.), replace the fil-
ter in the signal pressure output ith a
scre -in throttle, if necessary, to improve
the control properties. See also sections
2.1, 2.2 and 2.3.
Important!
The positioner does not have its o n vent-
ing plug, instead vented air has to escape
through venting plugs located on the mount-
ing parts (see Figs. 3, 5 and 7).
A filter check valve for the vented air is in-
cluded in every positioner delivery (under
the transparent protective cap on the back
of the positioner). Replace the standard vent-
ing plug included in the accessories ith
this filter check valve. This is the only ay to
achieve the degree of protection IP 65 by
preventing dirt and moisture from entering
the device.
2.1 Direct attachment to Type
3277 Actuator
The necessary accessories are listed in the
Tables 1, 2 and 3 on page 13.
When looking at the signal pressure connec-
tion or the switchover plate (actuator 120
cm2), the positioner must be attached to the
left side of the actuator.
The arrow on the black cover of the case
(Fig. 11) should point towards the dia-
phragm chamber.
Exception: Control valves in which the plug
closes the seat area when the actuator stem
retracts. In this case, the positioner has to
be attached to the right side of the actuator
and the arrow points away from the dia-
phragm chamber.
1. Screw the clamp (1.2) to the actuator
stem, ensuring that the fastening screw
is located in the groove of the actuator
stem.
2. Screw the assigned pick-up lever D1 or
D2 to the transmission lever of the posi-
tioner.
3. Fasten the distance plate (15) with seal
pointing towards the actuator yoke.
4. Place the positioner on the plate so that
the lever D1 or D2 slides centrally over
the pin of the clamp (1.2). Then screw
tight to the distance plate (15).
5. Mount cover (16).
Actuators with 240, 350 and 700 cm2
6. Check whether the tongue of the seal
(17) is properly aligned at the side of
the connection block (Fig. 3, center)
10 EB 8383-1 EN
Attac ment to t e control valve
Actuator stem retracts
Side view of connection block
with seal (new) with switch plate (old)
Fig. 3 ⋅Attachment and signal pressure connection for Type 3277 Actuators (top) and 3277-5 ith 120 cm
(bottom)
SUPPLY
1817 19
1.2
D2
D1
17
16
15
1.2
16
17
15
Actuator stem retracts
Internal signal pressure
connection Signal pressure tube
1.2 Clamp
D1 Lever
D2 Lever
15 Distance plate
16 Cover
17 Seal
18 Cover plate
19 Switch plate
Signal pressure bore
Connection block
Marking
Marking
Symbol "actuator
stem extends"
"Actuator stem
retracts"
Switchover
plate
Switchover plate Signal pressure input
Signal pressure
input with brass
throttle, if required
Actuator stem extends
Venting
Actuator stem extends
EB 8383-1 EN 11
Attac ment to t e control valve
with the actuator symbol "actuator stem
extends" or "actuator stem retracts" to
match the actuator version used.
If not, remove the three fastening
screws and the cover plate (18), turn
the seal (17) by 180° and reinsert it.
When the old connection block is used,
turn the switch plate (19) to align the ac-
tuator symbol with the arrow.
7. Place the connection block with its seal
rings on the positioner and actuator
yoke and screw it tight using the fasten-
ing screw.
For actuators with "actuator stem re-
tracts", additionally attach the ready-
made signal pressure line.
Actuator with 120 cm2
For the Type 3277-5 Actuator with 120 cm2
effective diaphragm area, the signal press-
ure is transmitted to the diaphragm cham-
ber via the switchover plate (Fig. 3 bottom).
For a rated travel of 7.5 mm, a brass
throttle (see Accessories table on page 13)
must be pressed into the seal located in the
signal pressure input on the actuator yoke.
For a rated travel of 15 mm, this is only re-
quired when the supply pressure exceeds
4 bar.
6. Remove the screw plug on the rear of
the positioner case and seal the signal
pressure output (Output 38) with the
plug from the accessories.
7. Mount the positioner so that the bore in
the distance plate (15) is aligned with
the seal located in the bore of the actua-
tor yoke.
8. Align the switchover plate with the
corresponding symbol for left attach-
ment and screw the plate to the actua-
tor yoke.
Important!
If, in addition to the positioner, a solenoid
valve or a similar device is attached to the
120 cm2 actuator, the rear M3 scre must
not be removed. In this case, the signal
pressure has to be fed from the signal press-
ure output to the actuator via the required
connecting plate (see Table 2). The s it-
chover plate is no longer required.
Note!
For faster control valves ith a transit time
less than 0.6 seconds, replace the filter in
the signal pressure output (output 38) ith a
scre -in throttle (see Accessories table), if
necessary.
Filling the diaphragm chamber with air
If the Type 3277 Actuators diaphragm
chamber must be filled with air exhausted
from the positioner, the diaphragm cham-
ber (for version with "actuator stem ex-
tends") can be connected to the connection
block using a tube (see Table 3). To do
this, first remove the screw plug from the
connection block.
For the Type 3277-5 Actuator with "actua-
tor stem retracts", the air exhausted from
the positioner is constantly supplied to the
diaphragm chamber through an internal
bore.
12 EB 8383-1 EN
Attac ment to t e control valve
1402-0938 1402-0939
1) Order with every pressure gauge kit: 2 restrictions (1790-6121)
1)
2.2 Attachment acc. to IEC 60534-6
The positioner is attached according to
NAMUR as shown in Fig. 4 using an adapt-
er housing. The valve travel is transmitted
via the lever (18) and the shaft (25) to the
bracket (28) in the adapter housing and
then to the coupling pin (27) located on the
lever of the positioner.
To attach the positioner, you will require the
mounting parts listed in Table 4. Which
lever should be used depends on the rated
valve travel.
The positioner must be attached to the
adapter housing with the arrow on the
black case cover pointing away from the
diaphragm actuator towards the valve.
xception: Control valves in which the plug
closes the seat area when the actuator stem
retracts. In this case, the arrow must point
towards the diaphragm actuator.
If the adapter housing cannot be mounted
between the actuator and valve (e.g. be-
cause the actuator is from another manufac-
turer), the arrow on the case cover must
point towards the valve!
Note!
For faster control valves ith a transit time
less than 0.6 seconds, replace the filter in
the signal pressure output (output 38) ith a
scre -in throttle (see Accessories table).
2.2.1 Mounting sequence
Refer to Tables and 5 on page 16 for re-
quired mounting parts.
Note!
Prior to mounting the parts, apply signal
pressure to the actuator so that the valve is
set to 50 % of its travel. This is the only ay
to make sure that the lever (18) and bracket
(28) are exactly aligned.
Control valve with cast yoke
1. Use countersunk screws to fix the plate
(20) to the coupling which connects the
plug stem and actuator stem. With actu-
ators 2100 and 2800 cm2, use addi-
tional mounting bracket (32).
2. Remove rubber plug from the adapter
housing and fasten the housing to the
NAMUR rib with hexagon head screw.
Control valve with rod-type yoke
1. Screw plate (20) to the follower clamp
of the plug stem.
2. Screw the studs (29) into the adapter
housing.
3. Place the housing with the plate (30) on
either the right or left side of the valve
stem and fasten tight using the nuts
(31). On doing so, make sure the hous-
ing is aligned at a height which will
still allow the lever (18) to be attached
horizontally.
4. Screw the pin (19) into the center row
of holes in the plate (20) and lock into
place so that it is located approximately
above the correct lever marking (1 to 2)
14 EB 8383-1 EN
Attac ment to t e control valve
Fig. 4 ⋅Attachment according to IEC 60534-6 (NAMUR)
2
1,5
1
2826
AB
24 25 22
32
31
20 19
19 21 2023 18
27b
27a
29
30
Attachment to
NAMUR rib
Mounting position
Attachment to rod
18 Lever N1, N2
19 Pin
20 Plate
21 Clamp
22 Clamping plate
23 Screw
24 Pointer
25 Shaft
26 Lever of positioner
27a Transmission pin
27b Lock nut
28 Bracket
29 Studs
30 Plate
31 Nuts
32 Mounting bracket
EB 8383-1 EN 15
Attac ment to t e control valve
for the assigned travel, see Table 5.
Intermediate values must be calculated.
Move the clamp (21) beforehand to
clasp the pin.
5. Measure the distance from the middle
of the shaft (25) to the middle of the pin
(19). This value must be entered later
when the positioner is being con-
figured.
2.2.2 Presetting the valve travel
1. Adjust the shaft (25) in the adapter
housing so that the black pointer (24) is
aligned with the casted marking on the
adapter housing.
2. Screw the clamping plate (22) tight in
this position using the screw (23).
3. Screw the coupling pin (27) into the po-
sitioner lever (26) on the side with the
Table 4 Attach. acc. to I C 60534-6 Control valve Travel in mm With lever Order no.
NAMUR mounting kit
See Fig. 4 for parts
Valve with cast yoke 7.5 to 60 N1 (125 mm) 1400-6787
30 to 120 N2 (212 mm) 1400-6789
Valve with
rod-type
yoke with
rod diameter
in mm
20 to 25 N1 1400-6436
20 to 25 N2 1400-6437
25 to 30 N1 1400-6438
25 to 30 N2 1400-6439
30 to 35 N1 1400-6440
30 to 35 N2 1400-6441
Attachment to Fisher and Masoneilan linear actuators
(one each of both mounting kits is needed per one actuator)
1400-6771
and
1400-6787
Accessories Press. gauge mounting block G 1/4: 1400-7458 1/4 NPT: 1400-7459
Pressure gauge set St. st./brass: 1400-6957 St. st./St. st.: 1400-6958
Signal pressure throttles (screw-in type and brass throttle) 1400-6964
Filter check valve, replaces vent plug and increases the degree of protection
to IP 65 (one included with the delivered positioner) 1790-7408
Table 5 Attachment according to I C 60534-6
Travel mm *) 7.51515303060306060120
Pin on mark *) 1 12121212
Corresp. distance: pin/lever pivot 42 42 84 42 84 84 168 84 168
With lever N1 (125 mm in length) N2 (212 mm in length)
Transmission pin (27) at position A A B A B
*) Deviating travels (intermediate values) must be calculated accordingly
16 EB 8383-1 EN
Attac ment to t e control valve
insert nuts and secure the pin on the
other side with a hex nut. Observe the
mounting position A or B explained in
Table 5 and Fig. 4.
4. Place the positioner onto the adapter
housing, making sure the coupling pin
(27) is positioned within the arms of the
bracket (28).
To do so, insert a 2.5 mm Allen key or
a screwdriver from the front into the
bore located below the oblong hole on
the cover plate, and push the positioner
lever into the required position.
5. Screw positioner to the adapter housing.
6. Relieve signal pressure from the actuator.
2.3 Attachment to rotary actuators
The positioner can also be attached to rot-
ary actuators in accordance with VDI/VD
3845 by using the mounting parts and ac-
cessories listed in Table 6. In this arrange-
ment, the actuators rotary motion is con-
verted via the cam disk of the actuator stem
and the feeler roll of the positioner lever
into a linear motion which is required for
the inductive displacement sensor.
ach cam disk has two curves for the
ranges of rotational angle from 0 to 90°
(recommended for all angles of rotation
smaller than 90°) and 0 to 120° (recom-
mended for all angles of rotation larger
than 90°).
Table 6 Rotary actuators (Complete mounting parts, but without cam disks)
Attachment acc. to
VDI/VD 3845, level
1
SAMSON Type Actuator Attachment to Masoneilan actuator
Actuator
160 cm
2
Actuator
320 cm
2
Camflex I
DN 25 ...100
Camflex I
DN 125...250
Camflex II
Order no.
1400-8815 1400-7103 1400-7104 1400-7118 1400-7119 1400-7120
Piping kit 8 x 1 stainless steel
G: 1400-6670 NPT: 1400-6672
G: 1400-6669 NPT: 1400-6671
Accessories Order no.
Reversing amplifier for double-acting actuators without springs G: 1079-1118 NPT: 1079-1119
Cam disk (0050-0089) with accessories, angle of rotation 0 to 90° and 0 to 120° 1400-6959
Cam disk (0050-0089) specially for V T C, adjustable per software from 0 to 75° 1400-6960
Cam disk (0050-0090) specially for Camflex, adjustable per software from 0 to 50° 1400-6961
Pressure gauge mounting block G 1/4: 1400-7458; 1/4 NPT: 1400-7459
Pressure gauge set St. steel/Brass:
1400-6957
St. steel/St. steel:
1400-6958
Signal pressure throttles (screw-in type and brass throttle) 1400-6964
Filter check valve, replaces vent plug and increases the degree of protec-
tion to IP 65 (one included with the delivered positioner) 1790-7408
EB 8383-1 EN 17
Attac ment to t e control valve
For double-acting, springless rotary actua-
tors, a reversing amplifier must be attached
to the positioner housing on the side where
it is connected to the actuator (see section
2.3.4).
If the positioner is attached to a SAMSON
Type 3278 Rotary Actuator, the air ex-
hausted from the positioner is admitted to
the inside of the actuator without any addi-
tional tubing.
If the positioner is attached to actuators
from other manufacturers (NAMUR), the air
is applied to the diaphragm chamber
through a tube with a tee connecting the ac-
tuator and the exhaust connection of the in-
termediate piece.
Note!
For faster control valves ith a transit time
less than 0.6 seconds, replace the filter in
the signal pressure output (output 38) ith a
scre -in throttle (see Accessories Table 6).
2.3.1 Mounting the lever with
feeler roll
1. Place lever with attached feeler roll
(35) on the transmission lever (37) and
secure it with the supplied screws (38)
and washers.
2.3.2 Mounting the intermediate
piece
AM ON Type 3278 Actuator:
1. Screw adapter (36) to the free end of
the rotary actuator shaft, using two
screws.
2. Position intermediate piece (34) on the
actuator housing and secure it with two
screws. Align the intermediate piece so
that the air connections of the posi-
tioner face the side of the diaphragm
case.
Actuators according to VDI/VDE 3845
1. Place the whole intermediate piece (34,
42, 44 and 45) onto the bracket in-
cluded in the delivery scope of the actu-
ator (fixing level 1 VDI/VD 3845) and
secure with screws.
2. Align the cam disk (40) and scale (39)
as described in section 2.3.3 and screw
tight.
With springless actuators, the reversing am-
plifier must be screwed to the side of the po-
sitioner case. See section 2.3.4.
18 EB 8383-1 EN
Attac ment to t e control valve
Vent plug or
filter check valve
Fig. 5 ⋅Attachment to rotary actuators
33
3835
39
39
40
34
36
40
34
44
45
42
43
37
Attachment to
SAMSON Type 3278
Attachment acc. to
VDI/VD 3845
33 Positioner
34 Intermediate piece
35 Lever with cam follower roll
36 Adapter
37 Transmission lever
38 Screws
39 Scale
40 Cam disk
41 Actuator shaft
42 Plate
43 Bracket
44 Coupling
45 Seal
EB 8383-1 EN 19
Attac ment to t e control valve
2.3.3 Aligning and mounting the
cam disk
In rotary actuators with spring-return mech-
anism, the actuator springs determine the
fail-safe position and the direction of rota-
tion of the control valve.
With double-acting, springless rotary actua-
tors, the direction of rotation depends on
both the actuator and valve version used.
The initial position is always based on a
closed valve!
Whether the control valve should open or
close when the reference variable increases
must be set in the software (direction of ac-
tion increasing/increasing or increasing/de-
creasing).
1. Place the cam disk with scale on the
adapter (36) or coupling (34), and
fasten the screws loosely at first.
The cam disk has two cam sections. The
starting point of each section is marked by
a small hole.
Note!
When the valve is closed, the starting point
(hole) of the disk must be aligned so that the
pivot of the cam disk, the 0° position of the
scale and the arro mark on the vie ing
indo are in one line.
The starting point for the closed valve posi-
tion should never be belo the 0° position!
In actuators ith fail-safe position "valve
OPEN", the maximum signal pressure must
be applied to the actuator prior to aligning
the cam disk.
In springless actuators, the supply air must
be connected.
2. On aligning the cam disk, clip on the
double-sided scale disk so that the scale
matches the direction of rotation of the
control valve. Only then secure the cam
disk with the fastening screws.
ecuring the aligned cam disk
If you want to additionally secure the cam
disk to prevent it from being turned, pro-
ceed as follows:
There are four holes arranged around the
center hole on the cam disk. Select a suit-
able hole from the four holes to secure the
cam disk.
Drill a hole in the adapter (36) or coupling
(44) through the hole chosen and insert a
2 mm dowel pin.
3. Attach the positioner to the intermediate
piece (34) so that the lever (35) touches
the cam disk with its feeler roll.
To do so, insert a 2.5 mm Allen key or
screwdriver from the front into the bore
hole located below an oblong hole in
the cover plate and bring the positioner
lever in the required position.
4. Screw positioner to the intermediate
piece.
20 EB 8383-1 EN
Attac ment to t e control valve

Other manuals for foundation 3787

1

Other Samson Controllers manuals

Samson 3271 Service manual

Samson

Samson 3271 Service manual

Samson 43-3 Service manual

Samson

Samson 43-3 Service manual

Samson 3375-10 Setup guide

Samson

Samson 3375-10 Setup guide

Samson 41-23 Series Service manual

Samson

Samson 41-23 Series Service manual

Samson Trovis 6400 Service manual

Samson

Samson Trovis 6400 Service manual

Samson TROVIS 5433 Service manual

Samson

Samson TROVIS 5433 Service manual

Samson 3730 Series Service manual

Samson

Samson 3730 Series Service manual

Samson 2469 Service manual

Samson

Samson 2469 Service manual

Samson 1060 Operating manual

Samson

Samson 1060 Operating manual

Samson 43-1 Service manual

Samson

Samson 43-1 Service manual

Samson foundation 3787 Service manual

Samson

Samson foundation 3787 Service manual

Samson TROVIS 6495 Series Service manual

Samson

Samson TROVIS 6495 Series Service manual

Samson TROVIS 5724-3 Service manual

Samson

Samson TROVIS 5724-3 Service manual

Samson 42-37 Service manual

Samson

Samson 42-37 Service manual

Samson Type 4708 Service manual

Samson

Samson Type 4708 Service manual

Samson TROVIS 5724-8 Service manual

Samson

Samson TROVIS 5724-8 Service manual

Samson 3277 Service manual

Samson

Samson 3277 Service manual

Samson TROVIS 5757-3 Instruction sheet

Samson

Samson TROVIS 5757-3 Instruction sheet

Samson EB 8315 EN User manual

Samson

Samson EB 8315 EN User manual

Samson TROVIS 5575 Service manual

Samson

Samson TROVIS 5575 Service manual

Samson 43-8 Service manual

Samson

Samson 43-8 Service manual

Samson TROVIS 5474 Service manual

Samson

Samson TROVIS 5474 Service manual

Samson TROVIS 5757-3 Service manual

Samson

Samson TROVIS 5757-3 Service manual

Samson 3277 Service manual

Samson

Samson 3277 Service manual

Popular Controllers manuals by other brands

Energy Technology OCEM AUGIER DIAM4200 Series Installation & maintenance

Energy Technology

Energy Technology OCEM AUGIER DIAM4200 Series Installation & maintenance

GF EA 04 operating instructions

GF

GF EA 04 operating instructions

Danfoss AMEi 6 iNET operating guide

Danfoss

Danfoss AMEi 6 iNET operating guide

Siemens SIMATIC EM 300 manual

Siemens

Siemens SIMATIC EM 300 manual

Nanjing Putian Datang Information Electronics Co., Ltd. CL12/2410LI-A user manual

Nanjing Putian Datang Information Electronics Co., Ltd.

Nanjing Putian Datang Information Electronics Co., Ltd. CL12/2410LI-A user manual

Dangerous Music Master Setup and operation manual
Dangerous Music

Dangerous Music Master Setup and operation manual

Taconova NOVASTAT RF MINI manual

Taconova

Taconova NOVASTAT RF MINI manual

Parker Hauser COMPAX-S Series user guide

Parker

Parker Hauser COMPAX-S Series user guide

RKI Instruments Beacon 110 Operator's manual

RKI Instruments

RKI Instruments Beacon 110 Operator's manual

Adaptec AAR-2420SA Read me

Adaptec

Adaptec AAR-2420SA Read me

Weidmüller WEIDOS-MKR1010-A1 manual

Weidmüller

Weidmüller WEIDOS-MKR1010-A1 manual

Trox Technik FK2-EU manual

Trox Technik

Trox Technik FK2-EU manual

BGS technic 8603 instruction manual

BGS technic

BGS technic 8603 instruction manual

Mitsubishi Electric MELSEC-I/OLINK Handbook

Mitsubishi Electric

Mitsubishi Electric MELSEC-I/OLINK Handbook

JVC RM-LP5G user manual

JVC

JVC RM-LP5G user manual

Autoscript FC/WIRELESS-IP Operation manual

Autoscript

Autoscript FC/WIRELESS-IP Operation manual

IAI SS-S instruction manual

IAI

IAI SS-S instruction manual

Gentec 882VR Operation and maintenance manual

Gentec

Gentec 882VR Operation and maintenance manual

manuals.online logo
manuals.online logoBrands
  • About & Mission
  • Contact us
  • Privacy Policy
  • Terms and Conditions

Copyright 2025 Manuals.Online. All Rights Reserved.