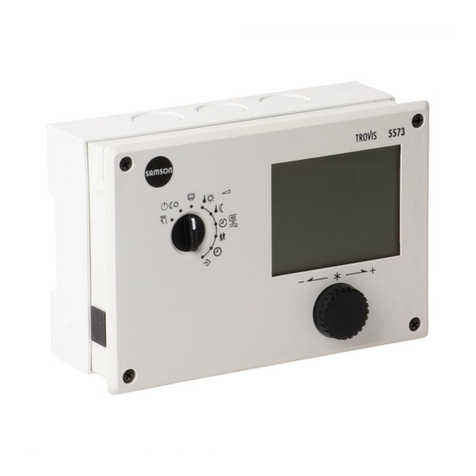
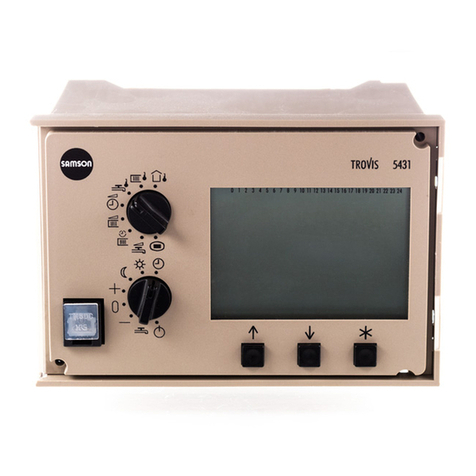
Samson TROVIS 5474 Service manual

Automation System 5400
Boiler Controller
TROVIS 5474
Mounting and
Operating Instructions
EB 5474 EN
®
Electronics from SAMSON
Firmware version 2.0x
Edition July 2004

Disclaimer of liability
We are constantly developing our products and therefore, reserve the right to change the prod-
uct or the information contained in this document at any time without notice.
We do not assume any liability for the accuracy or completeness of these mounting and
operating instructions. Moreover, we do not guarantee that the buyer can use the product for an
intended purpose. SAMSON rejects any liability for claims by the buyer, especially claims for
compensation including lost profits or any other financial loss, except the damage was caused
intentionally or by gross negligence. If an essential term of the contract is breached by
negligence, SAMSON’s liability is limited to the foreseeable damage.
Safety instructions
4The device may only be assembled, started up or operated by trained and
experienced personnel familiar with the product. Proper shipping and
appropriate storage are assumed.
4The controller has been designed for use in electrical power systems. For
wiring and maintenance, you are required to observe the relevant safety
regulations.
4The Safety shutdown function (section 8.10) does not replace the safety tem-
perature limiter as the boiler controller is not a safety-relevant component.
2EB 5474 EN
Disclaimer of liability

Contents
1 Operation . . . . . . . . . . . . . . . . . . . . . . . . . . . . . . . 6
1.1 Operating elements. . . . . . . . . . . . . . . . . . . . . . . . . . . 6
1.1.1 Operating keys . . . . . . . . . . . . . . . . . . . . . . . . . . . . . 6
1.1.2 Operating switches . . . . . . . . . . . . . . . . . . . . . . . . . . . 7
1.2 Operating modes. . . . . . . . . . . . . . . . . . . . . . . . . . . . 8
1.3 Display. . . . . . . . . . . . . . . . . . . . . . . . . . . . . . . . . 9
1.4 Displaying data . . . . . . . . . . . . . . . . . . . . . . . . . . . . 10
1.5 Setting the controller time . . . . . . . . . . . . . . . . . . . . . . . 11
1.6 Setting the times-of-use . . . . . . . . . . . . . . . . . . . . . . . . 13
1.6.1 Entering vacation periods . . . . . . . . . . . . . . . . . . . . . . . 15
1.6.2 Entering public holidays . . . . . . . . . . . . . . . . . . . . . . . . 16
2 Start-up. . . . . . . . . . . . . . . . . . . . . . . . . . . . . . . . 18
2.1 Setting the system code number and the boiler rating . . . . . . . . . . 18
2.2 Activating and deactivating functions. . . . . . . . . . . . . . . . . . 19
2.3 Changing parameters . . . . . . . . . . . . . . . . . . . . . . . . . 21
2.4 Enter key number . . . . . . . . . . . . . . . . . . . . . . . . . . . 22
2.5 Calibrating sensors . . . . . . . . . . . . . . . . . . . . . . . . . . 22
2.6 Resetting to default values . . . . . . . . . . . . . . . . . . . . . . . 24
3Manual operation . . . . . . . . . . . . . . . . . . . . . . . . . . . 25
4 Systems. . . . . . . . . . . . . . . . . . . . . . . . . . . . . . . . 26
5 Boiler functions . . . . . . . . . . . . . . . . . . . . . . . . . . . . 32
5.1 Boiler switching behavior . . . . . . . . . . . . . . . . . . . . . . . 32
5.2 Lag/lead sequence control. . . . . . . . . . . . . . . . . . . . . . . 34
5.2.1 Control without sensor VFg . . . . . . . . . . . . . . . . . . . . . . 34
5.2.2 Outdoor temperature-dependent sequence . . . . . . . . . . . . . . . 34
5.2.3 Capacity-dependent sequence . . . . . . . . . . . . . . . . . . . . . 35
5.2.4 Sequence lock. . . . . . . . . . . . . . . . . . . . . . . . . . . . . 35
5.2.5 Lag delay . . . . . . . . . . . . . . . . . . . . . . . . . . . . . . . 35
5.3 Change in lag/lead sequence (Anl 4 to 7) . . . . . . . . . . . . . . . 36
5.3.1 Outdoor temperature-dependent change (Anl 5 and 7) . . . . . . . . . 36
5.3.2 Capacity-dependent change (Anl 5 and 7) . . . . . . . . . . . . . . . 36
5.3.3 Operating hours-dependent change (Anl 5 and 7) . . . . . . . . . . . 37
5.3.4 Change with binary input (Anl 4 to 7) . . . . . . . . . . . . . . . . . 37
5.4 Return flow boost . . . . . . . . . . . . . . . . . . . . . . . . . . . 37
5.4.1 Common return flow boost . . . . . . . . . . . . . . . . . . . . . . 38
5.5 Parallel operation (Anl 7) . . . . . . . . . . . . . . . . . . . . . . . 38
EB 5474 EN 3
Contents

5.6 Operating hours counter. . . . . . . . . . . . . . . . . . . . . . . . 38
5.7 Boiler pump control . . . . . . . . . . . . . . . . . . . . . . . . . . 39
5.8 Boiler sensor acting as a thermostat . . . . . . . . . . . . . . . . . . 39
5.9 Modulation feedback . . . . . . . . . . . . . . . . . . . . . . . . . 40
5.10 Operational alarm . . . . . . . . . . . . . . . . . . . . . . . . . . 40
5.11 Return flow sensor acting as a thermostat. . . . . . . . . . . . . . . . 41
6 Functions of the heating circuit . . . . . . . . . . . . . . . . . . . . 42
6.1 Outdoor temperature-dependent advance heating . . . . . . . . . . . 42
6.2 Optimization using a room sensor . . . . . . . . . . . . . . . . . . . 42
7 Functions of the DHW circuit. . . . . . . . . . . . . . . . . . . . . . 44
7.1 DHW heating in the storage tank system (Anl 1 to 3) . . . . . . . . . . 44
7.1.1 Priority circuit (Anl 1 to 3) . . . . . . . . . . . . . . . . . . . . . . . 45
7.2 Forced charging of the DHW storage tank (Anl 1 to 7) . . . . . . . . . 46
7.3 Thermal disinfection (Anl 1 to 3) . . . . . . . . . . . . . . . . . . . . 47
7.4 External DHW demand (Anl 1 to 7) . . . . . . . . . . . . . . . . . . 48
8 System-wide functions . . . . . . . . . . . . . . . . . . . . . . . . 49
8.1 Weather-compensated control . . . . . . . . . . . . . . . . . . . . . 49
8.1.1 Gradient characteristic . . . . . . . . . . . . . . . . . . . . . . . . 50
8.1.2 4-point characteristic . . . . . . . . . . . . . . . . . . . . . . . . . 51
8.2 Fixed set point control . . . . . . . . . . . . . . . . . . . . . . . . . 52
8.3 Differential temperature control using variable weighting factors. . . . . 53
8.4 Deactivation depending on outdoor temperature . . . . . . . . . . . . 53
8.5 Summer mode. . . . . . . . . . . . . . . . . . . . . . . . . . . . . 54
8.6 Delayed outdoor temperature adaptation. . . . . . . . . . . . . . . . 54
8.7 Automatic summer time/winter time changeover . . . . . . . . . . . . 55
8.8 Frost protection . . . . . . . . . . . . . . . . . . . . . . . . . . . . 55
8.9 Forced operation of the pumps. . . . . . . . . . . . . . . . . . . . . 56
8.10 Flow temperature limitation . . . . . . . . . . . . . . . . . . . . . . 56
8.11 Control mode . . . . . . . . . . . . . . . . . . . . . . . . . . . . . 57
8.11.1 Three-step control . . . . . . . . . . . . . . . . . . . . . . . . . . . 58
8.11.2 On/off control . . . . . . . . . . . . . . . . . . . . . . . . . . . . 58
8.11.3 Continuous control . . . . . . . . . . . . . . . . . . . . . . . . . . 58
8.12 Control signal deactivation. . . . . . . . . . . . . . . . . . . . . . . 59
8.13 Processing of external demand. . . . . . . . . . . . . . . . . . . . . 59
8.14 Feedforwarding the outdoor temperature . . . . . . . . . . . . . . . . 59
8.15 Locking of changed settings . . . . . . . . . . . . . . . . . . . . . . 60
9 Operational faults . . . . . . . . . . . . . . . . . . . . . . . . . . 61
4EB 5474 EN
Contents
9.1 Error list . . . . . . . . . . . . . . . . . . . . . . . . . . . . . . . 61
9.2 Sensor failure . . . . . . . . . . . . . . . . . . . . . . . . . . . . . 61
9.3 Displaying the lead/collective error alarm . . . . . . . . . . . . . . . 62
9.4 Error status register . . . . . . . . . . . . . . . . . . . . . . . . . . 62
9.5 Error alarms . . . . . . . . . . . . . . . . . . . . . . . . . . . . . 64
9.5.1 Sending text message in case of error . . . . . . . . . . . . . . . . . 64
9.5.2 Sending fax in case of a fault alarm . . . . . . . . . . . . . . . . . . 65
10 Communication . . . . . . . . . . . . . . . . . . . . . . . . . . . . 66
10.1 Controller with RS-232 port . . . . . . . . . . . . . . . . . . . . . . 67
10.2 System bus interface in conjunction with cable converters
RS-232/RS-485 (for four-wire bus) . . . . . . . . . . . . . . . . . . 68
10.3 Description of communication parameters to be adjusted . . . . . . . . 69
10.4 Meter bus interface . . . . . . . . . . . . . . . . . . . . . . . . . . 71
10.4.1 Activating the meter bus . . . . . . . . . . . . . . . . . . . . . . . . 71
10.5 Memory module. . . . . . . . . . . . . . . . . . . . . . . . . . . . 73
11 Installation . . . . . . . . . . . . . . . . . . . . . . . . . . . . . . 74
12 Electrical connection. . . . . . . . . . . . . . . . . . . . . . . . . . 76
13 Appendix. . . . . . . . . . . . . . . . . . . . . . . . . . . . . . . 82
13.1 Function block list . . . . . . . . . . . . . . . . . . . . . . . . . . . 82
13.2 Parameter lists . . . . . . . . . . . . . . . . . . . . . . . . . . . . 93
13.3 Displays . . . . . . . . . . . . . . . . . . . . . . . . . . . . . . . 107
13.4 Sensor resistance tables . . . . . . . . . . . . . . . . . . . . . . . 115
13.5 Technical data . . . . . . . . . . . . . . . . . . . . . . . . . . . . 116
13.6 Customer data . . . . . . . . . . . . . . . . . . . . . . . . . . . . 117
Index . . . . . . . . . . . . . . . . . . . . . . . . . . . . . . . . 125
EB 5474 EN 5
Contents

1 Operation
The controller is ready for use with the temperatures and time schedules preset by the manufac-
turer.
On start-up, the current time and date need to be set at the controller (–> section 1.5).
1.1 Operating elements
The operating controls are located in the front panel of the controller and protected by a Plexi-
glas door.
1.1.1 Operating keys
Changeover key
(press using a pointed object such as a pen)
Switch from the info level to the parameter and configuration level and back
Reset key
(press using a pointed object such as a pen)
Press to reset accessible parameters to their default settings; the controller
must be in the configuration level
Arrow keys
– To scroll within levels
– To change values
Enter key
– To access levels
– Access parameters and functions to edit them
– Confirm settings
– Display set points in the info level
6EB 5474 EN
Operation

1.1.2 Operating switches
Mode selector switch
Automatic mode with switchover between
day mode and night mode
Automatic mode with switchover between
day mode and stand-by mode
Day mode (rated operation)
Night mode (reduced operation)
Manual/maintenance mode
Stand-by mode
Selector switch
Boiler 1 and 2 in operation;
automatic lag/lead sequence change
Boiler 1 in operation,
Boiler 2 switched off
Boiler 2 in operation,
Boiler 1 switched off
Boiler 1 and 2 switched off
Boiler 1 and 2 in operation;
Boiler 2 as lead boiler
Boiler 1 and 2 in operation;
Boiler 1 as lead boiler
EB 5474 EN 7
Operation
121122O 12

Correction switch for the flow temperature
Set point set-back by 2.5 °C per notch
No change in set point
Set point raised by 2.5 °C per notch
1.2 Operating modes
Day mode (rated operation)
Regardless of the programmed times-of-use and summer mode, the set points relevant for rated
operation are used by the controller.
Night mode (reduced operation)
Regardless of the programmed times-of-use and summer mode, the set points relevant for re-
duced operation are used by the controller.
Stand-by mode
The controller is switched off. The boilers only work when there is a demand for DHW or a de-
mand for an external set point. The protective functions remain active.
Automatic mode
During the programmed times-of-use, the controller works in rated operation. Outside these
times-of-use, the controller is in reduced operation or stand-by mode, depending on the set-
tings. The controller switches automatically between both operating modes.
Maintenance mode
Pumps are controlled manually (–> section 3).
Control is not possible. Use the maintenance mode just for maintenance purposes and for emis-
sion measurements.
The default setting of the circulation pumps is set for constant operation.
8EB 5474 EN
Operation
0
+

1.3 Display
During operation, the display indicates the current time as well as information about the opera-
tion of the controller. The times-of-use are represented by black squares below the row of num-
bers at the top of the display. Icons indicate the operating status of the controller.
The controller status can be displayed in the operating level (–> section 1.4).
EB 5474 EN 9
Operation
1
2
1
2
1
2
12
1
2
3
4
5
6
7
8
9
10 11 12 13 14 15
012345678910 1211 131415161718192021222324
Fig. 1 · Icons
1 Automatic operation
2 Rated operation
3 Vacation mode
4 Reduced operation
5 Public holiday mode
6 Summer mode
7 Frost protection
8 Manual/maintenance
mode
9 Malfunction
10 Boiler and boiler stages
11 Valve in control circuit 1
Open: Left arrow
Closed: Right arrow
12 Boiler pump 1 ON
13 Valve in control circuit 2
Open: Left arrow
Closed: Right arrow
14 Boiler pump 2 ON
15 DHW heating

1.4 Displaying data
Controller time, measured values, set points and limits, times-of-use, public holidays and vaca-
tion periods can be retrieved and displayed in th
eInF1
to
InF9
info levels (-> Fig. 10 on page
131). The various levels are listed in section 13.3.
4InF1: Boiler 1
4InF2: System Anl 1 to 3, Co5 -> Fb13 = ON: Separate heating circuit
System Anl 4 to 7: Boiler 2
4InF3: System Anl 1 to 3, Co5 -> Fb13 = ON: Direct heating circuit
4InF4: DHW heating
4InF5: General information, e.g. times-of-use
4InF8: Error initialization
4InF9: Modbus and meter bus communication
Proceed as follows:
Select info level.
Open info level.
Scroll to read the various datapoints of the selected info level that appear one after
the other.
Compare the set point/limit with the actual value.
Press both arrows keys simultaneously:
Return to the display with time.
10 EB 5474 EN
Operation

1.5 Setting the controller time
The current time and date need to be set immediately after start-up and after a power failure
lasting longer than 24 hours. This is indicated by the time blinking on the display.
The time is set in the
PA5
parameter level.
Proceed as follows:
Switch to the configuration and parameter level.
Display:
PA1
Select PA5 parameter level.
Open PA5 parameter level.
Display: Time
Activate editing mode for the controller time.
blinks.
Change time.
Confirm time.
Display: Date (Day-Month)
Activate editing mode for the date.
blinks.
Change date.
EB 5474 EN 11
Operation
1
242322212019181716151413121110
9876543210
242322212019181716151413121110
9876543210
242322212019181716151413121110
9876543210
242322212019181716151413121110
9876543210

Confirm date.
Display: Year
Activate editing mode for the controller time.
blinks.
Change year.
Confirm year.
Exit PA5 parameter level.
Return to the operating level.
Note!
The controller automatically returns to the operating level if the keys are left unpressed for two
minutes.
12 EB 5474 EN
Operation
242322212019181716151413121110
9876543210

1.6 Setting the times-of-use
Two times-of-use can be set for each day of the week. If only one time-of-use is required, the
start and stop times of the second time-of-use must be programmed to identical times.
Parameters WE Parameter level / Range of values
Period/day 1–7 PA5 / 1–7, 1 to 7
Start first time-of-use 7:00 PA5 / 00:00 to 24:00h; in steps of 30 minutes
Stop first time-of-use 12:00 PA5 / 00:00 to 24:00h; in steps of 30 minutes
Start second time-of-use 12:00 PA5 / 00:00 to 24:00h; in steps of 30 minutes
Stop second time-of-use 22:00 PA5 / 00:00 to 24:00h; in steps of 30 minutes
Proceed as follows:
Switch to the configuration and parameter level.
Display:
PA1
Select PA5 parameter level.
Open PA5 parameter level.
Display: Controller time
Select datapoint for times-of-use.
Display:
Activate editing mode for times-of-use.
Display: 1–7
Select period/day for which the times-of-use are to be
valid:
1–7 = Monday to Sunday,
1 = Monday, 2 = Tuesday, …, 7 = Sunday
EB 5474 EN 13
Operation
242322212019181716151413121110
9876543210
242322212019181716151413121110
9876543210
1
242322212019181716151413121110
9876543210

Activate editing mode for period/day.
Display: START; blinks.
Edit start time (steps of 30 minutes).
Confirm start time.
Display:
STOP
Edit stop time (steps of 30 minutes).
Confirm stop time.
Display:
START
The second time-of-use is set like the first time-of-use.
To set the times-of-use for each day, repeat the instructions in the fields highlighted in gray.
Select
End
on the display.
Exit the datapoint for times-of-use.
Exit the parameter level.
Return to the operating level.
Note!
Do not use the 1–7 menu to check the programmed times-of-use. On opening this menu, the ti-
mes-of-use are reset to their default settings.
Note!
The controller automatically returns to the operating level if the keys are left unpressed for two
minutes.
14 EB 5474 EN
Operation
242322212019181716151413121110
9876543210
STOP
242322212019181716151413121110
9876543210
START

1.6.1 Entering vacation periods
When the switch position Automatic operation with switchover between day mode and night
mode is selected, night set points (reduced set points) are used by the controller. When the
switch position Automatic operation with switchover between day mode and stand-by mode
is selected, the system is switched off. The frost protection function remains active.
A maximum of 10 vacation periods may be entered.
Parameter WE Parameter level / Range of value
Vacation periods – PA5 / 01.01 to 31.12
Proceed as follows: Switch to the parameter and configuration level.
Display:
PA1
Select PA5 parameter level.
Open PA5 parameter level. Display: Controller time
Select datapoint for vacation period. Display:
Open data point for vacation period. Display:
START
If applicable, select
– – – –
.
Activate editing mode for vacation periods.
blinks.
Set start date of vacation period.
Confirm start date of the vacation period.
Display:
STOP
Set end of vacation period.
Confirm end of the vacation period.
To enter additional vacations, re-select
––––
(between 31.12 and 01.01) and repeat the steps
in the fields highlighted in gray.
Exit the parameter level.
Return to the operating level.
Note!
In systems Anl 1 to 3 with integrated DHW heating (Co5 -> Fb13 = ON), the vacations entered
also apply to the DHW heating with the setting Co4 -> Fb10 = ON.
EB 5474 EN 15
Operation
242322212019181716151413121110
9876543210

Vacation periods that are not assigned to a specific date should be deleted by the end of the
year so that they are not carried on into the following year.
Deleting vacation periods:
Select the vacation period you wish to delete in the datapoint for vacation periods.
Confirm selection.
Select
– – – –
.
Delete vacation period.
Note!
The controller automatically returns to the operating level if the keys are left unpressed for two
minutes.
1.6.2 Entering public holidays
The times-of-use programmed for Sunday apply on public holidays. A maximum of 20 public
holidays can be entered.
Parameter WE Parameter level / Range of value
Public holidays – PA5 / 01.01 to 31.12
Proceed as follows: Switch to the parameter and configuration level.
Display:
PA1
Select PA5 parameter level.
Open PA5 parameter level. Display: Controller time
Select datapoint for public holidays.
Display:
Open datapoint for public holidays.
Display:
START
If applicable, select
– – – –
.
Activate editing mode for public holiday.
blinks.
Edit public holiday.
Confirm public holiday.
16 EB 5474 EN
Operation
012345678910 1211 131415161718192021222324

To enter additional public holidays, re-select
––––
(between 31.12 and 01.01) and repeat the
steps in the fields highlighted in gray.
Exit the parameter level.
Return to the operating level.
Note!
In systems Anl 1 to 3 with integrated DHW heating (Co5 -> Fb13 = ON), the public holidays en-
tered also apply to the DHW heating with the setting Co4 -> Fb10 = ON.
Public holidays that are not assigned to a specific date should be deleted by the end of the year
so that they are not carried on into the following year.
Deleting a public holiday:
Select the holiday you wish to delete in the datapoint for public holidays.
Confirm selection.
Select
– – – –
.
Delete the public holiday.
Note!
The controller automatically returns to the operating level if the keys are left unpressed for two
minutes.
EB 5474 EN 17
Operation

2 Start-up
2.1 Setting the system code number and the boiler rating
7 different hydraulic schematics are available. Each system configuration is represented by a
system code number (Anl). The different schematics are dealt with in section 4. Available con-
troller functions are described in sections 5 to 8.
Changing the system code number resets previously adjusted function blocks to their default set-
tings (WE). Function block parameters and settings in the parameter level remain unchanged.
The system code number is set in the parameter and configuration level.
Proceed as follows:
Switch to the parameter and configuration level.
Display shows:
PA1
Select
Anl
level.
Open
Anl
level.
Display:
Anl 1
Select system code number (Anl).
System Anl 1
Anl 1
Single boiler for one-stage burner
System Anl 2
Anl 2
Single boiler for two-stage burner
System Anl 3
Anl 3
Single boiler for modulating burner
System Anl 4 12
Anl 4
Double boiler for one-stage condensing boiler and
two-stage low-temperature boiler
System Anl 5 12
Anl 5
Double boiler for 2 two-stage burners
System Anl 6 12
Anl 6
Double boiler for modulating and two-stage burner
System Anl 7 12
Anl 7
Double boiler for two modulating burners
Confirm system code number (Anl).
The burner and stage icons for burner 1 blink.
The boiler rating is shown.
18 EB 5474 EN
Start-up
1
2
1
2
1
1
1
2
1
2
1
2
1
2
1

Set the required rating.
Set first the capacity of the basic stage and then the total capacity of the burner of
two-stage and modulating burners.
Confirm the rating.
Set the capacity of the second burner in systems Anl 4 to 7.
Select
End
on the display.
Exit the
Anl
level.
Display:
Co1
2.2 Activating and deactivating functions
A function is activated or deactivated in the associated function block. The numbers 0 to 24 in
the top row of the display represent the respective function block numbers. When a configura-
tion level is opened, the activated function blocks are indicated by a black square on the
right-hand side below the function block number. The function blocks are described in sec-
tion 13.2.
The functions are arranged in topic groups:
4Co1: Boiler 1
4Co2: Systems Anl 1 to 3, Co5 -> Fb13 = ON: separate heating circuit
Systems Anl 4 to 7: Boiler 2
4Co3: Systems Anl 1 to 3, Co5 -> Fb13 = ON: direct heating circuit
4Co4: DHW heating
4Co5: General functions
4Co6: Sensor initialization
4Co8: Error initialization
4Co9: Modbus and meter bus communication
Proceed as follows:
Switch to the parameter and configuration level.
Display shows:
PA1
Switch to the configuration level (-> Fig. 10, page 131).
Open the configuration level.
EB 5474 EN 19
Start-up

Select function block.
Activate editing mode for function block.
The function block number starts to blink.
If
0 0 0 0
appears on the display, the key number needs to be entered first (refer to
section 2.4).
Activate function block (Fb = ON).
An activated function block is indicated by a black square below (right) the function
block number in the top row of the controller display.
or:
Deactivate function block (Fb = OFF).
Confirm setting.
If the function block is not closed, further function block parameters can be adjusted.
Proceed as follows:
Make the desired changes and confirm.
If applicable, the next function block parameter is displayed.
Confirm all parameters to exit the opened function block.
To adjust additional function blocks within the configuration level, repeat the steps in the fields
highlighted in gray.
Exit the configuration level.
Return to the operating level.
Note!
The controller automatically returns to the operating level if the keys are left unpressed for two
minutes.
20 EB 5474 EN
Start-up
Table of contents
Other Samson Controllers manuals

Samson
Samson 3372 User manual

Samson
Samson 4765 Service manual

Samson
Samson Type 4708 Service manual

Samson
Samson 42-24 Service manual

Samson
Samson 4708-45 Service manual

Samson
Samson 44-6 B Service manual

Samson
Samson 3372 Service manual

Samson
Samson 43-6 Service manual

Samson
Samson 3374 Service manual

Samson
Samson 42-20 Service manual

Samson
Samson 2357-3 Service manual

Samson
Samson TROVIS 5724-3 Service manual

Samson
Samson 2357-31 Service manual

Samson
Samson 42-24 Service manual

Samson
Samson TROVIS 5433 Service manual

Samson
Samson TROVIS 5724-8 Service manual

Samson
Samson 3730-2 Service manual

Samson
Samson 3271 Service manual

Samson
Samson 3271 Service manual

Samson
Samson TROVIS 5433 User manual