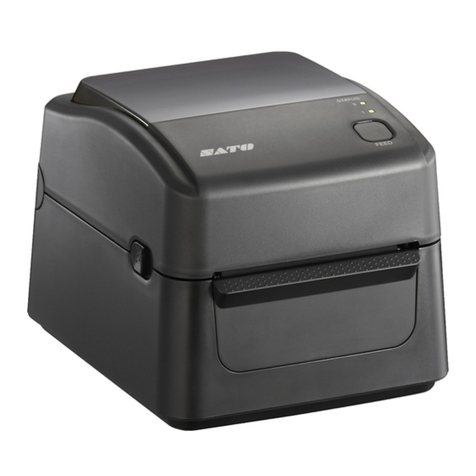
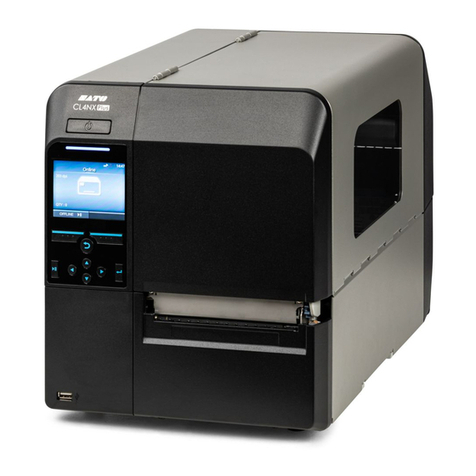
SATO ARGOX OS-214EX User manual

OS-214EX
User Manual
i
Revision History
Changes to the user manual are listed below:
Version
Date
(Y/M/D)
Description
Page
#
1.0
2018/10/23
Initial release
1.1
2019/12/11
Added a paragraph of warning messages to the
Caution section
iii
1.2
2019/12/25
Added a back view of the model with USB
ONLY
4

OS-214EX
User Manual
ii
FCC ID
In a domestic environment this product may cause radio interference in
which case the user may be required to take adequate measures.
FCC Warning
This equipment has been tested and found to comply with the limits for a
Class A digital device, pursuant to Part 15 of the FCC Rules. These limits are
designed to provide reasonable protection against harmful interference
when the equipment is operated in a commercial environment. This
equipment generates, uses, and can radiate radio frequency energy, and if
not installed and used in accordance with the instructions in this manual, it
may cause harmful interference to radio communications. Operation of this
equipment in a residential area is likely to cause harmful interference in
which case the user will be required to correct the interference at his own
expense.
FCC Statement for Optional RF module
This device complies with RF radiation exposure limits set forth for an
uncontrolled environment.
The antenna used for this transmitter must be installed to provide a
separation distance of at least 20 cm from all people and must not be
collocated or operating in conjunction with any other antenna or
transmitter.
WARNING
Changes or modifications not expressly approved by the party responsible
for compliance could void the user's authority to operate the equipment.
(for USA only)

OS-214EX
User Manual
iii
Liability Disclaimer
ARGOX Corporation takes steps to assure that the company’s published
engineering specifications and manuals are correct; however, errors do
occur. ARGOX reserves the right to correct any such errors and disclaims any
resulting liability. In no event shall ARGOX or anyone else involved in the
creation, production, or delivery of the accompanying product (including
hardware and software) be liable for any damages whatsoever (including,
without limitation, damages for loss of business profits, business
interruption, loss of business information, or other pecuniary loss) arising
out of the use of or the results of use of or inability to use such product,
even if ARGOX has been advised of the possibility of such damages.
Caution
Any changes or modifications not expressly approved by the party
responsible for compliance could void the user's authority to operate the
equipment.
To ensure this printer can fulfill user's demand, when using narrow media
for continuous printing, the printer will optimize appropriately to support
continuous, high quality print-out. If you have any questions, please consult
Argox technical service personnel.

OS-214EX
User Manual
iv
Contents
1 Introduction ................................................................................................................1
1.1 Features............................................................................................................1
1.2 Unpacking.........................................................................................................2
1.3 Understand your printer ..................................................................................3
1.3.1 Front view .............................................................................................3
1.3.2 Back view ..............................................................................................3
1.3.3 Interior view I........................................................................................4
1.3.4 Interior view II.......................................................................................5
1.4 Controls and Indicators ....................................................................................6
2 Get started ..................................................................................................................7
2.1 Loading ribbon .................................................................................................7
2.2 Load media.....................................................................................................11
2.2.1 Prepare media.....................................................................................11
2.2.2 Loading media.....................................................................................11
2.3 Attach the power cord ...................................................................................15
2.4 Turn on/off your printer.................................................................................16
2.4.1 Turn on your printer............................................................................16
2.4.2 Turn off your printer ...........................................................................17
2.4.3 Test media feed ...................................................................................18
2.5 Media types....................................................................................................19
2.6 Media sensing ................................................................................................20
2.6.1 Reflective sensor.................................................................................20
3 Printer operation.......................................................................................................22
3.1Printing Media Calibration & Configuration...........................................................22
3.2 Restore your printer.......................................................................................29
3.3 Communications ............................................................................................29
3.3.1 Interfaces and Requirements..............................................................29
3.4 Driver installation...........................................................................................31
3.4.1 Installing a Plug and Play printer driver (for USB only).......................31
3.4.2 Installing a Printer Driver (for other interfaces except USB)...............36
4 Maintenance .............................................................................................................43
4.1 Cleaning..........................................................................................................43
4.1.1 Printhead.............................................................................................43
4.1.2 Media housing.....................................................................................44
4.1.3 Sensor..................................................................................................45
4.1.4 Platen roller.........................................................................................45
OS-214EX
User Manual
v
5 Troubleshooting ........................................................................................................46
5.1 LED Diagnosis .................................................................................................46
5.2 Printer issues..................................................................................................49
5.3 Media issues...................................................................................................49
5.4 Ribbon Problems............................................................................................51
5.5 Other issues....................................................................................................52
6 Specifications ............................................................................................................53
6.1 Printer ............................................................................................................53
6.2 Media .............................................................................................................54
6.3 Fonts, Barcodes, and Graphics Specification .................................................55
6.4 Electrical and operating environment............................................................58
6.5 Physical dimension.........................................................................................58
6.6 Interfaces........................................................................................................59
6.6.1 USB......................................................................................................59
6.6.2 Ethernet ..............................................................................................60
6.6.3 RS-232C ...............................................................................................61

OS-214EX
User Manual
1
1 Introduction
Thank you for purchasing the ARGOX OS-214EX printer. This manual
provides information about how to set up and operate your printer, load the
media and solve common problems.
1.1 Features
Various Connectivity Options USB Device, USB Host, RS-232 and
Ethernet
Easy Operation One-button design for easy control
Fast Print Speed Max 6 inches/sec for the OS-214EX model
Wireless LAN Connection Build a Wireless LAN printing environment
with Ethernet
External Memory The extra USB port allows you to use a USB flash
drive for storage

OS-214EX
User Manual
2
1.2 Unpacking
Make sure all of the following items are included in your package.
ARGOX OS-214EX
Label Printer
Quick Installation Guide
DVD
Power Supply
AC Power Cord
USB Cable
Media Hanger /
Media Shields
Core for Ribbon Core
(0.5 inch)
When you receive the printer, open the package immediately and inspect for
shipping damage. If you discover any damage, contact the shipping company
and file a claim. ARGOX is not responsible for any damage incurred during
shipping. Save all package materials for the shipping company to inspect.
Note If any item is missing, please contact your local dealer.

OS-214EX
User Manual
3
1.3 Understand your printer
1.3.1 Front view
1.3.2 Back view
For Model with USB (Client), Ethernet, and RS-232
Top Cover
Power LED Indicator
Ready LED Indicator
Feed Button
Power Switch
Power Jack
LAN
USB (Client)
USB (Host)
RS-232

OS-214EX
User Manual
4
For Model with USB (Client) only
Caution To avoid injury, be careful not to trap your fingers in the Paper
Slot while opening or closing the Top Cover.
1.3.3 Interior view I
Media Hanger
Ribbon Pick-up Holder
Release Lever
USB (Client)

OS-214EX
User Manual
5
1.3.4 Interior view II
Warning The thermal print head becomes very hot during printing. Do
not touch the print head or touch around it directly after printing. By
doing so you may get burnt.
Thermal Print Head
Ribbon Supply Holder
Platen Roller
Power Switch

OS-214EX
User Manual
6
1.4 Controls and Indicators
The following table explains control and indicator functions.
Control /
Indicator
Function
Power Switch
On: turns on normal operation
Off: turns off power
Note: Turn power off before connecting or
disconnecting cables
Power Indicator
Green light shows the power-on
Light off shows the power-off
Blinking light indicates error has occurred
Ready Indicator
Green shows printer is ready to operate
Blinking light indicates printer is paused
or data transferring
Seagull driver status monitor
Feed Button
Press to advance labels to the first
printing position
Press to take the printer out of "pause"
Press and hold while turning on the
power to print out a configuration profile

OS-214EX
User Manual
7
2 Get started
2.1 Loading ribbon
Note: This section does not apply to direct thermal printing.
1. Lift the top cover to expose the media compartment.
2. Unlatch the print head module by pushing the two white release levers on the
sides toward the rear.
Media Compartment
Print Head Module
Release Lever
Release Lever

OS-214EX
User Manual
8
3. Turn over the print head module to expose the ribbon supply holder.
4. Unwrap the ribbon roll pack and separate the ribbon roll and the bare core.
5. Attach the edge of the ribbon on the bare core and wind it a little bit onto the
core.
6. Insert the ribbon roll into the supply holder. (First snap in the left side and
then the right side.)
Bare Core
Ribbon Supply Holder
Ribbon Roll
Ribbon Supply Holder

OS-214EX
User Manual
9
7. Turn back the print head module and then insert the bare core into the
pick-up holder. (First snap in the left side, and then the right side.)
8. Turn the wheel of the print head module to ensure the ribbon is tightly
wound.
Wheel
Ribbon Pick-up Holder
Bare Core

OS-214EX
User Manual
10
9. Press down the print head module firmly until you hear a snap. In order to
confirm the complete and rigid fixing, please visually check whether the
black tenon is fully inserted into the white print head module switch, that is,
the white print head module switch should be fixed onto the black tenon.
Print Head Module

OS-214EX
User Manual
11
2.2 Load media
There are various types and sizes for the media roll. Load the applicable
media to satisfy your need.
2.2.1 Prepare media
The inside wound and outside wound media roll can be loaded into the
printer the same way. In case the media roll is dirty during shipping,
handling or storage, remove the outside length of the media. It helps avoid
dragging adhesive and dirty media between the printhead and platen roller.
Inside Wound
Outside Wound
2.2.2 Loading media
1. Lift the top cover to expose the media compartment.

OS-214EX
User Manual
12
2. Remove the media hanger.
3. Insert the hanger into the hollow portion of cylinder of the media roll from right
to left.
4. Click the media hanger back into the media compartment.
Media Roll
Media Hanger
Media Compartment
Media Compartment
Media Hanger

OS-214EX
User Manual
13
5. Align the media roll to the left end.
6. Move the shield from right to left until it leans against the media.
7. Unlatch the print head module.
8. Hold the print head module upright with one hand to allow the media to pass
under it. Lead the media through the media guides with the other hand.
9. Lead the media over the platen roller.
Shield
Media Roll
Print Head Module
Media Guide

OS-214EX
User Manual
14
1. Press down the print head module firmly until you hear a snap. In order
to confirm the complete and rigid fixing, please visually check whether
the black tenon is fully inserted into the white print head module
switch, that is, the white print head module switch should be fixed
onto the black tenon.
10. Close the top cover and turn on the printer or press the "FEED" button if the
printer is already on.
Feed Button
Other manuals for ARGOX OS-214EX
1
This manual suits for next models
1
Table of contents
Other SATO Printer manuals

SATO
SATO S8408 Standard User manual

SATO
SATO CL408e User manual

SATO
SATO CL6XXe User manual

SATO
SATO CX400 User manual

SATO
SATO CX200 Operating instructions

SATO
SATO M10e Series User manual

SATO
SATO M 8400S User manual

SATO
SATO LC400e Series Owner's manual

SATO
SATO Argox D4 Series User manual

SATO
SATO PW208NX User manual