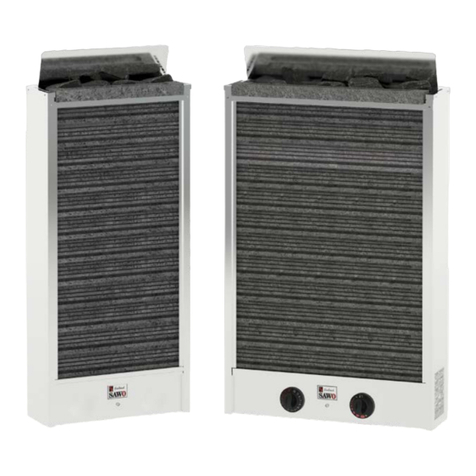
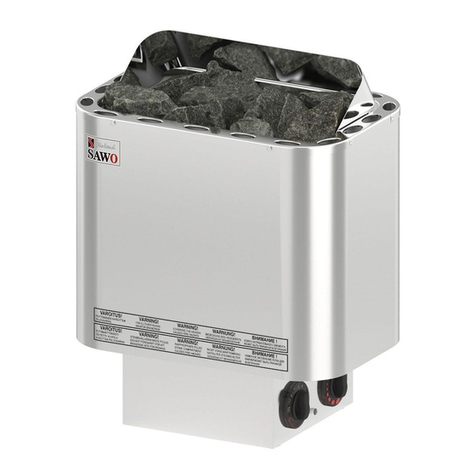
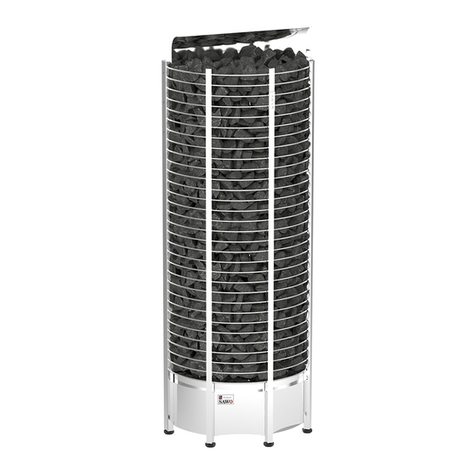
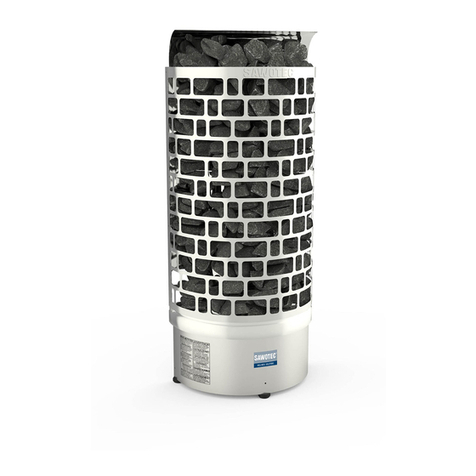
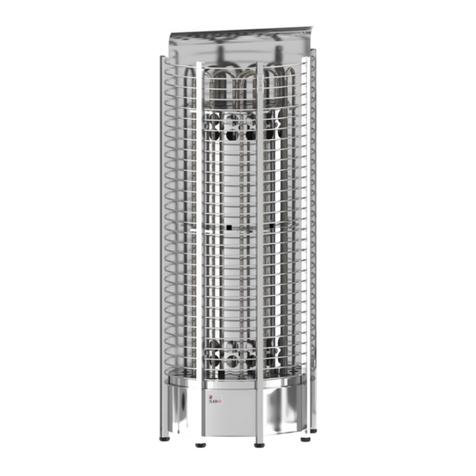
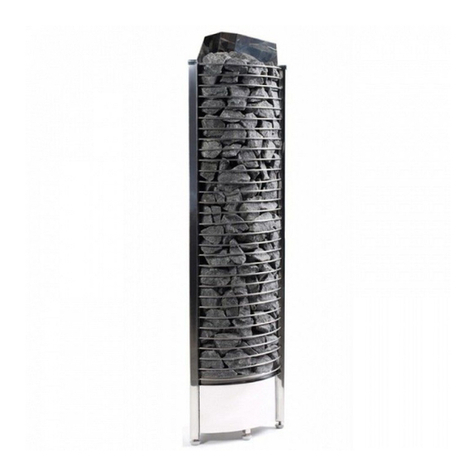
Sawo TH3-35Ni2-WL User manual

TOWER HEATER
WALL
Congratulations on your purchase of SAWO sauna heater!
Please read the manual carefully before using the heater.
Поздравляем с приобретением электрической печи SAWO для сауны!
Пожалуйста, внимательно ознакомьтесь с руководством перед ее
использованием.
Ni2
version
Saunova 2.0
ЭЛЕКТРИЧЕСКАЯ ПЕЧЬ ДЛЯ САУНЫ | ELECTRIC SAUNA HEATER
Не предназначена для использования в США, Канаде и Мексике.
Not for use in the USA, Canada and Mexico.
TH2-30Ni2-WL TH3-35Ni2-WL TH3-45Ni2-WL TH3-60Ni2-WL TH4-60Ni2-WL
TH5-80Ni2-WL TH5-90Ni2-WL TH6-80Ni2-WL TH6-90Ni2-WL
СОВМЕСТИМОСТЬ В РАБОТЕ С SAUNOVA 2.0
User interface to be purchased separately,
interface is not included in the package.
Пульт управления приобретается отдельно.
For control operation. Please refer to Saunova 2.0 control
manual.
Порядок управления описан в руководстве к Saunova 2.0.
COMPATIBLE WITH SAUNOVA 2.0 USER INTERFACE
РУКОВОДСТВО ПО
ЭКСПЛУАТАЦИИ
MANUAL
РУССКИЙ | ENGLISH

СОДЕРЖАНИЕ
Техника безопасности...................................................................4
Для пользователей: ...............................................................4
Для технических специалистов: .............................................6
Установка печи.............................................................................8
Камни для печи .......................................................................... 10
Загрузка камней в печь............................................................... 10
Установка пульта управления..................................................... 12
Датчик........................................................................................ 13
Датчик двери.............................................................................. 14
Вентилятор (доп. функция)......................................................... 14
Электрическая схема .................................................................. 16
Максимальная продолжительность сеанса .................................. 18
Главный переключатель печи..................................................... 18
DIP-переключатель..................................................................... 20
Функции DIP-переключателя ...................................................... 20
Продолжительность сеанса......................................................... 20
Вентиляция................................................................................. 22
Изоляция.................................................................................... 22
Прогрев сауны............................................................................ 24
Требования к качеству воды, подливаемой в печь...................... 24
Техническое обслуживание сауны .............................................. 26
Диагностика ............................................................................... 28
Технические характеристики ...................................................... 30
Запчасти для печи Tower: ........................................................... 31
Техническое обслуживание печи ................................................ 32
ПРОЧТИТЕ РУКОВОДСТВО
И ОЗНАКОМЬТЕСЬ С
ВАЖНЫМИ УКАЗАНИЯМИ
READ THE MANUAL FOR
ADDITIONAL IMPORTANT
INSTRUCTIONS
НЕ НАКРЫВАЙТЕ ПЕЧЬ –
ЭТО МОЖЕТ ПРИВЕСТИ К
ВОЗГОРАНИЮ
COVERING THE HEATER
CAUSES FIRE HAZARD
2РУССКИЙ

TABLE OF CONTENTS
NOTE!
Warranty is not covering damages
which are caused by installing, using or
maintenance of contrary guidelines in
this manual. Contact for your retailer in
warranty questions.
Safety instructions..........................................................................5
For user:.................................................................................5
For technicians:.......................................................................7
Heater installation ..........................................................................9
Heater stones .............................................................................. 11
Loading stones into the heater ..................................................... 11
Installation of the Control Panel..................................................... 12
Sensor......................................................................................... 13
Door Sensor................................................................................. 15
Fan Feature (optional) .................................................................. 15
Electrical diagram......................................................................... 16
Maximum Session Time ................................................................ 19
The Heater Main Switch................................................................ 19
DIP Switch................................................................................... 21
DIP Switch Functions.................................................................... 21
Session Time ............................................................................... 21
Air ventilation............................................................................... 23
Insulation .................................................................................... 23
Heating of the sauna room............................................................ 25
Quality requirements for water which is thrown to the heater .......... 25
Sauna maintenance ...................................................................... 27
Diagnostic table ........................................................................... 29
Technical data.............................................................................. 30
Tower Heater Spareparts: ............................................................. 31
Heater maintenance ..................................................................... 32
ВНИМАНИЕ!
На ущерб, причиненный
установкой, использованием или
техническим обслуживанием печи
не в соответствии с указаниями
настоящего руководства, гарантия
не распространяется. По вопросам
гарантииобращайтеськпродавцу.
ENGLISH 3

ТЕХНИКА БЕЗОПАСНОСТИ
Перед использованием сауны и при установке печи ознакомьтесь с данными
мерами безопасности.
Для пользователей:
• Данное оборудование не предназначено для использования людьми
(включая детей) с недостаточным опытом или с ограниченными
физическими или умственными способностями, кроме как под строгим
надзором со стороны более опытных пользователей.
• Чистка и обслуживание оборудования не должны выполняться детьми без
контроля взрослых.
• Детям ни при каких обстоятельствах не разрешается играть с
оборудованием.
• Не используйте печь в качестве гриля.
• Не кладите на электрическую печь деревянные предметы.
• Не накрывайте печь. Это может привести к пожару.
• Не используйте печь в качестве сушилки для белья. Это может привести к
пожару.
• Никогда не садитесь на печь. Она нагревается до очень высоких
температур, и вы можете получить сильный ожог.
• Не используйте морскую или хлорированную воду (например, из
плавательного бассейна или джакузи). Из-за этого печь может выйти из
строя.
• После установки новой печи включите ее на 30 минут. На это время
покиньте сауну. см. стр. 32.
• Перед включением режима с предварительно установленным таймером или
режима дистанционного управления убедитесь, что на печи отсутствуют
воспламеняющиеся предметы.
4РУССКИЙ

SAFETY INSTRUCTIONS
Please take note of these safety precautions before using the sauna or when installing
the heater.
For user:
• This product is not designed to be used by persons (including children)
with limited physical or mental abilities and limited experience and
knowledge except under close supervision by a responsible person
with knowledge and experience or having been advised by such person.
• Cleaning and user maintenance shall not be made by children without
supervision.
• Under no circumstances should children be allowed to play with the device.
• Do not use the heater as a grill.
• Do not put wood of any kind on the electric heater.
• Do not cover the heater. It may cause a re.
• Do not use the heater as clothes dryer. It may cause re.
• Never sit on the heater. It is really hot and can cause serious burns.
• Do not use chlorinated water (e.g. From the swimming pool or
jacuzzi) or seawater. It can destroy the heater.
• When installing a new heater, switch the heater on for 30mins. Do not stay
inside the sauna room while performing the operation. See page 33.
• Make sure that no ammable objects have been placed on the heater before
activating the preset time function or the stand-by mode for the remote
operation.
ENGLISH 5

Для технических специалистов:
• Работы по электромонтажу и ремонту должны выполняться
квалифицированным электриком.
• При установке печи соблюдайте рекомендации по минимальным
безопасным расстояниям (см. стр. 9).
• Электронный датчик и электронная нагревательная система должны
располагаться таким образом, чтобы входящие потоки воздуха их не
задевали. Панель управления может быть установлена как снаружи так и
внутри сауны.
• Если печь используется для общественных саун или таких, которые могут
включаться с помощью выносной системы дистанционного управления,
дверь сауны должна быть оборудована механизмом блокировки, чтобы
при включении режима готовности к дистанционному управлению он
отключался при открывании двери.
• Следуйте рекомендациям относительно объемов сауны (см. стр. 38.
• Следуйте рекомендациям по вентиляции сауны (см. стр. 30).
6РУССКИЙ

For technicians:
• Wiring and repairs must be done by a certied electrician.
• Follow the Minimum Safety Distances when mounting the heater (See page 9).
• The electronic sensor and electronic heating system should be mounted in a way
so that incoming air will not interfere with it. The control unit can be mounted
outside or inside the sauna cabin.
• If this sauna heater is used for public saunas or saunas that may be switched on
by a separate remote-control system, the door of the sauna room must be tted
with an interlock such that the stand-by mode setting for remote operation is
disabled if the sauna door is opened when the stand-by mode setting for remote
operation is set.
• Observe the specications on volumes of the sauna cabin (See page 38 ).
• Observe the specications on ventilation of the sauna cabin (See page 31).
ENGLISH 7

1400mm
200mm
1900
100
20
max. 750
100
УСТАНОВКА ПЕЧИ
Печь можно установить в любом месте сауны, однако в целях безопасности и удобства
необходимо соблюдать указанные ниже минимально допустимые расстояния (см.
стр. 9). Соблюдайте требования, указанные в таблице технических характеристик
(см. стр. 32) для объема вашей сауны. Не устанавливайте печь в нише пола или
стены. Если нет особых указаний по установке второй печи, установка более одной
печи не допускается. Во многих странах действует закон, согласно которому печи
должны быть прикручены к полу.
Печка нагревается до очень высоких температур. Чтобы избежать случайного
контакта с печью, рекомендуется установить ограждение.
Необходимо использовать кабель типа HO7RN-F или его аналог. В целях
обеспечения безопасности и надежности установка печи должна выполняться
квалифицированным электриком. Неправильное подключение может вызвать удар
током или пожар. См. электрическую схему (см. стр. 16).
ВНИМАНИЕ
Печь нужно закреплять
у достаточно прочной
стены, способной ее
выдержать.
WARNING
Heater must be xed to the
wall that is strong enough
to support the heater.
*К печи нужно
прикрепить
теплоотражатель
* Refelector must be
attached to the heater
Опорные скобы
Bracket support
Рис. 1a
Fig. 1a
Рис. 1b
Fig. 1b
Подставка
Stand
Для предотвращения
случайного
перемещения печи ее
следует привинтить
прямо к полу.
Must be screwed
directly on the oor
to prevent the heater
from being accidentally
moved.
Поверните для
регулировки
высоты.
Twist to adjust
height.
Прикрепите к
стене.
Afx to the wall.
8РУССКИЙ | ENGLISH

1900
100
20
max. 750
100
HEATER IN ISTALLATION
The heater can be placed wherever in the sauna, but for safety and convenience, follow
the minimum safety distances as provided below (See page 9). Follow the cubic
volumes given in the Technical Data (See page 38). Do not install the heater to the
oor or wall niche. Do not install more than one heater in a sauna room unless you follow
the special instructions for twin-heater installations. In most countries, there is a law that
requires heaters to be screwed to the oor.
The heater gets very hot. To avoid the risk of accidental contact with the heater, it is
recommended that a heater guard be provided.
The cable used for sauna wiring must be HO7RN-F type or its equivalent. A certied
electrician must do the installation of the heater to ensure safety and reliability. Improper
electrical connection can cause electric shock or re. Refer to the electrical diagram (See
page 16).
NOTE!
Remove the carton from the heating
elements before installing the heater
as it is only intended to protect them
during shipment.
Minimum safety distances (mm)
Минимальные безопасные расстояния (мм)
ВНИМАНИЕ!
Перед установкой печи вытащите
из нагревательных элементов
весь картон – он предназначен
для защиты исключительно при
транспортировке.
Kuva 2
Fig. 2
9
РУССКИЙ | ENGLISH

12
КАМНИ ДЛЯ ПЕЧИ
Загружаемые в печь камни должны сохранять достаточно тепла для эффективного испарения
попадающей на них воды и поддержания необходимой влажности в сауне. Замена камней
производится раз в год или после 500 часов эксплуатации (в зависимости от того, какое
условие наступает раньше). Мелкие осколки, отколовшиеся от камней, необходимо удалять
и заменять новыми, как указано в руководстве. При загрузке камней рекомендуется надеть
защитные перчатки для предотвращения порезов. Необходимое количество камней указано
в таблице технических характеристикна см. стр. 38 настоящего руководства.
ВНИМАНИЕ! Никогда не используйте печь без камней – это может привести
к пожару. Используйте только камни, рекомендованные SAWO. Использование
других камней может повредить нагревательные элементы и лишить вас гарантии
на печь. Не используйте керамические или другие искусственные камни!
ЗАГРУЗКА КАМНЕЙ В ПЕЧЬ
Рекомендуется промыть все камни перед загрузкой их в печь для удаления пыли и загрязнений,
которые могут вызвать неприятные запахи при первых использованиях печи. Важно загружать
камни таким образом, чтобы не блокировать свободную циркуляцию воздуха. Размещайте
камни в печи так, чтобы нагревательные элементы не были видны ни под каким углом. Не
загружайте крупные камни, которые не помещаются между нагревательными элементами. Не
загружайте в печь маленькие камни и осколки диаметром менее 35 мм, поскольку они могут
блокировать циркуляцию воздуха и привести к перегреву нагревательных элементов, а также
к их возможному выходу из строя. Размещайте камни в печи так, чтобы нагревательные
элементы не были видны ни под каким углом. Если нагревательные элементы будут
соприкасаться друг с другом, это значительно сократит их срок службы.
ВНИМАНИЕ! Поломка нагревательного элемента в связи с перегревом, вызванным
использованием камней, не предназначенных для печи, или в связи с неправильной загрузкой
камней, не является гарантийным случаем.
Перед загрузкой камней электрик должен проверить работу печи.
Проверку можно выполнить путем включения печи на короткое время без камней иубедившись,
что все нагревательные элементы нагреваются.
Правильное
расположение камней
Good stone arrangement
Вид сверху
Top view
Нагревательные
элементы
Heating element
Не кладите камни внутрь держателя
нагревательных элементов.
Do not put stones inside the heating
element holder.
Камни
Stone
Неправильное
расположение камней
Bad stone arrangement
Рис. 3
Fig. 3
10 РУССКИЙ

12
HEATER STONES
The main purpose of the stones in the heater unit is to store enough energy to efciently
vaporize the water thrown on top of the stones to maintain correct humidity in the sauna
room. The stones must be removed at least once a year or every 500 hours which ever
occurs rst. All stone crumbles must be removed from the heater unit and replaced with
new ones as described in the heater manual. When placing the stones, recommended to
use cut resistant gloves. The required amount of stones is listed in the manual provided
(See page 38, Technical Data).
NOTE! Never use the heater without stones as it may cause re. Use only manufacturer
recommended SaWo-stones. Using unsuitable stones may lead to heating element damage
and will void the warranty. Never use eramic stones or other articial stones of any type!
LOADING STONES INTO THE HEATER
It is recommended that all stones should be rinsed to remove any stains or dust that can
cause unpleasant odor during the rst few times of using the heater. It is important that
the stones are loaded carefully in a way that they do not block air circulation through the
heater. Load the stones to the heater so that the heating elements are not visible from
any angle. Larger stones that won’t t between the heating elements must not be forced
in place instead they must be completely removed. Small crumble or stone pieces smaller
than 35mm in diameter must not be loaded into the heater because they will block the
air circulation and will cause overheating and possible heating element damage. Load
the stones to the heater so that the heating elements are not visible from any angle. If
heating elements touch each others, it will signicantly reduce the life span of heating
element.
NOTE! Heating element damage due to overheating caused by wrong kind of stones or stones
which were wrongly loaded into the heater is not covered by the factory warranty.
Before the heater is lled with stones, electrician should test that the heater works.
Testing can be done by turning on the heater for a short time without any stones and
verifying that all heating elements are heating up.
С изолирующей вставкой:
• Быстрая нагревательная способность снижает
потребление энергии
• Продлевается срок службы нагревательных
элементов
• Лучше циркулирует воздух
• Повышается температура помещения
Без изолирующей вставки:
• Количество пара напрямую зависит от
количества камней
• меренная температура помещения
• Более мягкий пар
With stone spacer:
• Faster heating ability thus reduces
power consumption
• Extend life span of heating element
• Improves air circulation
• Hotter room temperature
Without stone spacer:
• More stones means more steam
• Milder room temperature
• Softer steam
Изолирующая вставка
stone spacer Рис. 4
Fig. 4
ВНИМАНИЕ!
Убедитесь в отсутствии
мелких камней,
способных попасть внутрь
изолирующей вставки,
иначе они заблокируют
циркуляцию воздуха.
NOTE!
Make sure that any size of
stone can’t get inside the
stone spacer as it will block
the air ow.
ENGLISH 11

УСТАНОВКА ПУЛЬТА УПРАВЛЕНИЯ(СМ. СХЕМУ)
3. Подключите панель управления к блоку
мощности кабелем RJ12.
4. Вставьте корпус в вырезанный участок.
5. Прикрутите панель управления к стене с
помощью прилагаемых винтов.
6. Защелкните лицевую крышку панели на
свое место.
1. Установите выносную панель управления
в выбранном вами месте. При установке
внутри сауны убедитесь, что выбранное
место соответствует минимальным и
максимальным значениям на схеме ниже.
2. Вырежьте фрагмент стены согласно
параметрам.
INSTALLATION OF THE CONTROL PANEL
(SEE ILLUSTRATION)
1. Mount the separate control panel in you
preferred location. Make sure that the
installation location follows the min and
max values in below image if the separate
control panel is installed inside the sauna
room.
2. Cut the wall section according to the
specications.
3. Connect the RJ12 cable provided from
the control panel to the Power Controller.
4. Insert the casing on the cut section.
5. Screw the Control panel to the wall with
screws provided.
6. Snap the top cover of the panel to its
place.
Блок мощности
Power Controller
См. электрическую схему
на стр. 16-25
Refer to Electrical Diagram
on pages 16-25
NOTE!
RJ cable should not be
installed inside the sauna
room above 800mm from
the oor level.
ВНИМАНИЕ!
Внутри сауны кабель
RJ не следует
прокладывать на
высоте более 800 MM
от уровня пола.
Рис. 5
Fig. 5
3.
SEPARATE CONTROL INTERFACE
Saunova 2.0
4.
5.
6.
Casing
Top cover
1.
2.
ВНУТРИ САУНЫ
81 mm
130 mm
37 mm
(Вырезка)
(Cut)
INSIDE THE SAUNA ROOM
OUTSIDE THE SAUNA ROOM
СНАРУЖИ САУНЫ
Кабель RJ внутри стены
Макс. 800 мм от пола
HEATER
FLOOR
ПОЛ
Мин. 600 мм
OK to install
in the surface
with moulding
Inside the wall RJ cable
Insulation
Do not installl
RJ cable
on this area
Max. 800mm from the floor
Min. 600mm ПЕЧЬ
USER INTERFACE
ПУЛЬТ УПРАВЛЕНИЯ
ПУЛЬТ УПРАВЛЕНИЯ
Корпус
Лицевая
12 РУССКИЙ | ENGLISH

360°
180°
Min. 1000mm
Min. 500mm
100mm
150mm
Min. 1000mm
Min. 1000mm
See Airvent
illustration
Рис. 6
Fig. 6
ДАТЧИК
SENSOR
Place the sensor over the heater. (See g. 6)
Do not place the sensors near the air ventilation. The closeness of the air vent cools
down the sensor. Thus, an incorrect temperature is displayed and the heater may over-
heat.
Поместите датчик над печью (см. Рис. 6).
Не размещайте датчики рядом с вентиляционными отверстиями:это охлаждает
их,из-за чего отображается неправильная температура, и печь может перегреться.
ВНИМАНИЕ!
Не размещайте датчики на расстоянии
менее 1000 мм от ненаправленного
вентиляционного отверстия или на
расстоянии менее 500 мм от вент. отверстия,
обращенного в противоположную от датчика
сторону.
NOTE!
Do not place the sensors too near to air ventila-
tion (not under 1000mm) or not under 500mm
from air ventilation, which is directed away from
sensors.
Датчик
Sensor
Датчик
Sensor
ВЕНТИЛЯЦИОННОЕ
ОТВЕРСТИЕ
AIR VENT
ПОТОЛОК
CEILING
Вид сверху
Top view Вид сбоку
Side view
СТЕНА
WALL
СТЕНА
WALL
ПОЛ
FLOOR
ПОЛОЖЕНИЕ ДАТЧИКА
SENSOR LOCATION
Датчик
температуры
Temperature Sensor
ВЕНТИЛЯЦИОННОЕ
ОТВЕРСТИЕ
AIR VENT
Установка вентиляционного
отверстия
Air vent installation
Ненаправленный
поток воздуха
Non-directed
airow
Directed airow
Направленный
поток воздуха
Датчик
Sensor
Sensor
Датчик
ВЕНТИЛЯЦИОННОЕ
ОТВЕРСТИЕ
AIR VENT
3.
SEPARATE CONTROL INTERFACE
Saunova 2.0
4.
5.
6.
Casing
Top cover
1.
2.
ВНУТРИ САУНЫ
81 mm
130 mm
37 mm
(Вырезка)
(Cut)
INSIDE THE SAUNA ROOM
OUTSIDE THE SAUNA ROOM
СНАРУЖИ САУНЫ
Кабель RJ внутри стены
Макс. 800 мм от пола
HEATER
FLOOR
ПОЛ
Мин. 600 мм
OK to install
in the surface
with moulding
Inside the wall RJ cable
Insulation
Do not installl
RJ cable
on this area
Max. 800mm from the floor
Min. 600mm ПЕЧЬ
USER INTERFACE
ПУЛЬТ УПРАВЛЕНИЯ
ПУЛЬТ УПРАВЛЕНИЯ
Корпус
Лицевая
13
РУССКИЙ | ENGLISH

ДАТЧИК ДВЕРИ
В саунах для коммерческого использования рекомендуется установить датчик двери.
Если дверь открывается в период обратного отсчета таймера, предварительный
запуск отключается.
Дверной датчик также обеспечивает, чтобы дверь не оставалась долго открытой
при включенной печи. Если каменка запущена, и дверь открывается более чем на 15
минут, на дисплее отображается предупреждающий пользователя сигнал и надпись
«oPEn» («ОТКРЫТО»). Печь при этом автоматически выключается.
ВЕНТИЛЯТОР (ДОП. ФУНКЦИЯ)
Функцию вентилятора можно активировать только в том случае, если в блоке
управления имеется функция комби.
Вентилятор можно включать и выключать по желанию. Его максимальная мощность
– 100 Вт при 230 В переменного тока.
14 РУССКИЙ

DOOR SENSOR
In other than household use, it is recommended to install door sensor. The door sensor
disables all pre-run operations if the door is opened while the pre-run countdown is active.
The door sensor also ensures that the door is not open for long periods of time when
the heater is on. If the heater is on and the door is open for more than 15minutes, an
alarm and “oPEn” will be displayed to warn the user. The heater will be switched off
automatically.
FAN FEATURE (OPTIONAL)
The fan function can only be activated if the combi feature is present on the control unit.
Fan can be switched On/Off. The maximum power is 100W with 230 VAC.
ENGLISH 15

ELECTRICAL DIAGRAM
ЭЛЕКТРИЧЕСКАЯ СХЕМА
The cable must
be HO7RN-F
type or its
equivalent.
Do not connect both
Optional Sensors
same time. Only
one of the optional
sensors at a time is
allowed.
Optional
Temperature &
Humidity Sensor
for Bench Area
Optional
Temperature
Sensor for
Bench Area
Temperature
Sensor
with Fuse
The cable must
be HO7RN-F
type or its
equivalent.
4 m
L1
L2
N
PE
100 W
AC1
Light
T/H Sensor
Sensors
FUS TS
FUS TS
14 1423 23
FUS TS
14
TS1 TS2
For DIP switch
setting refer to
page 21
Error
Indicator
LEDs
Fuse Glass
Light
1000 mA
Fuse Glass
400V 3N~
50/60Hz
Max. 9.0 kW
Control Unit
Main Switch
BROWN
BLACK
BLUE
1 1 0 1
Saunova 2.0
User Interface
TB: Control of Heating
1 11 3
2
SAFETY
SWITCH
REM ON
43424
REM ON
SAFETY SWITCH
EMPTY
SAFETY
SESSION
TEMP
SLAVE
COMBI
1 2 3
TB
LIGHT
NN
Note:
RJ Data Cable
REMOTE
ON
SWITCH
SAFETY
SWITCH
BLACK BROWN
WHITE
WHITE
BLUE
BLACK BROWN
WHITE BLUE
BLUE
UB N U V W N N N N R-in S-in T-in
F3
K3 RS1
RS1
RS3
K1
K2
K4
K5
K6
J4 J3 J2 J1
CONTROL
A A
SAU-UI-V2
Primary
Supply
160 mA
Power Supply
400V 3N~
50/60Hz
230V 1N~
50/60Hz
Max. 9.0 kW
4 core cable
L1
N
PE
Power Supply
230V 1N~
50/60Hz
3 core cable
Sauna Heater
3,0 kW
H1 H2
L1L2NPE L1NPE
TH2-30Ni2
kW H1 H2
3.0TH2-30Ni2-WL 1.5 1.5
Malli
Model
TS1
Температурный датчик
с предохранителем
TS2
Дополнительный
датчик
температуры
для полков
Т/Н
датчик
дополнительный
датчик
температурыи
влажности
16 17
РУССКИЙ | ENGLISHРУССКИЙ | ENGLISH

4 m
L1
L2
L3
N
PE
100 W
AC1
Light
T/H Sensor
Sensors
FUS TS
FUS TS
14 1423 23
FUS TS
14
TS1 TS2
For DIP switch
setting refer to
page 21
Error
Indicator
LEDs
Fuse Glass
Light
1000 mA
Fuse Glass
400V 3N~
50/60Hz
Max. 9.0 kW
Control Unit
Main Switch
BROWN
BLACK
BLUE
1 1 0 1
Saunova 2.0
User Interface
TB: Control of Heating
1 11 3
2
SAFETY
SWITCH
REM ON
43424
REM ON
SAFETY SWITCH
EMPTY
SAFETY
SESSION
TEMP
SLAVE
COMBI
1 2 3
TB
LIGHT
NN
Note:
RJ Data Cable
REMOTE
ON
SWITCH
SAFETY
SWITCH
BLACK BROWN
WHITE
WHITE
BLUE
BLACK BROWN
WHITE BLUE
BLUE
UB N U V W N N N N R-in S-in T-in
F3
K3 RS1
RS1
RS3
K1
K2
K4
K5
K6
J4 J3 J2 J1
CONTROL
A A
SAU-UI-V2
Primary
Supply
160 mA
Power Supply
The cable must
be HO7RN-F
type or its
equivalent.
Do not connect both
Optional Sensors
same time. Only
one of the optional
sensors at a time is
allowed.
Optional
Temperature &
Humidity Sensor
for Bench Area
Optional
Temperature
Sensor for
Bench Area
Temperature
Sensor
with Fuse
TH3-35Ni2
TH3-45Ni2
TH3-60Ni2
400V 3N~
50/60Hz
230V 1N~
50/60Hz
Max. 9.0 kW
230V 3~
50/60Hz
Max. 6.0 kW
5 core cable
L1
L2
L3
N
PE
Power Supply
The cable must
be HO7RN-F
type or its
equivalent.
230V 3~
50/60Hz
4 core cable
L1
N
PE
Power Supply
The cable must
be HO7RN-F
type or its
equivalent.
230V 1N~
50/60Hz
3 core cable
Sauna Heater
3,5 kW - 6,0 kW
H1 H2 H3
L1 L2 L3NN NPE L1 L2 L3NN NPE
L1 L2 L3NN NPE
kW H3H1 H2
3.5TH3-35Ni2-WL 1.15 1.15 1.15
4.5TH3-45Ni2-WL 1.5 1.5 1.5
6.0TH3-60Ni2-WL 2.0 2.0 2.0
Malli
Model
TS1
Температурный датчик
с предохранителем
TS2
Дополнительный
датчик
температуры
для полков
Т/Н
датчик дополнительный
датчик температурыи влажности
18 19
РУССКИЙ | ENGLISHРУССКИЙ | ENGLISH

100 W
AC1
Light
T/H Sensor
Sensors
FUS TS
FUS TS
14 1423 23
FUS TS
14
TS1 TS2
TB: Control of Heating
REM ON
SAFETY SWITCH
Note:
REMOTE
ON
SWITCH
SAFETY
SWITCH
BLACK BROWN
WHITE
WHITE
BLUE
BLACK BROWN
WHITE BLUE
BLUE
Do not connect both
Optional Sensors
same time. Only
one of the optional
sensors at a time is
allowed.
Optional
Temperature &
Humidity Sensor
for Bench Area
Optional
Temperature
Sensor for
Bench Area
Temperature
Sensor
with Fuse
H1 H2 H3 H4
230V 1N~
50/60Hz
Max. 9.0 kW
Single phase
Used for
PE
Ground
Sauna Heater
Max 9,0 kW
UB N U V W N N N N R-in S-in T-in
J4 J3 J2 J1
230V 1N~
50/60Hz
3 core cable
L1
N
PE
Power Supply
The cable must
be HO7RN-F
type or its
equivalent.
H1 H2 H3 H4
4 m
PE
Ground
For DIP switch
setting refer to
page 21
Error
Indicator
LEDs
Fuse Glass
Light
1000 mA
Fuse Glass
400V 3N~
50/60Hz
Max. 9.0 kW
Control Unit
Main Switch
BROWN
BLACK
BLUE
1 1 0 1
400V 3N~
50/60Hz
5 core cable
Saunova 2.0
User Interface
Sauna Heater
Max 9,0 kW
1 11 3
2
SAFETY
SWITCH
REM ON
43424
EMPTY
SAFETY
SESSION
TEMP
SLAVE
COMBI
1 2 3
TB
LIGHT
NN
RJ Data Cable
UB N U V W N N N N R-in S-in T-in
F3
K3 RS1
RS1
RS3
K1
K2
K4
K5
K6
J4 J3 J2 J1
CONTROL
A A
SAU-UI-V2
Primary
Supply
160 mA
L1
L2
L3
N
PE
Power Supply
The cable must
be HO7RN-F
type or its
equivalent.
TH4-60Ni2
kW H3H1 H2 H4
6.0TH4-60Ni2-WL 1.5 1.5 1.5 1.5
Malli
Model
TS1
Температурный датчик
с предохранителем
TS2
Дополнительный
датчик
температуры
для полков
Т/Н
датчик
дополнительный
датчик
температурыи
влажности
20 21
РУССКИЙ | ENGLISHРУССКИЙ | ENGLISH

100 W
AC1
Light
T/H Sensor
Sensors
FUS TS
FUS TS
14 1423 23
FUS TS
14
TS1 TS2
TB: Control of Heating
REM ON
SAFETY SWITCH
Note:
REMOTE
ON
SWITCH
SAFETY
SWITCH
BLACK BROWN
WHITE
WHITE
BLUE
BLACK BROWN
WHITE BLUE
BLUE
Do not connect both
Optional Sensors
same time. Only
one of the optional
sensors at a time is
allowed.
Optional
Temperature &
Humidity Sensor
for Bench Area
Optional
Temperature
Sensor for
Bench Area
Temperature
Sensor
with Fuse
TH5-80Ni2
TH5-90Ni2
H1 H2 H3 H4 H5
4 m
PE
Ground
For DIP switch
setting refer to
page 21
Error
Indicator
LEDs
Fuse Glass
Light
1000 mA
Fuse Glass
400V 3N~
50/60Hz
Max. 9.0 kW
Control Unit
Main Switch
BROWN
BLACK
BLUE
1 1 0 1
400V 3N~
50/60Hz
5 core cable
Saunova 2.0
User Interface
Sauna Heater
Max 9,0 kW
1 11 3
2
SAFETY
SWITCH
REM ON
43424
EMPTY
SAFETY
SESSION
TEMP
SLAVE
COMBI
1 2 3
TB
LIGHT
NN
RJ Data Cable
UB N U V W N N N N R-in S-in T-in
F3
K3 RS1
RS1
RS3
K1
K2
K4
K5
K6
J4 J3 J2 J1
CONTROL
A A
SAU-UI-V2
Primary
Supply
160 mA
L1
L2
L3
N
PE
Power Supply
The cable must
be HO7RN-F
type or its
equivalent.
H1 H2 H3 H4 H5
230V 1N~
50/60Hz
Max. 9.0 kW
Single phase
Used for
PE
Ground
Sauna Heater
Max 9,0 kW
UB N U V W N N N N R-in S-in T-in
J4 J3 J2 J1
230V 1N~
50/60Hz
3 core cable
L1
N
PE
Power Supply
The cable must
be HO7RN-F
type or its
equivalent.
kW H3H1 H2 H4 H5
8.0
9.0TH5-90Ni2-WL
TH5-80Ni2-WL 2.0
2.0 2.0
1.5
1.5 2.0 1.5
1.5 1.5 1.5
Malli
Model
TS1
Температурный датчик
с предохранителем
TS2
Дополнительный
датчик
температуры
для полков
Т/Н
датчик
дополнительный
датчик
температурыи
влажности
22 23
РУССКИЙ | ENGLISHРУССКИЙ | ENGLISH

100 W
AC1
Light
T/H Sensor
Sensors
FUS TS
FUS TS
14 1423 23
FUS TS
14
TS1 TS2
TB: Control of Heating
REM ON
SAFETY SWITCH
Note:
REMOTE
ON
SWITCH
SAFETY
SWITCH
BLACK BROWN
WHITE
WHITE
BLUE
BLACK BROWN
WHITE BLUE
BLUE
Do not connect both
Optional Sensors
same time. Only
one of the optional
sensors at a time is
allowed.
Optional
Temperature &
Humidity Sensor
for Bench Area
Optional
Temperature
Sensor for
Bench Area
Temperature
Sensor
with Fuse
230V 1N~
50/60Hz
H1 H2 H3 H4 H5 H6
230V 1N~
50/60Hz
Max. 9.0 kW
3 core cable
Single phase
Used for
PE
Ground
Sauna Heater
Max 9,0 kW
UB N U V W N N N N R-in S-in T-in
J4 J3 J2 J1
L1
N
PE
Power Supply
The cable must
be HO7RN-F
type or its
equivalent.
TH6-80Ni2
TH6-90Ni2
4 m
PE
Ground
For DIP switch
setting refer to
page 21
Error
Indicator
LEDs
Fuse Glass
Light
1000 mA
Fuse Glass
400V 3N~
50/60Hz
Max. 9.0 kW
Control Unit
Main Switch
BROWN
BLACK
BLUE
1 1 0 1
400V 3N~
50/60Hz
5 core cable
Saunova 2.0
User Interface
1 11 3
2
SAFETY
SWITCH
REM ON
43424
EMPTY
SAFETY
SESSION
TEMP
SLAVE
COMBI
1 2 3
TB
LIGHT
NN
RJ Data Cable
UB N U V W N N N N R-in S-in T-in
F3
K3 RS1
RS1
RS3
K1
K2
K4
K5
K6
J4 J3 J2 J1
CONTROL
A A
SAU-UI-V2
Primary
Supply
160 mA
L1
L2
L3
N
PE
Power Supply
The cable must
be HO7RN-F
type or its
equivalent.
Sauna Heater
Max 9,0 kW
H1 H2 H3 H4 H5 H6
kW H3H1 H2 H4 H5
8.0
9.0TH6-90Ni2-WL
TH6-80Ni2-WL 1.5
1.5 1.5
1.15
1.5 1.5 1.5
1.5 1.15
H6
1.5
1.151.5
Malli
Model
TS1
Температурный датчик
с предохранителем
TS2
Дополнительный
датчик
температуры
для полков
Т/Н
датчик
дополнительный
датчик
температурыи
влажности
24 25
РУССКИЙ | ENGLISHРУССКИЙ | ENGLISH
This manual suits for next models
12
Table of contents
Languages:
Other Sawo Heater manuals

Sawo
Sawo TH6-80Ni-WL User manual

Sawo
Sawo ORION Series User manual

Sawo
Sawo TH2-30NB User manual

Sawo
Sawo SCANDIA SCA-45NB User manual
Sawo
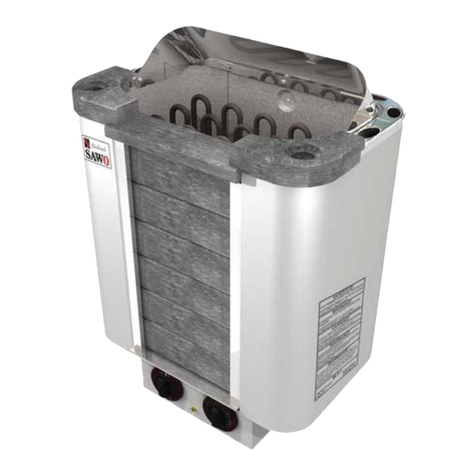
Sawo Nimbus User manual

Sawo
Sawo CUBOS Series User manual

Sawo
Sawo KRIOS Series User manual

Sawo
Sawo ARIES ARI3-45Ni2-CNR User manual

Sawo
Sawo TH6-120N-CNR User manual

Sawo
Sawo TH2-30NB User manual

Sawo
Sawo SCANDIA SCA-45NB User manual

Sawo
Sawo TH3-35NB User manual

Sawo
Sawo NORDEX Series User manual

Sawo
Sawo MX-30NB User manual

Sawo
Sawo SCANDIA SCA-45NB User manual

Sawo
Sawo MINI MN-23NB User manual
Sawo
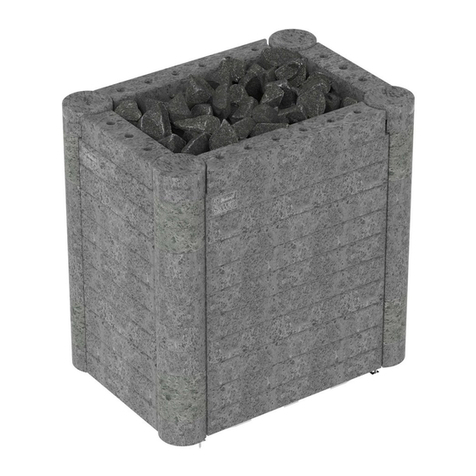
Sawo SAVONIA User manual

Sawo
Sawo TH3-35NB-CNR User manual

Sawo
Sawo Aries Corner User manual

Sawo
Sawo ARIES ROUND Series User manual