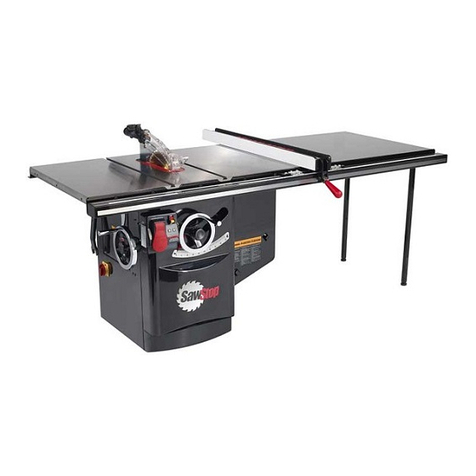
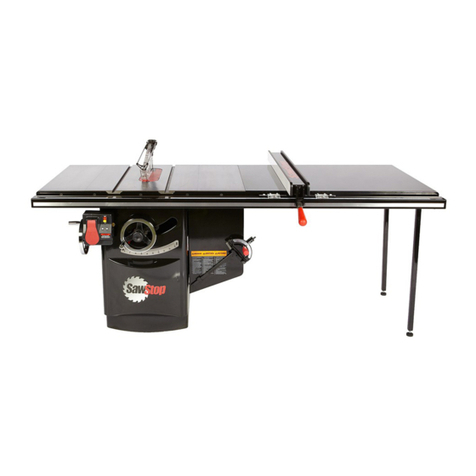
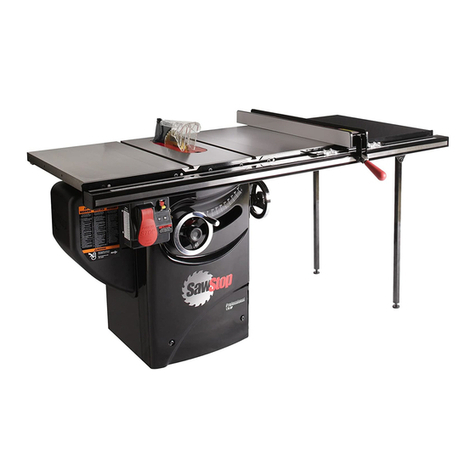
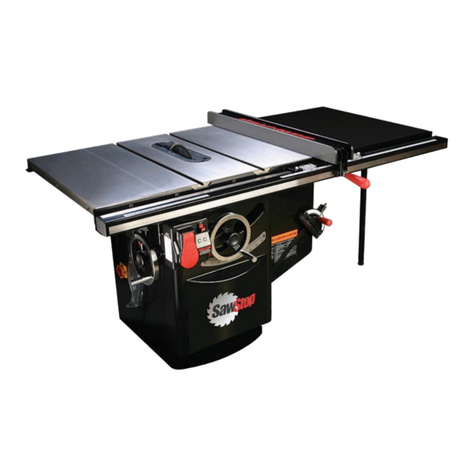
SawStop T-Glide Fence System User manual

SawStop®
T-Glide™Fence System-
Industrial Series II
OWNER’S MANUAL

1. You must install a rip fence before using your saw. Attempting to use the saw without a rip fence could result in
serious personal injury.
2. Always use a rip fence when making rip cuts. Never perform a ripping operation freehand or a serious injury
may result.
3. Always use a push stick or push block when your hand comes within 6” of the blade. Attempting to use the rip
fence for narrow cuts without a push stick or push block could result in a serious injury.
4. Do not use the miter gauge when making rip cuts.
5. While making bevel cuts, use the fence only on the right side of the saw blade to prevent the blade from
possibly contacting the fence. The brake will activate if the spinning saw blade comes into contact with the
metal in the fence.
Safety
Warranty
SawStop warrants to the original retail purchaser of a new T-Glide Fence System - Industrial Series II from
an authorized SawStop distributor that the fence system will be free from defects in material and workmanship
for TWO YEARS from the date of purchase. SawStop warrants to the original retail purchaser of a refurbished,
demonstration or oor model T-Glide Fence System - Industrial Series II from an authorized SawStop distributor that
the fence system will be free from defects in material and workmanship for ONE YEAR from the date of purchase.
This warranty does not apply to defects arising from misuse, abuse, negligence, accidents, normal wear-
and-tear, unauthorized repair or alteration, or lack of maintenance. This warranty is void if the fence system or any
portion of the fence system is modied without the prior written permission of SawStop, LLC, or if the fence system
is located or has been used outside of the country where the authorized SawStop distributor from whom the fence
system was purchased resides.
Please contact SawStop to take advantage of this warranty. If SawStop determines the fence system is
defective in material or workmanship, and not due to misuse, abuse, negligence, accidents, normal wear-and-
tear, unauthorized repair or alteration, or lack of maintenance, then SawStop will, at its expense and upon proof
of purchase, send replacement parts to the original retail purchaser necessary to cure the defect. Alternatively,
SawStop will repair the fence system provided it is returned to SawStop, shipping prepaid, with proof of purchase
and within the warranty period.
SawStop disclaims any and all other express or implied warranties, including merchantability and tness for a
particular purpose. SawStop shall not be liable for death, injuries to persons or property, or incidental, consequential,
contingent or special damages arising from the use of the fence system.
This warranty gives you specic legal rights. You may have other rights which vary from state to state.
front rail
rear rail
main tube
support leg (2)
extension table
leg support
bracket (2)
leveling feet (2)
fence handle hardware bag
T-Glide fence
5 mm hex key 5 mm ball-end
hex driver
Owner’s Manual
Unpacking Your T-Glide Fence System
While unpacking your saw, verify that you have all the components shown below for your specic fence system.
The T-Glide Fence System – Industrial Series II is available in either a 52” system or a 36” system. Although the
components pictured below are from the 52” system, the components from the 36” system are similar.
page 1

Installation
To install the rails, extension table, and fence you will need the following tools:
5 mm hex driver and 6 mm hex key (included)
13 mm and 17 mm wrenches (or adjustable wrench)
Phillips head screwdriver
1. Installing the Front Rail: The rst step in installing the fence is to attach the front rail to the table. Please
see pages 14 and 16 for exploded views of the rails and extension tables. The rails are shipped in the long
cardboard box packaged with the main tube. The front rail is the larger of the two and includes 5 countersunk
holes that are used to mount the rail to the front of the table. To mount the front rail, position the rail along the
front of the table with the cut-outs at the top of the rail centered on the miter gauge slots in the table. Thread
three M8 x 25 (6) countersunk socket head bolts into the threaded holes in the front of the main table, indicated
by the arrows below. See Fig. 1. Tighten the bolts using the 5 mm hex driver.
Next, mount the front rail to the cast iron extension wings using two M8 x 35 (2) countersunk socket head bolts
(the longer bolts), two M8 washers (3), two M8 lock washers (4) and two M8 hex nuts (5). Position the bolts
through the front rail and the extension table, then install the washer, lock washer and nut (in that order) on
the end of the bolt, indicated by the circles shown above in Fig. 1. The holes in the extension wings are not
threaded and are slightly larger than the bolts they receive. If necessary, use the rail to pull the wings up or
down slightly until the wings are ush with the table. Then tighten the nuts to secure the wings in place.
page 2
Fig. 1

2. Installing the Rear Rail:You install the rear rail like you installed the front rail, except that you will probably
want to leave the rear rail a little loose until you get the extension table installed. The rear rail is attached to the
main table by two M8 x 25 (6) countersunk socket head bolts, as shown by the arrows in Fig. 2. Position the
rear rail along the back of the table with the cut-outs at the top of the rail centered on the miter gauge slots in
the table. Thread the bolts into the threaded holes and tighten using the 5 mm hex driver. See Fig. 2.
Mount the rear rail to each extension wing using an M8 x 35 (2) countersunk socket head bolt (the longer bolts),
an M8 washer (3), an M8 lock washer (4) and an M8 hex nut (5) for each of the holes shown by the circles
in Fig. 2. If necessary, push down or pull up on the wings before tightening the nuts to ensure the wings are
parallel to the table. As mentioned above, it is usually easier to leave the bolts in the rear rail slightly loose until
the extension table is installed as it may be difcult to position the extension table between the rails if both rails
are tightened down.
3. Installing the Extension Table:Once the rails are in place you can mount the extension table to the rails.
Begin by installing the adjustable foot in the bottom of each support leg. First, thread an M8 hex nut (5) onto
the threaded shaft of the foot (19) as close to the rubber base as possible. Next, thread the foot into the bottom
of the support leg (18) as far as possible. See Fig. 3.
page 3
Fig. 2
Fig. 3

Locate the two leg support brackets. Remove
the two M8 x 20 countersunk socket head bolts
(21) from the hardware bag along with two M8
washers (14), two M8 lock washers (15) and two
M8 hex nuts (16). Mount one leg support bracket
to the underside of each of the rails as shown in
Fig. 4. Hand tighten the nuts; do not fully tighten
them.
Once mounted, the brackets should create a shelf
as shown in the close-up view of Fig.5 below.
leg support
bracket
Fig. 4
Fig. 5
21
Place the extension table between the rails and slide it towards the extension wing (see Fig. 6). Be careful when
positioning the extension table because it is not yet secured to the rails and could fall.
Fig. 6
14
15
16
page 4

The extension table mounts to the rails with bolts that pass through holes in the rails and extension table. If you
have an extension table for a 36” fence system, take two M8 x 40 countersunk socket head bolts (17) and insert one
through the hole in the front rail closest to the saw and the other through the hole in the rear rail closest to the saw,
as shown in Fig. 7a. If you have an extension table for a 52” fence system, take four M8 x 40 countersunk socket
head bolts (17) and insert one bolt into each of the two holes in the front rail, and one bolt into each of the two
holes in the rear rail, as shown in Fig. 7b.
The support legs attach to the outer ends of the rails and extension table with M8 x 65 countersunk socket head
bolts (22). Align the top hole in one support leg with the second-outermost hole in the front rail, and the top hole in
the second support leg with the outermost hole in the back rail. Make sure the legs are positioned against the inside
of the extension table. Insert M8 x 65 bolts (22) through the holes in each of the rails, extension table and each of
the legs. Place an M8 washer (14) and an M8 lock washer (15) on the threaded end of each bolt and then thread an
M8 hex nut (16) onto each bolt (see Fig. 8). Hand tighten the nuts; do not fully tighten them.
Fig. 8
Place an M8 washer (14), an M8 lock washer (15) and an M8 hex nut (16) on the threaded end of each bolt, keeping
them loose. Do not insert bolts through the outermost holes in the front and rear rails at this time.
Fig. 7a
22
14
15
16
Fig. 7b
17
14 16
17
14
16
15 15
page 5

14. Install an M8 x 40 countersunk socket head bolt (17) through the one remaining front rail hole and into the
corresponding hole in the front edge of the extension table for a 36” fence system, or install M8 x 40 countersunk
socket head bolts (17) through the three remaining front rail holes and into the corresponding holes in the front
edge of the extension table for a 52” fence system (see the circles in Fig. 10). Install an M8 x 40 countersunk
socket head bolt (17) through the rear rail and into the corresponding hole in the rear edge of the extension
table for a 36” fence system, or use three M8 x 40 countersunk socket head bolts (17) for a 52” fence system.
Place an M8 washer (14) and an M8 lock nut (16) on each bolt and hand tighten.
Use a straight-edge to level the front edge of the extension table to the saw table (see Fig. 10). You may have
to pull up or push down on the extension table to level it. Once the front edge of the extension table is level,
use a 5 mm hex key and a 13 mm wrench to fully tighten the nuts on the bolts along the front rail. Repeat the
process to level the rear edge of the extension table. Also fully tighten the bolts that attach the leg support
brackets to the front and rear rails (bolts ).
21
Attach each support leg to the corresponding leg support bracket with an M10 x 40 hex head bolt (23), two M10
washers (24), and an M10 lock nut (25), as shown in Fig. 9, and fully tighten the bolts using two 17 mm wrenches.
Note that the leg support brackets align with different holes in the front and rear legs because the brackets are at
different elevations.
straight-edge
Fig. 10
Fig. 9
front
rail rear
rail
23
23
make sure to tighten the bolts that
attach the leg support brackets to
the front and rear rails
2424
24
24 25
21
25
page 6

Next, install the M8 x 45 socket head bolt (26) and D-washer (27) through the hole in the center of the left side
of the extension table. The bolt should also extend through the center hole in the right extension wing. Make
sure the at edge of the D-washer is facing upward. See Fig. 11. Install an M8 x 23 x 2 washer (14), an M8 lock
washer (15), and an M8 x 1.25 hex nut (16) on the end of the bolt and hand tighten.
If you left the rear rail slightly loose, tighten it now. If necessary, pull up or push down on the extension wings
before tightening as described on the previous page.
Once both rails are installed securely, adjust the position of the extension table so that its top surface is level
and ush with the top surface of the cast iron extension wing. Fully tighten the nuts to lock the extension table
in place. If necessary, put upward or downward pressure on the left edge of the extension table to make it
ush with the extension wing, and then tighten the M8 x 45 socket head bolt (26) that passes through the
D-washer (27).
Finally, adjust the position of the foot on the bottom of the support leg to ensure the leg is in solid contact with
the ground.
Fig. 11
page 7

The holes in the bottom of the front rail are oversized to allow the position of the tube on the rail to be adjusted. To
set the tube in the correct position, rst pull the tube away from the cast-iron table as far as possible. Next, place
your fence down on the tube with the fence glide bracket resting on the upper rear edge of the tube. Position the
fence so that it is near the left end of the tube and the front glide pads are in contact with the rear surface of the
main tube. See Figs. 13a and 13b.
Installing the Main Tube:The main tube is installed on the front rail using the M8 x 16 hex head bolts with
attached washers (7). Position the tube on the horizontal portion of the front rail with the rulers facing up and the
12” ruler on the left side. The powder coated surfaces of the tube and rail can be slick, so be careful that the tube
does not fall off the rail. Align the holes in the rail with the holes in the bottom of the tube. Thread the M8 x 16 hex
head bolts through the rail and into the threaded holes in the bottom of the tube. See Fig. 12. Leave the bolts nger
tight.
Note: the hardware bag includes enough main tube hardware to mount the 36” or 52” version. If you have a 36”
assembly you will have extra.
page 8
Fig. 13a Fig. 13b
Fig. 12
front glide pad
rear glide pad

Next, move the fence to the right end of the tube and repeat the above process. Tighten the right-most M8 bolt
that mounts the tube to the front rail. Conrm that the left end of the tube is still correctly positioned by sliding
the fence to the left end of the tube. If the gap between the tube and rail on the left end has changed, loosen the
left-most bolt and readjust the position of the tube. Once both ends of the tube are adjusted correctly, tighten
the remaining M8 x 16 hex head bolts to lock the tube to the front rail. The fence should now slide smoothly
along the tube without binding and without excessive play when changing directions.
Next, attach the fence handle to the fence by threading the handle into the cam lock. Press down on the
fence handle to clamp the fence to the main tube. If the fence does not clamp tightly enough to the main tube
to hold its position against a moderate amount of force, you can increase the clamping force by turning both
parallelism adjustment screws clockwise. See Fig. 14. Alternatively, if too much pressure on the handle is
needed to clamp the fence to the main tube, you can reduce the clamping force by adjusting both parallelism
adjustment screws counter-clockwise.
Once the fence is correctly clamped to the main tube, adjust the position of the left end of the tube so that there
is only a small gap (approximately 1/16”) between the front rail and the rear glide pads on the fence. See Fig.
15. Tighten the left-most M8 x 16 hex head bolt that mounts the tube to the front rail using a 13 mm wrench.
page 9
Fig. 15
Fig. 14
gap

If there is any misalignment, you can correct it by turning one of the two parallelism adjustment screws in the
vertical edge of the fence glide bracket. See Fig. 14.
The next step is to adjust the face plates to be perpendicular to the table top. The angle between the face plates
and the table is set by the two plastic leveling screws in the horizontal edge of the glide bracket. See Fig. 17.
5. Fence Adjustments: Although the fence is factory-adjusted to nominal settings, it is usually necessary to
make nal adjustments once your rails and extension table have been installed on the saw.
The rst step is to align the face plates to be parallel to the miter slots. Begin by sliding the fence along the
tube until the left face plate is ush with the right edge of the right miter slot. Lock the fence handle and check
that the face plate is ush with the miter slot edge along its whole length. See Fig. 16. You can check this either
visually or by running your nger along the face plate and miter slot edge.
page 10
Fig. 16
Fig. 17

Place a combination square on the table top and against the left face plate. See Fig. 18. Use a 6 mm hex key
to adjust the leveling screws as necessary until the face plate is parallel to the vertical edge of the combination
square.
If necessary, you can adjust both of the plastic set screws to ensure the position indicator lenses are close to,
but not touching, the main tube or rulers.
The last step is to set the spacing between the bottom of each face plate and the table. The face plates are
held in place by a series of screws threaded into nuts embedded in the face plates. The heads of the screws
t into key-hole slots in the sides of the fence. See Fig. 19.
page 11
Fig. 19
Fig.18

It is usually possible to adjust the position of the face plates by lightly tapping the top or bottom edge of the face
plates with a plastic or wooden mallet. However, if the face plates do not move when tapped, you can loosen
the mounting screws as described below to adjust the face plates.
If the right face plate needs to be adjusted,
you must rst remove the left face plate. Begin
by laying the fence on the table with the left
face plate facing down. You can access the
screws for the left face plate through the slots
on the bottom of the fence. Insert a 5 mm ball
end hex driver or hex key through the slot at
the end of the fence and into the screw head.
See Fig. 20. Loosen the screw but do not
unthread it completely. Continue this process
with each slot/screw pair. It may be helpful to
shine a ashlight down the end of the tube
to illuminate the screw heads. Once all the
screws are loosened push the face downward
to align the screw heads with the large portion
of the key-hole slots, and then pull the face
plate off the fence.
Once the left face plate has been removed, you can access the screws for the right face plate through the key-
hole slots for the left face plate. See Fig. 16. Loosen each screw in the right face plate just enough to allow
the face plate to slide against the fence. Install the fence on the main tube and position the right face plate as
desired, making sure to leave at least a small gap between the bottom of the face plate and the table so the
face plate does not drag on the table.
Next, lift the fence off the tube and place it on the
table with the right face plate facing down. Make
sure not to move the face plate from the position
you set it. If necessary you can clamp the face
plate to the fence to keep the face plate from
moving. Tighten each screw to lock the right face
plate in position. Make sure not to over-tighten
these screws as it that may cause a slight
concavity in the surface of the face plate near
the screw.
Replace the left face plate onto the fence and
install the fence on the main tube. Adjust the
position of the left face plate as desired. Lift the
fence off the tube and set it on the table with the
left face plate down, making sure the position of
the face plate doesn’t move. Tighten the screws
to lock the left face plate onto the fence. Your
fence is now fully adjusted and ready to use.
page 12
Fig. 16
Fig. 20

This page is blank.
page 13

page 14
9
7
5
3
8
6
11
10
14
12
13
10
2
1
3
2
4
15
SawStop T-Glide
™Fence Assembly
10
SawStop
17
18
16

page 15
No. Description Part No. Qty.
Fence Assembly (items 1 - 18 assembled)* TGI2-FA
1Fence Tube TGI2-001 1
2 Face Plate TGI2-002 2
3 M6 x 1 x 12 Socket Head Screw TGI2-003 24
4 Handle TGI2-004 1
5Cam Lock TGI2-005 1
6 M10 x 1.5 x 50 Hex Head Bolt TGI2-006 1
7M10 x 1.5 Lock Nut TGI2-007 1
8 Flex Plate TGI2-008 1
9Leveling Adjustment Screw M12 x 1.75 TGI2-009 2
10 Glide Plate TGI2-010 5
11 Parallelism Adjustment Screw M10 x 1.5 x 8 TGI2-011 2
12 Position Indicator Lens TGI2-012 2
13 M6 x 1.0 x 10 Button Head Phillips Screw TGI2-013 4
14 M6 x 13 x 2 Washer TGI2-014 4
15 M6 x 1.0 x 10 Flat Head Phillips Screw TGI2-015 2
16 Flex Arm TGI2-016 1
17 Label TGI2-017 1
18 Fence Tube End Cap TGI2-018 1
Accessories
N/A Owner’s Manual TGI2-019 1
N/A Hardware Bag For Rail Assembly TGI2-020 1
N/A 5mm Ball-end Hex Driver TGI2-021 1
N/A 6mm Hex Wrench TGI2-022 1
N/A Fence Installation Guide TGI2-023 1
N/A Fence Attention Magnet TGI2-024 1
Fence Assembly
*Each Fence box also contains the hardware for the Rail Assembly.

page 16
14
15
16
23 4 5
2
6
17
16 15
1
14
21
7
12
10
11
8
5432
6
917
2
22
17
21
14 15 16
27 26
22
14 15 16
25
24
20
24
13
23 15
14 16
18
16
19
page marker
SawStop 36” Rails and Extension Table

page 17
36” Rails and Extension Table Parts List
No. Description Part No. Qty.
36” Rail Assembly (hardware in fence box)* TGI2-R36A
1 36” Front Rail TGI2-025 1
2 M8 x 1.25 x 35mm Flat Head Socket Screw TGI2-026 4
3 M8 x 23 x 2 Washer TGI2-027 4
4M8 Lock Washer TGI2-028 4
5 M8 x 1.25 Hex Nut TGI2-029 4
6 M8 x 1.25 x 25 Flat Head Socket Screw TGI2-030 5
7M8 x 1.25 x 16 Hex Head Bolt (w/ Captured Washer) TGI2-031 7
836” Main Tube TGI2-032 1
9 36” Rear Rail TGI2-033 1
10 Main Tube End Cap TGI2-034 2
11 12” Ruler TGI2-035 1
12 36” Ruler TGI2-036 1
N/A Hardware Bag for Rail Assembly (items 2-7) TGI2-020 1
36” Extension Table Assembly TGI2-T36A
13 36” Extension Table TGI2-037 1
14 M8 x 23 x 2 Washer TGI2-038 9
15 M8 Lock Washer TGI2-039 9
16 M8 x 1.25 Hex Nut TGI2-040 11
17 M8 x 1.25 x 40mm Flat Head Socket Screw TGI2-041 4
18 Support Leg TGI2-042 2
19 Leveling Foot TGI2-043 2
20 Leg Support Bracket TGI2-044 2
21 M8 x 1.25 x 20 Flat Head Socket screw TGP2-045 2
22 M8 x 1.25 x 65 Flat Head Socket Screw TGI2-046 2
23 M10 x 1.5 x 40 Hex Head Bolt TGI2-047 2
24 M10 x 25 x 1.5 Washer TGI2-048 4
25 M10 x 1.5 Lock Nut TGI2-049 2
26 M8 x 1.25 x 45 Socket Head Cap Screw TGI2-050 1
27 D-Washer TGI2-051 1
N/A Hardware Bag for 36” Extension Table
(items 14-17, 21-27) TGI2-059 1
*Each Fence box contains one bag of hardware for a 52” Rail Assembly. If you purchased a 36” Rail Assembly, please
discard the extra hardware.

page 18
3
2
2
2
2
6
17
21 17 22
16
14 15
3
4
5
9
8
12
11
10 7
21
1
27 26
20
14 15 16
25
24
24
13
22 14
15 16
18
16
19
23
45
6
14
15
17 16
1415
16
page marker
SawStop 52” Rails and Extension Table
Table of contents
Other SawStop Saw manuals

SawStop
SawStop PCS31230 User manual

SawStop
SawStop MB-CNS-000 User manual

SawStop
SawStop CNS175 User manual

SawStop
SawStop RT-LFT User manual

SawStop
SawStop JSS-MCA User manual

SawStop
SawStop ICS31230 User manual

SawStop
SawStop JSS Manual

SawStop
SawStop CTS-120A60A User manual

SawStop
SawStop 10” User manual

SawStop
SawStop JSS-120A60 User manual

SawStop
SawStop CB31230 User manual

SawStop
SawStop Jobsite Saw User manual

SawStop
SawStop ICS31240-50 User manual

SawStop
SawStop T-Glide User manual

SawStop
SawStop CNS-SFA User manual

SawStop
SawStop CB31230 User manual

SawStop
SawStop JOBSITE SAW PRO User manual

SawStop
SawStop JSS Manual

SawStop
SawStop JSS User manual

SawStop
SawStop MC-CNS User manual