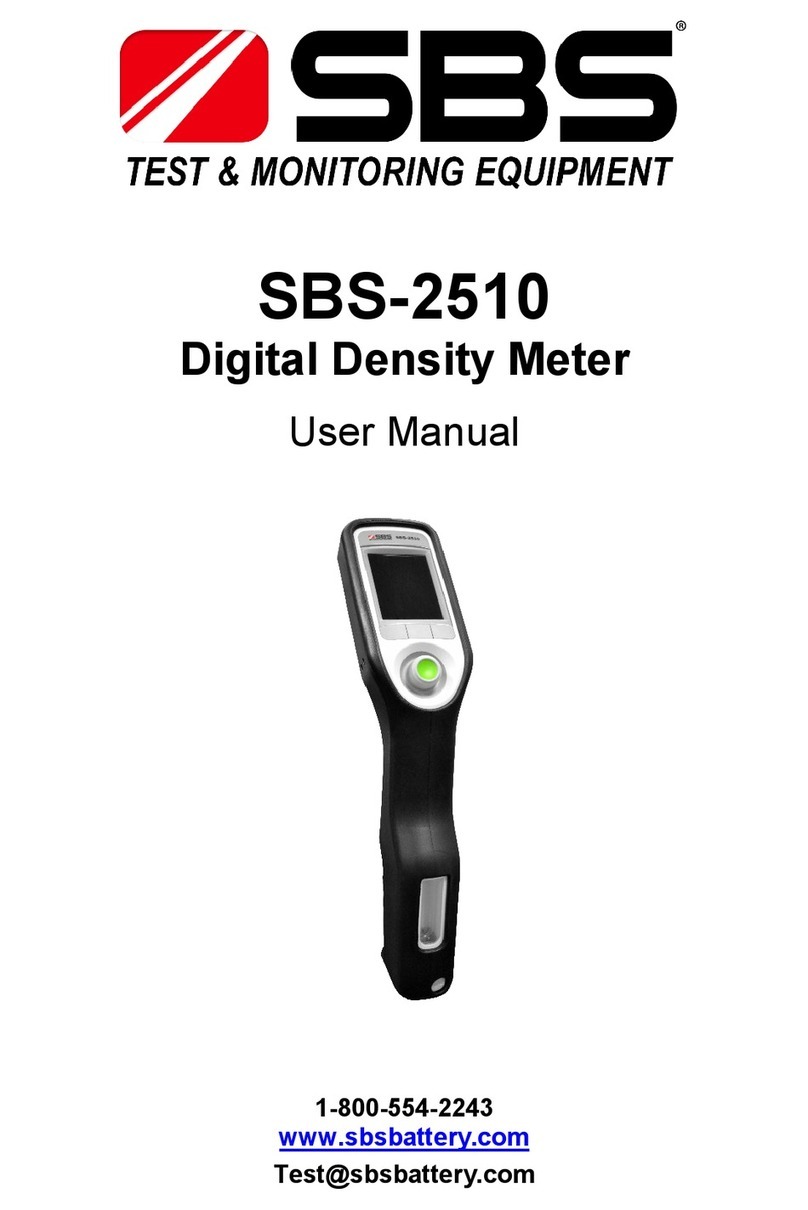
SBS SBS-2510 User manual


SBS-2510 Digital Density Meter
Table of Contents
1
Table of Contents
1
Introduction 4
2
Safety Information 5
2.1
Definitions of signal words and warning symbols ....................................................... 5
2.2
Product specific safety notes ................................................................................... 5
3
Design and Function 7
3.1
Instrument overview............................................................................................... 7
3.2
Overview of functions ............................................................................................. 7
3.3
User interface......................................................................................................... 9
3.3.1
Home screen............................................................................................ 9
3.3.2
Icons on the screen .................................................................................. 9
4
Installation and commissioning 10
4.1
Scope of delivery .................................................................................................. 10
4.2
Unpack the density meter...................................................................................... 10
4.3
Charge the density meter ...................................................................................... 11
4.3.1
Charge with the AC adapter..................................................................... 11
4.3.2
Charge with a computer.......................................................................... 11
4.4
Setup for working with the sample pump ................................................................ 12
4.4.1
Activate the sample pump mode.............................................................. 12
4.4.2
Install the filling tube .............................................................................. 12
4.5
Install accessories ................................................................................................ 13
4.5.1
Setup for working witha syringe.............................................................. 13
4.5.1.1
Activate the syringe mode .................................................................. 13
4.5.1.2
Install the connector for the syringe .................................................... 14
4.5.2
Connect a printer ................................................................................... 14
4.5.2.1
Connect a USB printer........................................................................ 15
4.5.2.2
Connect a Bluetooth printer ................................................................ 15
4.5.2.3
Print a test page ................................................................................ 15
4.6
Configure the density meter .................................................................................. 16
4.6.1
Change the date andtime format............................................................. 16
4.6.2
Change the temperature unit................................................................... 17
4.6.3
Change the density unit .......................................................................... 17
4.6.4
Change energy saver settings.................................................................. 17
4.6.5
Protect actions with a password............................................................... 18
4.6.5.1
Enable the password protection .......................................................... 18
4.6.5.2
Disable the password protection ......................................................... 18
4.6.5.3
Change the password ........................................................................ 19
4.6.6
Activate and deactivate the auto rotation of the screen....................................19
4.6.7
Activate and deactivate the audio signal ................................................... 19
4.6.8
Change the keyboard layout.................................................................... 19
4.6.9
Change the language.............................................................................. 19
4.6.10
Activate and deactivate a cleaning reminder ............................................. 19
4.7
Configure density determinations........................................................................... 20
4.7.1
Create, change or deletea method .......................................................... 20
4.7.1.1
Create a method................................................................................ 20
4.7.1.2
Change a method .............................................................................. 21
4.7.1.3
Delete a method................................................................................ 21
4.7.2
Change a test......................................................................................... 21
4.7.3
Change an adjustment............................................................................ 21
4.7.4
Configure the user guidance.................................................................... 22
4.7.4.1
Define the level ofuser guidance .................................................... ….22
4.7.4.2
Define the pump speed ...................................................................... 22
4.7.4.3
Define the fill cycle (only guided workflow) .......................................... 22

2
Table ofContents
SBS-2510 Digital Density Meter
4.7.4.4
Define the cleaning type (only guided workflow) ....................................... 22
4.7.4.5
Activate and deactivate the confirmation of results .................................... 23
4.7.5
Configure the measurement reliability........................................................... 23
4.7.6
Configure the result conversion .................................................................... 23
4.7.6.1
Density and specific gravity ..................................................................... 24
4.7.6.2
Alcohol concentration ............................................................................. 25
4.7.6.3
American Petroleum Institute (API).......................................................... 25
4.7.6.4
Baumé scale .......................................................................................... 25
4.7.6.5
Sulfuric acid concentration ...................................................................... 26
4.7.6.6
Sugar concentration ............................................................................... 26
4.7.6.7
User defined concentration ..................................................................... 26
4.7.6.8
Define the temperature-compensation coefficient ..................................... 28
4.7.7
Configure the automatic documentation of results.......................................... 29
4.7.7.1
Configure the sample or standard identification......................................... 29
4.7.7.2
Configure the automatic printing of results ............................................... 30
4.7.8
Configure result limits.................................................................................. 31
4.7.9
Configure a standard................................................................................... 31
4.7.10
Configure the tolerance fora test ................................................................. 31
5
Operation 33
5.1
Start up the density meter .................................................................................... 33
5.2
Shut down the density meter................................................................................. 33
5.3
Navigate and enter information ............................................................................. 34
5.3.1
Navigate through menus and confirm settings .......................................... 34
5.3.2
Enter text and numbers .......................................................................... 34
5.4
Typical phases of density determinations ............................................................... 35
5.4.1
Fill the measuring cell and measure the density......................................... 35
5.4.2
Prepare the measuring cell for the next sample ......................................... 35
5.5
Example: Density determination using the sample pump.......................................... 35
5.5.1
Configure the method............................................................................. 36
5.5.2
Perform the density determination........................................................... 37
5.6
Example: Density determination using a syringe ..................................................... 38
5.6.1
Configure the method............................................................................. 38
5.6.2
Perform the density determination........................................................... 39
5.7
Example: Density determination of cold or hot samples............................................ 41
5.7.1
Configure the method............................................................................. 41
5.7.2
Perform the density determination........................................................... 43
5.8
View, export, print anddelete results ..................................................................... 44
5.8.1
View results........................................................................................... 44
5.8.2
Delete all results .................................................................................... 44
5.8.3
Export and print results .......................................................................... 44
5.8.3.1
Print results ...................................................................................... 45
5.8.3.2
Configure the filter ............................................................................ 46
6
Maintenance 47
6.1
Maintenance schedule .......................................................................................... 47
6.2
Clean the density meter ........................................................................................ 47
6.2.1
Clean the housing .................................................................................. 47
6.2.2
Clean the measuring cell......................................................................... 48
6.2.2.1
Clean using the sample pump ............................................................. 48
6.2.2.2
Clean using a syringe ......................................................................... 49
6.3
Check the measurement accuracy.......................................................................... 49
6.3.1
Example: Test with water........................................................................ 49
6.3.1.1
Configure the test.............................................................................. 50
6.3.1.2
Perform the test ................................................................................ 50
6.3.2
Measures if a test fails ............................................................................ 51
6.4
Replace the battery .............................................................................................. 51
6.5
Replace the filling tube.......................................................................................... 52

SBS-2510 Digital Density Meter
Table of Contents
3
6.6
Replace the sample pump ..................................................................................... 52
6.7
Update the firmware ............................................................................................. 53
6.8
Prepare the density meterfor storage .................................................................... 53
6.9
Ship the density meter .......................................................................................... 53
6.10
Dispose of the density meter ................................................................................. 54
7
Troubleshooting 55
7.1
List of errors and problems.................................................................................... 55
7.2
Restore the factory adjustment data ...................................................................... 56
7.3
Adjust the measurement accuracy ......................................................................... 56
7.3.1
Example: Adjustment with water ............................................................. 57
7.3.1.1
Configure the adjustment................................................................... 57
7.3.1.2
Perform the adjustment ..................................................................... 57
7.4
Restore the factory settings.........................................................................................59
7.5
View the firmware version and other system information .......................................... 59
8
Technical data 60
8.1
Density meter ...................................................................................................... 60
8.2
Measurement ....................................................................................................... 61
9
Accessories 62
9.1
Sampling ............................................................................................................. 62
9.2
Printers................................................................................................................ 63
9.3
Miscellaneous accessories ..................................................................................... 63
10
Appendix 64
10.1
Density of pure water (0…40 °C) ........................................................................... 64
10.2
Temperature-compensation coefficients ................................................................ 64
Index 65

4
Table ofContents
SBS-2510 Digital Density Meter
1 Introduction
Thank you for choosing a STORAGE BATTERY SYSTEMS SBS-2510 digital density meter. The handheld
density meter is a
measuring instrument used to determine the density of liquids.
About this document
The instructions in this document refer to the handheld density meter SBS-2510 running firmware
version V1.0.0 or higher.
If you have any additional questions, contact your authorized SBS sales representative or dealer
.
https://www.sbsbattery.com
Conventions and symbols
Note: For useful information about the product.
Refers to an external document.
Elements of instructions
Prerequisites
1 Steps
2 Steps
Intermediate results
3 Steps
Results

SBS-2510 Digital Density Meter
Introduction
5
2 Safety Information
•
This Reference Manual contains a full description of the instrument and its use.
•
Keep the Reference Manual for futurereference.
•
Include the Reference Manual if you transfer the instrument to other parties.
Only use the instrument according tothe Reference Manual. If you donotusetheinstrumentaccording to
the Reference Manual or if it is modified, the safety of the instrument may be impaired and Storage
Battery Systems LLC, assumes no liability.
2.1
Definitions of signal words and warning symbols
Safety notes contain important information on safety issues. Ignoring the safety notes maylead topersonal
injury, damage to the instrument, malfunctions and false results. Safety notes are marked with the following
signal words and warningsymbols:
Signal words
WARNING
A hazardous situation with medium risk, possibly resulting in death or severe injury
if not avoided.
NOTICE
A hazardous situation with low risk, resulting in damage to the instrument, other
material damage, malfunctions and erroneous results, or loss of data.
Warning symbols
Electrical shock
2.2
Product specific safety notes
Intended use
Thedigital density meter is designed to be used by trained staff and is intended for measuring the density
of liquid
samples that are compatible with the materials with which they come into contact.
Thedigital densitymeter isdesigned forindoor and outdoor operation in dryconditions. The
following site requirements apply:
•
The ambient conditions are within the limits specified in the technical data.
•
Non corrosive gas atmosphere
•
Non explosive atmosphere
•
No powerful electric or magnetic fields
Anyothertypeofuseandoperation beyond thelimitsofusestatedbyStorage Battery Systems, LLC
withoutconsent from Storage Battery Systems, LLC is considered as not intended.
This device complies with Industry Canada license-exempt RSS standard(s) and part 15 of the FCC Rules.
Operation is subject to the following two conditions: (1) this device may not cause interference, and (2)
this device must accept any interference, including interference that may cause undesired operation of the
device. Changes or modifications not expressly approved by the party responsible for compliance could
void the user's authority to operate the equipment.
Responsibilities of the instrument owner
Theinstrument owneristheperson holdingthelegaltitletotheinstrumentandwhousestheinstrument or
authorizes any person to use it, or the person who is deemed by law to be the operator of the instrument.
The instrument owner is responsible for the safety of all users of the instrument and third parties.
Storage Battery Systems, LLC assumes that the instrument owner trains users to safely use the
instrument in their
workplace and deal with potential hazards. Storage Battery Systems, LLC assumes that
the instrument owner provides
the necessary protective gear.

6
Design and Function
SBS-2510 Digital Density Meter
WARNING
NOTICE
Safety notes
Danger of death or serious injury due to electric shock!
Contact with parts that carry a live current can lead to death or injury.
1
Only use the SBS AC adapter designed for your instrument.
2Keep all electrical cables and connections away from liquids and moisture.
3Check the cables and the plugs for damage and replace damaged cables and plugs.
Risk of damage tothe instrument due tothe use ofunsuitable parts!
Using unsuitable parts with the instrument candamagetheinstrument or causeit to
malfunction.
−Only use parts from Storage Battery Systems, LLC that are intended to be
used with your instrument.

SBS-2510 Digital Density Meter
Safety Information
7
3
Design and Function
3.1
Instrument overview
12
11
13
1
2
10
3
9
4
8
5
7
6
No.
Name
Function
1
USB-C socket
To connect the density meter with the AC adapter or a computer.
2
Battery cover
To access the battery.
3
USB-A socket
To connect a USB, USB printer or Bluetooth Dongle.
4
Sample pump cover
To access the sample pump.
5
Sample pump
window
Toviewthesamplepumpandto check ifthesamplepumpisfilledor empty.
6
Filling tube
To fill and drain the measuring cell.
7
Filling opening with
locking screw
To fill and drain the measuring cell using a syringe. The locking screw closes
off the filling opening.
8
Measuring cell
window
To view the measuring cell and to check if the measuring cell is filled or
empty.
9
Navigation
joystick
To navigate through the menus.
10
Key 1
To start up the density meter, select menu items and to navigate.
11
Key 2
To select menu items and to navigate.
12
Key 3
To select menu items and to navigate.
13
Screen
To display settings and results.
3.2
Overview of functions
The digital density meter uses an oscillating body method as measurement technology. The digital
density meter has no
active temperature control.

8
Design and Function
SBS-2510 Digital Density Meter
1
2
3
4
5
If you measure samples with low viscosity, you can use the sample pump (1) and the filling tube (2) to fill
the measuring cell (5). For samples with high viscosity you can use a syringe (3) and the connector for the
syringe (4) to fill the measuring cell (5). The user can observe the filling through the window of the
measuring cell.
Forrepeated measurements, you candefineandsaveworkflows asmethods.Twoworkflow types are
available:
•
Customizable guided workflow: guides the user step by step through the density determination.
•
Unguided workflow: the user decides which steps are needed.
Theresultsareautomatically convertedintooneofthefollowing predefined unitsoraunitthatthe user
defines.
•
Density
•
Specific gravity
•
Alcohol concentration
•
American Petroleum Institute (API density, API specific gravity, API degree)
•
Baumé scale
•
Sulfuric acid concentration
•
Sucrose concentration

SBS-2510 Digital Density Meter
Design and Function
9
Icon
Location
Explanation
Sampling ribbon
Sample pump activated and piston in the lowermost position.
3.3
User interface
3.3.1
Home
screen
1
2
3
4
5
6
No.
Name
Explanation
1
Status ribbon
Displaysthecurrentdate,time,batterychargestatusandconnectionto
Accessories.
2
Method ribbon
Displays the type of density determination and the method identification or the
selected standard.
•
MS: measurement using amethod
•
TE: test
•
ADJ
: adjustment
3
Sample ID ribbon
Displays the sample ID.
4
Measuring ribbon
Displaystheunit,themeasured valueorresultand thetemperatureofthe
measuring cell.
5
Sampling ribbon
Displays the current status of the sample pump or syringe.
6
Keyfunctions ribbon
Displays the function of the keys.
3.3.2
Icons on the screen
Statusribbon Barcode reader is scanning.
Statusribbon Density meter is sending data to the printer.
Status ribbon Shows the charge of the battery.
Status ribbon
Battery is charging.
Sampling ribbon
Syringe mode activated. The sample pump is deactivated.
Sampling ribbon
Sample pump activated and piston in theuppermost position.
d [g/cm3]
Temp. 23 °C
Menu Results Start

10
Installation and commissioning
SBS-2510 Digital Density Meter
Part
Handheld density meter
Order number
SBS-2510
4
Installation and commissioning
4.1
Scope of delivery
Filling Tube
190 mm
•
Tube
•
Connector syringe/filling tube
•
Washer
Battery Li-Ion
2400mAh
2510-TUBE-190
2510-BATTERY
Bluetooth Dongle 2510-DONGLE
4.2
Unpack the density meter
1
Remove the SBS-2510 digital density meter from the protective packaging.
2
Store the packing material for later transport over long distances.
3Check if you received all parts listed in the scope of delivery.
4
Inspect the parts visually for flaws ordamage.
5If parts are missing or damaged, report it immediately and file a freight claim if needed.
UserManual
–
USB-Charger
Cable
2510-USB-C

SBS-2510 Digital Density Meter
Installation and commissioning
11
WARNING
NOTICE
4.3
Charge the density meter
You can either charge the SBS-2510 digital density meter using the supplied AC adapter ora computer.
Recharging an empty
battery takes approximately three hours.
4.3.1
Charge with the AC adapter
The AC adapter is suitable for all supply line voltages ranging from 100...240 V AC and 50/60 Hz.
Danger of death or serious injury due to electric shock!
Contact with parts that carry a live current can lead to death or injury.
1
Only use the Storage Battery Systems SBS-2510 AC adapter designed for your instrument.
2Keep all electrical cables and connections away from liquids and moisture.
3Check the cables and the plugs for damage and replace damaged cables and plugs.
Danger of damage to the AC adapter due to overheating!
If the AC adapter is covered or in a container, it is not sufficiently cooled and overheats.
1
Do not cover the AC adapter.
2Do not put the AC adapter in a container.
Assemble the AC adapter
1Slide the desired set of prongs (1) into the AC
adapter (2). 1
2
Insert the USB-A plug of the USB-C cable in the
USB-A socket of the AC adapter.
2
Connect the density meter to the power supply
1
Insert the USB-C plug of the USB-C cable in the USB-C socket of the density meter.
2Install the cables in such a way that they cannot be damaged or interfere with operation.
3
Insert the plug of the AC adapter in a power outlet that is easily accessible.
The density meter starts charging and the
icon is displayed.
Change the prongs of the AC adapter
1
Pull the plug of the AC adapter out of the power
outlet. 1
2Push the button (2) and slide the set of prongs (1)
out. 2
3
Slide the desired set of prongs into the AC adapter.
4.3.2
Charge with a computer
A running computer with USB-A sockets (USB 2.0 or higher) is available.
1
Insert the USB-C plug of the USB-C cable in the USB-C socket of the density meter.
2Install the cables in such a way that they cannot be damaged or interfere with operation.

12
Installation and commissioning
SBS-2510 Digital Density Meter
3
Insert the USB-A plug in the USB-A socket of the computer.
The density meter starts charging and the
icon is displayed.
4.4
Setup for working with the sample pump
4.4.1
Activate the sample pump mode
1Press the Menu key.
2
Navigate to
Settings
>
Measurement
>
Sampling
.
The Sampling window opens.
3
Navigate to
Sample pump
.
4Press the OK key.
5Navigate back to the home screen.
The icon is displayed in the sampling ribbon.
4.4.2
Install the filling tube
The filling tube (tube (1), connector (2) and
washer (3)) is assembled.
The locking screw (2) is installed and tight.
−Screw the connector (1) of the filling tube into the
opening (3) and tighten it.
1
2 3
1
2
3

SBS-2510 Digital Density Meter
Installation and commissioning
13
4.5
Install accessories
4.5.1
Setup for working with a syringe
When you work with a syringe you can place the density meter either on the bench or hold it upright.
4.5.1.1 Activate the syringe mode
The piston is in the lowermost position.
1Press the Menu key.
2
Navigate to
Settings
>
Measurement
>
Sampling
.
The Sampling window opens.
3
Navigate to
Syringe
.
4Press the OK key.
5Navigate back to the home screen.
The icon is displayed in the sampling ribbon.
6
If you want place the density meter on the bench, activate the auto rotation of the screen.
See also
Activate and deactivate the auto rotation of the screen
}
Page 19

14
Installation and commissioning
SBS-2510 Digital Density Meter
Connection type
Printer
4.5.1.2 Install the connector for the syringe
The connector for the syringe is available.
The filling tube is installed.
1
Unscrewthelockingscrewcounterclockwise witha
flat screwdriver and remove it.
2
Screwtheconnector into thefilling openingand
tighten it.
See also
Accessories
}
Page 62
Install the filling tube
}
Page 12
4.5.2
Connect a printer
In order to print the results right after the measuring procedure, the density meter has to be connected to a
USB or Bluetooth printer. Alternatively, the results can be printed at a later time from the
Results
menu.
The following printer types are compatible with the density meter:
Bluetooth
2510-DONGLE (sold separately)
USB 2510-PRINTER (sold separately)
Note
TheBluetooth functionisonly available inselected countries with the necessary approvals. Formore
information, contact an authorized Storage Battery Systems, LLC sales or service representative.
https://www.sbsbattery.com

SBS-2510 Digital Density Meter
Installation and commissioning
15
Refer to the user documentation of your printer for setting up and operating the printer.
See also
Accessories
}
Page 62
4.5.2.1 Connect a USB printer
1Press the Menu key.
2Navigate to Settings > Printer > Printer type.
The Printer type window opens.
3Navigate to USB.
4Press the OK key.
5
Connect the USB-A plug of USB-C cable with the USB-A socket of the printer.
6
Connect the USB-A plug with the USB-A socket of the density meter.
7
Switch on the printer.
The connection is established.
See also
Configure the automatic printing of results
}
Page 30
Print results
}
Page 45
4.5.2.2
Connect a Bluetooth printer
The Bluetooth printer is set up andrunning.
1
Insert the Bluetooth dongle in the USB-A socket of the density meter.
2Press the Menu key.
3Navigate to Settings > Printer > Printer type.
The Printer type window opens.
4
Navigate to
Bluetooth
.
5Press the OK key.
6Press the Menu key.
7Navigate to Printer selection.
The
Printer selection
window with a list of available
Bluetooth printers opens.
8
Navigate to the Bluetooth printer you want to
connect.
9Press the OK key.
See also
Configure the automatic printing of results
}
Page 30
Print results
}
Page 45
4.5.2.3
Print a test page
The printer is connected and running.
1Press the Menu key.
2Navigate to Settings > Printer > Test printer.
If there is no connection yet, the notification Connecting to printer is displayed.
When the connection is established, a test page is printed.

16
Installation and commissioning
SBS-2510 Digital Density Meter
See also
Connect a printer
}
Page 14
4.6
Configure the density meter
4.6.1 Change the date and time format
The following date formats are available:
•
dd/mm/yyyy
: day/month/year, e.g. 30/11/2018
•
mm/dd/yyyy
: month/day/year, e.g. 11/30/2018
•
yyyy/mm/dd
: year/month/day, e.g. 2018/11/30
•
dd.mm.yyyy
: day.month.year, e.g. 30.11.2018
The following two time formats are available.
•
24 h: 24-hour clock, e.g. 6:30 and 18:30
•
am/pm: 12-hour clock, e.g. 6:30 am and 6:30 pm
Procedure
1Press the Menu key.
2
Navigate to
Settings
>
Date / Time
.
The
Date / Time
window opens.
3
Navigate to
Date
or
Time
.
4To change the date or time, move the navigation joystick up to raise or down to lower the number.
5
To switch between day, month and year orhours and minutes, move the navigation joystick to the left
or right.
6Press the OK key.
7
Navigate to
Date format
or
Time format
.
8
Navigate to the format you want to use.
9Press the OK key.

SBS-2510 Digital Density Meter
Installation and commissioning
17
4.6.2
Change the temperature unit
Two temperature units are available.
•
°
F
•
°C
When you change the temperature unit, temperatures are displayed in the selected unit. The temperature
unit of results that were determined before you changed the unit remain unchanged.
Procedure
1Press the Menu key.
2
Navigate to
Settings
>
Global units
>
Temperature unit
.
The Temperature unit window opens.
3
Navigate to the desired
Temperature unit
.
4Press the OK key.
The temperatures are displayed in the selected unit.
4.6.3
Change the density unit
Three density units are available.
•
g/cm³
•
kg/m³
•
lb/gal (US)
When you change the density unit, density values are displayed in the selected unit. There are two
exceptions.
•
The densities of results that were determined before you changed the unit remain unchanged.
•
If you select the unit [lb/gal], the unit [g/cm3] is still used for adjustments and tests.
Procedure
1Press the Menu key.
2Navigate to Settings > Global units > Density unit.
The Density unit window opens.
3
Navigate to the desired
Density unit
.
4Press the OK key.
The densities are displayed in the selected unit
4.6.4
Change energy saver settings
The settings of the parameters
Brightness
,
Energy saver
and
Auto shutdown
influence the power
consumption and thus the battery life.
Parameter
Description
Values
Brightness
Defines the brightness of the screen.
10...100 %
Energy saver
Defines if the screen is dimmed when no action has been
performed for a given time.
Off | 30 | 60 | 90 | 120
seconds
Auto shutdown
Defines if the density meter is shut down when no action has
been performed for a giventime.
Off | 2 | 5 | 10 minutes
Procedure
1Press the Menu key.
2
Navigate to
Settings
>
Screen
.
The Screen window opens.
3
Navigate to the desired parameter and change the settings.

18
Installation and commissioning
SBS-2510 Digital Density Meter
Action Password protected
4.6.5
Protect actions with a password
With the parameter
Password
you can prevent users from performing certain actions without a password.
The following table shows which actions are password-protected.
Start methods.
No
Start tests. No
Start adjustments.
Yes
Viewtheconfiguration ofmethods, testsandadjustments.
No
Changetheconfiguration ofmethods, testsandadjustments. Yes
Create and delete methods. Yes
View, print and export results.
No
Delete all results.
Yes
Viewthesettings ofthe densitymeter. No
Change the settingsofthedensity meter. Yes
Update the firmware.
Yes
Restore factory adjustment.
Yes
Restore factory settings.
Yes
Thepassword has to beentered once before a user performs a password-protected action and does not
have to be reentered until the density meter is restarted.
If the user forgets the password, the universal password 8606 unlocks all actions and settings.
4.6.5.1
Enable the password protection
4.6.5.1.1
Press the Menu key.
4.6.5.1.2 Navigate to
Settings
>
Password
>
Password protection
.
The Password protection window opens.
4.6.5.1.3 Navigate to
Yes
.
4.6.5.1.4
Press the OK key.
The Password window opens.
4.6.5.1.5
Enter a password with the navigation joystick.
4.6.5.1.6
Press the OK key.
4.6.5.1.7 Reenter the password.
4.6.5.1.8
Press the OK key.
The password has to be entered before the user can perform a protected action.
4.6.5.2
Disable the password protection
1Press the Menu key.
2
Navigate to
Settings
>
Password
>
Password protection
.
The Password protection window opens.
3
Navigate to
No
.
4Press the OK key.
The Password window opens.
5Enter the password with the navigation joystick.
6Press the OK key.
Users can perform all actions.
Other manuals for SBS-2510
2
Table of contents
Other SBS Measuring Instrument manuals