3
Installation, Installatie, Installation, Installation
D
Technische Hinweise:
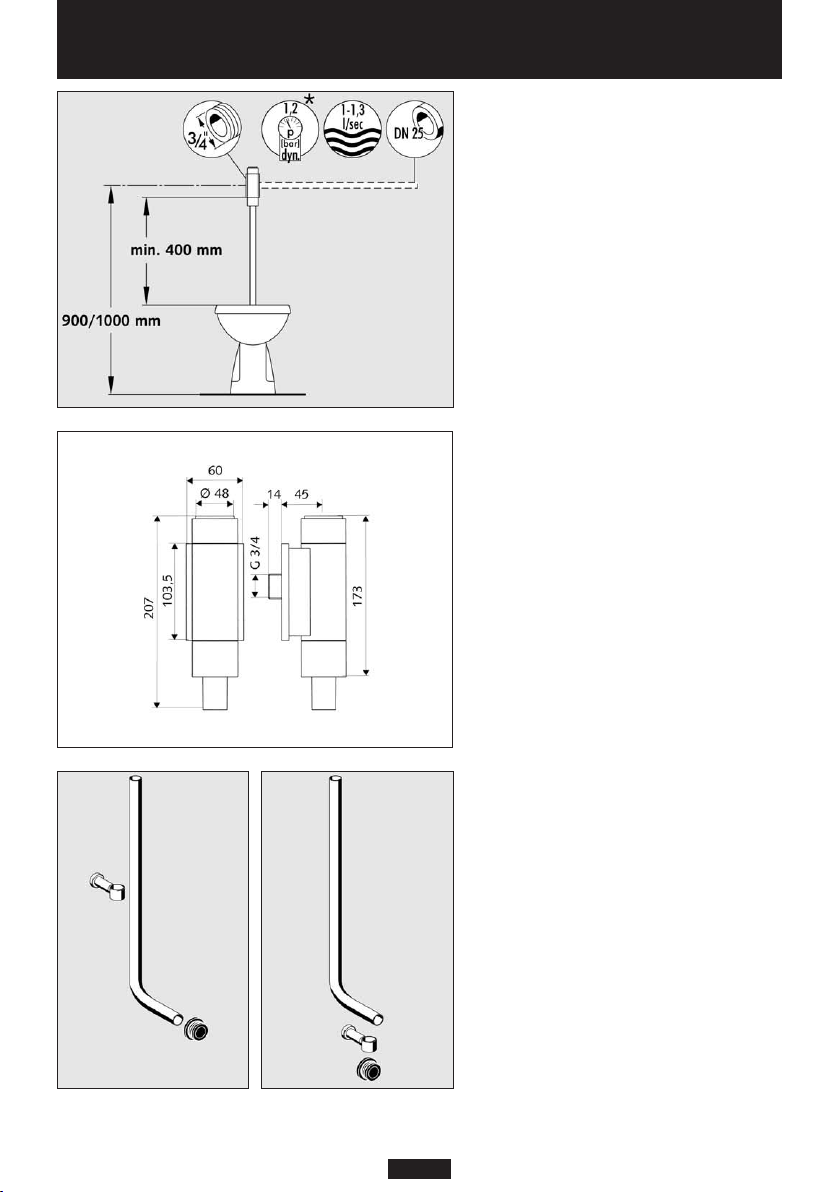
1. WC-Druckspüler nach DIN EN 12541,
DN 20 lasse 6 für Flach und Tiefspül WC
DIN-DVGW BP0379
Leitungsdimensionierung nach DIN 1988 Teil 3
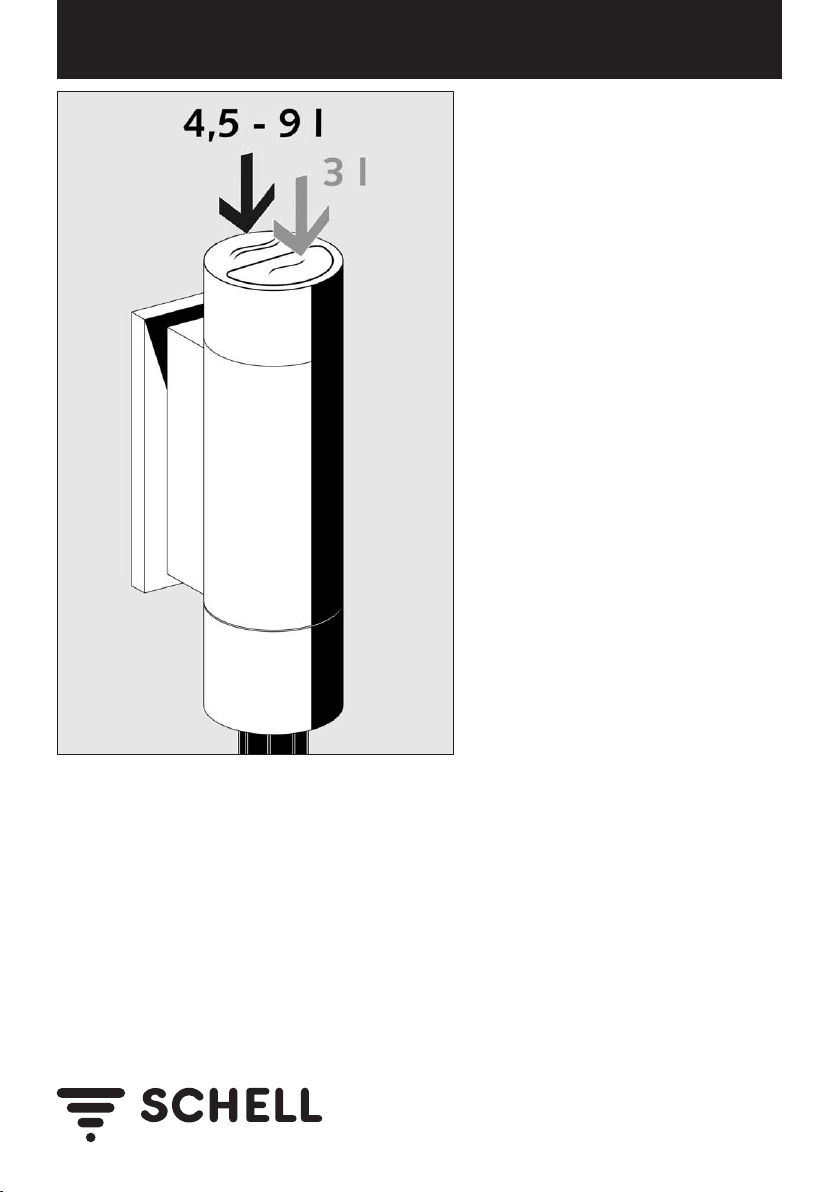
Hauptspülmenge: 4,5 - 9 Liter einstellbar
Spartaste: 3 Liter
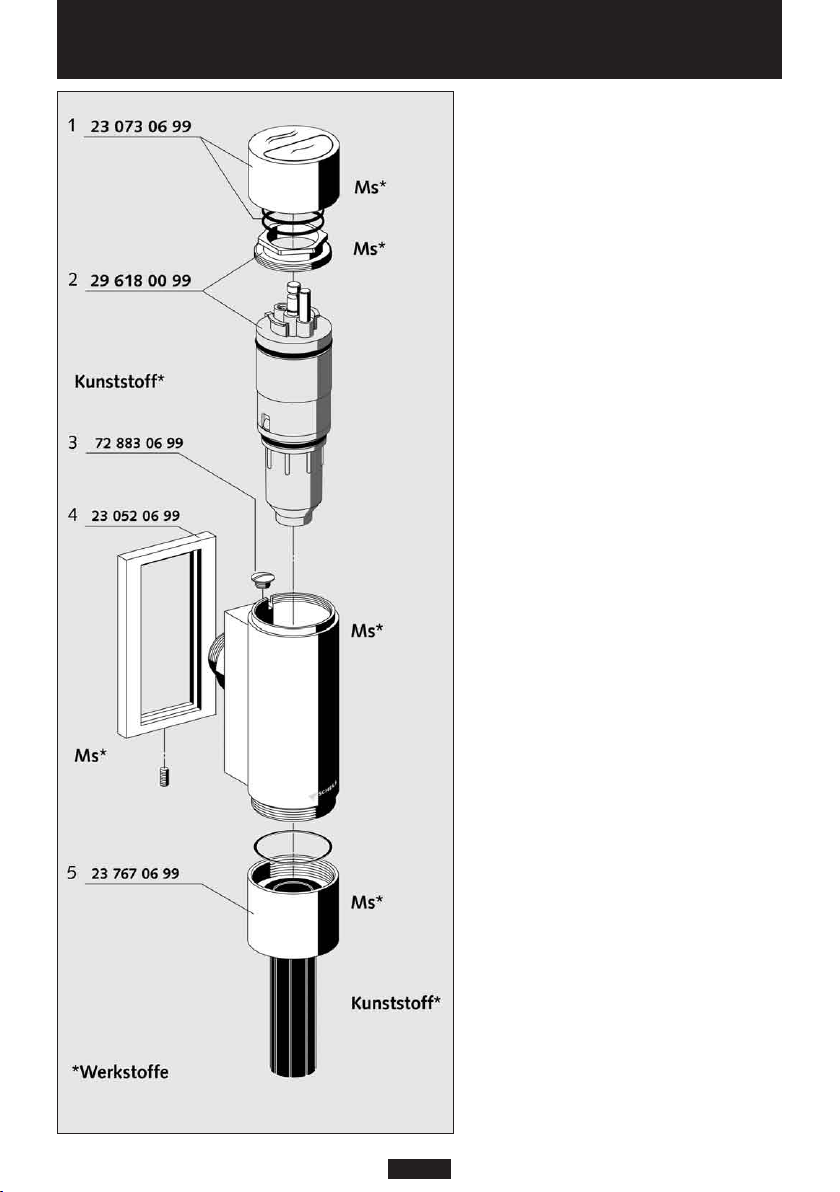
2. Abmessungen
3. Spülrohrgarnitur, Art.-Nr. 03 209 06 99
4. Einzelteile:
Spülrohr 28/26 mm, Art.-Nr. 03 100 06 99
Spülrohrschelle, Art.-Nr. 03 203 06 99
WC-Innenverbinder: Art.-Nr. 77 101 00 99
O
Technische richtlijnen:
1. WC-drukspoeler volg. DIN EN 12541,
DN 20 klasse 6 voor vlak- en diepspoel WC
DIN-DVGW BP0379
Waterleiding dimensioneren volgens DIN 1988 deel 3
Hoofdspoelvolume: 4,5 - 9 liter instelbar
Spaarknop: 3 liter
2. Afmetingen
3. Spoelbuisset, Art. nr. 03 209 06 99
4. Afzonderlijke delen:
Spoelbuis 28/26 mm, Art. nr. 03 100 06 99
Spoelbuisbeugel, Art. nr. 03 203 06 99
WC-aansluitmof voor inwendige aansluiting
Art. nr. 77 101 00 99
F
Directives techniques:
1. Robinet-poussoir urinoir selon DIN EN 12541,
DN 20 classe 6 pour cuvette à fond plat ou profond
DIN-DVGW BP0379
Dimensionnement des canalisations suivant
DIN 1988 partie 3
Volume de rinçage principal: 4,5 - 9 l réglable
Touche économique: 3 litres
2. Dimensions
3. Set tube de chasse, Réf. 03 209 06 99
4. Pièces séparées:
Tube de chasse 28/26 mm, Réf. 03 100 06 99
Collier / tube de chasse, Réf. 03 203 06 99
Manchon/WC pour raccordement intérieur,
Réf. 77 101 00 99
G
Technical instructions:
1. Urinal flush valve unit according to DIN EN 12541,
DN 20 class 6 for wash-out and wash-down WC
DIN-DVGW BP0379
Pipe dimension according to DIN 1988 part 3
Main flush quantity: 4,5 - 9 l adjustable
Economy button: 3 I
2. Dimensions
3. Flush pipe connection kit, Item no. 03 209 06 99
4. Single parts:
Flush pipe 28/26 mm, Item no. 03 100 06 99
Flush pipe clip, Item no. 03 203 06 99
Internal WC connector, Item no. 77 101 00 99
1
2
34
1”/DN 25
Wasserzuleitung
Watertoevoer
Alimentation d’eau
water feed
*Fließdruck, Werkdruk, Pression dynamique, flow pressure