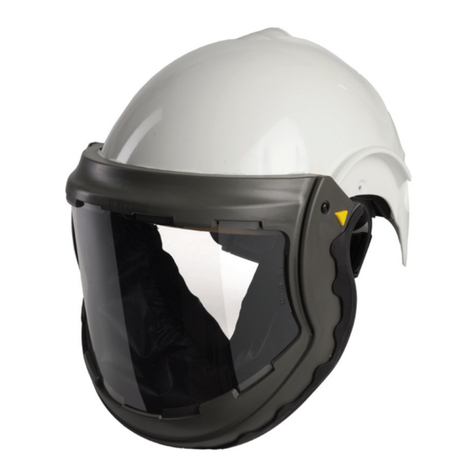
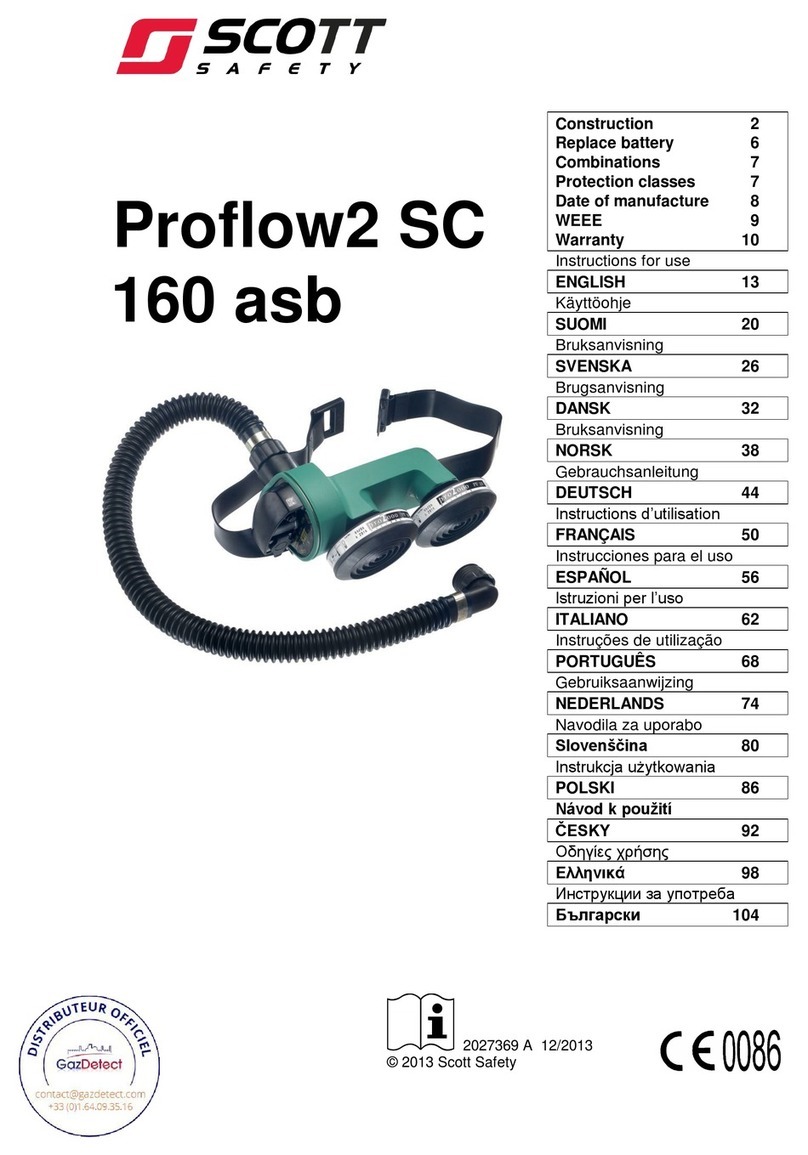
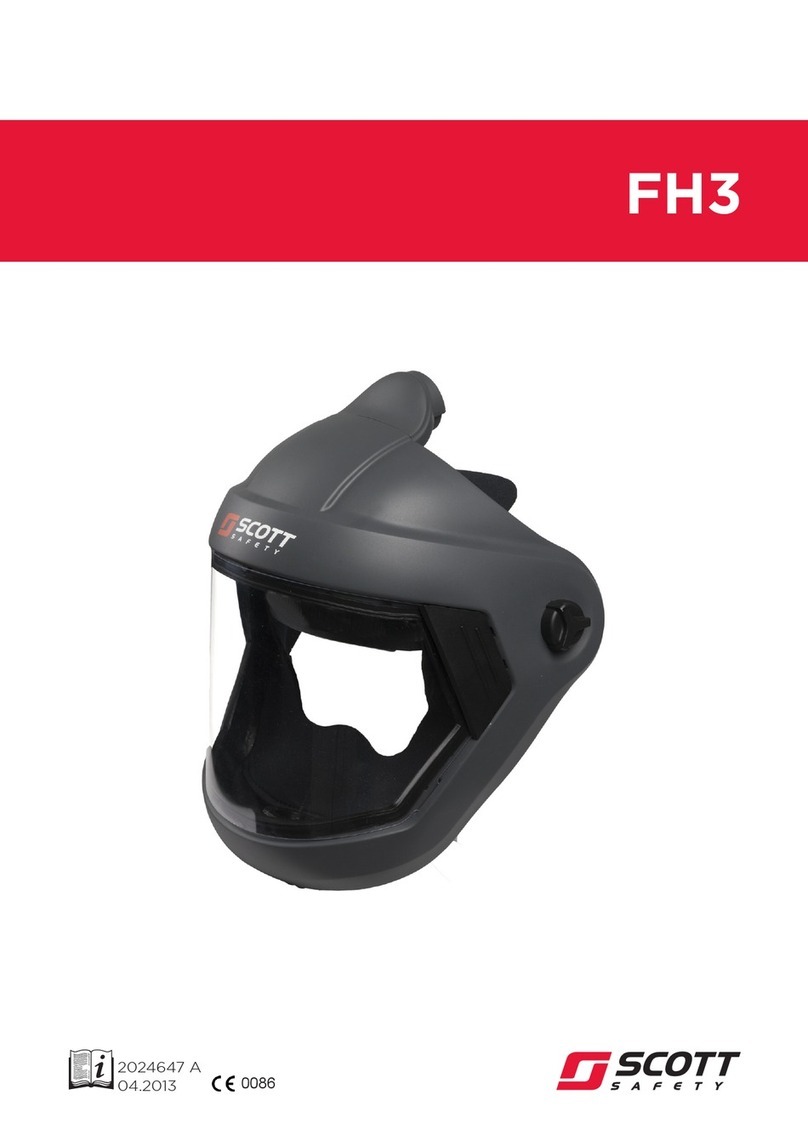
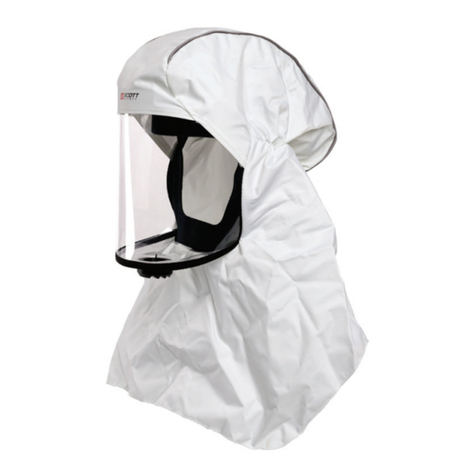
Scott Safety FH1 Manual

FH1,FH2 & FH21
2025048 A
04.2012 ce0086

Operating and Maintenance Instructions 1
Gebrauchs- und Wartungsanleitung 9
Instructions d'utilisation et d'entretien 17
Gebruiks- en onderhoudsaanwijzingen 25
Instrucciones de Funcionamiento y Mantenimiento 33
Instruções Operacionais e de Manutenção 41
Istruzioni d’uso e manutenzione 49
Οδηγίες λειτουργίας και συντήρησης 57
Kullanım ve Bakım Talimatları 65

1
FH1, FH2 & FH21
GB
Operating and Maintenance Instructions
!
!
!
!
!
!
!
!
!
!
!
!
!
!
!
!
!
!
WARNINGS
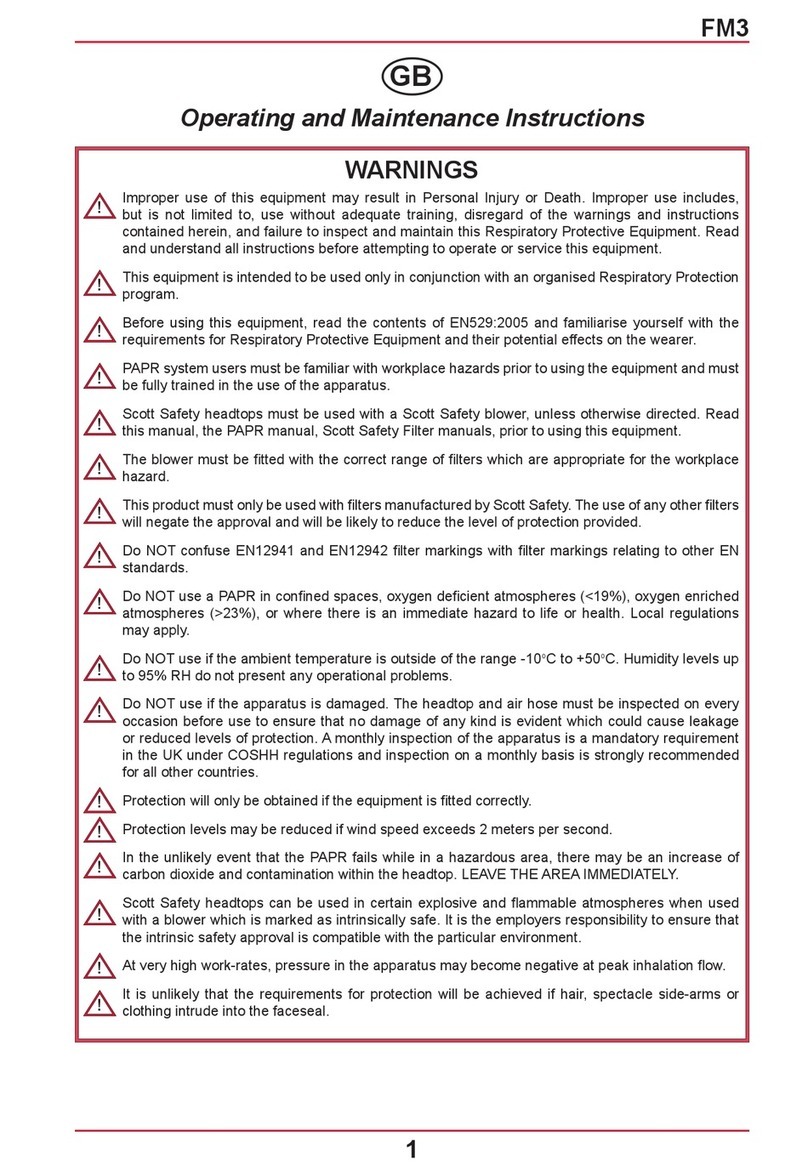
Improper use of this equipment may result in Personal Injury or Death. Improper use includes, but
is not limited to, use without adequate training, disregard of the warnings and instructions con-
tained herein, and failure to inspect and maintain this Respiratory Protective Equipment. Read and
understand all instructions before attempting to operate or service this equipment.
This equipment is intended to be used only in conjunction with an organised Respiratory Protection
program.
Before using this equipment, read the contents of EN529:2005 and familiarise yourself with the
requirements for Respiratory Protective Equipment and their potential effects on the wearer.
PAPR system users must be familiar with workplace hazards prior to using the equipment and
must be fully trained in the use of the apparatus.
Scott Safety headtops must be used with a Scott Safety blower, unless otherwise directed. Read
this manual, the PAPR manual, Scott Safety Filter manuals, prior to using this equipment.
The blower must be fi tted with the correct range of fi lters which are appropriate for the workplace
hazard.
This product must only be used with fi lters manufactured by Scott Safety. The use of any other
fi lters will negate the approval and will be likely to reduce the level of protection provided.
Do NOT confuse EN12941 and EN12942 fi lter markings with fi lter markings relating to other EN
standards.
Do NOT use a PAPR in confi ned spaces, oxygen defi cient atmospheres (<19%), oxygen enriched
atmospheres (>23%), or where there is an immediate hazard to life or health. Local regulations
may apply.
Do NOT use if the ambient temperature is outside of the range -10oC to +50oC. Humidity levels up
to 95% RH do not present any operational problems.
Do NOT use if the apparatus is damaged. The headtop and air hose must be inspected on every
occasion before use to ensure that no damage of any kind is evident which could cause leakage
or reduced levels of protection. A monthly inspection of the apparatus is a mandatory requirement
in the UK under COSHH regulations and inspection on a monthly basis is strongly recommended
for all other countries.
Protection will only be obtained if the equipment is fi tted correctly.
Protection levels may be reduced if wind speed exceeds 2 meters per second.
In the unlikely event that the PAPR fails while in a hazardous area, there may be an increase of
carbon dioxide and contamination within the headtop. LEAVE THE AREA IMMEDIATELY.
Scott Safety headtops can be used in certain explosive and fl ammable atmospheres when used
with a blower which is marked as intrinsically safe. It is the employers responsibility to ensure that
the intrinsic safety approval is compatible with the particular environment.
At very high work-rates, pressure in the apparatus may become negative at peak inhalation fl ow.
It is unlikely that the requirements for protection will be achieved if hair, spectacle side-arms or
clothing intrude into the faceseal.
Filters must not be fi tted directly to the headtop.

2
FH1, FH2 & FH21
TECHNICAL DESCRIPTION
The FH1, FH2 and FH21 headtops are a range of protective headtops designed to be used
alongside Scott Safety powered air purifying respirators (PAPR), and one of three types of
breathing hose.
They are approved to EN12941-TH3.
• FH1 is a full face hood, manufactured from polyurethane-coated nylon, visor manufactured
in Poly Ethylene Tetra Glycol (PETG)
• FH2 is a full face hood, manufactured from polyurethane-coated nylon with added
protection of a full neck cape, PETG visor
• FH21 is a full face hood, manufactured from polyurethane, encased between two layers of
textured, nonwoven, polypropylene anti-static material, PETG visor.
When used with a Scott Safety PAPR, these headtops are designed to be used alongside three
types of breathing hose:
1. 400mm Polyurethane self adjusting - Scott PU Stretch 400
2. 850mm Polyurethane non-stretch - Scott PU non-stretch
3. 800mm Ethylene Propylene Diene Monomer - Scott EPDM
The choice of hose is dependent on your own work practises/needs and is beyond the scope
of this manual. For further information contact Scott Safety customer services, details at the
rear of this manual.
The FH1, FH2 and FH21 headtops are fully adjustable to fi t head sizes with a horizontal
measurement of 53 - 65cm (measured at brow level, full circumference) and a vertical
measurement of 53 - 72cm (measured under the chin, full circumference)
This series of headtops use an internal soft elasticated ‘head net’ with a lightweight browband,
complete with comfort sweat-band, and a neoprene faceseal, allowing the headtops to be fi tted
easily and with comfort.
FH1, FH2 and FH21 are designed to operate with a fl ow rate of between 120 litres per minute
and 220 litres per min and are compatible for use with Scott PAPR systems (EN12941 TH3)
Please read this manual in conjunction with the respective system manual prior to use.
Note
All new headtops are supplied with a protective fi lm secured onto the
visor. This fi lm is for transit purposes only and must be removed prior to
the headtop being used.

3
FH1, FH2 & FH21
1. Head Net fabric panel
2. Adjustable length elasticated crown strap
3. Adjusting buckle
4. Rear of head elasticated strap/seal
5. Browband with comfort sweat-band
6. Neoprene faceseal
7. Front positioning elastic
8. Rear positioning elastic
9. Crown strap positioning strips
PARTS DIAGRAM

4
FH1, FH2 & FH21
PRE-USE CHECKS
Other than the addition of the neck cape the
FH1, FH2 and FH21 are similar in operation
and in design, therefore the following instruc-
tions are applicable to all in the series.
HOSES
• Inspect the breathing hose for any signs
of creasing and ensure that it is not torn
• Ensure that both ends of the breathing
hose are free from dirt or debris and that
there is no damage to the thread on the
male end
• Test the smooth operation of the rotating
spacer, it should rotate through 360o
• Inspect the breathing hose nut and
washers, check that the nut threads
freely over the male breathing hose
connector
• For a Spirit hose check that the red
locking collar on the breathing hose
female connector works correctly and
is free from damage, ensure that the
witness marks are aligned with the
opening in the black collar and ready
to place over the air outlet on the Spirit
blower
• For a Tornado/Profl ow hose check
that the ‘O’ ring is in place and in good
condition
Note
The following instructions are for FH1, FH2 and FH21 headtops and
their breathing hoses. These instructions must be used alongside the
Operating and Maintenance Instructions for the chosen PAPR.
Note
The life of a headtop has many factors
that make it diffi cult to predict service life.
Therefore the headtop should be inspected
carefully before and after each use to
ensure that it has not become damaged.
As a guideline we would anticipate that a
headtop used indoors and for ‘occasional’
use would have a service life of about
fi ve years, provided that the equipment is
stored and maintained correctly.
Note
‘O’ rings and gaskets on all hoses should
be replaced at least annually.

5
FH1, FH2 & FH21
The headtop and breathing hose are now
ready to be attached to the PAPR
Assembly
NOTE
Whilst the materials that may come into
contact with the wearers skin are not
known to be likely to cause irritation to the
skin or other adverse effects to health, they
may cause allergic reactions in particularly
susceptible individuals.
Headtop
• Check that the headtop is in a good,
clean condition, free from any damage
and is not torn; paying attention to the
hose opening, also the browband, head
net harness, faceseal and exhale valve
• Inspect the visor for any signs of
damage, and ensure visor is free from
deep scratches, cracks or crazing
• Make sure that there are no blemishes,
solvents or paint that may obscure vision
• Examine the browband and the head net
harness, ensuring that all soft elasticated
supports are in place
POWERED AIR SUPPLY SYSTEM
The PAPR must be checked in accordance
with the operating and maintenance
instructions specifi c for the chosen model.
Once all parts have been verifi ed serviceable
then the system can be fully assembled in
preparation for donning, see section Donning.

6
FH1, FH2 & FH21
DONNING
The donning procedures are the same for
FH1, FH2 and FH21. When donned correctly
the browband will be central to the user’s
forehead and the head net will sit comfortably
over the user’s head/crown.
Glasses should NOT be worn with the FH1,
FH2 and FH21 as this will affect the seal
around the user’s face.
When worn correctly the headtops will be
comfortable and a full range of motion will be
achievable.
• While holding the headtop at either side
of the browband, offer your forehead
onto the browband.
• Pull the neoprene faceseal onto the face
and under the chin using the locating tag
• With your forehead in the correct position
(the browband should be just above
the eyebrows) slowly ease the head net
onto the top of your head by pulling the
locating tab at the rear.
• Ensure the head net is fi tted correctly,
not rucked or uneven.
The head net is critical to the integrity of
the headtop
NOTE
The PAPR must go through a pre-use
check in accordance with the Operating
and Maintenance Instructions manual prior
to use.
The breathing hose must be attached to the
blower prior to donning the Headtop - See
Operating and Maintenance Instructions.
• Pull the rear of the headtop fully down
into a comfortable and secure position.
• If using the FH2 or FH21 full cape
versions then pull the cape down fully
until it rests fl at, covering the upper part
of the shoulders, chest and back
• Ensure that there is a comfortable ten-
sion and contact around the faceseal
with no gaps
• Test for a good range of motion. The
faceseal should remain in contact with
the face
NOTE
On initial use the headtop may be too tight
or too loose around the faceseal area.
If this is the case the headtop may be
adjusted to improve comfort and faceseal,
using the adjustment buckle shown in
the drawing page 5. The buckle can be
opened and the elastic either tightened or
slackened to suit. Remember to close the
buckle after adjustment.

7
FH1, FH2 & FH21
DOFFING
Once free of any hazard switch off the blower
• If wearing FH1 then simply pull the visor
away from the face with the locating tag
and lift off the headtop
• With FH2 and FH21 gather up the neck
cape, pull the visor away from the face
and lift off the headtop
• Place the headtop onto a clean surface
• Remove the PAPR in accordance
with the Operating and Maintenance
instructions
• Proceed with after use cleaning and
storage
CAUTION
DO NOT REMOVE THE HEADTOP UNTIL
YOU ARE IN A SAFE AND HAZARD
FREE ZONE
AFTER USE CLEANING
• Disconnect the breathing hose from the
blower
• Inspect the headtop for worn, ageing or
damaged components
• Carefully wash or wipe clean the
headtop and wipe clean the blower with
a warm water solution containing a mild
detergent
• It is recommended that headtop visors
be wiped clean with Distel® wipes
• If necessary, wash the outside of
the breathing hose carefully using
warm water solution containing a mild
detergent
• Ensure the breathing hose connections
are free from all dirt or debris that could
prevent an effective seal with the blower
Once clean all components must be left to
dry naturally.
Note
If during use the equipment may have
become contaminated by hazardous
substances, the contamination must
be identifi ed and properly removed or
the contaminated components must be
replaced before next use.
Disposal of the contaminated components
must be carried out in accordance with
local regulatory requirements.
NOTIFIED BODIES
BSI (0086)
Kitemark Court,
Davy Ave,
Knowlhill,
Milton Keynes,
MK5 8PP.
England

8
FH1, FH2 & FH21
STORAGE
Once all the components are clean and dry
store in a clean environment.
SPARES
Replacement parts and accessories may
be ordered through Scott Safety customer
services. The department can also provide
general information on other Scott Safety
products.
Scott Safety
Pimbo Road, West Pimbo,
Skelmersdale, Lancashire,
WN8 9RA, England
www.scottsafety.com
Tel: +44 (0) 1695 711711
Fax: +44 (0) 1695 711775
WARRANTY
The products manufactured at our factories
in Skelmersdale and Vaasa carry a warranty
of 12 months (unless stated otherwise).
This includes parts, labour and return to site
The warranty period runs from the date of
purchase by the end user.
These products are warranted to be free
from defects in materials and workmanship
at the time of delivery. Scott Safety will be
under no liability for any defect arising from
wilful damage, negligence, abnormal working
conditions, failure to follow the original
manufacturer’s instructions, misuse or
unauthorised alteration or repair.
Evidence of purchase date will need to be
produced for any claims arising during the
warranty period. All warranty claims must
be directed through Scott Safety customer
services and in accordance with our sales
return procedure.
MAINTENANCE
Regular and scheduled maintenance is
essential for the integrity of the equipment.
As well as the pre-use and storage checks
the apparatus must be checked on a monthly
basis, a service should be performed annually
by a qualifi ed service and maintenance
operative.
A regular monthly maintenance schedule is
performed as per the pre-use checks which
includes a thorough visual of all components.
Carry out a thorough inspection of all
component parts before and after each
occasion of use.
Pay particular attention on the headtops to
the exhalation valve and the insertion point of
the blower assembly hose.
The exhalation valve on the headtops
must be replaced annually regardless of
the condition.
In storage, exhalation valves have a shelf life
of fi ve years, after which time they should be
discarded.
Exhalation valves are marked with a code
indicating the year of manufacture. The code
‘07’ corresponds to the year 2007 and a dot
is added each year thereafter. The code ‘07•’
(notice the dot after the 7) indicates the year
2008.
INSPECTION DETAILS
Record test and maintenance details on the
inspection sheet provided at the rear of this
manual.
Information recorded usually includes:
• Name of employer responsible for the
apparatus
• Make, model number or identifi cation
mark of the apparatus, together with a
description of any distinguishing features
• Date of inspection/maintenance
together with name, signature or unique
identifi cation mark of the examiner
• Condition of the apparatus, details of
any defects found and any remedial
action taken
9
FH1,FH2 & FH21
D
Betriebs- und Wartungsanleitung
!
!
!
!
!
!
!
!
!
!
!
!
!
!
!
!
!
!
WARNHINWEISE
Die unsachgemäße Verwendung dieses Gerätes kann in Personenschäden oder Todesfolge
resultieren. Die unsachgemäße Verwendung umfasst - ist jedoch nicht beschränkt auf - den
Einsatz ohne entsprechende Schulung, eine Missachtung der in diesem Dokument enthaltenen
Warnhinweise und Anweisungen sowie unterlassene Inspektion und Wartung dieses
Atemschutzgerätes. Bitte lesen Sie alle Anweisungen gründlich, bevor Sie versuchen, das Gerät
zu betreiben oder zu warten.
Dieses Gerät ist ausschließlich zum Einsatz im Rahmen eines organisierten Atemschutzprogramms
konzipiert.
Lesen Sie vor Gebrauch dieses Gerätes den Inhalt der Norm EN529:2005 und machen Sie sich mit
den Anforderungen an Atemschutzgeräte sowie ihren potenziellen Auswirkungen auf den Träger
vertraut.
Benutzer von PAPR-Systemen müssen vor Gebrauch des Gerätes mit den am Arbeitsplatz
vorherrschenden Gefahren vertraut sein und eine gründliche Schulung zum Einsatz des Gerätes
absolviert haben.
Wenn nicht anders angegeben, müssen Scott Safety Kopfteile zusammen mit einem Scott Safety
Gebläse verwendet werden. Lesen Sie vor Gebrauch dieses Gerätes dieses Handbuch, das PAPR
Handbuch sowie die Scott Safety Filterhandbücher.
Das Gebläse muss mit dem korrekten Filtersortiment ausgestattet sein, das für die am Arbeitsplatz
vorherrschenden Gefahren geeignet ist.
Dieses Produkt darf nur mit Filtern, die von Scott Safety hergestellt wurden, verwendet werden.
Die Verwendung anderer Filter macht die Gerätezulassung ungültig und beeinträchtigt sehr
wahrscheinlich den vom Gerät gelieferten Schutzgrad.
Verwechseln Sie Filtermarkierungen gemäß EN12941 und EN12942 NICHT mit Filtermarkierungen,
die sich auf andere EN-Normen beziehen.
PAPR-Systeme NICHT in engen Räumen, sauerstoffarmer Umgebung (<19,5%), mit Sauerstoff
angereicherter Umgebung (>23%) oder an Orten verwenden, wo eine unmittelbare Gefahr für
Leben oder Gesundheit besteht. Es gelten u.U. lokale Vorschriften.
Gerät NICHT benutzen, wenn sich die Umgebungstemperatur außerhalb des Bereichs von -10oC
bis +50oC befi ndet. Eine relative Luftfeuchte von bis zu 95% beeinträchtigt die Gerätefunktion nicht.
KEINE beschädigten Geräte verwenden. Kopfteil und Luftschlauch sind stets vor dem Einsatz
zu untersuchen, um sicher zu stellen, dass sie keine Beschädigungen aufweisen, die ansonsten
Leckagen bedingen oder die Schutzfunktion beeinträchtigten könnten. Die monatliche
Inspektion des Gerätes ist eine gemäß COSHH-Vorschriften (Vorschriften zur Überwachung von
gesundheitsgefährdenden Stoffen) vom britischen Gesetzgeber erhobene Anforderung. Für alle
anderen Länder wird eine monatliche Inspektion ebenfalls strengstens empfohlen.
Der Schutzgrad wird nur dann erreicht, wenn das Gerät korrekt angelegt wird.
Windgeschwindigkeiten von mehr als 2m pro Sekunde können einen verringerten Schutzgrad
bedingen.
Für den unwahrscheinlichen Fall, dass das PAPR-System in einem Gefahrenbereich versagt,
kann es im Kopfteil zu einer erhöhten Ansammlung von Kohlendioxid und Kontaminationsstoffen
kommen. DEN GEFAHRENBEREICH SOFORT VERLASSEN.
Scott Safety Kopfteile können in bestimmten explosiven und leicht entfl ammbaren Atmosphären
eingesetzt werden, wenn sie mit einem Gebläse verwendet werden, das als eigensicher
gekennzeichnet ist. Es ist die Verantwortlichkeit des Arbeitgebers sicherzustellen, dass die
eigensichere Zulassung für die jeweilige Umgebung gilt.
Bei sehr hoher Arbeitsbelastung kann bei maximaler Einatemfrequenz innerhalb des Gerätes ein
Unterdruck entstehen.
Es ist recht unwahrscheinlich, dass ein vorschriftsmäßiger Schutz erzielt wird, wenn Haare,
Brillenbügel oder Teile der Kleidung in die Gesichtsmanschette hineinragen.
Filter dürfen nicht direkt am Kopfteil befestigt werden.

10
FH1,FH2 & FH21
TECHNISCHE BESCHREIBUNG
Die Kopfteile der Serien FH1, FH2 und FH21 gehören zu einem Sortiment an Kopfschutzteilen,
die zum Gebrauch mit Scott Safety luftreinigenden Atemschutzgeräten mit Eigenantrieb
(PAPR) und einem von drei Atemschlauchtypen konzipiert sind.
Sie sind gemäß EN12941-TH3 zugelassen.
• FH1 ist eine Vollgesichtshaube, die aus mit Polyurethan beschichtetem Nylon gefertigt ist,
und deren Schutzvisier in Polyethylen-Terepthalatglykol (PETG) ausgeführt ist.
• FH2 ist eine Vollgesichtshaube, die aus mit Polyurethan beschichtetem Nylon gefertigt ist
und als zusätzlichen Schutz eine ganz umschließende Halsmanschette und ein PETG-
Schutzvisier aufweist.
• FH21 ist eine Vollgesichtshaube, die aus Polyurethan gefertigt ist, das von zwei Schichten
eines Vliesstoff-, Polypropylen-Materials mit antistatischen Eigenschaften umschlossen
wird; mit PETG-Schutzvisier.
Bei Verwendung mit einem Scott Safety PAPR-System, sind diese Kopfteile zum Einsatz mit
drei Atemschlauchtypen konzipiert:
1. einem dehnbaren 400mm Polyurethanschlauch - Scott PU Stretch 400
2. einem nicht dehnbaren 850mm Polyurethanschlauch - Scott PU non-stretch
3. einem 800mm Ethylen-Propylen-Dien-Kautschukschlauch - Scott EPDM.
Die Wahl des Schlauches ist von Ihrer eigenen Arbeitsweise/Ihren spezifi schen Anforderungen
abhängig und übersteigt den Rahmen dieses Handbuches. Weitere Angaben erhalten Sie vom
Scott Safety Kundendienst, zu dem Sie hinten in diesem Handbuch weitere Angaben fi nden.
Die Kopfteile der Serien FH1, FH2 und FH21 sind vollständig verstellbar und lassen sich an
alle horizontal gemessenen Kopfgrößen von 53 - 65cm (in Brauenhöhe gemessen, voller
Umfang) und vertikal gemessenen Kopfgrößen von 53 - 72cm (unter dem Kinn gemessen,
voller Umfang) anpassen.
Dieses Sortiment an Kopfteilen verwendet ein innen befi ndliches weiches, elastisches
‘Kopfnetz’ mit leichtem Augenbrauenband, komplett mit bequemem Schweißband und einer
Neopren-Gesichtsmanschette, was ein problemloses und bequemes Aufsetzen gestattet.
Die Kopfteile FH1, FH2 und FH21 sind zum Betrieb mit Durchfl ussraten von 120 Litern pro
Minute bis 220 Litern pro Minute konzipiert und zum Gebrauch mit Scott PAPR-Systemen
(EN12941 TH3) kompatibel. Bitte lesen Sie vor Gebrauch dieses Handbuch zusammen mit
dem jeweiligen Systemhandbuch.
Hinweis
Alle neuen Kopfteile werden mit einer auf dem Visier angebrachten
Schutzfolie geliefert. Diese Folie dient lediglich zum Schutz während
des Transports und ist vor Gebrauch des Kopfteils zu entfernen.

11
FH1,FH2 & FH21
1. Kopfnetz-Stoffteil
2. Verstellbarer elastischer Vorderkopfgurt
3. Verstellschnalle
4. Elastische(r) Hinterkopfgurt/-Manschette
5. Augenbrauenband mit bequemem Schweißband
6. Neoprene-Gesichtsmanschette
7. Elastikband zur Vorderfi xierung
8. Elastikband zur Hinterfi xierung
9. Vorderkopfgurt Fixierstreifen
TEILE- ÜBERSICHT

12
FH1,FH2 & FH21
SCHLÄUCHE
• Untersuchen Sie den Atemschlauch
auf Anzeichen von Verknickungen und
achten Sie darauf, dass er keine Risse
aufweist.
• Stellen Sie sicher, dass beide Enden
des Atemschlauches frei von Schmutz
und Ablagerungen sind und dass
das Gewinde an der Steckerseite
unbeschädigt ist.
• Überprüfen Sie das rotierende
Distanzstück auf einwandfreie Funktion
- es sollte sich um 360odrehen lassen.
problemlos auf den Atemschlauch-
Steckanschluss aufschrauben lässt.
• Überprüfen Sie bei Spirit-Schläuchen,
dass der rote Spannring am
Buchsensanschluss des Atemschlauchs
fehlerfrei funktioniert und unbeschädigt
ist. Achten Sie darauf, dass die
Markierungen auf die im schwarzen
Ring befi ndliche Öffnung ausgerichtet
sind und der Schlauch so auf dem
Luftauslass am Spirit-Gebläse platziert
werden kann.
ÜBERPRÜFUNG VOR GEBRAUCH
Abgesehen von der Halsschutzmanschette
sind FH1, FH2 und FH21 ähnlich in Aufbau
und Funktion, daher trifft die folgende
Anleitung auf alle Geräte dieser Serie zu.
• Untersuchen Sie Mutter und
Distanzscheiben des Atemschlauches;
überprüfen Sie, dass sich die Mutter
Hinweis
Die folgende Anleitung gilt für Kopfteile der Serien FH1, FH2 und FH21
und die zugehörigen Atemschläuche. Diese Anleitung ist zusammen mit
der Betriebs- und Wartungsanleitung des gewählten PAPR-Systems zu
lesen.
Hinweis
Die Betriebslebensdauer eines
Kopfteils ist von zahlreichen Faktoren
abhängig, was es schwierig macht, sie
vorherzubestimmen. Daher sind Kopfteile
stets vor und nach jedem Einsatz gründlich
zu untersuchen, um sicherzustellen, dass
sie keine Beschädigungen aufweisen. Als
Richtwert kann man davon ausgehen,
dass ein Kopfteil, das drinnen und nur
'gelegentlich' verwendet wird, eine
Betriebslebensdauer von rund fünf Jahren
aufweist - vorausgesetzt, dass das Gerät
korrekt gelagert und gewartet wird.
Hinweis
Die O-Ringe und Dichtungen aller
Schläuche sind mindestens einmal
jährlich zu erneuern.
• Bei einem Tornado/Profl ow-Schlauch ist
darauf zu achten, dass sich der O-Ring
an Ort und Stelle befi ndet und in gutem
Zustand ist.

13
FH1,FH2 & FH21
Montage
Kopfteil und Atemschlauch sind jetzt
bereit zum Anschluss an das PAPR
HINWEIS
Obwohl nicht bekannt ist, dass die
Materialien, die mit der Haut des Trägers
in Berührung kommen, Hautreizungen oder
andere gesundheitsschädliche Reaktionen
hervorrufen, können sie dennoch bei
besonders empfi ndlichen Personen
allergische Reaktionen auslösen.
Kopfteil
• Überprüfen Sie, dass sich das Kopfteil
in einem guten, sauberen Zustand
befi ndet, keinerlei Beschädigungen oder
Risse aufweist; achten Sie dabei auf
die Schlauchöffnung und ebenso auf
Augenbrauenband, Kopfnetzgeschirr,
Gesichtsmanschette und Ausatemventil.
• Untersuchen Sie das Visier auf
Anzeichen von Beschädigung und
stellen Sie sicher, dass das Visier keine
tiefen Kratzer, Sprünge oder feinen
Risse aufweist.
• Stellen Sie sicher, dass es keinerlei
Makel, Lösungsmittel- oder
Farbrückstände aufweist, die die Sicht
beeinträchtigen könnten.
• Untersuchen Sie das Augenbrauenband
und das Kopfnetzgeschirr und stellen
Sie sicher, dass sich alle weichen,
elastischen Aufl agen an Ort und Stelle
befi nden.
LUFTVERSORGUNGSSYSTEM MIT
EIGENANTRIEB
Das PAPR-System muss gemäß Betriebs-
und Wartungsanleitung für das jeweilige
Modell überprüft werden.
Nachdem die Betriebsbereitschaft aller
Teile überprüft wurde, kann das System in
Vorbereitung auf das Anlegen des Gerätes
montiert werden - siehe Abschnitt Anlegen.

14
FH1,FH2 & FH21
• Ergreifen Sie das Kopfteil an beiden
Seiten des Augenbrauenbands und
schieben Sie den Vorderkopf in das
Augenbrauenband hinein.
• Ziehen Sie die Neopren-Gesichtsman-
schette mithilfe der Positionierlasche
über das Gesicht und unter das Kinn.
• Mit dem Vorderkopf in der richtigen
Position (das Augenbrauenband sollte
sich knapp über den Augenbrauen
befi nden) ziehen Sie das Kopfnetz
vorsichtig über den Kopf, indem Sie
die hinten befi ndliche Positionierlasche
benutzen.
• Stellen Sie sicher, dass das Kopfnetz
korrekt sitzt und keine Falten oder
Unebenheiten aufweist.
Das Kopfnetz spielt eine kritische Rolle in
Bezug auf die Integrität des Kopfteils.
• Bei den FH2 oder FH21 Versionen mit
voll umschließender Halsmanschette -
Manschette ganz herunterziehen, bis sie
fl ach anliegt und den oberen Schulter-,
Brust- und Rückenbereich abdeckt.
ANLEGEN
Das Anlegenverfahren ist für FH1, FH2 und
FH21 gleich. Bei korrektem Anlegen befi ndet
sich das Augenbrauenband in der Mitte der
Stirn des Trägers und das Kopfnetz bedeckt
den Kopf/Vorderkopf des Trägers bequem.
Mit dem FH1, FH2 und FH21 sollten keine
Brillen getragen werden, da diese die Abdich-
tung um das Gesicht des Trägers beeinträch-
tigen.
Beim korrekten Tragen des Kopfteils
sitzt dieses bequem und gestattet
uneingeschränkte Beweglichkeit.
HINWEIS
Das PAPR muss vor Gebrauch einer
Überprüfung gemäß Betriebs- und
Wartungsanleitung unterzogen werden.
Der Atemschlauch muss vor dem Anlegen
des Kopfteils am Gebläse befestigt werden
- siehe Betriebs- und Wartungsanleitung.
• Ziehen Sie die hintere Seite des Kopfteils
vollständig herunter, sodass sie bequem
und sicher anliegt.
HINWEIS
Beim Ersteinsatz kann das Kopfteil im
Bereich der Gesichtsmanschette zu eng
oder zu locker anliegen. Ist dies der Fall,
so kann das Kopfteil zur Verbesserung
des Tragekomforts und der Abdichtung am
Gesicht mithilfe der Verstellschnalle - sie
Abb. auf Seite 5 - entsprechend verstellt
werden. Die Schnalle lässt sich öffnen
und das Gummiband kann je nach Bedarf
festgezogen oder gelockert werden.
Vergessen Sie nicht, die Schnalle nach
dem Verstellen zu schließen.
• Stellen Sie sicher, dass die
Gesichtsmanschette bequem und
gleichzeitig eng anliegt und luftdicht
abschließt.
• Überprüfen Sie, dass eine gute
Beweglichkeit möglich ist. Die
Gesichtsmanschette sollte dabei stets
mit dem Gesicht in Kontakt bleiben.

15
FH1,FH2 & FH21
ABLEGEN
Nach dem Verlassen der Gefahrenzone -
Gebläse abschalten.
• Beim FH1 - einfach Visier mithilfe
der Positionierlasche vom Gesicht
wegziehen und Kopfteil abnehmen
• Beim FH2 und FH21 - Halsmanschette
ergreifen, Visier vom Gesicht wegziehen
und Kopfteil abnehmen.
• Kopfteil auf einer sauberen Fläche
ablegen.
• PAPR-System gemäß Betriebs- und
Wartungsanleitung ablegen.
• Dann die Reinigung nach Gebrauch
vornehmen und das Gerät lagern.
VORSICHT
KOPFTEIL NICHT ABNEHMEN,
BEVOR SIE DEN GEFAHRENBEREICH
VERLASSEN HABEN.
REINIGUNG NACH GEBRAUCH
• Atemschlauch vom Gebläse trennen.
• Kopfteil auf verschlissene, alte oder
beschädigte Bestandteile überprüfen.
• Kopfteil vorsichtig abwaschen oder
abwischen und Gebläse abwischen -
dazu ein Gemisch aus warmem Wasser
und einem milden Reiniger benutzen.
• Es wird empfohlen, Kopfteil-Visiere mit
Distel® Tüchern abzuwischen.
• Falls notwendig, Außenseite des
Atemschlauchs vorsichtig mit einem
Gemisch aus warmem Wasser und
einem milden Reiniger abwischen.
• Stellen Sie sicher, dass die
Atemschlauchanschlüsse keinerlei
Verschmutzungen oder Ablagerungen
aufweisen, die eine wirksame
Abdichtung am Gebläse beeinträchtigen
könnten.
Nach der Reinigung müssen alle
Bestandteile an der Luft trocknen.
Hinweis
Besteht die Möglichkeit, dass die
Ausrüstung während des Einsatzes durch
gefährliche Substanzen kontaminiert
wurde, so muss der Kontaminationsstoff
identifi ziert und korrekt entfernt werden
oder die kontaminierten Bauteile sind vor
dem nächsten Einsatz auszutauschen.
Die Entsorgung kontaminierter Bauteile
muss gemäß lokal gültiger Gesetzgebung
erfolgen.
PRÜFBEHÖRDEN
BSI (0086)
Kitemark Court,
Davy Ave,
Knowlhill,
Milton Keynes,
MK5 8PP.
England.

16
FH1,FH2 & FH21
LAGERUNG
Nachdem alle Bauteile gereinigt und
getrocknet sind, sind sie in sauberer
Umgebung zu lagern.
ERSATZTEILE
Ersatz- und Zubehörteile können vom Scott
Safety Kundendienst bestellt werden.
Unsere Kundendienstabteilung kann Ihnen
auch allgemeine Informationen zu anderen
Scott Safety Produkten geben.
Scott Safety
Pimbo Road, West Pimbo,
Skelmersdale, Lancashire,
WN8 9RA, England.
www.scottsafety.com
Tel: +44 (0) 1695 711711
Fax: +44 (0) 1695 711775
GARANTIE
Auf alle in unseren Werken in Skelmersdale
und Vaasa hergestellten Produkte wird (wenn
nicht anders angegeben) eine Garantie von
12 Monaten gewährt. Diese Garantie umfasst
Teile, Arbeitskraft sowie die Rücksendung an
den Standort. Die Garantiefrist beginnt mit
dem Kaufdatum durch den Endnutzer.
Das Unternehmen übernimmt die Garantie
dafür, dass diese Produkte zum Zeitpunkt
der Auslieferung weder Material- noch
Fertigungsmängel aufweisen. Scott Safety
wird bei Defekten, die durch vorsätzliche
Beschädigung, Fahrlässigkeit, unübliche
Arbeitsbedingungen, Nichteinhaltung der
ursprünglichen Gebrauchsanweisung des
Herstellers, unsachgemäßem Gebrauch und
durch nicht genehmigte Modifi kationen bzw.
Reparaturen entstehen, von seiner Haftpfl icht
befreit.
Sofern Ansprüche während der Garantiezeit
geltend gemacht werden, muss das
Kaufdatum belegt werden. Alle Mängelrügen
während der Garantiezeit müssen beim Scott
Safety Kundendienst geltend gemacht werden
und unserem Waren-Rückgabeverfahren
entsprechen.
WARTUNG
Eine regelmäßige planmäßige Wartung ist
notwendig, um eine fehlerfreie Funktion des
Gerätes zu erzielen.
Neben den Überprüfungen vor Gebrauch und
Lagerung ist das Gerät einer monatlichen
Überprüfung zu unterziehen; einmal jährlich
ist es einer Wartung durch einen qualifi zierten
Service- und Wartungstechniker zu
unterziehen.
Eine regelmäßige monatliche Wartung
ist gemäß Überprüfungen vor Gebrauch
vorzunehmen, die eine visuelle Kontrolle aller
Bauteile umfassen.
Nehmen Sie eine gründliche Inspektion alle
Bauteile vor und nach jedem Einsatz vor.
Achten Sie dabei am Kopfteil besonders auf
das Ausatemventil und die Anschlussstelle
des Gebläseschlauchs.
Das am Kopfteil befi ndliche Ausatemventil
muss - ungeachtet seines Zustandes -
jährlich ausgetauscht werden.
Gelagerte Ausatemventile haben eine
Lebensdauer von fünf Jahren und nach Ablauf
dieser Zeit müssen sie entsorgt werden.
Ausatemventile sind mit einem Code
gekennzeichnet, der das Herstellungsjahr
angibt. Der Code ‘07’ entspricht dem Jahr
2007 und für jedes darauf folgende Jahr
wird ein Punkt hinzugefügt. Der Code ‘07•’
(beachten Sie den Punkt nach der Zahl 7)
bezeichnet das Jahr 2008.
WARTUNGSANGABEN
Notieren Sie Angaben zu Überprüfung und
Wartung im Prüfprotokoll, das sich hinten in
diesem Handbuch befi ndet.
Zu den notierten Angaben gehören
normalerweise:
• Name des Arbeitgebers, der für das
Gerät zuständig ist
• Marke, Modellnummer oder
Markierungskennzeichen des Gerätes,
einschließlich einer Beschreibung
besonderer Kennzeichen, die eine klare
Erkennung gestatten.
• Inspektions-/Wartungsdatum,
zusammen mit Namen, Unterschrift bzw.
unverkennbarem Kürzel des Prüfers.
• Zustand des Gerätes, Angaben zu allen
festgestellten Beschädigungen sowie
den ergriffenen Korrekturmaßnahmen.

17
FH1,FH2 & FH21
F
Mode d'emploi et instructions quant à l'entretien
!
!
!
!
!
!
!
!
!
!
!
!
!
!
!
!
!
!
AVERTISSEMENTS :
Une mauvaise utilisation de ce matériel peut entrainer des blessures ou des risques de décès.
Par mauvaise utilisation nous entendons, sans nous y limiter, un usage avant toute formation
adéquate, la négligence des avertissements et instructions ci-indiqués ainsi que le manque
d'inspection et d'entretien de ce dispositif de protection respiratoire. Bien lire et assimiler
l'ensemble des instructions avant de tenter d'utiliser ou d'entretenir ce dispositif.
Ce dispositif ne doit être utilisé qu'en conjonction avec un programme de protection respiratoire
prévu.
Avant d'utiliser ce dispositif, veuillez lire le document EN529:2005 afi n de bien connaitre les
spécifi cations liées à ce dispositif ainsi que leurs effets potentiels sur son utilisateur.
Les utilisateurs du système PAPR doivent connaitre les dangers inhérents au lieu de travail avant
d'utiliser le dispositif, et doivent également être parfaitement formés à l'utilisation de l'appareil.
Les casques et masques de sécurité Scott doivent être utilisés avec un système respiratoire
de Scott Safety à moins d'une mention contraire. Consulter ce manuel, le manuel du PAPR, les
manuels sur les fi ltres de Scott Safety, avant d'utiliser cet appareil.
L'appareil respiratoire doit être installé en respectant la bonne gamme de fi ltres correspondant au
danger du lieu de travail.
Cet appareil ne doit être utilisé qu'avec des fi ltres fabriqués par Scott Safety. L'utilisation de tout
autre fi ltre éliminera l'approbation et diminuera probablement le niveau de protection assuré.
Ne PAS confondre les marques des fi ltres EN12941 et EN12942 avec celles liées aux autres
normes EN.
Ne PAS utiliser un PAPR dans des espaces confi nés, manquant d’oxygène (<19.5%), enrichis en
oxygène (>23%), ou en cas de dangers mortels ou pour la santé. La règlementation locale est
susceptible d’être en vigueur.
Ne PAS utiliser l'appareil si la température ambiante sort de la fourchette -10oC - +50oC. Des
niveaux d'humidité allant jusqu'à 95 % RH ne posent pas de problèmes d'utilisation.
Ne PAS utiliser l'appareil s'il est endommagé. Le casque souple et l'amenée d'air doivent être
vérifi és avant toute utilisation afi n de garantir l'absence de dégâts susceptibles d'entrainer des
fuites ou de faire chuter le niveau de protection. L'appareil doit être vérifi é mensuellement comme
stipulé au RU, conformément aux règlement COSHH, et il est vivement recommandé de le vérifi er
mensuellement dans le cas d'autres pays.
La protection ne sera assurée que si l'appareil est monté correctement.
Les niveaux de protection peuvent chuter si la vitesse du vent dépasse les 2 mètres par seconde.
Dans l'éventualité très improbable ou le PAPR tombe en panne dans un endroit dangereux, du
dioxyde de carbone peut pénétrer à l'intérieur du casque souple et le contaminer. DANS CE CAS,
QUITTER IMMÉDIATEMENT LA ZONE.
Les casques Scott Safety peuvent être utilisés en environnements infl ammables et défl agrants,
lorsqu'ils sont utilisés en conjonction avec un appareil respiratoire indiqué comme étant
intrinsèquement sûr. L'employeur est chargé de garantir que l'approbation intrinsèque de sécurité
soit compatible avec l'environnement particulier.
Lorsqu'il est énormément utilisé, l'appareil peut voir sa pression devenir négative lors des périodes
d'inhalation les plus intenses.
Il est fort improbable que l'appareil n'arrive pas à protéger parfaitement si des cheveux, des
branches latérales de lunettes ou du tissu pénètrent au niveau du joint facial.
Les fi ltres ne doivent pas être installés directement sur le casque souple.

18
FH1,FH2 & FH21
DESCRIPTION TECHNIQUE
LES casques FH1, FH2 et FH21 font partie d'une série de casques de protection devant être
utilisés en conjonctionavec des appareils respiratoires purifi ant, à amenée d'airScott Safety
(PAPR),et l'un des trois types de durite de respiration.
Ils sont conformes à EN12941-TH3.
• Le FH1 est une capuche intégrale à masque facial, fabriquée en nylon revêtu de
polyuréthane, et la visière est fabriquée en PTEG.
• Le FH2 est une capuche intégrale à masque faciale, fabriquée en nylon recouvert de
polyuréthane, comportant une cape supplémentaire protégeant tout le cou, comportant
une visière en PETG.
• Le FH21 est une capuche intégrale à masque facial, fabriquée en polyuréthane, encastrée
entre deux couches de matériau antistatique en polypropylène, texturée, non tissée,
comportant une visière en PETG.
Lorsqu'ils sont utilisés avec un PAPRScott Safety, ces casques souples peuvent être utilisés
avec trois types de durite respiratoire :
1. Scott PU Stretch 400 de 400 mm de long, en polyuréthane et étirable
2. Scott PU non-stretch de 850 mm, en polyuréthane, non étirable
3. Scott EPDM de 800 mm, en éthylène-propylène-diène monomère
Le choix de durite dépend de la façon dont vous l'utilisez et de vos besoins, et n'a aucun rapport
avec ce manuel. Pour de plus amples informations, veuillez contacter le service à la clientèle
de Scott Safety dont les coordonnées se trouvent au verso de ce manuel.
Les casques souples FH1, FH2 et FH21 sont entièrement ajustables et peuvent s'adapter à
différentes tailles de tête, d'une grandeur horizontale de 53 à 65 cm (mesurée au niveau du
front, circonférence totale) et d'une grandeur verticale de 53 à 72 cm (mesurée sous le menton,
circonférence totale)
Cette série de casques souples fait appel à un 'fi let de tête' interne et légèrement élastique,
ainsi qu'à un bandeau de front léger, accompagné d'un bandeau antitranspiration, d'un joint
facial en néoprène, permettant aux casques de s'adapter facilement à la tête et en tout confort.
Les FH1, FH2 et FH21 sont conçus pour être utilisés en fonction d'un débit allant de 120 à
220 litres par minute, et peuvent être utilisés avec des systèmes PAPR Scott (EN12941 TH3).
Veuillez lire ce manuel ainsi que celui du système respectif avant utilisation.
Nota:
Une pellicule de protection sur la visière se trouve sur tous nouveaux
casques souples. Cette pellicule ne sert qu'au transport et doit être
enlevée avant d'utiliser le casque souple.
Other manuals for FH1
1
This manual suits for next models
2
Table of contents
Languages:
Other Scott Safety Safety Equipment manuals

Scott Safety
Scott Safety FH1 User manual

Scott Safety
Scott Safety ModulAir 2 User manual

Scott Safety
Scott Safety FH3 Manual

Scott Safety
Scott Safety CONNECT QUEUE User manual

Scott Safety
Scott Safety FH31 User manual

Scott Safety
Scott Safety FM2 User manual

Scott Safety
Scott Safety FM3 User manual

Scott Safety
Scott Safety Proflow2 SC 120 User manual

Scott Safety
Scott Safety FH6 Manual

Scott Safety
Scott Safety ELSA User manual