manuals.online logo
Brands
  1. Home
  2. •
  3. Brands
  4. •
  5. Sealey
  6. •
  7. Power Tools
  8. •
  9. Sealey CP72V User manual

Sealey CP72V User manual

Other Sealey Power Tools manuals

Sealey SMS2008 User manual

Sealey

Sealey SMS2008 User manual

Sealey GSA20 User manual

Sealey

Sealey GSA20 User manual

Sealey SA397 User manual

Sealey

Sealey SA397 User manual

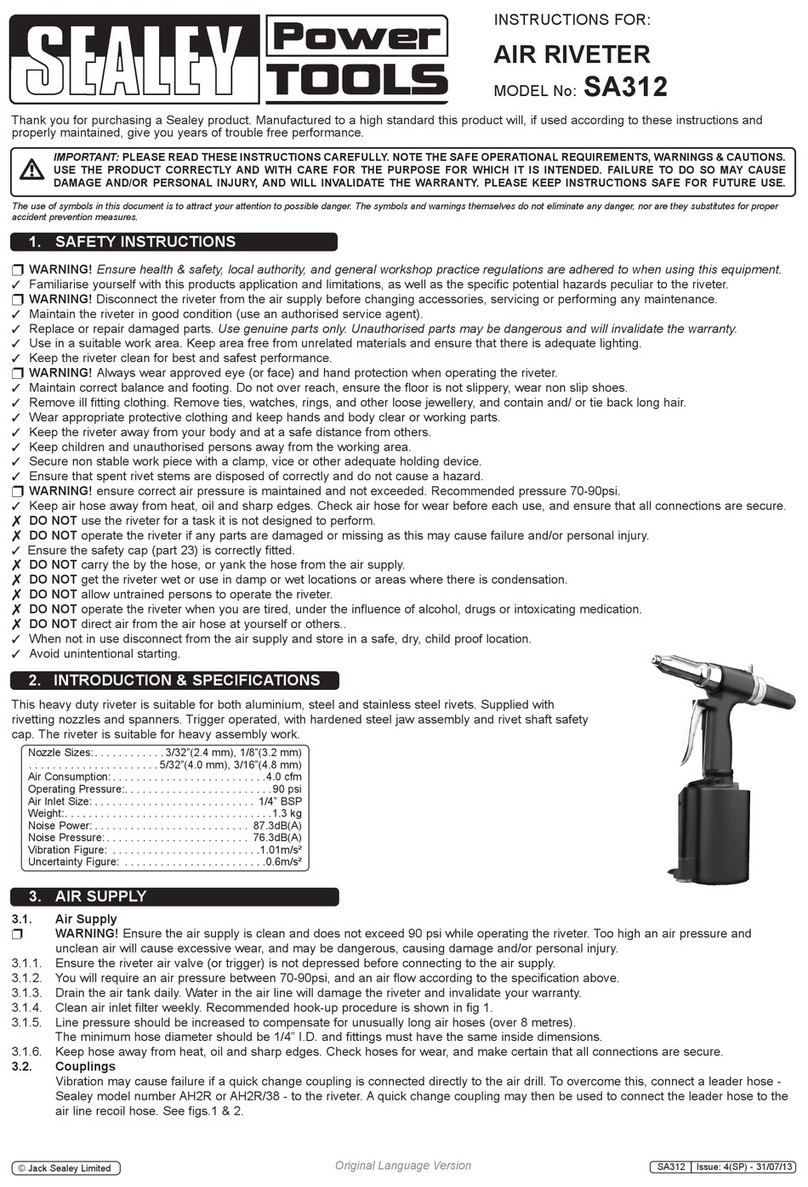
Sealey Power Tools SA651.V3 User manual

Sealey

Sealey Power Tools SA651.V3 User manual

Sealey Black Series User manual

Sealey

Sealey Black Series User manual

Sealey YK10B.V4 User manual

Sealey

Sealey YK10B.V4 User manual

Sealey SA204 User manual

Sealey

Sealey SA204 User manual

Sealey YK20F User manual

Sealey

Sealey YK20F User manual

Sealey PS982.V2 User manual

Sealey

Sealey PS982.V2 User manual

Sealey YK15FFP.V2 User manual

Sealey

Sealey YK15FFP.V2 User manual

Sealey CP1201 User manual

Sealey

Sealey CP1201 User manual

Sealey CP20VPS User manual

Sealey

Sealey CP20VPS User manual

Sealey CP1812 User manual

Sealey

Sealey CP1812 User manual

Sealey DG02.V2 User manual

Sealey

Sealey DG02.V2 User manual

Sealey SG14 User manual

Sealey

Sealey SG14 User manual

Sealey CP2144 User manual

Sealey

Sealey CP2144 User manual

Sealey STW101 User manual

Sealey

Sealey STW101 User manual

Sealey SB997 User manual

Sealey

Sealey SB997 User manual

Sealey SV10.8 Series User manual

Sealey

Sealey SV10.8 Series User manual

Sealey STW805 User manual

Sealey

Sealey STW805 User manual

Sealey SA20/S User manual

Sealey

Sealey SA20/S User manual

Sealey CP20VAP User manual

Sealey

Sealey CP20VAP User manual

Sealey AK2941 User manual

Sealey

Sealey AK2941 User manual

Sealey POWER TOOLS SNA9821 User manual

Sealey

Sealey POWER TOOLS SNA9821 User manual

Popular Power Tools manuals by other brands

ISLAND HOPPER Power Egg HT-309 operating instructions

ISLAND HOPPER

ISLAND HOPPER Power Egg HT-309 operating instructions

Sioux Tools SSR6P25 Instructions-parts list

Sioux Tools

Sioux Tools SSR6P25 Instructions-parts list

Makita HM1317C technical information

Makita

Makita HM1317C technical information

ABB Smart Tool + quick start guide

ABB

ABB Smart Tool + quick start guide

Baumr-AG BMJK-24S user manual

Baumr-AG

Baumr-AG BMJK-24S user manual

Bosch Professional GST 18 V-LI S Original instructions

Bosch

Bosch Professional GST 18 V-LI S Original instructions

Ronix RA-2702 quick start guide

Ronix

Ronix RA-2702 quick start guide

Nordson ProBlue user guide

Nordson

Nordson ProBlue user guide

aoyue int6028 instruction manual

aoyue

aoyue int6028 instruction manual

Hitachi CJ 65VA2 Instruction manual and safety instructions

Hitachi

Hitachi CJ 65VA2 Instruction manual and safety instructions

Makita HM1304 instruction manual

Makita

Makita HM1304 instruction manual

Kurtz Ersa Ersa X-TOOL VARIO operating instructions

Kurtz Ersa

Kurtz Ersa Ersa X-TOOL VARIO operating instructions

SCHUNK KSO 65 Installation and operating instruction

SCHUNK

SCHUNK KSO 65 Installation and operating instruction

Harken LokHead 500 user manual

Harken

Harken LokHead 500 user manual

Senco DuraSpin ExTPro installation instructions

Senco

Senco DuraSpin ExTPro installation instructions

Ferm JSM1020 Original instructions

Ferm

Ferm JSM1020 Original instructions

Milwaukee M12 FUEL 2559-20 Operator's manual

Milwaukee

Milwaukee M12 FUEL 2559-20 Operator's manual

EINHELL BT-CD 12/2 operating instructions

EINHELL

EINHELL BT-CD 12/2 operating instructions

manuals.online logo
manuals.online logoBrands
  • About & Mission
  • Contact us
  • Privacy Policy
  • Terms and Conditions

Copyright 2025 Manuals.Online. All Rights Reserved.

INSTRUCTIONS FOR:
CORDLESS CAULKING GUN
MODEL No: CP72V
Thank you for purchasing a Sealey product. Manufactured to a high standard this article will, if used according to these instructions and
properly maintained, give you years of trouble free performance.
1. SAFETY INSTRUCTIONS
IMPORTANT: PLEASE READ THESE INSTRUCTIONS CAREFULLY. NOTE THE SAFE OPERATIONAL REQUIREMENTS, WARNINGS AND
CAUTIONS. USE THIS PRODUCT CORRECTLY AND WITH CARE FOR THE PURPOSE FOR WHICH IT IS INTENDED. FAILURE TO DO SO MAY
CAUSE DAMAGE AND/OR PERSONAL INJURY AND WILL INVALIDATE THE WARRANTY. PLEASE KEEP INSTRUCTIONS SAFE FOR FUTURE USE.
1.1. GENERAL SAFETY
 Follow all workshop safety rules, regulations and conditions when using the gun.
Remove the battery pack from the gun before servicing or performing any maintenance.
Maintain the gun and battery pack in good condition. Check moving parts for alignment on a regular basis.
Replace or repair damaged parts. Use an authorised service agent and recommended parts only. Unauthorised parts may be dangerous
and will invalidate the warranty.
Keep the gun, battery pack and charger clean for optimum performance.
 Use approved eye and ear protection.
Keep the work area clean and tidy and free from unrelated materials.
Maintain correct balance and footing. Ensure the floor is not slippery and wear non-slip shoes.
Keep children and unauthorised persons away from the work area.
DO NOT operate the gun if any parts are missing as this may cause failure and/or personal injury.
DO NOT operate the gun where there are solvent fumes or flammable gases, liquids or solids.
DO NOT use the gun for a task it is not designed to perform.
DO NOT operate the gun when you are tired or under the influence of alcohol, drugs or intoxicating medication.
DO NOT get the gun or battery charger wet or use in damp or wet locations.
Keep gun and charger in the case and store in a safe, dry, childproof area where the temperature will not exceed 104°F (40°C).
1.2. BATTERY SAFETY INSTRUCTIONS
Use only the charger provided to charge the battery pack.
DO NOT charge the battery pack when room temperature is below 50°F (10°C) or above 95°F (35°C).
DO NOT attempt recharging the pack by means of an engine generator or a DC power source.
DO NOT short-circuit the battery pack by touching both terminals at the same time with a metal object, or your fingers etc.
DO NOT store battery pack (or gun) in locations where the temperature may exceed 104°F (40°C) e.g. in outside sheds, above heaters etc.
DANGER! DO NOT attempt to disassemble the battery pack. For safety and environmental reasons DO NOT discard in domestic waste or
by burning. ONLY discard or recycle according to local authority regulations.
 WARNING! DO NOT allow a leaking battery to contact your person. If you come into contact with battery liquid take the following
immediate action: a) Skin contact: Wash immediately with soap and water, then wash in either lemon juice or vinegar.
     b) Eye contact: Wash with a strong solution of boric acid and seek immediate medical attention.
1.3. MAINS POWER ELECTRICAL SAFETY (In relation to the battery charger)
WARNING! It is the user’s/owner’s responsibility to check the following:
You must check all electrical equipment and appliances to ensure that they are safe before using. You must inspect power supply leads,
plugs and all electrical connections for wear and damage. You must ensure the risk of electric shock is minimised by the installation of
appropriate safety devices. An RCCB (Residual Current Circuit Breaker) should be incorporated in the main distribution board. We
recommend that an RCD (Residual Current Device) is used with all electrical products. It is particularly important to use an RCD with
portable products that are plugged into a supply not protected by an RCCB. If in doubt consult a qualified electrician. You may obtain an
RCD by contacting your local Sealey dealer. You must also read and understand the following instructions concerning electrical safety.
1.3.1. The Electricity At Work Act 1989 requires all portable electrical appliances, if used on business premises, to be tested by a qualified
person, using a Portable Appliance Tester (PAT), at least once a year.
1.3.2. The Health & Safety at Work Act 1974 makes owners of electrical appliances responsible for the safe condition of the appliance and
the safety of the appliance operator. If in any doubt about electrical safety, contact a qualified electrician.
1.3.3. DO ensure that the insulation on all cables and the product itself is safe before connecting to the mains power supply. See 1.3.1.
above and use a Portable Appliance Tester (PAT).
1.3.4. DO ensure that cables are always protected against short circuit and overload.
1.3.5. DO regularly inspect power supply leads, plugs and sockets for wear, damage or loose connections.
1.3.6. DO check that the voltage marked on the product is the same as the power supply to be used.
1.3.7. DO NOT pull or carry the appliance by the cables.
1.3.8. DO NOT pull the plug from the socket by the cable.
1.3.9. DO NOT use worn or damage leads, plugs or connections.
1.4. BATTERY CHARGER SAFETY INSTRUCTIONS
WARNING! DO NOT attempt to charge any battery other than that supplied for the gun. Other types of batteries may explode!
All mains electrical supply safety features must be followed as described in 1.3. above.
Disconnect the charger from the mains supply when not in use.
 DO NOT charge battery if room temperature is below 41°F (5°C) or above 104°F (40°C)
DO NOT expose the charger to damp or wet conditions.
 DO NOT pull or carry the charger by the power lead.
DO NOT operate the charger if it has been dropped, or has received a sharp knock, or is damaged. Take the charger to an
authorised agent for repair or obtain a replacement.
 DO NOT dismantle the charger as this may cause damage and/or personal injury and will invalidate the warranty.
DO NOT insert foreign objects or material into the hole reserved for the battery pack.
Original Language Version CP72V Issue: 2 - 26/10/09
Battery:......................7.2V (0.8Ah)
Speed: .....................0-270mm/min
Charge Time: ....................3-5hours
Accessories:..................Extra Battery
Battery Model No: .................CB7205
Weight Inc. Battery: ..................2.0kg
2. INTRODUCTION & SPECIFICATION
3. OPERATING INSTRUCTIONS
Note: When new, the battery pack will have been shipped in a low charge state. It will take longer to charge initially, and several subsequent
charges may also take a little longer than when the battery pack reaches its optimum performance. Remove battery pack from case and
charge as below:
3.1. CHARGING THE BATTERY PACK
3.1.1. Plug the AC adaptor pin into the socket on the charging base and plug the adaptor into the supply wall outlet.
3.1.2. To remove the battery pack from gun, depress the two side release clips and withdraw battery from the gun handle. 
 WARNING! Do not touch metal terminals.
3.1.3. The battery pack and charger have the positive (+) and negative (-) terminals marked. Align the correct terminals and insert the battery
into the charger.
Note: The battery pack is so designed that it will only enter the charger unit the correct way. When placed in the charger, a very slight
downward pressure will seat the pack firmly into the terminals. The red LED will light when the power supply is turned on to indicate
power supply is connected, green light will light to indicate battery is charging.
3.1.4. The charging will take approximately 3-5 hours from a fully discharged state. DO NOT leave on charge for longer than this period.
3.1.5 . After removing the battery, disconnect the charger from the mains supply and store in the carry case.
 WARNING! Never leave the battery unattended whilst charging due to the potential fire hazard.
Note: If two batteries are to be charged in succession allow the charger to cool between uses.
Well balanced cordless caulking gun with ergonomic handle. Can dispense up to 15 cartridges on one charge. Accepts standard 310ml
cartridges up to 220mm length. Includes extra battery, charger unit and transformer plug. Supplied in blow mould storage/carry-case.
Tube Holder
Trigger
Plunger Release Switch
Plunger
Battery
Charging Base
AC Adaptor
Spare Battery
Original Language Version CP72V Issue: 2 - 26/10/09
4. MAINTENANCE
4.1. CLEANING
4.1.1 After completing usage, always remove the tube holder and tube.
4.1.2. Regularly inspect tube holder cap to ensure it is properly tightened.
4.1.3. Keep the tube holder and piston joint clean and in proper working order.
4.1.4. Always release the plunger shaft back to the correct position for storage after use.
4.1.5. Keep motor vents clear of dust and debris.
4.1.6. If the tool is not operating normally, making unusual noises, or appears defective, stop using it immediately and get it repaired by a
qualified technician.
4.1.7. Clean tool with a damp cloth and light detergent. Do not use solvents as they can damage the plastic parts.
3.2. Operation.
3.2.1 To fit a tube of silicone, remove battery from gun handle.
3.2.2. Depress the plunger release switch and pull the plunger back as far
as it will go.
3.2.3. Unscrew the tube holder, turning anti-clockwise.
3.2.4. Slide the new silicone tube into the tube holder cylinder.
3.2.5. Replace the tube holder by screwing clockwise.
3.2.6. Cut the silicone tubes nozzle to the desired width.
3.2.7. Replace the battery in the guns handle.
3.2.8. To activate the gun simply squeeze the trigger.
3.2.9. To stop the flow of silicone release the trigger. The flow will slow
once the trigger is released. To completely stop the flow of silicone as your release the trigger, loosen the tube holder slightly by
turning anti-clockwise. Alternatively you may press the plunger release switch and retract the plunger.
Note: Always remove the battery from the gun before making any adjustments, changing tube or storing etc.
Plunger
Plunger Release Switch
NOTE: It is our policy to continually improve products and as such we reserve the right to alter data, specifications and component parts without prior notice.
IMPORTANT: No liability is accepted for incorrect use of this product.
WARRANTY: Guarantee is 12 months from purchase date, proof of which will be required for any claim.
INFORMATION: For a copy of our latest catalogue and promotions call us on 01284 757525 and leave your full name and address, including postcode.
01284 757500
01284 703534
sales@sealey.co.uk
Sole UK Distributor, Sealey Group,
Kempson Way, Suffolk Business Park,
Bury St. Edmunds, Suffolk,
IP32 7AR
www.sealey.co.uk
Web
email
Original Language Version CP72V Issue: 2 - 26/10/09
Item Part No. Description
1 CP72V.01 HOUSING A (RIGHT)
2 CP72V.02 HOUSING B (LEFT)
3 CP72V.03 TAPPING SCREW
4 CP72V.04 TAPPING SCREW
5 CP72V.05 PULLER
6 CP72V.06 TUBE HOLDER CAP
7 CP72V.07 HEX SHAFT
8 CP72V.08 PIN
9 CP72V.09 PISTON JOINT
10 CP72V.10 NUT
11 CP72V.11 ALUMINIUM TUBE HOLDER
12 CP72V.12 TUBE HOLDER COVER
13 CP72V.13 COTTER PIN
14 CP72V.14 SPRING
15 CP72V.15 COVER PLATE
16 CP72V.16 TAPPING SCREW
17 CP72V.17 COVER GEAR
18 CP72V.18 SPACER
19 CP72V.19 COTTER PIN
20 CP72V.20 SHAFT COVER
21 CP72V.21 DRIVING PLATE
22 CP72V.22 STOP DRIVING PLATE
23 CP72V.23 SPRING
24 CP72V.24 MOTOR
25 CP72V.25 MOTOR GEAR
Item Part No. Description
26 CP72V.26 TAPPING SCREW
27 CP72V.27 GEAR HOUSING PLATE
28 CP72V.28 STUD SCREW
29 CP72V.29 GEAR HOUSING PLATE
30 CP72V.30 INTERNAL GEAR
31 CP72V.31 PLANET GEAR
32 CP72V.32 CARRIER GEAR
33 CP72V.33 PLANET GEAR
34 CP72V.34 CARRIER GEAR
35 CP72V.35 MAIN SHAFT
36 CP72V.36 MAIN SHAFT PLATE
37 CP72V.37 GEAR HOUSING
38 CP72V.38 STEEL BALL
39 CP72V.39 STEEL BALL COVER
40 CP72V.40 SHAFT COVER
41 CP72V.41 POWER CONNECTOR
42 CP72V.42 MOVING LOCK
43 CP72V.43 SPRING
44 CP72V.44 TRIGGER SWITCH
45 CP72V.46 BELT
46 CP72V.A TRANSFORMER PLUG FOR CP72V
CP72V.C CHARGER FOR CP72V
48 CB7205 BATTERY FOR CP72V
PARTS LIST FOR:
CORDLESS CAULKING GUN
Model: CP72V
NOTE: It is our policy to continually improve products and as such we reserve the right to alter data, specifications and component parts without prior notice.
Version No: 1
Date Issued: 011204
01284 757500
01284 703534
sales@sealey.co.uk
Sole UK Distributor
Sealey Group,
Bury St. Edmunds, Suffolk.
www.sealey.co.uk
Web
email
CP72V - 1 - 011204