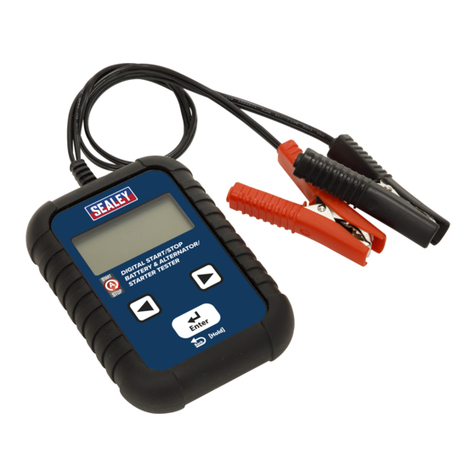
Sealey BT103 User manual

INSTRUCTIONS FOR
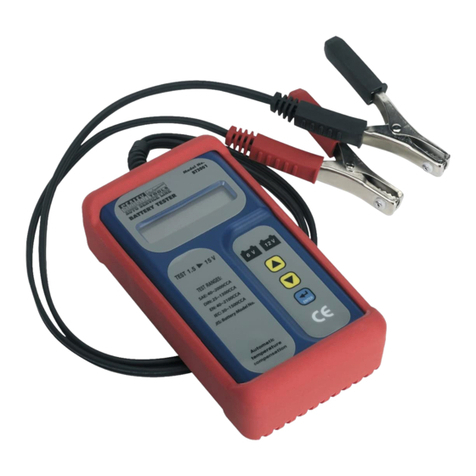
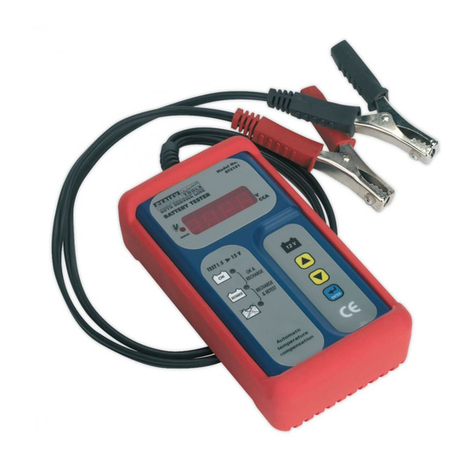
DIGITAL BATTERY TESTER 12V
MODEL NO: BT103
Thank you for purchasing a Sealey product. Manufactured to a high standard, this product will, if used according to these
instructions, and properly maintained, give you years of trouble free performance.
IMPORTANT: PLEASE READ THESE INSTRUCTIONS CAREFULLY. NOTE THE SAFE OPERATIONAL REQUIREMENTS, WARNINGS & CAUTIONS. USE
THE PRODUCT CORRECTLY AND WITH CARE FOR THE PURPOSE FOR WHICH IT IS INTENDED. FAILURE TO DO SO MAY CAUSE DAMAGE AND/OR
PERSONAL INJURY AND WILL INVALIDATE THE WARRANTY. KEEP THESE INSTRUCTIONS SAFE FOR FUTURE USE.
1. SAFETY
DANGER! BE AWARE, LEAD-ACID BATTERIES GENERATE EXPLOSIVE GASES DURING NORMAL BATTERY OPERATION. FOR
THIS REASON, IT IS VERY IMPORTANT TO READ AND FOLLOW THESE INSTRUCTIONS CAREFULLY, EACH TIME YOU USE THE
BATTERY TESTER.
Follow these instructions and those published by the battery and vehicle manufacturers, and the maker of any equipment you intend to use in
the vicinity of the battery. Remember to review warning marks on all products and on engines.
1.1. PERSONAL PRECAUTIONS
VIMPORTANT! Observe all Warning Symbols.
RWARNING! Wear approved eye protection. Wear appropriate Personal Protective Equipment. A full range of Personal Protective
Equipment is available from your Sealey dealer.
Remove personal metallic items such as rings, bracelets, necklaces and watches. A lead-acid battery can produce a short-circuit
current high enough to melt or weld a ring, which would cause severe burns.
Ensure that hands and clothing are clear of fan blades and other moving or hot engine parts. Remove ties and ensure that belts
cannot become entangled.
Ensure that there is another person within hearing distance and is able to come to your aid should a problem arise when working
near a lead-acid battery.
Havefreshwaternearbyincasebatteryacidcontactsskinorclothing;ushaffectedareaimmediately.Ifacidenterseyes,ush
immediately with clean running water for a minimum of 15 minutes, seek medical attention.
DO NOTsmokeorallowasparkorameinthevicinityofthebatteryorengine.
1.2. GENERAL SAFETY INSTRUCTIONS
Familiarise yourself with the application, limitations and potential hazards of the tester. Also refer to the vehicle manufacturer’s hand
book. IF IN ANY DOUBT CONSULT A QUALIFIED ELECTRICIAN.
Ensurethatthetesterisingoodconditionbeforeuse.Ifinanydoubtdonotusetheunitandcontactaqualiedelectrician.
Only use recommended attachments and parts. To use unapproved items may be dangerous and will invalidate your warranty.
Keep tools and other items away from the engine and ensure that you can see the battery and working parts of engine clearly.
Determine the system voltage before using the tester.
Ifthetesterreceivesasharpknockorblowtheunitmustbecheckedbyaqualiedserviceagentbeforeusing.
Clean battery terminals before using the tester.
Keep children and unauthorised persons away from the work area.
DO NOTdisassemblethetesterforanyreason.Thetestermustonlybecheckedbyqualiedservicepersonnel.
RWARNING! To prevent the risk of sparking, short circuit and possible explosion DO NOT drop metal tools in the battery area, or allow
them to touch the battery terminals.
DO NOT cross-connect tester to battery. Ensure positive (RED) clamp is to positive terminal and negative (black) clamp is to
negative terminal. If battery symbols cannot be distinguished, remember that the negative terminal is the one directly connected to
the vehicle bodywork.
DO NOT use the tester outdoors, or in damp, or wet locations and DO NOTuseinthevicinityofammableliquidsorgases.
Ensure there is effective ventilation to prevent a build-up of explosive gases.
DO NOT use the tester for a task for which it is not designed.
When not in use, store the tester carefully in a safe, dry, childproof location.
2. INTRODUCTION
Compact, fast and accurate assessment of battery condition, even with the battery partially discharged. No heat, no sparks and no
misdiagnosis. Just key in the battery rating from the top of the battery and the tester displays its results on an LCD screen.
Refer to
instruction
manual
Explosive
material
Wear eye
protection
Corrosive
substance
No open
ames
Indoor use only
BT103 | Issue 1 27/05/15
Original Language Version
© Jack Sealey Limited
3. SPECIFICATION
Model no: ............................................................................................................................ BT103
Rated battery voltage: ...............................................................................................................12V
Rating systems: .........................................................................................DIN, EN, GB, IEC, SAE
Test ranges: ................................................................................................... 100-1400 CCA* DIN
........................................................................................................................ 100-2000 CCA* EN
........................................................................................................................100-1400 CCA* GB
....................................................................................................................... 100-1400 CCA* IEC
.......................................................................................................................100-2000 CCA* SAE
..........................................................................................................................By battery type JIS
Voltage range:....................................................................................................................... 9-15V
Minimum power requirement:......................................................................................................9V
*CCA=cold cranking amps
Languages: ..............................................English, German, Dutch, French, Italian, Polish, Finnish
4. FEATURES
4.1. LCDDISPLAYg.1.1
4.1.1. Indicates test results. It is a two line backlit display with 8 characters on each line.
4.2. ENTERBUTTONg.1.2
4.2.1. Conrmsaselection(oraction)fromamenulistorreturnstothemainmenu.
4.3. SCROLLBUTTONg.1.3
4.3.1. Scrolls through the menu items or cancels an operation.
4.4. CLIPSg.1.4
4.4.1. Connects the tester to the battery.
4.5. BATTERY INTERNAL RESISTANCE
4.5.1. Internal Resistance (IR) is an important indicator of battery capability. When Internal Resistance exceeds a certain value, the
enginecannotbestarted.ThenormalIRvaluefor12Vshouldbeunder10mΩ.
4.6. BATTERY VOLTAGE
4.6.1. Normally it is impossible for the voltage of a battery, after it has been charged, to be 100%. The maximum value is 98%.
Charged:
98% Above 12.59V
75% 12.45V
50% 12.15%
Discharged:
Below 12.00V
g.1
BT103 | Issue 1 27/05/15
Original Language Version
© Jack Sealey Limited
BT103 | Issue 1 27/05/15
Original Language Version
© Jack Sealey Limited
5. OPERATION
5.1. BEFORE TESTING
5.1.1. For testing batteries of low frequency use, it is necessary to cycle (charge and discharge) the battery several times before testing.
Normally 3-5 times will achieve a reliable test result. Only after the cycling of the battery, can the chemical properties of the battery
be restored after a long period of no use.
5.1.2. If after 3-5 battery charges and discharges, the battery state of health is still lower than 60%, then battery replacement should be
considered.
5.1.3. Low use batteries should be charged once every 1-2 months to extend the battery’s life.
5.1.4. Whentestingabatteryttedtoavehicle,waitfortenminutesaftertheenginehasbeenturnedoff,forthemostaccuratebattery
test result.
5.1.5. If the battery voltage is below 12.4V recharge it.
5.1.6. Whenchargingisnished,donottestimmediately,waitforatleasttenminutestoallowthebatterytostabilise,thentest.
5.2. CONNECTING THE TESTER
5.2.1. Before testing make sure the battery terminals are really clean as grease and dust could lead to errors in the test results.
5.2.2. Ifthebatteryisstillttedtoavehicle,makesurethatallthecarelectronicsareoff,thedoorsareclosedandthattheignitionis
turned off.
5.2.3. The red clip is connected to the positive electrode and the black clip is connected to the negative electrode. The tester has an
automatic protection function. If the clips are accidentally reversed the screen will be dim, but it will not have any adverse
effects on the tester.
5.2.4. Ensurethattheclipshavearm,securegriponthebatteryterminals.
5.2.5. If the tester has a poor connection it will not be able to boot up. If this happens clean the battery terminals.
5.3. TESTER START UP
The tester automatically starts up after the clamps are correctly connected and displays the BATTERY TOOL start up interface,
seeg.2.After2secondsitautomaticallyentersthebatterytestprogramme.
5.4. BATTERY TEST
5.4.1. Enter the main menu. Therearetwosubmenus:ANALYZERandLANGUAGEseegs.3and4toscrollbetween.Setthedesired
language by scrolling through and pressing enter to set the desired language.
5.4.2. Use scroll to choose the battery’s actual position.ChoosebetweenOUTOFVEHICLEorINVEHICLE,pressentertoconrm,
seegs.5and6.(OUTOFVEHICLEiswiththebatterydisconnected,INVEHICLEiswiththebatteryconnectedtothevehicle).
5.4.3. Battery System Standard and Rating
5.4.3.1. Usescrolltochoosethetypeofbattery:CCA,DIN,JIS,EN,IEC,GB,SAE,MCA,BCI,CA,thenpressenter,seeg.7.Thetester
will test each battery according to the selected system and rating.
5.4.3.2. Use the scroll key to select according to the actual system standard and the rating marked on the battery.
g.2
g.3 g.4
g.5 g.6
g.7

BT103 | Issue 1 27/05/15
Original Language Version
© Jack Sealey Limited
5.4.3.3. CCA:ColdstartcurrentvalueisthemostcommonspecicationdevelopedbytheSAEandtheBCI.
BCI: International Battery Standards Committee.
CA: Effective starting current rating at 0°C.
MCA: Marine Battery Standard, effective starting current rating at 0°C.
JIS: Japanese Industrial Standard displays a combination of numbers and letters on the battery e.g. 55D23, 80D26.
DIN: German automotive industry stands committee.
EN: The European Automotive Manufacturer’s Association standards.
SAE: American Society of Engineers Standards.
GB: China National Standard.
5.4.3.4. Range rating is as follows:
Battery Standard Rating Range
CCA 100-2000
BCI 100-2000
CA 100-2000
MCA 100-2000
JS 26A17-245H52
DIN 100-1400
IEC 100-1400
EN 100-2000
SAE 100-2000
GB 100-1400
5.4.3.5. Choosethecorrectbatterystandard;press‘enter’thenthemenushowning.8appears.
5.4.3.6. Press scroll to increase or decrease in increments 5 units. Continue scrolling to the required battery rating. To change from
increasetodecreaseholdscrollforthreesecondsandthemenushowning.9willappear.Pressscrollagainandarrowwillpoint
upwards to increase.
5.4.3.7. If the battery does not show the standard on its label select CCA. If the battery does not display the rating value then take 7 times
quantity of electric charge as reference value. For example:
12V, 60Ah then input 60 x 7 = 420CCA.
5.4.3.8. Afterchoosingthecorrectteststandardandratedcapacitypressenterandthetesterwillbegintesting,seeg.10.
Test Result
5.4.3.9.Inlessthan3secondstheresultsofthetestwillbedisplayedonscreen,seeg.11.Presstheenterbuttontoexit.
g.8
g.9
g.10
g.11

BT103 | Issue 1 27/05/15
Original Language Version
© Jack Sealey Limited
5.4.3.10. The tester will determine the battery’s condition and produce the following condition descriptions:
1. Health>60%, Voltage>12.4V-- Good battery
2. Health>60%, Voltage<12.4V-- Good, Recharge
3. Health<60%, Voltage>12.4V-- Replace
4. Health=0, Voltage<12.4V, Electric current=0A or 0CCA
5. Health<60%, Voltage<12.4V-- Charge, Retest
5.4.4. The 5 Battery Test Results:
5.4.4.1. GoodBatteryseeg.12
The battery is in good condition and ready to use, (Health>60%, Voltage>12.4V).
5.4.4.2. Good,Rechargeseeg.13
Good battery but low current, recharge before using, (Health>60%, Voltage<12.4V).
5.4.4.3. Replaceseeg.14
The battery is near to, or has already reached the end of its usable life. Replace the battery, (Health<60%, Voltage>12.4V).
g.12
g.13
g.14

NOTE: It is our policy to continually improve products and as such we reserve the right to alter data, specications and component parts without prior notice.
IMPORTANT: No liability is accepted for incorrect use of this product.
WARRANTY: Guarantee is 12 months from purchase date, proof of which will be required for any claim.
5.4.4.4. BadCell,Replaceseeg.15
The battery has a damaged cell or a short circuit, replace the battery, (Health=0, Voltage<12.4V, Electric Current=0A 0r 0CCA).
5.4.4.5. Charge,Retestseeg.16
The battery is unstable and needs to be recharged and retested to avoid error. If the same test result appears after recharging and
retesting the battery is regarded as damaged and should be replaced, (Health<60%, Voltage<12.40V).
Note: If ‘REPLACE’ resulted from IN VEHICLE mode, it could be the case that the battery cables are not well connected. Retest
the battery in OUT OF VEHICLE mode before making a decision about replacing the battery.
Note: After testing press scroll to return directly to the startup interface.
g.15
g.16
Environmental Protection
Recycle unwanted materials instead of disposing of them as waste. All tools, accessories and packaging should be
sorted, taken to a recycling centre and disposed of in a manner which is compatible with the environment.
When the product becomes completely unserviceable and requires disposal, drain off any fluids (if applicable)
into approved containers and dispose of the product and the fluids according to local regulations.
WEEE Regulations
Dispose of this product at the end of its working life in compliance with the EU Directive on
Waste Electrical and Electronic Equipment (WEEE). When the product is no longer required, it must be disposed
of in an environmentally protective way. Contact your local solid waste authority for recycling information.

Table of contents
Other Sealey Test Equipment manuals

Sealey
Sealey AUTO SERVICE VS401 User manual

Sealey
Sealey BT2101.V2 User manual

Sealey
Sealey BT3000 User manual

Sealey
Sealey Auto Service VS0271 User manual

Sealey
Sealey CT955 V3 User manual

Sealey
Sealey VS270 User manual

Sealey
Sealey TA301 User manual

Sealey
Sealey TST22 User manual

Sealey
Sealey VSE210 User manual

Sealey
Sealey HBS97.HGV User manual

Sealey
Sealey VSE953 User manual

Sealey
Sealey VSE3158 User manual

Sealey
Sealey VS925 User manual

Sealey
Sealey AUTO SERVICE LINE TA125 User manual

Sealey
Sealey BT101 User manual

Sealey
Sealey BT91/7.V3 User manual

Sealey
Sealey TA131 User manual

Sealey
Sealey BT105 User manual

Sealey
Sealey VSE2020.V2 User manual

Sealey
Sealey CT955.V2 User manual