manuals.online logo
Brands
  1. Home
  2. •
  3. Brands
  4. •
  5. Sealey
  6. •
  7. Test Equipment
  8. •
  9. Sealey BT91/3.V2 User manual

Sealey BT91/3.V2 User manual

Other Sealey Test Equipment manuals

Sealey VSE210 User manual

Sealey

Sealey VSE210 User manual

Sealey BT2013.V5 User manual

Sealey

Sealey BT2013.V5 User manual

Sealey TA319.V2 User manual

Sealey

Sealey TA319.V2 User manual

Sealey BT2003.V5 User manual

Sealey

Sealey BT2003.V5 User manual

Sealey VS4021 User manual

Sealey

Sealey VS4021 User manual

Sealey VS0275.V2 User manual

Sealey

Sealey VS0275.V2 User manual

Sealey VS2058.V2 User manual

Sealey

Sealey VS2058.V2 User manual

Sealey VS0033 User manual

Sealey

Sealey VS0033 User manual

Sealey VS027.V3 User manual

Sealey

Sealey VS027.V3 User manual

Sealey BT2101 User manual

Sealey

Sealey BT2101 User manual

Sealey CT951.V4 User manual

Sealey

Sealey CT951.V4 User manual

Sealey Auto Service BT91D.V2 User manual

Sealey

Sealey Auto Service BT91D.V2 User manual

Sealey VSE3158 User manual

Sealey

Sealey VSE3158 User manual

Sealey Auto Service VS0271 User manual

Sealey

Sealey Auto Service VS0271 User manual

Sealey BT2011 User manual

Sealey

Sealey BT2011 User manual

Sealey TA120 User manual

Sealey

Sealey TA120 User manual

Sealey VS0012 User manual

Sealey

Sealey VS0012 User manual

Sealey VS211 User manual

Sealey

Sealey VS211 User manual

Sealey TA320 User manual

Sealey

Sealey TA320 User manual

Sealey VS8193 User manual

Sealey

Sealey VS8193 User manual

Sealey BT2012.V2 User manual

Sealey

Sealey BT2012.V2 User manual

Sealey BT01 User manual

Sealey

Sealey BT01 User manual

Sealey BT103 User manual

Sealey

Sealey BT103 User manual

Sealey BT2002 User manual

Sealey

Sealey BT2002 User manual

Popular Test Equipment manuals by other brands

Ambit P.F. Series instruction manual

Ambit

Ambit P.F. Series instruction manual

Megger BMM500 Series user guide

Megger

Megger BMM500 Series user guide

RJG Lynx Sensor Tester operating instructions

RJG

RJG Lynx Sensor Tester operating instructions

Mark-10 TT02 Series user guide

Mark-10

Mark-10 TT02 Series user guide

Martel 3001 Operator's manual

Martel

Martel 3001 Operator's manual

ElproSys DiagProg4 instruction manual

ElproSys

ElproSys DiagProg4 instruction manual

Redtech TRAILERteck T05 user manual

Redtech

Redtech TRAILERteck T05 user manual

Venmar AVS Constructo 1.0 HRV user guide

Venmar

Venmar AVS Constructo 1.0 HRV user guide

Test Instrument Solutions SafetyPAT operating manual

Test Instrument Solutions

Test Instrument Solutions SafetyPAT operating manual

Hanna Instruments HI 38078 instruction manual

Hanna Instruments

Hanna Instruments HI 38078 instruction manual

Kistler 5495C Series instruction manual

Kistler

Kistler 5495C Series instruction manual

Waygate Technologies DM5E Basic quick start guide

Waygate Technologies

Waygate Technologies DM5E Basic quick start guide

StoneL DeviceNet CK464002A manual

StoneL

StoneL DeviceNet CK464002A manual

Seica RAPID 220 Site preparation guide

Seica

Seica RAPID 220 Site preparation guide

Kingfisher KI7400 Series Training manual

Kingfisher

Kingfisher KI7400 Series Training manual

Kurth Electronic CCTS-03 operating manual

Kurth Electronic

Kurth Electronic CCTS-03 operating manual

SMART KANAAD SBT XTREME 3G Series user manual

SMART

SMART KANAAD SBT XTREME 3G Series user manual

Agilent Technologies BERT Serial Getting started

Agilent Technologies

Agilent Technologies BERT Serial Getting started

manuals.online logo
manuals.online logoBrands
  • About & Mission
  • Contact us
  • Privacy Policy
  • Terms and Conditions

Copyright 2025 Manuals.Online. All Rights Reserved.

INSTRUCTIONS FOR:
BATTERY DROP TESTER 12V
MODEL NO: BT91/3.V2
1.1. PERSONAL PRECAUTIONS
Ensure there is another person within hearing range of you and close enough to come to your aid, should a problem arise when working
near a lead-acid battery.
Wear safety eye protection and protective clothing. Avoid touching eyes while working near battery.
Have fresh water and soap nearby in case battery acid contacts skin, clothing, or eyes.
Wash immediately with soap and water if battery acid contacts skin or clothing. If acid enters eye, flush eye immediately with cool, clean
running water for at least 15 minutes and seek immediate medical attention.
Remove personal metallic items such as rings, bracelets, necklaces and watches. A lead-acid battery can produce a short-circuit current
which is high enough to weld such items to the vehicle, which would cause severe burns.
Ensure hands, clothing (especially belts) are clear of fan blades and other moving or hot parts of engine. Remove ties and contain long
hair.
 DO NOT smoke or allow a spark or flame in the vicinity of the battery or engine.
1.2. GENERAL SAFETY
Familiarise yourself with the application, limitations and potential hazards of the tester. Also refer to the vehicle manufacturer’s handbook.
IF IN ANY DOUBT CONSULT A QUALIFIED ELECTRICIAN.
Ensure that the tester is in good condition before use. If in any doubt do not use the unit and contact a qualified electrician.
Only use recommended attachments and parts. To use unapproved items may be dangerous and will invalidate your warranty.
Keep tools and other items away from the engine and ensure that you can see the battery and working parts of engine clearly.
Confirm that the battery to be tested is 12V, and not 6V or 24V, before using the tester.
If the tester receives a sharp knock or blow the unit must be checked by a qualified service agent before using.
If the battery terminals are corroded or dirty clean them before using the tester.
Keep children and unauthorised persons away from the work area.
 DO NOT dis-assemble the tester for any reason. The tester must only be checked by qualified service personnel.
WARNING! To prevent the risk of sparking, short circuit and possible explosion DO NOT drop metal tools in the battery area, or allow them to touch
the battery terminals.
DO NOT use the tester outdoors, or in damp, or wet locations and DO NOT use within the vicinity of flammable liquids or gases.
 Ensure there is effective ventilation to prevent a build-up of explosive gases.
DO NOT use the tester for a task for which it is not designed.
 When not in use, store the tester carefully in a safe, dry, childproof location.
 DO NOT connect the tester for more than 8 seconds at a time. Use for longer may result in overheating and will invalidate your warranty.
1. SAFETY
DANGER! LEAD-ACID BATTERIES GENERATE EXPLOSIVE GASES DURING NORMAL BATTERY OPERATION. FOR THIS REASON, IT IS
VERY IMPORTANT TO READ AND FOLLOW THESE INSTRUCTIONS CAREFULLY, EACH TIME YOU USE THE BATTERY TESTER.
Follow these instructions and those published by the battery and vehicle manufacturers, and the maker of any equipment you intend to use in the
vicinity of the battery. Remember to review warning marks on all products and on engines.
Wear Eye
Protection
No Open
Flame
Corrosive
Substance
2. INTRODUCTION
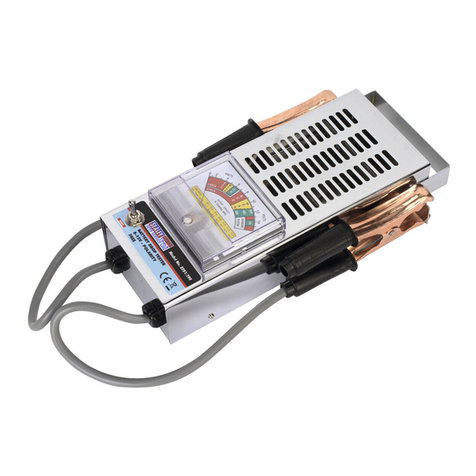
The BT91/3 is a traditionally styled drop tester for all 12V automotive batteries. It applies a load across the cells and measures the output on the
meter. This gives an indication of the battery voltage, a faulty cell or a short circuited cell.
BT91/3.V2 Issue:3 (L) - 05/06/17
© Jack Sealey Limited Original Language Version
Thank you for purchasing a Sealey product. Manufactured to a high standard, this product will, if used according to these instructions
and properly maintained, give you years of trouble free performance.
IMPORTANT: PLEASE READ THESE INSTRUCTIONS CAREFULLY. NOTE THE SAFE OPERATIONAL REQUIREMENTS, WARNINGS & CAUTIONS. USE THE PRODUCT
CORRECTLY AND WITH CARE FOR THE PURPOSE FOR WHICH IT IS INTENDED. FAILURE TO DO SO MAY CAUSE DAMAGE AND/OR PERSONAL INJURY AND WILL
INVALIDATE THE WARRANTY. KEEP THESE INSTRUCTIONS SAFE FOR FUTURE USE.
Refer to instruction
manual
 WARNING! Ensure you read, understand and apply the safety and operational instructions before applying the tester probes to the
battery. Only when you are sure that you understand the procedures is it safe to proceed with the testing process.
3.1. Preparation
3.1.1. Check battery casing for cracks or leakage and confirm that it is 12V.
3.1.2. Clean battery terminals.
3.1.3. If possible, check electrolyte levels and top up with distilled water as necessary.
WARNING! Ensure vehicle, or battery, is in a well ventilated area before starting to test.
3.1.4. Remove the caps from the ends of the probes, press one probe to the positive (+) battery terminal and the other probe to negative (-)
terminal. Note that this tester is not polarity sensitive. If the pointer does not move, either there is a bad connection or the battery is
completely dead.
3.1.5. Note the meter reading, remove the tester from the battery and re-fit the caps to the end of the probes.
3.1.6. Refer to the chart below for diagnostics.
3. OPERATION
BATTERY CONDITION METER READING ACTION NECESSARY
1) Battery fully charged
and healthy.
2) Battery healthy but
discharged.
3) Faulty Cell*
4) Shorted Cell(s)
Needle will indicate approximately 9V and will remain steady in this position.
NOTE: Smaller capacity or ‘Economy’ batteries may read 7 or 8V. Very heavy
duty batteries may read a steady10 or 11V.
Needle will indicate as above but will drop away steadily to 3V and remain there.
Needle will indicate approximately 9V and drop rapidly to approximately 3V,
remaining there or rising slowly to approximately 6V.
Needle will indicate zero volts and then rise to approximately 6V and remain
there.
This condition should be checked
be checked by the use of a
hydrometer. The battery should be
removed, recharged and retested.
Battery should be replaced.
*Condition indicated in 3 & 4 may cause suspect cell to boil.
Environmental Protection
Recycle unwanted materials instead of disposing of them as waste. All tools, accessories and packaging should be sorted, taken to a recycling centre
and disposed of in a manner which is compatible with the environment. When the product becomes completely unserviceable and requires disposal,
drain off any fluids (if applicable) into approved containers and dispose of the product and the fluids according to local regulations.
NOTE: It is our policy to continually improve products and as such we reserve the right to alter data, specifications and component parts without prior notice.
IMPORTANT: No liability is accepted for incorrect use of this product.
WARRANTY: Guarantee is 12 months from purchase date, proof of which will be required for any claim.
01284 757500
01284 703534
sales@sealey.co.uk
Sole UK Distributor, Sealey Group,
Kempson Way, Suffolk Business Park,
Bury St. Edmunds, Suffolk,
IP32 7AR
www.sealey.co.uk
BT91/3.V2 Issue:3 (L) - 05/06/17
© Jack Sealey Limited Original Language Version