5. With sharp knife, cut off stem as close to tank as pos-
sible. Push remaining portion into tank.
6. Lay tank on side and remove six (6) nuts from studs.
Tap cover to break seal and remove cover assembly
from tank. You can now see the vinyl bag. See Figure
11.
7. Before removing vinyl bag from groove seat in tank, BE
SURE all water is drained from bag. This can be ac-
complished by tipping tank upright and allowing re-
maining water to drain.
8. Carefully remove lip portion of bag from groove seat
and push bag into tank.
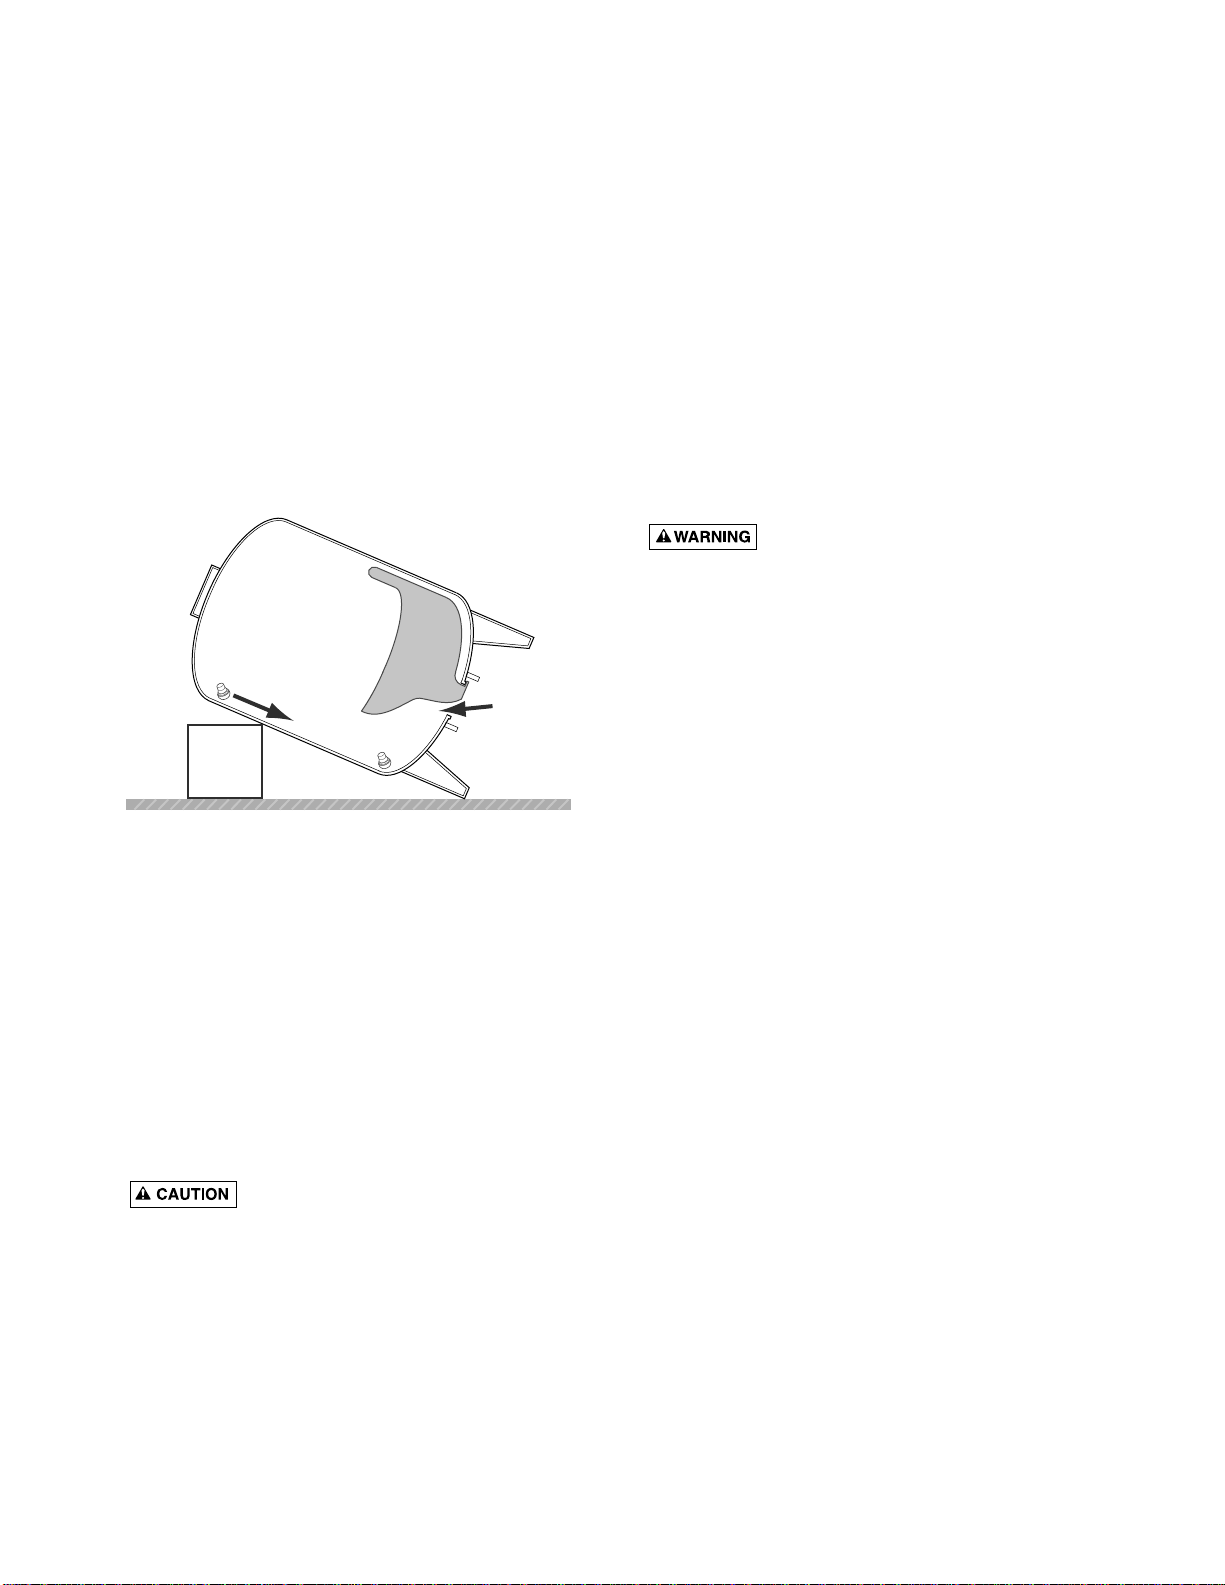
9. Block up tank as shown in Figure 13. This will allow
cutoffportionofstemtoslidedowntobottomoftank.
Reach in around bag until you find it and remove it.
10. Wipe a thin film of soapy solution on top half of re-
placement stem and insert in stem hole in top of tank.
It is necessary to use a valve stem pulling tool to pull
stem thru opening. This tool is the same as used by
your local filling station and Sears Automotive Center
when servicing tubeless tires.
11. Pullneckofbagout oftankopeningandseat ingroove.
BE SURE ring groove is clean.
12. Clean sealing surface of cover assembly and place on
studs.
13. Hand tighten all nuts on studs.
It is important that nuts be tightened as
follows: First, hand tighten all nuts. Then tighten one
nut to a snug fit. Next, tighten the one opposite to a
snug fit. Proceed, tightening the others in opposite
pairs to a snug fit. Recheck all nuts in same opposite
patterns to be sure they are evenly tightened and you
have a good seal. DO NOT overtighten, as you may
twist the studs off the tank. With a torque wrench,
tighten to 85 inch pounds.
14. Tip tank upright and assemble for operation.
15. Recharge tank with proper amount of air.
TESTING FOR LEAKAGE OF VINYL BAG
1. Disconnect power to pump.
2. Relieve (drain) ALL water in system by opening faucet
closest to tank.
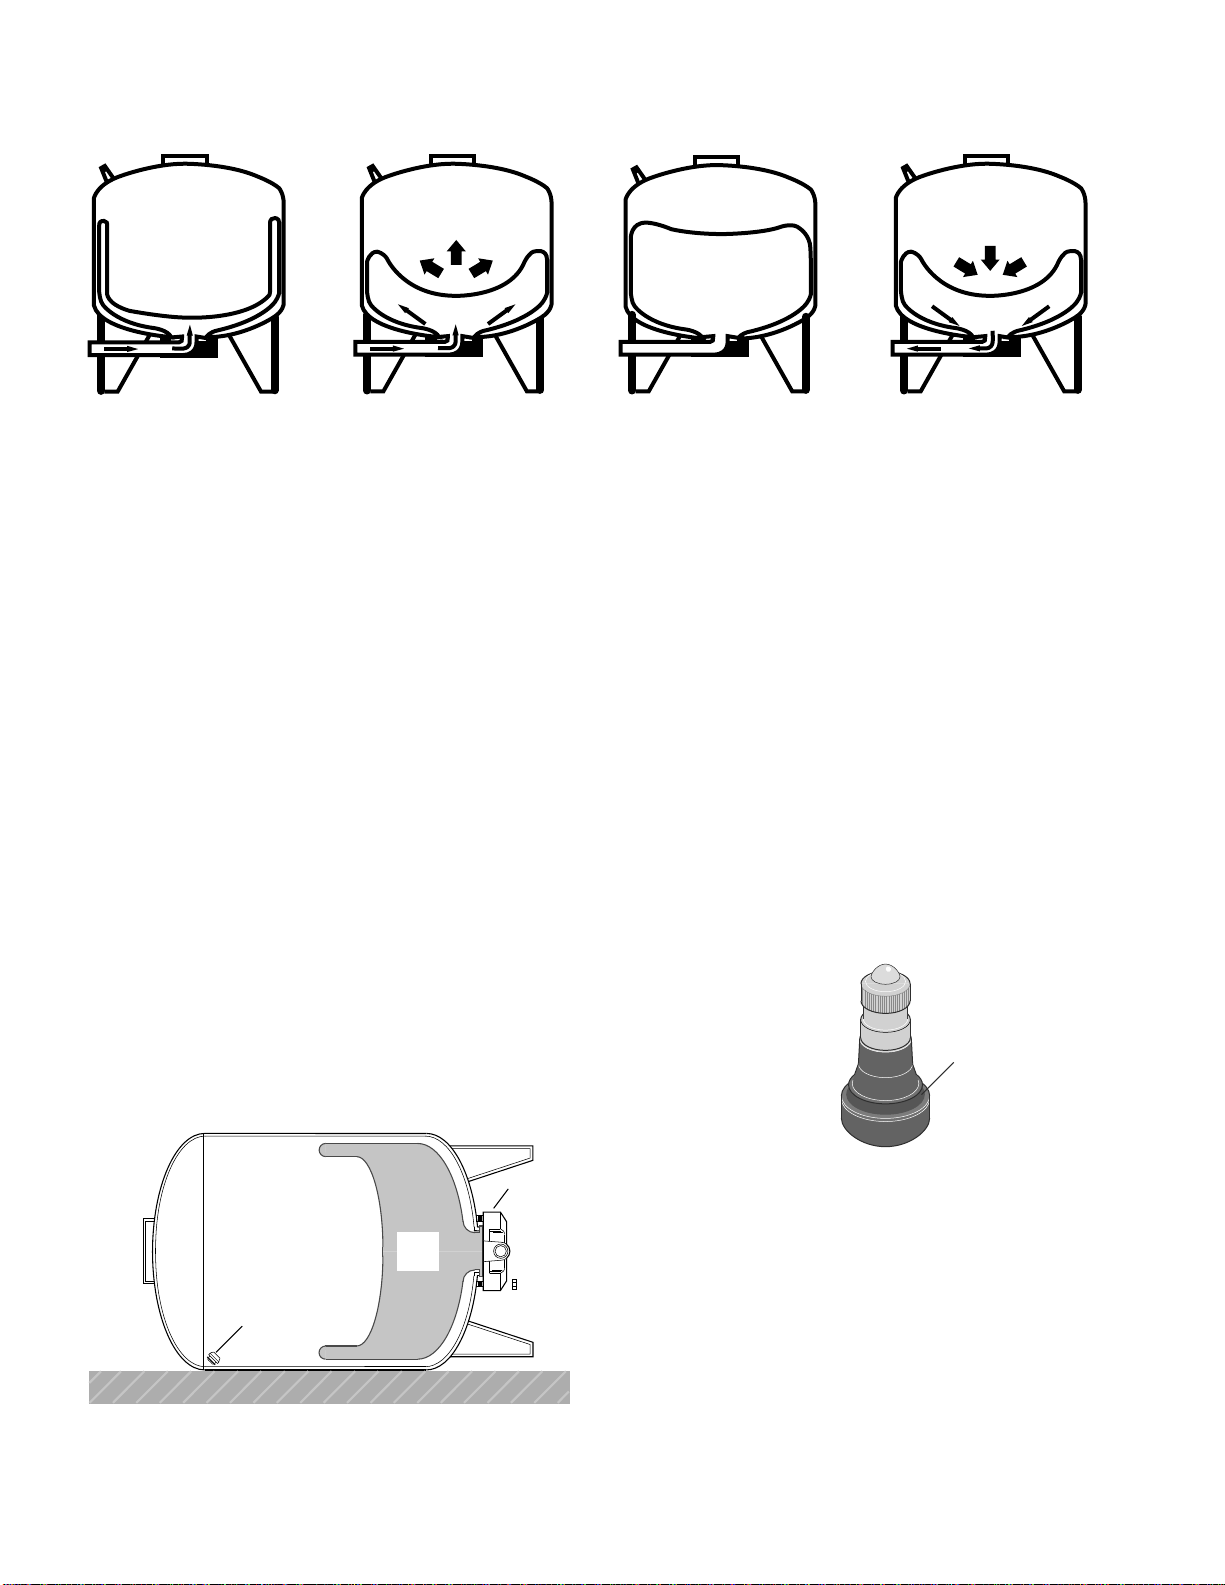
3. Relieve (expel) ALL air pressure in tank by removing
core from inside of air valve.
4. Disconnect outside piping only to tank.
5. Turn tank upside down.
NOTICE: BE CAREFUL not to damage air valve when
tipping tank. Removal of air valve is not required. If
waterleaksoutofthevalvecoreopening,thevinylbag
has a hole in it and must be replaced.
PROCEDURE FOR REPLACING VINYL
BAG
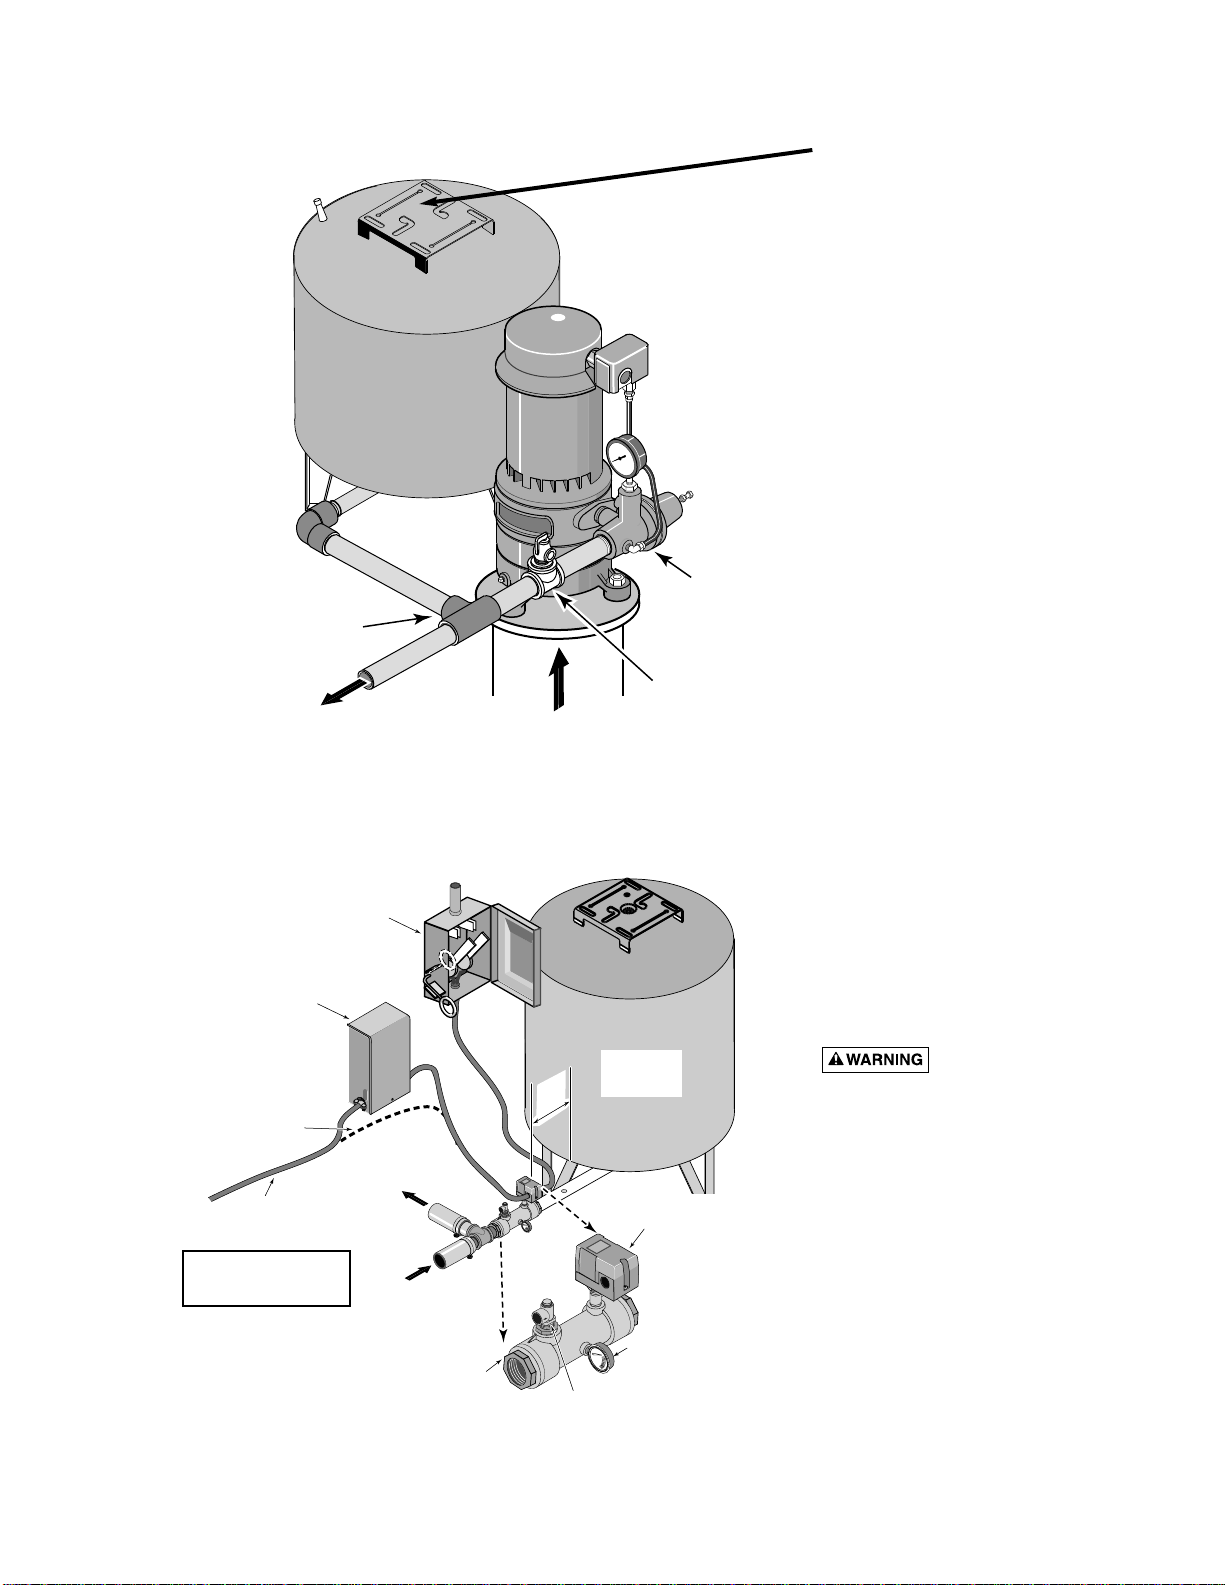
Be sure all air has been expelled from tank
before removing nuts.
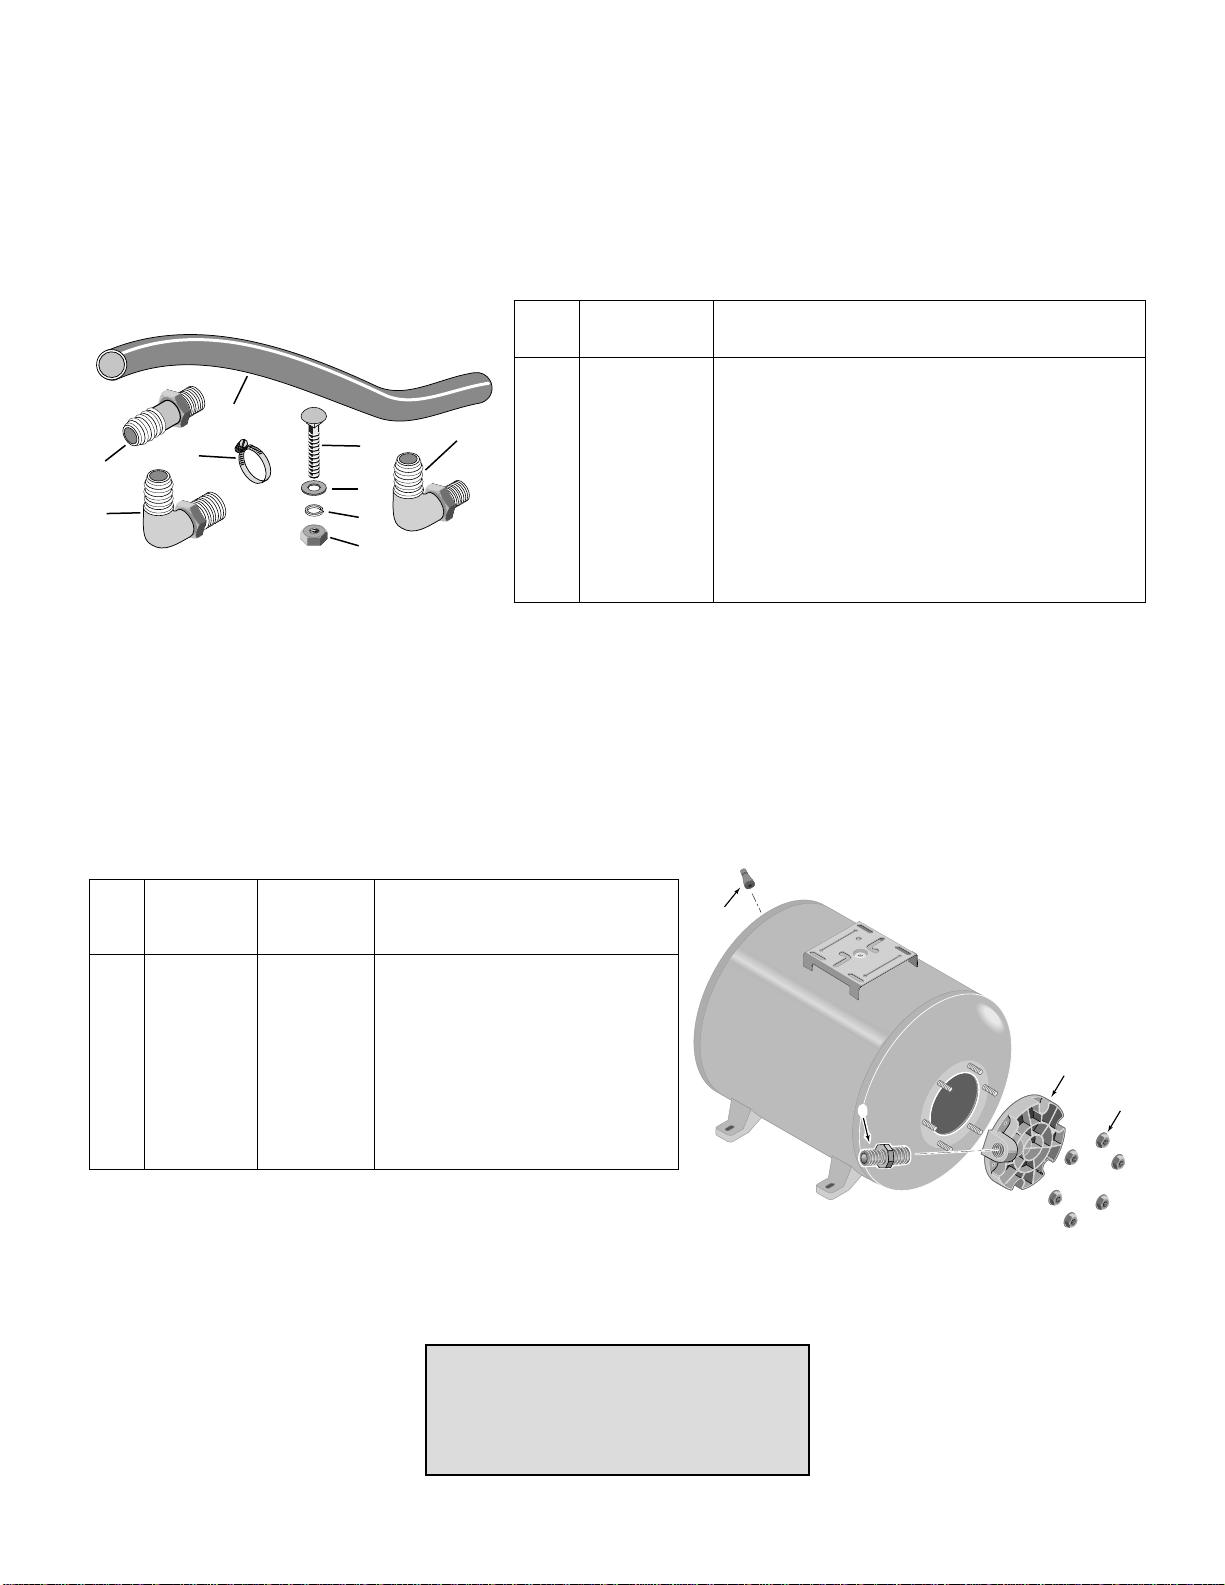
FOR 6, 19 AND 36 GALLON TANKS
1. Carefully lay tank on its side.
2. Remove nuts around cover plate.
3. Tap covertobreakthe seal and removecoverassembly
from tank. You can now see the vinyl bag.
4. Bag cannot be removed in one piece. Wherever con-
venient, grip bag with pliers and pull outward. At the
same time cut bag with sharp knife or single-edged
razor blade. Continue pulling and cutting until bag is
completely removed.
5. Clean and dry inside of tank.
NOTICE: Before replacement bag can be inserted in tank,
it must be tightly rolled up as follows:
1. Place bag on clean surface with opening up.
2. Flatten bag and force air out.
3. Tightly roll bag towards center opening.
4. Beforecenteropening iscoveredup,forceairoutof re-
maining portion of bag.
5. Finish rolling bag.
6. Asanaidforinsertingbagintank,sprinkleoutside with
talcum powder.
7. With tank upside down, push tightly rolled bag into
tank.
8. Put your arm in bag and push sidewalls outward. It is
NOT important that all wrinkles be removed.
9. Clean flange ring and groove of tank.
10. Pull lip of bag through tank opening and place in ring
groove.
11. MAKE SURE it seals properly in groove.
12. Clean sealing surface of cover assembly and place on
studs.
8
SERVICE HINTS
FIGURE 13