manuals.online logo
Brands
  1. Home
  2. •
  3. Brands
  4. •
  5. Seastar Solutions
  6. •
  7. Marine Equipment
  8. •
  9. Seastar Solutions HA6523 User manual

Seastar Solutions HA6523 User manual

INSTALLATION INSTRUCTIONS
Copy Part# 279129, Rev. E, 11/2014 Page 1 of 2
© 2009 Marine Canada Acquisition Inc. DBA SEASTAR SOLUTIONS 3831 No. 6 Road, Richmond, B.C. Canada V6V 1P6 Fax: 604.270.7172 Web: www.seastarsolutions.com
This kit is designed to replace the tilting mechanism of a SeaStar
Traditional and SeaStar Classic Tilt helms. In ALL cases, use ALL
of the mounting hardware, plates and mechanism that are included
with this kit. DO NOT re-use any of the older parts off your tilting
helm pump.
1. Remove steering wheel.
2. Remove plastic tilt covers.
3.
Locate and remove Socket Head Screw (item 1, figure A, A1 & B1).
4. Tilt Mechanism removal:
a. Traditional Tilt helms: Locate and remove the 4 nuts (item 2,
figure A) that fasten the tilt mechanism to the helm pump
b. Classic Tilt Helms: Locate and remove the two screws (item 2,
figure B) that fasten the tilt mechanism to the helm pump.
5. Slide Tilt Mechanism off of helm pump wheel shaft.
6. Traditional Helms ONLY. Locate and remove the three bolts and
washers (item 3 and 6, figure A) that fasten the helm plate (item
4, figure A) to the helm pump.
7. Locate and remove the four carriage bolts (item 5, figure A).
Discard the helm plate (item 4, figure A) and fasteners as they
are not required for installation.
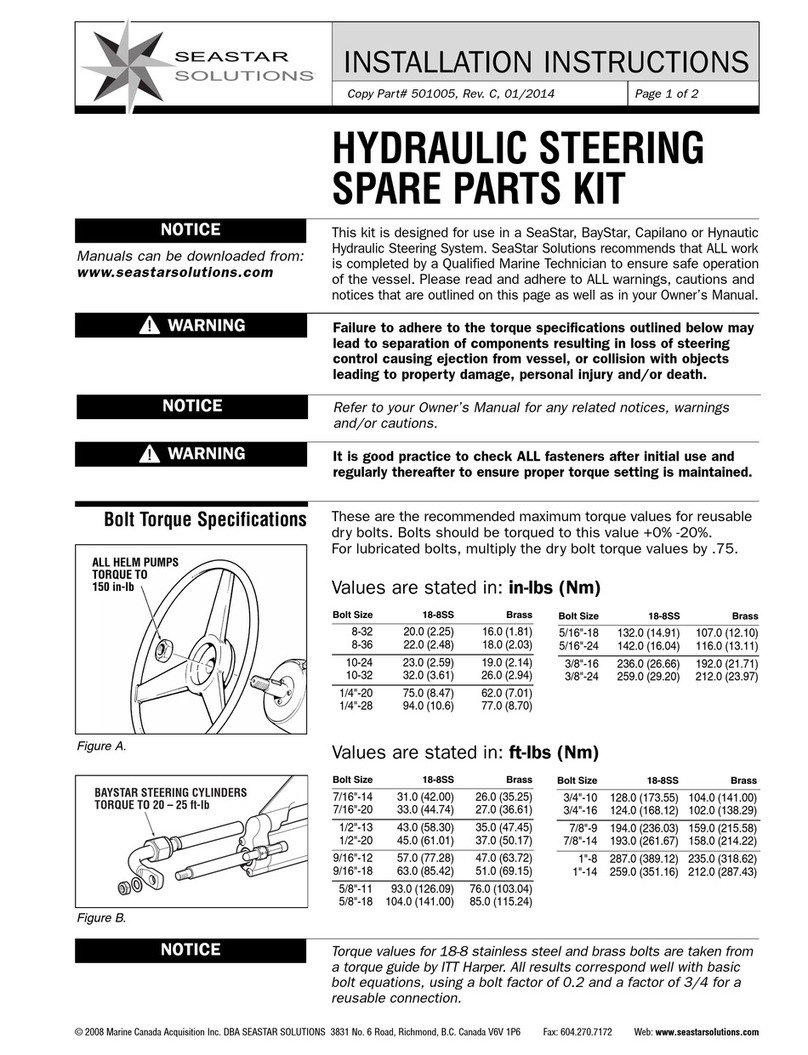
AT this time the helm pump will NOT be fastened to the dash board.
Take appropriate steps to avoid kinking of the steering lines.
Tilt Mechanism Removal
CLASSIC TILT MECHANISM
REPLACEMENT, Part #HA6523
Figure A. Traditional Tilt Helm Mechanism Shown.
1
2
4
5x 4 x 4
3x 3
6x 3
Figure A1. 1
WARNING
CAUTION
INSTALLATION INSTRUCTIONS
Copy Part# 279129, Rev. E, 11/2014 Page 2 of 2
© 2009 Marine Canada Acquisition Inc. DBA SEASTAR SOLUTIONS 3831 No. 6 Road, Richmond, B.C. Canada V6V 1P6 Fax: 604.270.7172 Web: www.seastarsolutions.com
7
24
3
5
6
8
10 12
11
x 3
16 x 3
15 x 4
14 x 4
x 7
13 x 4
91
Traditional Tilt Helm
Mechanism ONLY
Replacement Instructions
Classic Tilt & Traditional
Tilt Helm Mechanism
Replacement Instructions
1. Attach the helm shaft to the tilt mechanism (item 3, figure B) by
lining up the coupling slot with the helm shaft tongue and secure
with the one 10–24 NC x 7/8” bolt (item 1, figure B). Torque BOTH
bolts to 27–31 in/lb. (Refer to figure B1).
2. Install and tighten the two PHMS 5/16” NC x 3⁄4” screws (item
2, figure B) and the star washers (item 4, figure B) to secure the
tilt mechanism to the dash plate. Torque to 160–180 in/lb.
3. Install the boot latch (item 5, figure B) onto the tilt latch of the
tilt mechanism.
4. Fit the upper bezel (item 6, figure B) into the lower bezel (item 7,
figure B) and position these two parts over the tilt mechanism and
latch boot. Install the 7 x BHSCS 8–32 x 1⁄2” SS (item 8, figure B)
screws into the positions shown.
5. Grease steering shaft with good quality marine grade grease.
6. Install the woodruff key (item 9, figure B) and wheel shaft nut
(item 10, figure B), Tighten steering wheel shaft nut prior to
continuing with installation instructions. Torque wheel shaft nut
to 150 in/lb. DO NOT exceed 200 in/lb.
7. Confirm proper function of the tilt mechanism by performing the
following points.
• Push tilt latch forward to ‘unlock’ the tilt mechanism.
• Check ALL positions of the tilt and confirm that the latch ‘locks’
in place for each position, tilt lever will click back into the
locked position.
1. I
nstall the
square mounting plate (item 11, figure B) to the dash
using the
four dash bolts, washers and nuts (items 13, 14 and 15,
figure B). Torque nuts (item 15, figure B) to 110 in/lb.
2. Install the helm pump onto the square mounting plate (item 11,
figure B) using the bolts and washers provided (items 12 and 16).
Torque to 160–180 in/lb.
WARNING
Use self-locking fasteners provided
ONLY; substituting non-self locking
fasteners can result in loosening or
separation of equipment leading to
loss of steering control causing
property damage and/or personal
injury or death
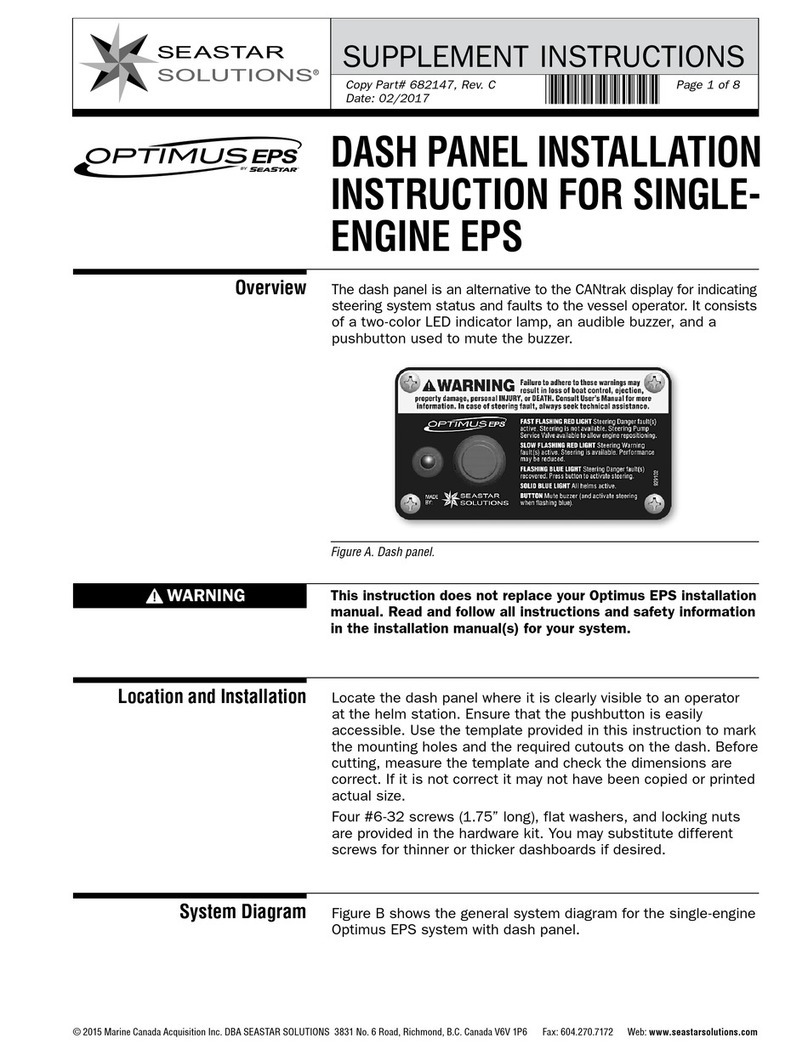
Figure B. Classic Tilt Mechanism Shown.
1
Figure B1.

Other Seastar Solutions Marine Equipment manuals

Seastar Solutions HA5477 User manual

Seastar Solutions

Seastar Solutions HA5477 User manual

Seastar Solutions Optimus Seastation User manual

Seastar Solutions

Seastar Solutions Optimus Seastation User manual

Seastar Solutions SeaStation Manual

Seastar Solutions

Seastar Solutions SeaStation Manual

Seastar Solutions HF6010 Owner's manual

Seastar Solutions

Seastar Solutions HF6010 Owner's manual

Seastar Solutions HP6115 User manual

Seastar Solutions

Seastar Solutions HP6115 User manual

Seastar Solutions HA5456 User manual

Seastar Solutions

Seastar Solutions HA5456 User manual

Seastar Solutions HC5323-3 User manual

Seastar Solutions

Seastar Solutions HC5323-3 User manual

Seastar Solutions HP6031 User manual

Seastar Solutions

Seastar Solutions HP6031 User manual

Seastar Solutions SeaWays Manual

Seastar Solutions

Seastar Solutions SeaWays Manual

Seastar Solutions HA1230 User manual

Seastar Solutions

Seastar Solutions HA1230 User manual

Seastar Solutions ABYC CHX8000 Series User manual

Seastar Solutions

Seastar Solutions ABYC CHX8000 Series User manual

Seastar Solutions HP6016 User manual

Seastar Solutions

Seastar Solutions HP6016 User manual

Seastar Solutions OPTIMUS EPS Instruction Manual

Seastar Solutions

Seastar Solutions OPTIMUS EPS Instruction Manual

Seastar Solutions OPTIMUS EPS Owner's manual

Seastar Solutions

Seastar Solutions OPTIMUS EPS Owner's manual

Seastar Solutions DC1000 Assembly instructions

Seastar Solutions

Seastar Solutions DC1000 Assembly instructions

Seastar Solutions Hynautic 04 Series Quick start guide

Seastar Solutions

Seastar Solutions Hynautic 04 Series Quick start guide

Seastar Solutions Teleflex HC5331-3 User manual

Seastar Solutions

Seastar Solutions Teleflex HC5331-3 User manual

Popular Marine Equipment manuals by other brands

Fell Marine MOB Plus xHUB user manual

Fell Marine

Fell Marine MOB Plus xHUB user manual

Opacmare 1042 Use and maintenance instructions

Opacmare

Opacmare 1042 Use and maintenance instructions

morse SL-3 owner's manual

morse

morse SL-3 owner's manual

Siren Marine SirenSat Offshore Installation & user guide

Siren Marine

Siren Marine SirenSat Offshore Installation & user guide

Jensen MCD5070 Installating and operation manual

Jensen

Jensen MCD5070 Installating and operation manual

Raymarine SmartPilot ST6001 operating guide

Raymarine

Raymarine SmartPilot ST6001 operating guide

auto maskin Marine Pro 200 Series Quick installation guide

auto maskin

auto maskin Marine Pro 200 Series Quick installation guide

Klein 3000 Series troubleshooting guide

Klein

Klein 3000 Series troubleshooting guide

Elkron HPA100 manual

Elkron

Elkron HPA100 manual

Clarion CMD6 owner's manual

Clarion

Clarion CMD6 owner's manual

Raytheon V300 instruction manual

Raytheon

Raytheon V300 instruction manual

Eaton SQG3 Series Technical data

Eaton

Eaton SQG3 Series Technical data

Clarion CMDB Owner's manual & installation manual

Clarion

Clarion CMDB Owner's manual & installation manual

Hansson PyroTech Ikaros-Line instructions

Hansson PyroTech

Hansson PyroTech Ikaros-Line instructions

Interphase 20/20 Operation manual

Interphase

Interphase 20/20 Operation manual

MOFLASH SIGNALLING AE40M-24R-SB quick guide

MOFLASH SIGNALLING

MOFLASH SIGNALLING AE40M-24R-SB quick guide

Raymarine ST60 Tridata Owner's handbook

Raymarine

Raymarine ST60 Tridata Owner's handbook

SBG Systems Ellipse AHRS Hardware manual

SBG Systems

SBG Systems Ellipse AHRS Hardware manual

manuals.online logo
manuals.online logoBrands
  • About & Mission
  • Contact us
  • Privacy Policy
  • Terms and Conditions

Copyright 2025 Manuals.Online. All Rights Reserved.