JRC Alphatron Marine AlphaDynaPos User manual

AlphaDynaPos
Ship Automation and Navigation system
Operation Manual
www.jrc.am

2 Contents
Contents
I Preface..........................................................................................................6
I.1 Revision History........................................................................................................................................................6
I.2 General......................................................................................................................................................................6
I.3 Glossary.................................................................................................................................................................... 7
I.3.1 Units................................................................................................................................................................. 7
I.3.2 Abbreviations and Explanation of Terms.........................................................................................................8
II Cautions.................................................................................................... 10
III Introduction..............................................................................................11
III.1 Communication Overview..................................................................................................................................... 11
III.2 Communication Matrix...........................................................................................................................................12
III.2.1 DP Control Commands to Thrusters 1a, 2a, 3a, 4a, 5a, 6a........................................................................12
III.2.2 Thruster Feedback to DP Controllers 1b, 2b, 3b, 4b, 5b, 6b...................................................................... 12
III.2.3 JC Control Commands to Thrusters 1c, 2c, 3c, 4c, 5c, 6c......................................................................... 12
III.2.4 Thruster Feedback to JC Controllers 1d, 2d, 3d, 4d, 5d, 6d.......................................................................12
III.2.5 Settings Synchronize Between DP Stations 13a, 13b.................................................................................12
III.2.6 Status DP Stations to Back-Up DP Station 21a, 21b..................................................................................12
III.2.7 Status DP Stations JC Station 23a, 23b.....................................................................................................12
III.2.8 Status JC Station DP Stations 24a, 24b.....................................................................................................12
III.3 System Overview (DP2)........................................................................................................................................13
III.4 Sensor Overview...................................................................................................................................................14
III.5 System Principle - Schematic Overview...............................................................................................................15
III.6 System Diagram....................................................................................................................................................16
III.6.1 Motion Controller..........................................................................................................................................17
III.6.2 Normalize..................................................................................................................................................... 17
III.6.3 Position Controller........................................................................................................................................18
III.6.4 Velocity Controller........................................................................................................................................18
III.6.5 Gain..............................................................................................................................................................19
III.6.6 Vector Select................................................................................................................................................19
III.6.7 Force Calculation......................................................................................................................................... 19
III.6.8 Thruster Allocation....................................................................................................................................... 20
III.6.9 Thruster Ramp............................................................................................................................................. 20
III.6.10 Current Calculation.....................................................................................................................................21
1 Installation.................................................................................................22
1.1 Operator Stations...................................................................................................................................................22
1.1.1 Power Distribution Panels.............................................................................................................................22
1.1.2 DP Operator Panel........................................................................................................................................23
1.1.2.1 Joystick and Tracker ball.....................................................................................................................23
2 Operation...................................................................................................24
2.1 DP Control Transfer...............................................................................................................................................24
2.1.1 Before control transfer for usage in DP2 mode............................................................................................24
2.1.2 Control Transfer from Individual Control to DP/JC.......................................................................................24
2.1.3 Control Transfer from DP to JC Panel.........................................................................................................25
2.1.4 Control Transfer from DP/JC to Individual Control.......................................................................................25

3 Contents
2.1.5 Auto Control Transfer on Fail Condition.......................................................................................................25
2.1.6 Simulation Mode............................................................................................................................................25
2.1.6.1 Exit Simulation Mode...........................................................................................................................26
2.2 Control Modes........................................................................................................................................................27
2.2.1 Change Control Mode on a Station..............................................................................................................27
2.2.2 Manual Joystick Mode.................................................................................................................................. 27
2.2.3 Auto Joystick Mode.......................................................................................................................................28
2.2.4 Auto Positioning Mode..................................................................................................................................29
2.2.4.1 Operation Mode: Consequences Analysis...........................................................................................31
2.2.5 Auto Heading Mode......................................................................................................................................31
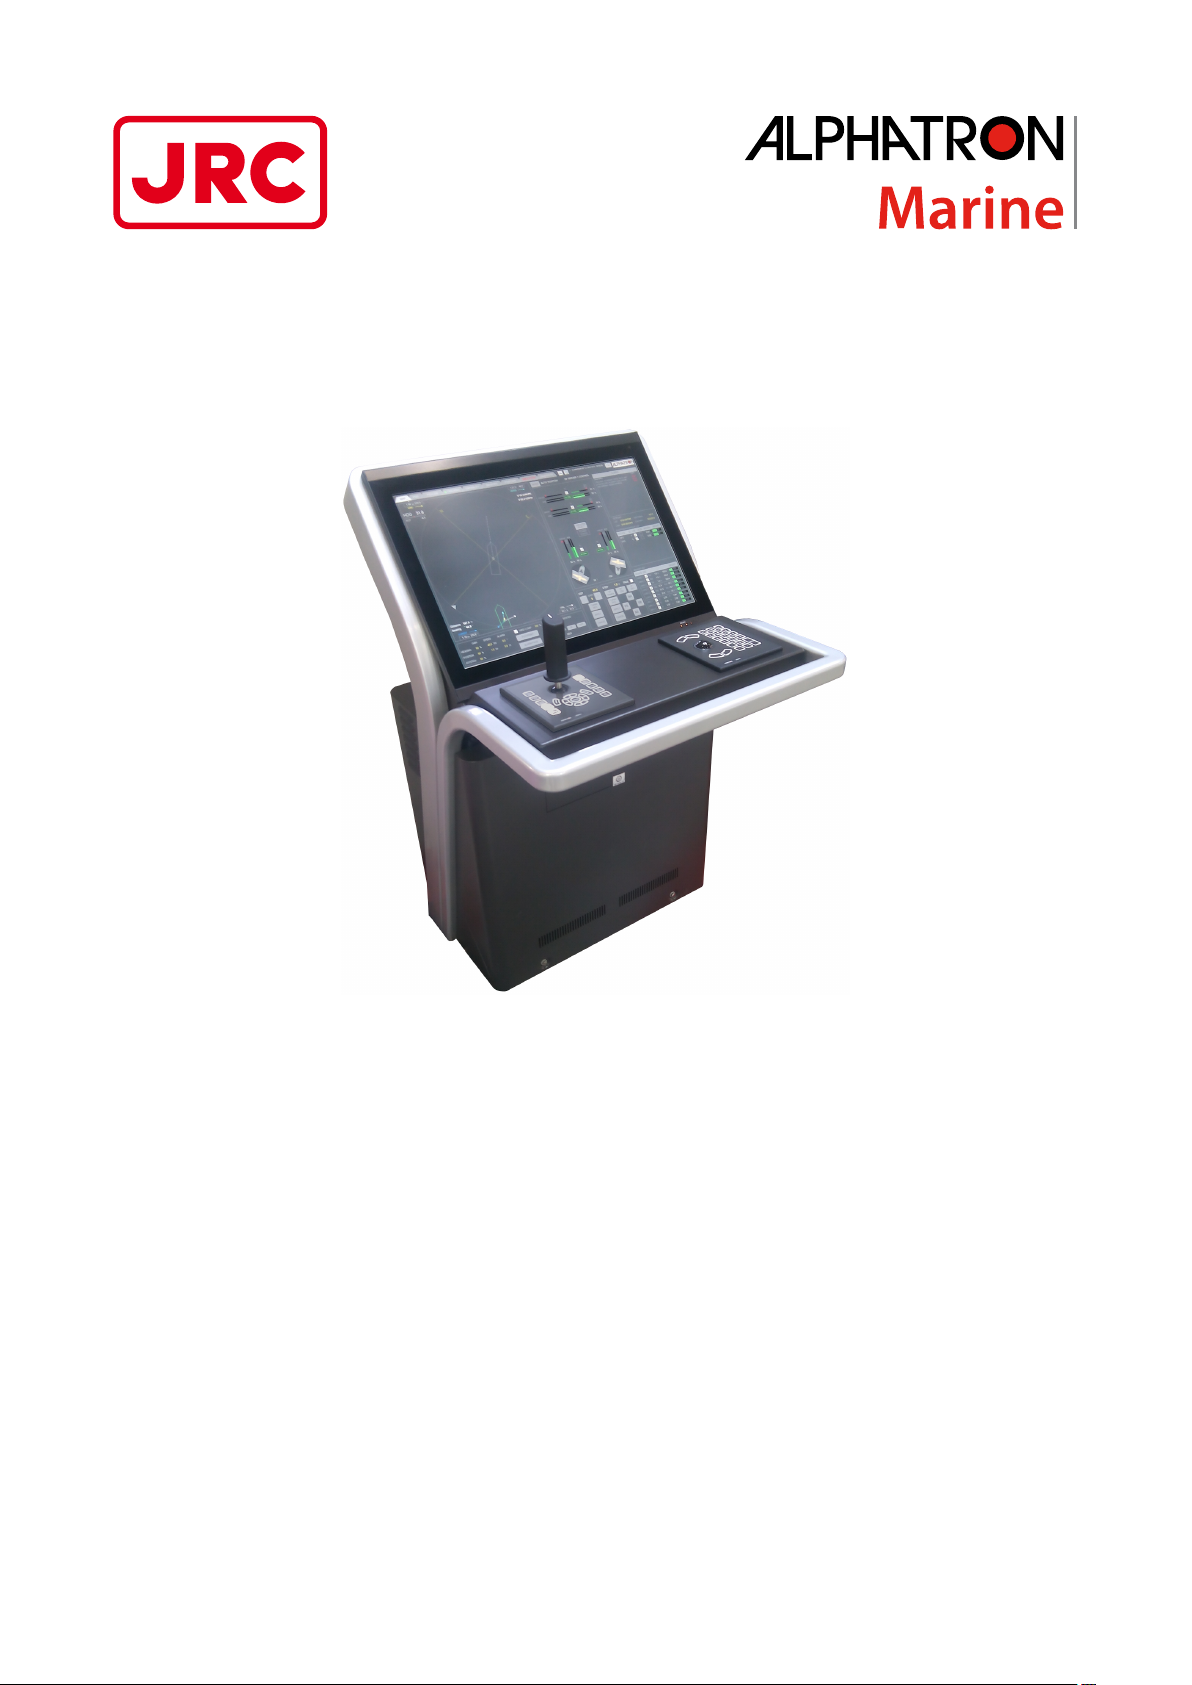
2.3 DP Workstation...................................................................................................................................................... 32
2.3.1 Map................................................................................................................................................................32
2.3.1.1 Map Section......................................................................................................................................... 33
2.3.1.2 Thrusters Section.................................................................................................................................34
2.3.1.3 Heading Setting Section...................................................................................................................... 35
2.3.1.4 Position Settings Section.....................................................................................................................35
2.3.1.5 Heading and Position Keeping Gain, Speed and Alarm Settings........................................................36
2.3.1.6 Joystick Gain Setting........................................................................................................................... 36
2.3.1.7 Environmental Settings........................................................................................................................ 37
2.3.1.8 Wind Compensation.............................................................................................................................37
2.3.1.9 Current Compensation.........................................................................................................................37
2.3.1.10 Alarm Area and Dimming...................................................................................................................38
2.3.2 Tracking.........................................................................................................................................................38
2.3.2.1 General Screen Description.................................................................................................................39
2.3.2.2 Creating and Running a Track............................................................................................................ 41
2.3.3 PMS...............................................................................................................................................................43
2.3.4 Capability.......................................................................................................................................................44
2.3.5 Sensors......................................................................................................................................................... 45
2.3.5.1 Available Sensors.................................................................................................................................45
2.3.5.2 Motion Sensor......................................................................................................................................45
2.3.5.3 Heading Sensor....................................................................................................................................46
2.3.5.4 Wind Sensor.........................................................................................................................................46
2.3.6 Position..........................................................................................................................................................47
2.3.6.1 GPS Sensor......................................................................................................................................... 48
2.3.6.2 GPS Sensor weighing..........................................................................................................................48
2.3.6.3 Acoustic Sensor................................................................................................................................... 49
2.3.7 Follow............................................................................................................................................................50
2.3.7.1 Select Sensor for F.U. (Follow Up)......................................................................................................51
2.3.7.2 Set system to Auto Position Follow Mode...........................................................................................51
2.3.8 Simulation......................................................................................................................................................52
2.3.8.1 Setting Environment in Simulation mode.............................................................................................52
2.3.8.2 Setting GPS in Simulation mode.........................................................................................................53
2.3.8.3 Setting Laser or Radar in Simulation Mode........................................................................................ 53
2.4 Operational Usage................................................................................................................................................. 53
2.4.1 Screen Selection...........................................................................................................................................53
2.4.2 Set MAP View Preferences.......................................................................................................................... 54
2.4.2.1 Vessel Orientation in MAP Screen......................................................................................................54
2.4.2.2 North Up in MAP Screen.....................................................................................................................55
2.4.2.3 Relative View Vessel in MAP Screen..................................................................................................55
2.4.2.4 Absolute View Vessel in MAP Screen.................................................................................................55
2.4.2.5 Automatic Zoom in MAP Screen......................................................................................................... 55
2.4.2.6 Automatic Zoom OFF in MAP Screen.................................................................................................55
2.4.3 Turn on Day / Night Dimming.......................................................................................................................56
2.4.4 Silence Horn, Accept Alarms........................................................................................................................57
2.4.4.1 Confirm all Alarms................................................................................................................................57
2.4.5 Joystick Gain.................................................................................................................................................58
2.4.6 Wind Compensation......................................................................................................................................58
2.4.7 Current Compensation..................................................................................................................................58
2.4.8 Turn Thrusters On/Off...................................................................................................................................59
2.4.9 Position Sensor Calibration and Selection................................................................................................... 59
2.4.10 Heading Settings.........................................................................................................................................60

4 Contents
2.4.10.1 Change Heading Set Point................................................................................................................60
2.4.10.2 Change Rotation Speed.....................................................................................................................61
2.4.10.3 Change Heading Gain....................................................................................................................... 61
2.4.10.4 Change Heading Alarm Limit.............................................................................................................62
2.4.11 Auto Position Mode Settings.......................................................................................................................62
2.4.11.1 Auto Position Mode............................................................................................................................62
2.4.11.2 Change Position Set Point.................................................................................................................62
2.4.11.3 Change Between Relative and Absolute Position Adjustment...........................................................63
2.4.11.4 Change Position Set Point Relative to Vessel...................................................................................63
2.4.11.5 Change Position Set Point to North, South, East or West Direction..................................................64
2.4.11.6 Change Position Point to Any Direction............................................................................................ 65
2.4.11.7 Change Target Set Point entering Latitude Longitude Coordinates.................................................. 65
2.4.11.8 Change Position Set Point Using Joystick.........................................................................................66
2.4.11.9 Set Transfer Speed............................................................................................................................66
2.4.11.10 Change Position Gain......................................................................................................................67
2.4.11.11 Change Position Alarm Limit........................................................................................................... 67
2.4.12 Follow Mode................................................................................................................................................68
2.5 Operational Scenarios............................................................................................................................................69
2.5.1 Before Using Auto Position Nearby Other Objects.......................................................................................69
2.5.2 Vessel Losing Position..................................................................................................................................69
2.5.3 Losing Redundancy (DP2)............................................................................................................................69
2.5.4 Strong Current Force....................................................................................................................................69
2.5.5 Strong Wind Force........................................................................................................................................70
2.5.6 Warning for Loss in Worst Case Failure......................................................................................................70
2.5.7 DP2 Usage Nearby High Objects.................................................................................................................70
2.5.8 Alternative Wind Sensor Usage....................................................................................................................70
2.6 Diagnostics and Alarms.........................................................................................................................................70
2.6.1 Description.....................................................................................................................................................70
2.6.2 Alarm List and Alarm Handling.....................................................................................................................70
2.6.3 System Alarms..............................................................................................................................................71
2.6.4 Thruster Alarms.............................................................................................................................................72
2.6.5 Reference Sensor Alarms.............................................................................................................................73
2.6.6 Position Sensor Alarms.................................................................................................................................74
2.6.7 Heading Sensor Alarms................................................................................................................................75
2.6.8 Wind Sensor Alarms.....................................................................................................................................76
2.6.9 Operational Alarms........................................................................................................................................77
3 Maintenance..............................................................................................79
3.1 Planned Maintenance.............................................................................................................................................79
3.1.1 System Restart..............................................................................................................................................79
3.1.2 UPS...............................................................................................................................................................79
3.1.3 Check Free Disk Space................................................................................................................................79
3.1.4 Set Date and Time........................................................................................................................................80
3.1.5 Joystick Calibration....................................................................................................................................... 80
3.2 Special Maintenance..............................................................................................................................................81
3.2.1 USB Memory Stick........................................................................................................................................81
3.2.2 Log Files........................................................................................................................................................81
3.2.3 Sensor Communication.................................................................................................................................82
3.3 Troubleshooting......................................................................................................................................................83
3.3.1 Question: Cannot Take Control Even when system Seems Ready.............................................................83
3.3.2 Question: Wind Compensation Does Not Work........................................................................................... 83
3.3.3 Question: Use Full Bow and Stern Thruster.................................................................................................83
3.3.4 Question: Release Control of Thrusters.......................................................................................................83
3.3.5 Question: CamClient No Communication.....................................................................................................83
3.3.6 Question: DGPS Diagnostics, How is This Detected?................................................................................. 83
4 Appendices................................................................................................84
4.1 Appendix A: UPS Battery History..........................................................................................................................84

6 | Preface
I Preface
This operator guide is intended for DP operators using the AlphaDynaPos DP system. The AlphaDynaPos DP system
offers the functionality to control the heading and position keeping of the vessel. For heading keeping at least one bow
thruster and one gyro should be available. For position keeping at least the stern thrusters and a positioning device such
as DGPS must be available.
Rotation
ZSurge,
Ahead / Astern
(X)
Sway,
Portside / Starboard
(Y)
List, Roll Trim, Pitch Heave
I.1 Revision History
Revision Nr. Description Date
V1.0 First Issue
I.2 General
The AlphaDynaPos Dynamic Positioning system automatically maintains a vessel's position and heading by controlling
thrusters based upon data received from position reference systems, gyro compasses, wind sensors and pitch/roll
sensors. The Dynamic Tracking mode allows the ship to move along a predefined track at low speed as defined by the
operator.
The AlphaDynaPos Joystick Control system (JC) is an independent JC control station serving as a backup for the DP
control station. The functionality of the independent Joystick station is equal to the functionality of a single DP control
station.
Note The functionality of the independent Joystick station is manual joystick or joystick with heading keeping
and wind correction, but without position control.
The AlphaDynaPos DP and JC systems are perfectly suited for vessels that require IMO DP notations, as shown in
Table 1: IMO DP Notations on page 6.
LRS DP (CM), DP (AM), DP (AA)
BV DYNAPOS SAM, DYNAPOS AM/AT, DYNAPOS AM/AT R
DNV DYNPOS-AUTS, DYNPOS-AUT, DYNPOS-AUTR
ABS DPS-0, DPS-1, DPS-2
GL DP-0, DP-1, DP-2

7 | Preface
CCS DP-0, DP-1, DP-2
RMRS DYNPOS-0, DYNPOS-1, DYNPOS-2
Table 1: IMO DP Notations
Main advantages of the AlphaDynaPos DP Dynamic Positioning system:
1. Accurate positioning with up to 0.5 meter accuracy in combination with accurate DGPS and MRU (inclinometer),
which is used as a position reference.
The DGPS and Motion Reference Unit allows for accurate filtering and calculating of the actual position with the
DGPS signal and taking into account the actual movement of the vessel. Higher position accuracy can be achieved
with for example, a laser beam system.
2. Sea trial tuning and testing can be limited to three days maximum.
Parameter tuning is already done before dispatch from our factory by modeling of the ship and testing with a ship
simulator. In addition, during the sea trial our self-tuning DP algorithms greatly reduce the time needed on board.
3. Extremely reliable hardware by using only solid state components and 24VDC power supply.
The DP Workstation uses solid state disks running under the Windows-XP embedded operating system. The DP
Workstation (Marine PC, TFT screen and Printer) and all other components of the DP system are working with a
24VDC supply voltage with low power consumption.
4. Cost effective DP solution.
Reliable hardware that is field proven on hundreds of vessels, that allows for efficient and standard manufacturing in
large quantities. Therefore the advanced AlphaDynaPos Dynamic Positioning system, including navigation sensor
package, can be offered at a very attractive price.
I.3 Glossary
The Glossary lists an overview of Units of measurements and a table of abbreviations and explanation of terms used in
this manual.
I.3.1 Units
The AlphaDynaPos DP system works with the following units:
Unit Description
Distance Meters
Speed Knots: 1 knot is approximately 0.5 m/sec
1 Knot is 1 nautical mile per hour, 1 nautical mile = 1852
meter.
More precisely: 1 knot x 1852 / 3600 = 0.514 m/s
Heading / Bearing Angle in degrees from 0 to 360°. 0° is towards North, 180°
is towards South.
Thruster direction Angle in degrees from -180 to +180° relative to vessel. 0°
is towards Bow, -180 and 180° is towards stern.
Rotation speed °/min.

8 | Preface
I.3.2 Abbreviations and Explanation of Terms
Abbreviation Description
Apparent Wind Wind speed and angle relative to vessel, as measured by
Wind sensor (see also True Wind). Wind is displayed in
numeric values with direction ‘coming from’.
COG Course Over Ground, in degrees, from 0 to 360°, Bearing
(relative to world).
Check Box Software switch:
To turn On (selected status)
To turn Off (deselected status)
DP Operator panel Panel with small TFT graphics built-in with joystick and
rotation knob built-in alongside. The Operator panel can
be controlled by push buttons in the display frame canvas.
DP system Dynamic Positioning system. Equipment reading position
sensors for automatic control of thrusters.
Joystick
Lever next to the small graphics screen. It has
control axis forward to afterward for vessel motion bow to
stern and left to right for vessel motion port to starboard,
depending on how it is positioned, orientated, on the
vessel.
The rotation knob is integrated in the lever and
controls a third axis by turning the lever clockwise, or
counterclockwise.
LAT, Latitude Latitude in degrees (°) angle from
center of earth to north pole as positive, to south pole as
negative. Format is dd°mm.mmmmm.
dd: whole degrees.
mm.mmmmm: minutes of degrees with decimals.
(60 minutes in 1 degree).
LON, Longitude Longitude in degrees (°) angle from
center of earth to Greenwich (England). Prefixed with W
for West or E for East. Positive to east, negative to west.
Format is dd°mm.mmmmm.
dd: whole degrees.
mm.mmmmm: minutes of degrees with decimals.
(60 minutes in 1 degree).
Screen, Mimic, Graphic Graphic display with moving objects and updated process
values that represent actual status of system.
ROT Rate of Turn, heading change degrees per minute (°/min),
positive towards starboard, negative towards port.

9 | Preface
Abbreviation Description
SOG Speed Over Ground (knots), Absolute Speed (relative to
world).
True Wind Wind speed and angle relative to world, as measured by
device on land (see also apparent wind).

10 | Cautions
II Cautions
• Caution: Operation system.
• To safely operate this equipment, so as not to adversely affect the warranty, only certified personnel should
operate this system.

11 | Introduction
III Introduction
III.1 Communication Overview
The following overview drawing shows a block diagram with the main system components and network connections.
Figure 1: Network Connections

12 | Introduction
III.2 Communication Matrix
This paragraph contains a table and description, which components exchange information via Ethernet network.
In this table each component name is shown in the vertical row with an Alphabetic character to identify. This character is
also used horizontally.
Station Computer A B C D E F G H I
DP1 MPC1 A- 13b 23a 1b 2b 3b 4b 5b 6b
21a
DP2 MPC2 B13a - 23b 1b 2b 3b 4b 5b 6b
21b
JS MPC3 C24a 24b - 1d 2d 3d 4d 5d 6d
THR XP-T1 D1a 1a 1c -
XP-T2 E2a 2a 2c -
XP-T3 F3a 3a 3c -
XP-T4 G4a 4a 4c -
XP-T5 H5a 5a 5c -
XP-T6 I6a 6a 6c -
III.2.1 DP Control Commands to Thrusters 1a, 2a, 3a, 4a, 5a, 6a
The MPC’s run the DP controllers which give thruster Set Points for RPM/Pitch and direction angle to the thruster
controller processors. Only the DP station that is in control sends these Set Points.
III.2.2 Thruster Feedback to DP Controllers 1b, 2b, 3b, 4b, 5b, 6b
The thruster processors collect actual RPM/Pitch signal and send this back to DP controllers.
III.2.3 JC Control Commands to Thrusters 1c, 2c, 3c, 4c, 5c, 6c
The MPC runs the JC controller, which give thruster Set Points for RPM/Pitch and direction angle to the thruster
controller processors. Only if the JC station is in control it sends these Set Points.
III.2.4 Thruster Feedback to JC Controllers 1d, 2d, 3d, 4d, 5d, 6d
The thruster processors collect actual RPM/Pitch signal and send this back to JC controller.
III.2.5 Settings Synchronize Between DP Stations 13a, 13b
The DP stations exchange user settings continuously. User settings include Gain, Alarm Limits, Set Points and all other
settings used to control the vessel.
III.2.6 Status DP Stations to Back-Up DP Station 21a, 21b
The DP stations exchange their status continuously.
III.2.7 Status DP Stations JC Station 23a, 23b
The DP stations exchange their status continuously.
III.2.8 Status JC Station DP Stations 24a, 24b
The DP stations exchange their status continuously.

13 | Introduction
III.3 System Overview (DP2)
Figure 2: system Overview (DP2)

14 | Introduction
III.4 Sensor Overview
Figure 3: Sensor Overview

15 | Introduction
III.5 System Principle - Schematic Overview
In this chapter is explained how the data flow of the DP system works. A system diagram visualizes how information
flows through the system processes.
Schematic Overview
The schematic overview of the system has the different sensors grouped into one symbol. This includes Gyro, DGPS,
and MRU sensors. The sensor filter checks each sensor signal and activates an alarm if a sensor fails.
Figure 4: Schematic Overview
The control block receives position and speed errors from the sensor filter and calculates the proper response. This is
sent to the vector selection block which also receives the mode that the user has selected and the position of the joystick
and the rotation knob. The block decides what to send to the force calculation block.
The force calculation block receives user or controller vector, wind and current forces, and it summarizes this to a total
force that is passed onto the Thruster allocation. This block decides how thrusters should be used, and sends the Set
Point for each thruster to the thruster ramp block. The thruster ramp applies the Set Point changes while taking into
account how fast a thruster can change angle and RPM. Also the approximate current is calculated from the applied
thrust and fed back to the force calculation block.

16 | Introduction
III.6 System Diagram
The system is built around the controller, which consists of a position and a velocity controller where all sensor data is
fed into and all thruster Set Points outputs are driven by. The Motion Control determines whether the Controller is used
or that the system is in Manual mode.
Figure 5: System Diagram

17 | Introduction
The system works according to the following process, which will be explained more thoroughly further on:
1. Motion Control determines which mode is used.
2. Normalize blocks convert sensor data to values between -1 and 1.
3. Position controller calculates the required thrust when positioned close to the target.
4. Velocity controller calculates required thrust when sailing to the target or along a track.
5. Gain is applied to the controller output. (not shown in system Diagram).
6. Vector Select checks for manual overrides from joystick or rotation knob.
7. Force calculation summarizes wind, waves, current and known external forces to total force demand.
8. Thruster Allocation routine determines the Set Point and direction of each thruster.
9. The thruster Ramps are applied, so that each thruster is increased or decreased to its ability.
10.Current is calculated from filtered thruster Set Points and speed of the vessel.
In the following chapters each of the processes in the system Diagram are explained in detail.
III.6.1 Motion Controller
The most important task of the Motion Controller is to change between modes:
• Joystick Manual.
• Joystick Auto (automatic heading control using bow thruster).
• Auto Position (full automatic control).
• Auto Pilot (automatic heading control using steering).
Note Due to Class requirements Auto Pilot is not available in DP system.
The Auto Position mode has several sub modes:
• Tracking
• ROV follow
The Motion Controller collects settings such as the Transfer speed and Rate Of Turn. Also the Motion Controller collects
sensor and position data. This data is passed on to the X, Y and Z controllers. The motion controller determines when
to change from velocity controlling to position controlling. For XY movements more than 15 meters Velocity Controller is
used. When the distance becomes less than 15 meters a combination of Position and Velocity controllers is used.
The Velocity Controller accelerates with a Deceleration / Acceleration setting of 0.05 meters / second.
For Z movements (rotation) the acceleration / deceleration is 1° / second and the system changes from positioning to
velocity when the heading distance is more than 30° from Set Point.
III.6.2 Normalize
The controller requires data scaled to values between range from -1 and +1.

18 | Introduction
The function of the Normalize Block is to scale the error of position and error of speed to this range. In the displayed
example below the normalization is done with a range from -40 meters to + 40 meters for both X and Y. The speed is 3.5
knots in X direction and 3.0 knots in Y direction. The Rotation range is -90° to +90°.
All values outside this range will be truncated to the range. For example:
• X distance error of -10 meter will give a controller input of -0.25.
• Y speed error of 0.5 knot will give a controller input of 0.16.
• Z rotation distance to Set Point of 130° will give a controller input of +1.
III.6.3 Position Controller
The Position Controller regulates the force to move a vessel to the position Set Point.
The Position Controller regulates the force to move a vessel to the position Set Point. This type of regulating is used for
shorter distances of up to 15 meters, as described in paragraph Motion Controller on page 17.
The Position Controller consists of a regulator and an integrator. Both get the same position error outputs from the
Normalize Block and output a force in X, Y or Z direction for the vessel to compensate.
The Regulator looks for the input value in a fuzzy logic table to find the proper response. This value is multiplied by the
gain factor 0.25. For example a position error of 0.25 gives an output value of ~ 0.07.
The Integrator uses a first order filter to compensate for errors of a constant type. This is mostly current, but can also be
an external force that needs the same correction force for a longer period of time. The I-Time value defines the length of
this period of time in seconds. For example a position error of 0.25 will give an output value of 0.25 after 60 seconds.
III.6.4 Velocity Controller
The Velocity Controller regulates the speed at which the vessel will move over when changing position Set Points or
sailing along a track.
This type of regulating is used for distances more than 15 meters, as described in paragraph Motion Controller on page
17.
The Velocity Controller consists of the same components as the Position Controller (see chapter Position Controller
on page 18). The difference is that the position error and speed input are calculated over time to get speed and
acceleration. The Velocity Controller also has its own fuzzy tables to look for the output value.
For example: If a command is given to move the vessel 100 meters forward, the Velocity Controller regulates that the
vessel will move at a speed of 3 m/s and with an acceleration of 2 m/s².

19 | Introduction
III.6.5 Gain
The Gain changes the response of the vessel from slow (smooth) to fast (aggressive). Before applying gain the position
and velocity calculations are added together, so one set of values of X, Y and Z motion is computed.
There are multiple gain factors. The K - Gain, which is setup during commissioning and the User - Gain, which can
be changed from (amongst others) the MAP screen (Figure 20: DP MAP Screen on page 32). The Gains are
multiplication factors on the X, Y, Z from the Regulator.
The regulators of Position and Velocity Controller are multiplied by the K factors. This influences how much the system
depends on the slow but steady integration of controller output and how much it uses of the position and speed errors.
The controller output for movement in X and Y directions are multiplied by the Position Gain factor and the controller
output for rotation, Z, is multiplied by the Heading Gain factor. These factors are available on the user screens such
as the MAP screen (Figure 20: DP MAP Screen on page 32). In this manner they can be changed easily to suit the
needs for the particular situation.
For example: The output of the FC-PD regulator is added to 0.6 times the output of the FC-PI regulator. This total is
multiplied by Position Gain of 70% (times 0.7) for the X-Y movements and multiplied by Heading Gain of 60% (times 0.6)
for the rotation movement. The result of this is output to the Vector selection.
III.6.6 Vector Select
Vector Selection receives the actual Set Points from the joystick, rotation knob and controller.
The joystick X and Y are multiplied by the individual X and Y Gain Settings, the Rotation Knob is multiplied by the Z
- Gain. All are multiplied by the common Joystick Manual Gain (JSM). Subsequently these values are added to the
controller outputs depending on settings. This is output to the Max block.
For example: If the user has the joystick and rotation knob set to neutral the Vector Select simply forwards the inputs to
the Max block. If the user has the joystick pushed forward, then the Vector Selection adds the forward setting to the X
input.
III.6.7 Force Calculation
The Force calculation block receives X,Y and Z motion as input.
In order to prevent the system from becoming overloaded the Force values are limited to the maximum. The forces are
output to the Summarize Block.

20 | Introduction
Figure 6: Summarize Block
The block gets inputs from the regulator, wind sensor and the current compensation. Extra external forces can be setup.
These forces are added into X, Y and Z force for the vessel. These forces are output towards the Allocation (ALLOC
block).
Lowering the wind compensation also lowers the thrust. If the vessel does require this thrust to stay in position, the
regulator will increase the integration factors.
III.6.8 Thruster Allocation
The Allocation Block receives force demand inputs from the force Calculation Block and outputs Thruster Set Point
towards the Ramp Block. The inputs are in 3 dimensions, X, Y and Z. The outputs are up to 2 Set Points per thruster for
the direction angle Set Point and the RPM set point.
The function of the Allocation Block is to divide the demand force over the available Thrusters. It gives priority to rotation
force. The Block will limit X and Y forces to ensure the vessel stays at the requested heading. This check is based on
force only. If a vessel has developed a particular speed, the rotation forces can become so high that also the heading
cannot be maintained.
III.6.9 Thruster Ramp
The Ramp Block receives all thruster Set Points and feedback as inputs and gives ramped thruster Set Points as
outputs.
Table of contents
Other JRC Marine Equipment manuals

JRC
JRC JAN-7201 User manual

JRC
JRC JAN-7202 User manual

JRC
JRC Alphatron AlphaPilot MFS User manual

JRC
JRC Alphatron Marine Rudder Feedback Unit HD User manual

JRC
JRC JLN-205MK2 User manual

JRC
JRC JUE-95SA - User manual

JRC
JRC JLR-7900 User manual

JRC
JRC JFV-130HP Series User manual

JRC
JRC ALPHATRON Marine AlphaRiverTrackPilot User manual

JRC
JRC JQE-103 - User manual
Popular Marine Equipment manuals by other brands

ACR Electronics
ACR Electronics GlobalFix 406 Product support manual

Furuno
Furuno FCV-271 Operator's manual

AML Oceanographic
AML Oceanographic MVP30 Operator's guide

KAC
KAC ENScape CWSS S3 Series Installation tips

Nexus
Nexus AUTOPILOT Installation and operation manual

Syqwest
Syqwest Bathy 2010PC Installation operation & maintenance