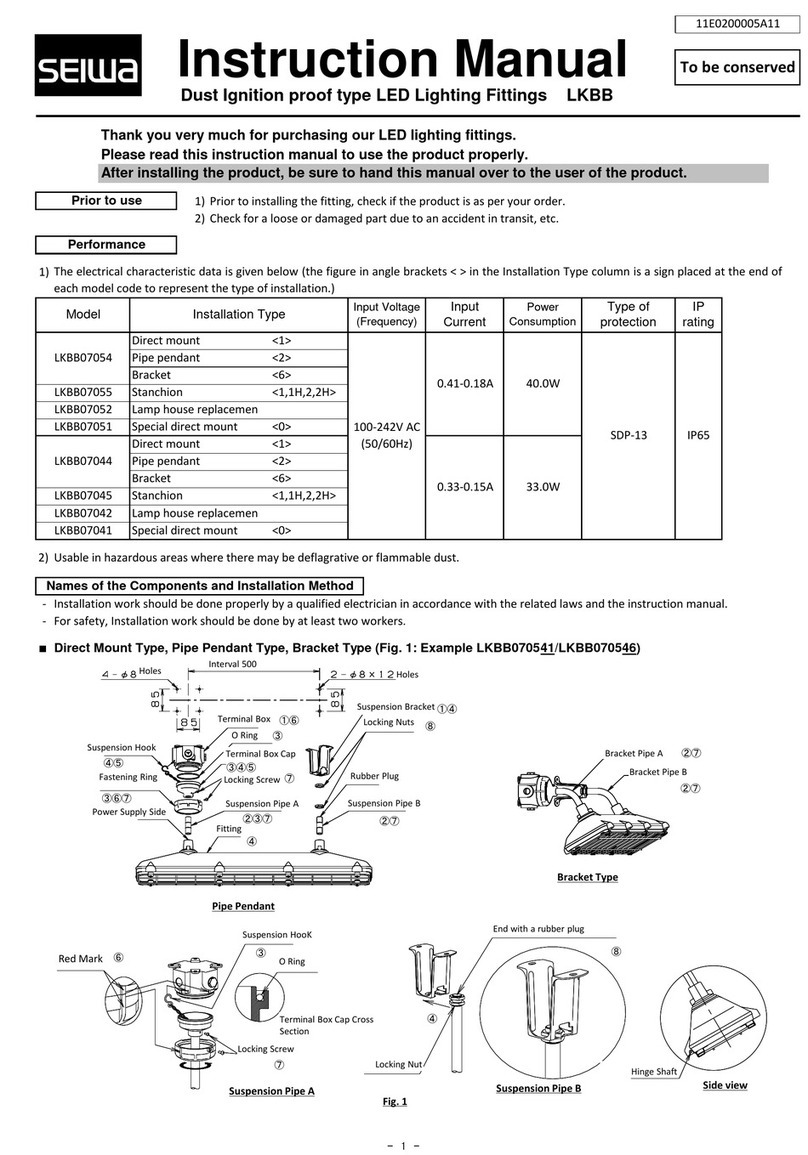
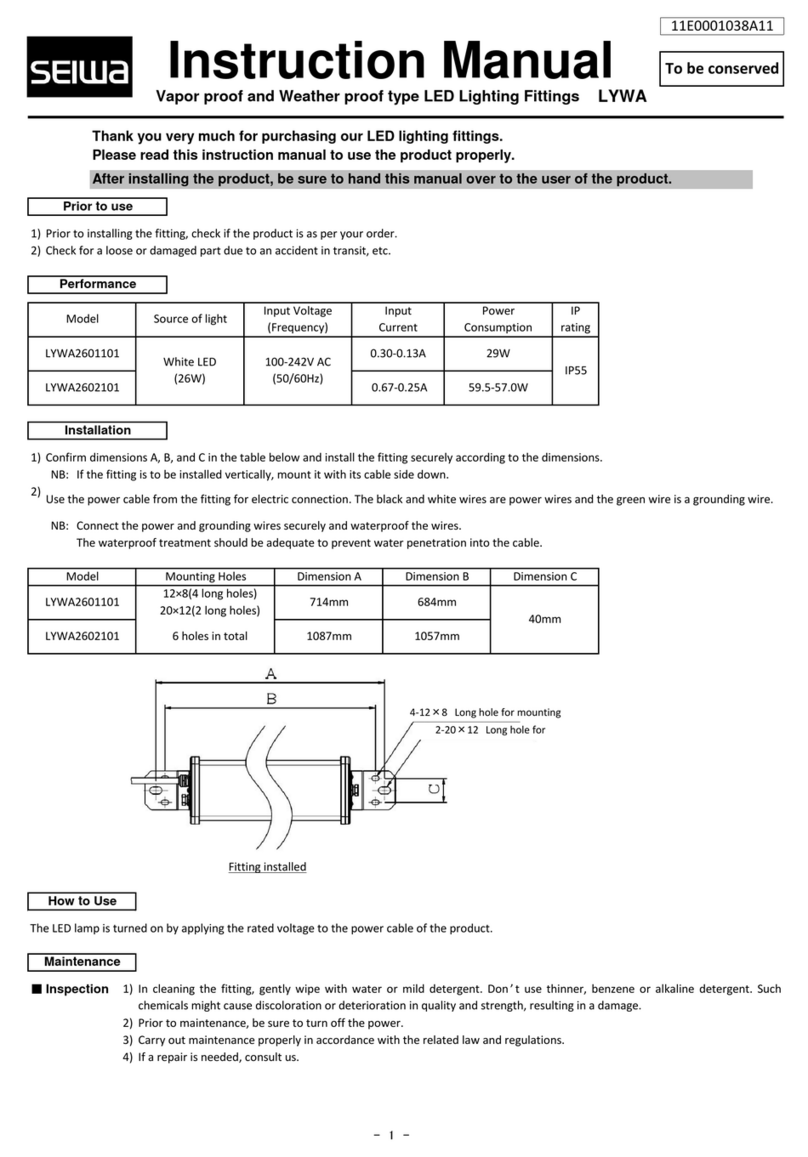
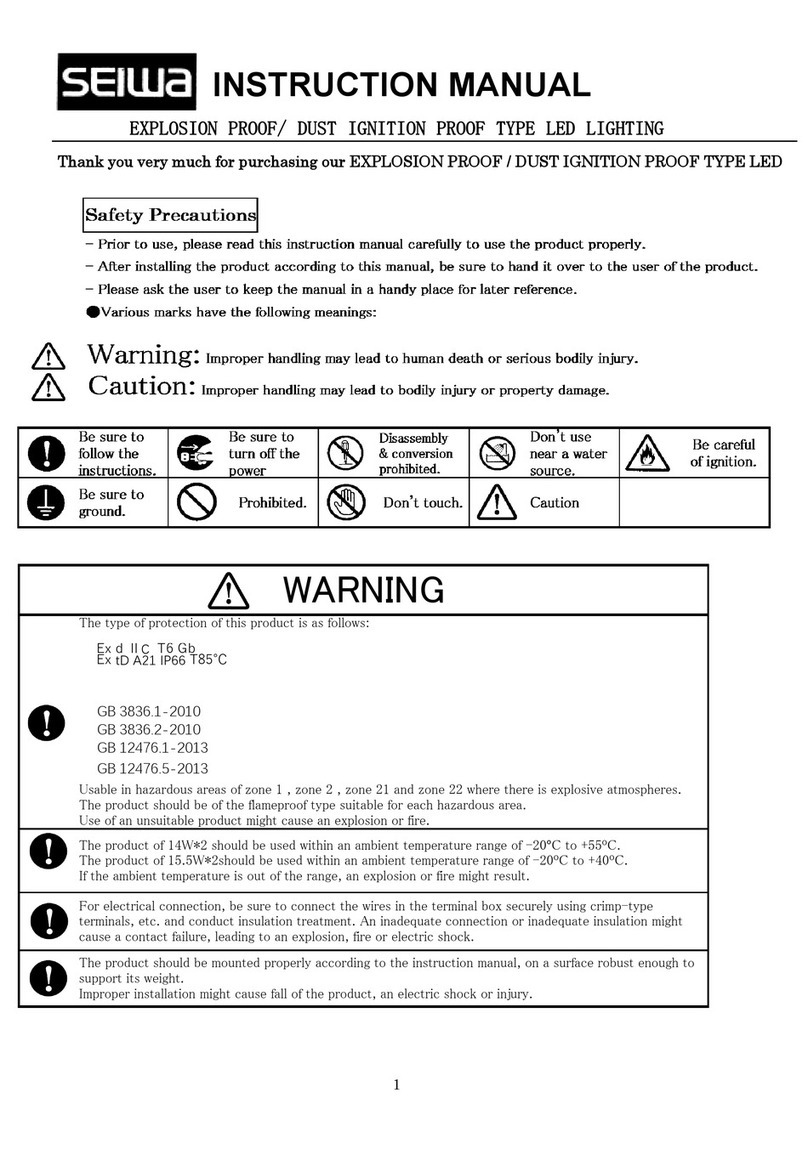
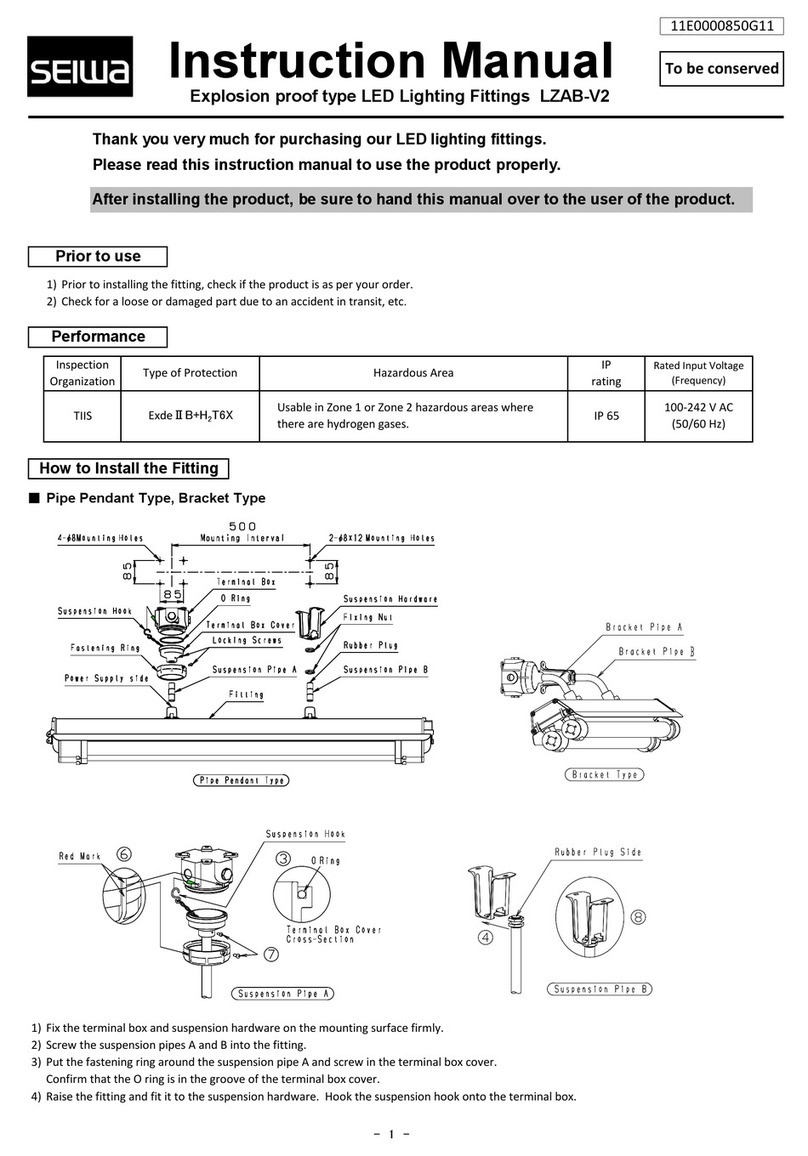
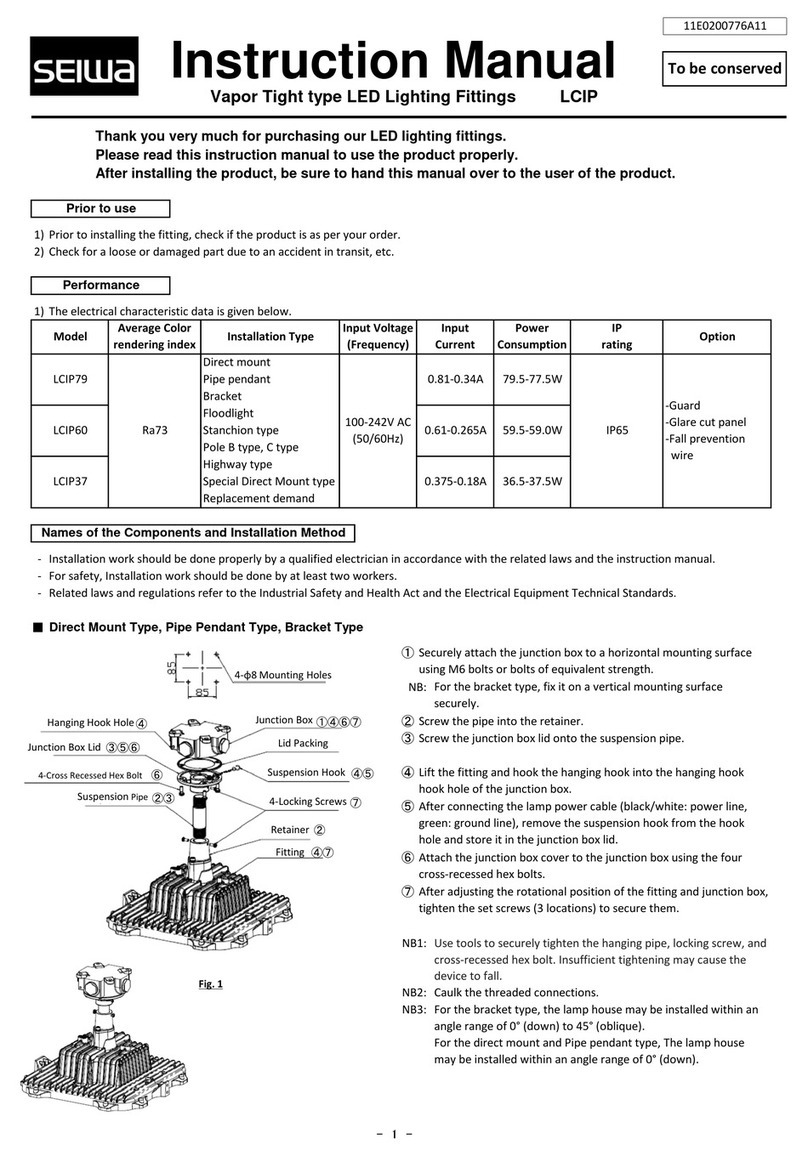
Seiwa LCTD110181-N User manual

Thank you very much for purchasing our LED lighting fittings.
Please read this instruction manual to use the product properly.
1) Prior to installing the fitting, check if the product is as per your order.
2) Check for a loose or damaged part due to an accident in transit, etc.
1)
The electrical characteristic data is given below.
- Installation work should be done properly by a qualified electrician in accordance with the related laws and the instruction manual.
- For safety, Installation work should be done by at least two workers.
■
Lighting fitting for inside inspection
NB1:
NB2: The mounting brackets are optionally available.
For further iforatio, see Optio: Moutig Bracket.
NB:
NB1: Use M8 or larger bolts to mount it on the structure.
NB2:
LCTD1101
81
-N
(5000K)
IP65
Please perform connection of power wires and insulating.
The colors of power wire are white and red. The color of earth
wire is black.
Vapor Tight Type LED Lighting Fittings
LCTD
After installing the product, be sure to hand this manual over to the user of the product.
Model
100-242V AC
50 / 60Hz
Input
Current
Power
Consumption
IP
rating
Mount the lamp house with the attached mounting brackets
on the structure (tank inspection hole, etc.) firmly.
Fig.1
81M
-W
11E0001151A11
To be conserved
Instruction Manual
Option
(3000K)
Input Voltage
(Frequency)
0.16-0.07A
When the supplied cross-recessed pan head machine
screws are used, the recommended thickness of the
mounting bracket is 2 to 5 mm.
Mounting Bracket
-M
Prior to use
Performance
Prepare robust mounting brackets to be attached to the lamp
house (fitting) referring to the figure on the right (mounting
hole positions).
Attach and fix the mounting brackets at four places (90 °
pitch) or three places (120° pitch).
Among the 12 cross-recessed pan head machine screws
(M5x12, with plain and spring washers) on the lamp house,
remove as many ones as needed. After removal, attach the
mounting brackets to the lamp house using as many cross-
recessed pan head machine screws as needed.
15.0-15.5W
Names of the Components and Installation Method
Be sure to fix the mounting brackets and lamp house firmly
using the mounting screw holes, though the mounting
bracket height (distance from the tank inspection hole,
etc.) is not limited.
Fig.2
CABLE
HVCT 1.25mm2×3C (2m)
Mounting bracket (option)
(not supplied)
Lamp housefittings
2
×
6-M5 Mounting screw
holes
Screw hole depth:8
12 cross-recessed pan head machine screw
M5×12 with spring and plain washers(supplied)
- -

■Option: Mounting Bracket
Fasten the removed machine screws and the four or three mounting brackets on the lamp house (Fig. 3).
NB:
Four (90° pitch) or three (120° pitch) mounting brackets are needed.
Mount the lamp house (fitting) with the attached mounting brackets on the structure (tank inspection hole, etc.) firmly.
NB1: The mounting bracket is made of 3.2 mm-thick sheet steel (coated). For its dimensions, see Fig. 4.
NB2: Use M8 bolts to mount the lamp house on the structure.
NB3: The interval between mounting brackets (pitch) is 213mm (diameter) as shown in Fig. 4.
The LED lamp is turned on by applying the rated voltage to the power cable of the product.
■
Inspection 1)
2) Prior to maintenance, be sure to turn off the power.
3) Carry out maintenance properly in accordance with the related law and regulations.
4) If a repair is needed, consult us.
1) In the period when the product is in use, never disassemble it.
2) For disposal of the product, follow the regulations and rules of your local government.
When reordering, please let us know:
・Drawing or drawing No. for the delivered product
・Manufacturing lot number on the nameplate
Fig.4
How to Use
Maintenance
In cleaning the fitting, gently wipe with water or mild detergent. Don ’tuse thinner, benzene or alkaline detergent. Such
chemicals might cause discoloration or deterioration in quality and strength, resulting in a damage.
Disassembly and Disposal
Reordering
Fig.3
Among the 12 cross-recessed pan head machine screws (M5x12, with plain and spring washers) on the lamp house, remove as many ones as
needed.
If the above information is unavailable, give us any material showing the appearance of the product
or details of the product specification (dimensions, mounting interval, lamp type, etc.).
Fig.5
Nameplate
3 mounting brackets (120°pitch)
4 mounting brackets(90°pitch)
Mounting
bracket
Lamp house
(fitting)
Mounting screw holes
Attachment to the Lamp
14×26Long hole
- -

1. Prior to maintenance or inspection, be sure to turn off the power.
2. Confirm that the screws and bolts are fastened properly and tightly.
3. The wirings work of fixings perform fixings and outside of wiring.
4. Don't open the fixing, please.
5. The supply voltage should be within the range of rating, and the supply voltage variation should be within ±6%.
6.
7.
8.
Prior to maintenance or inspection, be sure to turn off the power.
9. To prevent shortening of the service life, avoid turning on the fitting in direct sunlight.
10. To avoid noise or malfunctioning, don't use a radio, television or wireless infrared remote control near the fitting.
11.
12.
13.
14.
15. The LED lamp and the power supply unit cannot be replaced.
16. Do’t look straight at the LED lap. It ca daage your eyes.
17.
If there is a heat source near the product, the product may overheat due to radiation heat. Use a heat shield plate or thermally insulating
glass to prevent the product from being affected by radiation heat.
In grounding work, be sure to follow the technical standards for electrical equipment of your country.
Don’t open the front glass. The internal components such as the LED lamp become very hot. Don’t touch the LED lamp since a malfunction
or lighting failure might occur.
For white LED lamps, the luminescent color and brightness may vary with individual LEDs because of their nature. Also note that the rate
of attenuation with time varies with individual LED lamps.
The product must be mounted on a sturdy wall surface or structure which is vibration-free and less susceptible to damage. Otherwise, it
might fall or be damaged.
For use in an unfavorable location (a very hot, cold or humid place or a place in which there is strong wind or vibration, a salt damage
environment or a dusty or corrosive gas atmosphere), a special countermeasure should be taken.
The ambient temperature should be within the range of -20°Cto +50°C. There should be no influence of radiation heat.The use of the
product out of this range may shorten the service life.
CAUTIONS
- -

- Prior to use, please read the safety precautions and instruction manual thoroughly to use the product properly.
-
- Please keep the manual in a handy place for later reference.
●The various marks have the following meanings:
Do’t oer the produt ith a iflaale aterial suh as loth or paper or put aythig i the produt.
Such a material or thing might cause a fire.
The parts once removed for cleaning should be replaced properly according to the instruction manual.
An improperly placed part might cause the product to fall, resultng in an injury or property damage.
Be sure to turn
off the power.
Don’t use the product in a hazardous location where a flammable or explosive atmosphere such as a gaseous, steamy or
dusty atmosphere may exist. Use in such a location might cause an explosion or fire.
The ambient temperature should be within the operating temperature range specified in the instruction manual. If the
product should be used at a temperature higher than specified, an early lighting failure or malfunction might occur or a fire
might result.
If a product must be oriented in a specific manner for use, install it properly according to the marking on its body or the
instruction manual. Otherwise, a fire or electric shock might result.
Don’t touch.
In grounding work, be sure to follow the technical standards for electrical equipmentof your country. Inadequate grounding
might cause a fire or electric shock.
Be sure to
follow the
instructions.
Be sure to
ground.
For electrical connections, use crimp-type terminals, etc. to secure the connections and conduct insulation treatment. An
inadequate connection or inadequate insulation might cause an imperfect contact, leading to a fire or electric shock.
When leading the power cable into the product through a conduit or the like, waterproof the connection and joint
adequately to prevent water infiltration. Inadequate waterproofing might cause a fire or electric shock.
Do’t ope LED lap protetie oers suh as the frot glass ad glass gloe.
Do’t touh a LED lap, otherise a alfutio or lightig failure ight our.
Do’t ed, tist or pull the poer ale y fore.
Inadequate handling of the cable might damage it and result in a fire or electric shock.
Before cleaning, be sure to turn off the power.
Otherwise, a fire or electric shock might result.
Be careful of
ignition.
After installing the product, be sure to hand the safety precautions and instruction manual over to the user of the product.
Caution
WARNING:
CAUTION:
Improper handling may lead to a human death or serious bodily injury.
Improper handling may lead to a bodily injury or property damage.
Disassembly &
conversion
prohibited.
Don’t use near
a water source.
Prohibited.
11E0000742E11
Safety Precautions
To be conserved
WARNING
Do’t oert the produt.
Conversion might cause the product to fall or result in a fire or electric shock.
L照般6
- 1 /2 -

Please note that the above addresses and phone numbers may be changed.
Installation of the product should be carried out by a qualified person.
Installation by an unqualified person is legally prohibited.
Do’t use the produt i a strog orrosie gas atosphere hih otais hydrohlori aid or hlorie gases or the like.
Use in a corrosive gas atmosphere might cause the product to corrode and fall, resulting in an injury.
The product should be mounted on a surface robust enough to support its weight, properly according to the instruction
manual. Improper installation might cause the product to fall or result in an electric shock or injury.
WARNING
Fax
To ensure brightness and safety, carry out periodical cleaning and inspection.
If used in an extended period without maintenance or inspection, a smoke, fire or electric shock might result.
For a product marked with a frequency, don’t use the product at a frequency other than 50 or 60 Hz (local power supply
frequency). Use at a wrong frequency might cause a fire.
If you continue to use the product in an abnormal condition (smoke, odor, etc.), a fire or electric shock might result. If you
detect an abnormality, immediately turn off the power switch. Confirm that the abnormal condition has been eliminated
and make a repair call.
Fax
2-19-6 Yanagibashi, Taito-ku, Tokyo 111-0052 Japan
+81 3 5833 8971
+81 774 58 2034
+81 3 5833 8946
Head Office
+81 774 55 8181
Phone
36 Shinike, Terada, Joyo, Kyoto Pref. 610-0192 Japan
Tokyo Branch
SEIWA ELECTRIC MFG.CO., LTD.
Phone
CAUTION
A lighting fitting has a service life. A product which has been used for eight to ten years may have degraded internal parts
even if it looks normal. For safety and energy saving, we recommend you check and replace it. The LED module design life is
60,000 hours (different from the lighting fitting life) when used at an ambient temperature of 30°C, 10 hours per day, 3,000
hours per year. If used at a higher temperature or more hours per year, the life would be shortened. Have a specialist
inspect the product every three years. If used for an extended period without inspection, a smoke, fire, or electric shock
might result.
Never touch LED light sources and their surroundings.
The light sources and their surroundings are very hot, so an accidental touch might cause a burn.
Do’t use the produt at a oltage other tha the rated oltage idiated o the aeplate.
Otherwise, breakage, fire or electric shock might result.
Any product not marked as a product for outdoor use should not be used outdoors or in a humid place or near a water
source. Its use in such a place might cause a fire or electric shock.
Ni-Cd
Ni-MH
L照般6
Resycling
Please bring used Secondary batteries to the recycling station for effective use of precious
resources and global environment conservation.
JBRC Japan Portable Rechargeable Battery Recycling Center
Phone +81 3 6403 5763
For further information on the product, contact any of our offices listed below (if you like to make an inquiry, let us know the model name
indicated on the product nameplate).
CONTACT DETAILS
- 2 /2 -
This manual suits for next models
5
Table of contents
Other Seiwa Lighting Equipment manuals
Popular Lighting Equipment manuals by other brands
ALUZ
ALUZ A8 Series Guide
RAB Lighting
RAB Lighting ALED POST TOP installation instructions

Pablo
Pablo BOLA DISC Assembly/installation instructions

Beka LED
Beka LED Dataled 60 user manual
Simmonsigns
Simmonsigns PASSAFE installation guide
Vision & Control
Vision & Control LDLF60x600-W5K7/UDC Instructions for use
