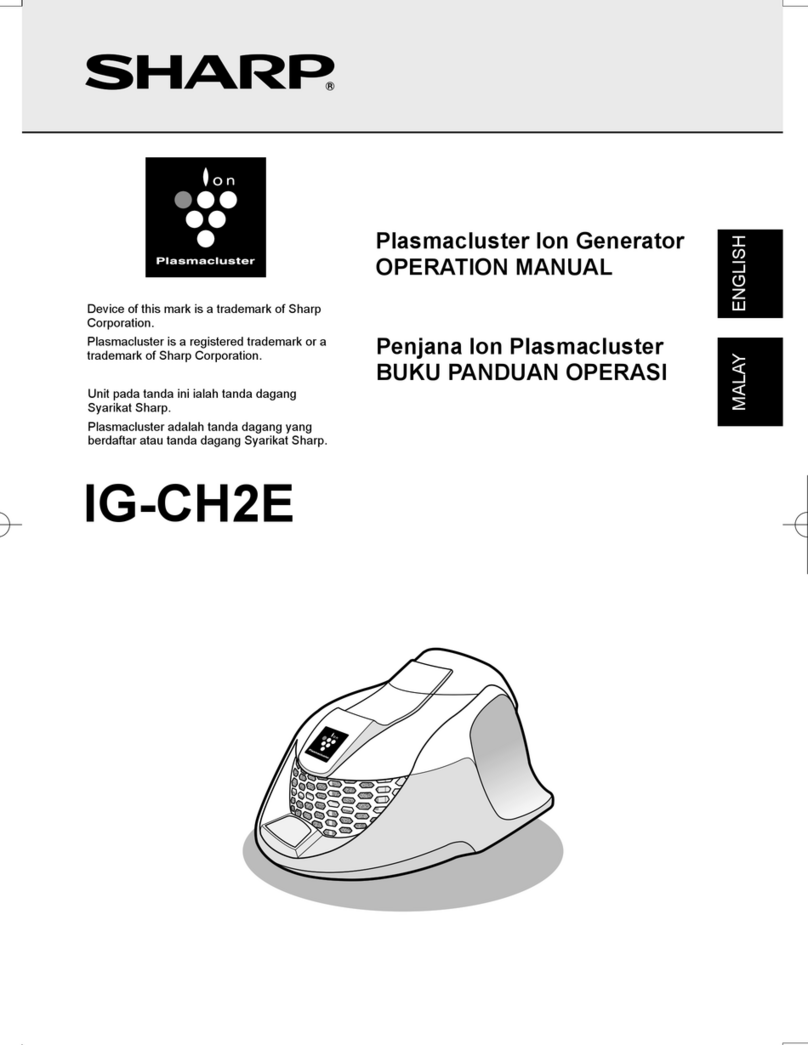
Sharp IG-DL1Y User manual

Plasmacluster Ion Generator
OPERATION MANUAL
IG-DL1Y
ENGLISH
Device of this mark is a trademark of Sharp Corporation.
Plasmacluster is a registered trademark or a trademark of
Sharp Corporation.
*
*
The number in this technology mark indicates an approximate
number of ions supplied into air 1 cm3, which is measured
around the center of a room with the applicable floor area (at
1.2m height above the floor) at the maximum wind volume,
whenplasmacluster ion evolving equipment using the
high-density plasmacluster ion evolving unit is placed close to
a wall.
Generator Ion Plasmacluster
PETUNJUK PEMAKAIAN
INDONESIAN
Baca dan simpan petunjuk ini dengan baik.
Lambang ini merupakan merek dagang dari Sharp
Corporation.
Plasmacluster merupakan merek dagang terdaftar atau
merek dagang dari Sharp Corporation.
No.Reg. : I.15.SEI26.02001.0910
IG-DL1Yen.indd1IG-DL1Yen.indd1 2011/09/309:21:002011/09/309:21:00

IG-DL1Yen.indd2IG-DL1Yen.indd2 2011/09/309:21:012011/09/309:21:01

ENGLISH
E-1
ENGLISH
Thank you for purchasing this SHARP Plasmacluster Ion Generator. Please
read this manual carefully before using Plasmacluster Ion Generator.
After reading, keep the manual in a convenient location for future reference.
The information provided in this manual is subject to change without notice.
CONTENTS
IMPORTANT SAFETY INSTRUCTIONS......................E-2
• WARNING............................................................................E-2
• CAUTIONS CONCERNING OPERATION ........................... E-2
• INSTALLATION GUIDELINES ............................................. E-2
PARTS NAME.....................................................................E-3
• MAIN UNIT / BACK / DISPLAY ............................................E-3
• ACCESSORIES ...................................................................E-3
INSTALLATION POSITION.............................................E-4
OPERATION .......................................................................E-6
CLEANING AND MAINTENANCE................................. E-8
• FILTER ................................................................................. E-8
• UNIT.....................................................................................E-9
• MAIN UNIT........................................................................... E-9
PLASMACLUSTER ION GENERATING UNIT REPLACEMENT
.. E-10
HOW TO REPLACE THE PLASMACLUSTER ION GENERATING UNIT
.. E-11
SPECIFICATIONS........................................................... E-11
TROUBLESHOOTING....................................................E-12
• While IG-DL1Y can remove suspended viruses and other
contaminants, it cannot create a completely sterile environment.
SHARP does not guarantee its ability to prevent microbial infection.
• To enable stable emission of high-density Plasmacluster ions, the
Plasmacluster Ion Generating Unit mounted in IG-DL1Y will need to
be replaced periodically*.
* Replacement is required approximately every 2 years (17,500 hours) when operated
24 hours a day. IG-DL1Y will stop operating after about 26 months (19,000 hours)
if the Plasmacluster Ion Generating Unit is not replaced.
IG-DL1Yen.inddSec1:1IG-DL1Yen.inddSec1:1 2011/09/309:21:012011/09/309:21:01

E-2
IMPORTANT SAFETY INSTRUCTIONS
When using electrical appliances, basic safety precautions should be followed, including the following
:
WARNING - To reduce the risk of electric shock, fire or injury :
• Read all instructions before using the unit.
• Use only a 220-240 volt outlet.
• Do not damage or modify power cord. Also, do not use the power cord if it is damaged.
• Do not remove the plug when your hands are wet.
•
Do not use the unit if the power cord or plug is damaged, or the connection to the wall outlet is loosened.
• Insert the plug securely all the way into power socket until it stops.
• When cleaning the unit, stop the operation and pull out the plug from the outlet.
• Periodically remove dust from the plug.
• If a defect is generated (burning smell etc.), stop the operation and pull out the plug from the outlet.
(Doing so could lead to fire or electric shock.) Contact the store you purchased this appliance from or
Sharp Service Center.
• Do not insert fingers or foreign objects into the air intake or air outlet.
• Do not modify the product. Also, no one other than an authorized repairman should take apart
or repair the product. (Doing so could lead to fire, electric shock or injury.) Contact the store you
purchased the appliance from or Sharp Service Center.
• Do not use or install the unit in unstable places. (The unit could fall, resulting in injury or damage.)
• Do not put the unit in the water, do not sprinkle water on the unit, or do not put water directly in the
unit. (Doing so could lead to fire or electric shock.)
• Do not use chlorine-based or acid detergent for cleaning. (Doing so could lead to generation of toxic
gas from detergent, damaging health.)
•
Do not cover the unit with easily burnable objects such as paper or cloth, or do not put them close to the unit.
• This appliance is not intended for use by persons (including children) with reduced physical, sensory
or mental capabilities, or lack of experience and knowledge, unless they have been given supervision
or instruction concerning use of the appliance by a person responsible for their safety.
• Children should be supervised to ensure that they do not play with the appliance.
CAUTIONS CONCERNING OPERATION:
• Do not pull on the cord when unplugging the plug. (Doing so could lead to leading to fire or electric
shock.)
• If you do not use the product for a long time, remove the plug from the outlet.
• Do not use the product at the following places.
• Places where water may be sprinkled or humid places such as a bathroom.
• Places where oil components such as edible oil are floating.
• Places where hair spray or chemicals are used such as barber shops or hair salons, or cleaners.
• Do not look in the spotlight, or do not put the light directly in the eyes. (Doing so could lead to damage
to the eyes.)
• When installing in a bed or a table, avoid places inappropriate for installation. (The unit could fall.)
• Do not forcibly rotate, pull, or bend the unit, or subject it to shocks or vibration.
• Do not carry or move the unit with the stand (or clamp) attached. (The unit could fall, resulting in injury
or damage.)
• Do not use items of silicone-containing products* near the unit. The fluororesin or silicone could get
stuck inside the unit, preventing it from producing Plasmacluster ions. If this happens, remove the
dust from the electrode section of the Plasmacluster Ion Generating Unit. (See E-9)
* Hair care products (split end coatings, hair mousses, hair treatments, etc.), cosmetics, antiperspirants,
antistatic agents, waterproofing sprays, polishes, glass cleaners, chemical impregnated clothes, wax, etc.
INSTALLATION GUIDELINES:
• Do not block the air inlet and/or air outlet.
• Place at least 2m away from equipment utilizing electric waves such as televisions or radios to avoid
electrical interference when using the unit.
• Appropriate room temperature is between 0-35ºC.
• Install the clamp to a place that can withstand tightening of the clamp or operation of the arm. The
thickness that can be clamped is from 25 mm to 50 mm.
IG-DL1Yen.inddSec1:2IG-DL1Yen.inddSec1:2 2011/10/2516:43:092011/10/2516:43:09
ENGLISH
E-3
PARTS NAME
ACCESSORIES
MAIN UNIT / BACK / DISPLAY
ON
OFF
FILTER
CLEAN
UNIT
RESET
3 Sec.
Press
Air Outlet
(Ion Outlet)
Plug
Spotlight
Arm
Installing Tabs
Connecting Part
Stand
Clamp
Clamp fixing
handle
•Unit Cleaning Brush •Operation Manual
Filter Cap
Operation Switch
(See E-6)
(See E-4)
(See E-5)
(See E-6)
BACK
DISPLAY
Air Inlet
Filter
Cap
Unit *
Cap Hook
Filter Reset Button
Filter Clean Light
(orange)
Operation Light
(blue)
Unit Replacing
Light (red)
(It is in the filter cap.)
* The unit refers to the Plasmacluster Ion
Generating Unit. (The same hereafter)
Do not remove the unit except for cleaning
electrode and replacing.
INCLUDED
Use the unit cleaning brush
only for cleaning the unit.
IG-DL1Yen.inddSec1:3IG-DL1Yen.inddSec1:3 2011/09/309:21:012011/09/309:21:01

E-4
INSTALLATION POSITION
Ensure that the connecting part is inserted all the way in the insertion section of the
stand or the clamp. This product includes a stand and a clamp, enabling two ways
of installation. Check each installation method before installation.
Installation using the stand
①
②
Ensure that the connecting part is inserted all the way in the insertion
section of the stand.
Installation the stand in a stable and level place.
Note:
To remove the unit from the stand, press and hold the both (right and left) installing tabs and
lift.
Ensure that the fixing tabs of the connecting part are inserted and lock in the stand.
(You can hear a clicking sound.)
Connecting part
Installing tabs
(right and left)
Fixing tabs
(right and left)
Stand
Insertion section
Insert
IG-DL1Yen.inddSec1:4IG-DL1Yen.inddSec1:4 2011/09/309:21:012011/09/309:21:01

ENGLISH
E-5
Installation using the clamp
①
②
Attach the clamp. (See the instructions below.)
Ensure that the connecting part is inserted all the way in the
insertion section of the clamp.
Note:
To remove the unit from the stand, press and hold the both (right and left) installing tabs and lift.
Ensure that the fixing tabs of the connecting part are inserted and lock in the clamp.
(You can hear a clicking sound.)
Avoid installations shown below.
There are two ways of installation using the clamp. It can be set to vertical or horizontal.
<Vertical installation of the clamp> <Horizontal installation of the clamp>
Connecting
part Installing
section
25 - 50
mm
Clamp
Insertion
section
Clamp fixing handle
Insert
Connecting
part
Installing
section
25 - 50
mm
Clamp
Insertion
section
Clamp fixing
handle
Insert
Clamping
allowance is
insufficient
Board is
too thin
Board is
too thick
Round
pipe
Installation
from the
under side
Uneven
place
Installation in which the
connecting part is facing
sideways
Connecting part
(To the backrest of the
bed etc.)
(To the side table etc.)
IG-DL1Yen.inddSec1:5IG-DL1Yen.inddSec1:5 2011/09/309:21:012011/09/309:21:01

E-6
OPERATION
1
2
3
Insert the plug to the outlet
Set the Operation Switch to turn ON
For using the spotlight, turn
the operation switch to “ ”
Plug
Operation Light (blue)
Spotlight
Operation Switch
Operation Switch
The Operation Light (blue) on the back side
is turned on, and Plasmacluster ions are
released.
The spotlight is turned on. Plasmacluster ions
are released continuously (Operation Light
(blue) lighting).
ON
OFF
UNIT
ON
OFF
At bedtime, the high density plasmacluster ion can be
delivered intensively near the face by setting up the unit at
the head of the bed. Set up the unit that the distance from
the outlet to the bed sheet (mattress) become approximately
70 cm.
IG-DL1Yen.inddSec1:6IG-DL1Yen.inddSec1:6 2011/09/309:21:022011/09/309:21:02

ENGLISH
E-7
Adjusting the direction of ion outlet
• Do not bend the arm as if you are folding it.
• In installation using the stand, do not bend the arm backward too. It may fall depending on
the installation state.
The distance from the outlet to the bed sheet (mattress) become approximately 70 cm.
Adjust the bending the arm and installing position of the stand or clamp.
Adjust the arm to the left, right, and front within
roughly 90°. Do not bend the arm backward.
(This is also the case when installation using
the clamp.)
<Installation using the stand > <Installation using the clamp >
Arm
Bending part is only
near the center of
the the arm.
Arm
Clamp
Stand
Left less
than 90°Right less
than 90°
Forward less
than 90°
IG-DL1Yen.inddSec1:7IG-DL1Yen.inddSec1:7 2011/09/309:21:022011/09/309:21:02

E-8
CLEANING AND MAINTENANCE
WARNING:
When cleaning the unit, be sure to first unplug the power cord, and never handle the
plug with wet hands. Electric shock and/or bodily injury may occur as a result.
The filter must be cleaned regularly in order to maintain the ion density. Clean the
filter about once a week or whenever the filter is clogged, even if the Filter Clean
Light has not turned on.
FILTER
1
2
Iterate through the Filter Cap and Filter at the rear of the unit.
Gently remove dust by using a vacuum cleaner.
Press the Filter Reset Button.
(for 3 seconds)
Filter Cap
Cap Hook
Press the cap hook to the
direction of the arrow to
remove the filter cap.
Detach the filter, and gently
remove dust from filter by using a
vacuum cleaner.
(We recommend “LOW” operation
of the vacuum cleaner.)
Wash with water, remove water, and dry it in the shade.
<For Stubborn Dirt>
▲mark is visible in the front side,
attach the filter to the filter cap,
and then install the filter cap.
(You can hear a clicking sound.)
Detach Clean Attach
Every week or more often if necessary
Once cleaning is completed, press and hold in
the Filter Reset Button for at least 3 seconds to
turn off the Filter Clean Light.
Filter
Cap Hook
Click
Tab
FILTER
CLEAN
RESET
3 Sec.
Press
When the Filter Reset Button is
pressed and held in for at least
3 seconds, the light blinks twice
then turns off.
mark
Even if the Filter Clean Light is off, press and
hold in the Filter Reset Button for at least 3
seconds after cleaning.
Filter Clean Light
Filter Clean Light will be lit after approx. 1
month (approx. 720 hours), when operated 24
hours a day.
IG-DL1Yen.inddSec1:8IG-DL1Yen.inddSec1:8 2011/09/309:21:032011/09/309:21:03

ENGLISH
E-9
UNIT (Electrode section)
Every 6 months or more often if necessary
Remove dust completely from the tip and root of the electrode of the unit with the
attached unit cleaning brush or commercial cotton swabs.
(About removing the unit, see "How to replace the Plasmacluster Ion Generating Unit" on E-11)
Do not touch the electrode section. (Doing so could lead to injury.)
• Do not transform the electrode section. (Doing so could lead to damage.)
• Do not touch the connection terminals. (Doing so could lead to damage.)
• Please damp the tip of a cotton swab with little water, if the dirt does not come off easily.
MAIN UNIT Every month or more often if necessary
Wipe with a dry soft cloth.
Use water and a mild detergent. And then, wipe with a wet
cloth. Make sure to dry out the main unit.
<For Stubborn Dirt>
Cleaning brush
Electrode
section
Electrode
Root of the
electrode
[Before maintenance] [After maintenance]
IG-DL1Yen.inddSec1:9IG-DL1Yen.inddSec1:9 2011/09/309:21:032011/09/309:21:03

E-10
FILTER
CLEAN
UNIT
RESET
3 Sec.
Press
FILTER
CLEAN
UNIT
RESET
3 Sec.
Press
Elapsed Time Display Message
Beginning to use.
Approx. 17,500 hours
to approx.19,000
hours
•
Suggest replacing
Plasmacluster Ion
Generating Unit.
•
It can be operated.
Approx.19,000 hours •
Unit stops operation.
(Spotlight will not light
also)
•
Replace the
Plasmacluster Ion
Generating Unit.
After replacing unit •
It can be operated.
PLASMACLUSTER ION GENERATING UNIT REPLACEMENT
If the total operating time passes approximately 17,500 hours (approximately 2 years
if the product is operated 24 hours a day), Unit Replacing Light flashes to notify you
of the replacement time of the unit.
Plasmacluster Ion Generating Unit for Replacement
<For Disposal>
Please dispose the used Plasmacluster Ion Generating
Unit according to any local laws and regulations.
-materials-
• Case : Acrylonitrile Butadiene (ABS)
• Unit : Polystyrene Terephthalate (PBT), Electric parts.
Unit Replacing
Light is off.
Unit Replacing
Light (red) is
flashing faster.
Unit Replacing
Light is off.
Unit Replacing Light
(red) is flashing.
Plasmacluster Ion Generating Unit
Model : IZ-CCM1E
FILTER
CLEAN
UNIT
RESET
3 Sec.
Press
FILTER
CLEAN
UNIT
RESET
3 Sec.
Press
IG-DL1Yen.inddSec1:10IG-DL1Yen.inddSec1:10 2011/09/309:21:032011/09/309:21:03

ENGLISH
E-11
After replacing the unit, ensure that turn on the Operation Switch is turned on
to see that the Operation Light (blue) is lighting.
HOW TO REPLACE THE PLASMACLUSTER ION GENERATING UNIT
*1 It is the value measured at point in wind blowing direction from air outlet when the product is operated with
a stand opened.
*2 The dimension when the clamp is installed horizontally (not including the clamp screw).
*3 The height is the dimension when the arm is extended straight.
Model IG-DL1Y
Power Supply 220-240V, 50/60 Hz
Operaqtion Mode Plasmacluster Ion Operation
Ion Density (ions/cm3)*1 70 cm : Approx. 100,000 1 m : Approx. 25,000
Total luminous flux (lm) 10
Airflow Volume (m3/min) 0.14
Power Consumption (W) 1.2 (Using the spotlight : 1.8)
Operating noise level (dBA) 25
Dimensions *3
(mm)
When installing the stand 190(W) x 565(H) x 200(D)
When installing the clamp *2 90(W) x 605(H) x 110(D)
Weight (kg) When installing the stand Approx. 1.2
When installing the clamp Approx. 0.7
Cord length (m) Approx. 1.8
SPECIFICATIONS
1
2
3
Remove the Filter Cap
Remove the Unit
Reinstall a new Unit and Filter Cap
①
①
①②
②
②
Hold the cap hook.
Pull the unit fixing tabs, and
Insert the unit with the electrode section facing inward.
Ensure that the cap hook and the tabs are in place.
Reinstall a new Unit Reinstall the
Filter Cap
Remove the filter cap.
Remove the unit.
Cap hook
Filter cap
Unit
Unit fixing tab
Tab
Electrode section
Unit
IG-DL1Yen.inddSec1:11IG-DL1Yen.inddSec1:11 2011/10/2516:43:112011/10/2516:43:11

E-12
FILTER
CLEAN
UNIT
RESET
3 Sec.
Press
Problem WHAT TO DO
The Plasmacluster Ion Generator
does not work. •
Is the plug connected properly?
Please be connected definitely.
•
Is a Plasmacluster Ion Generating Unit inserted
properly? Insert Plasmacluster Ion Generating Unit
correctly.
•
It’s time to replace Plasmacluster Ion Generating
Unit. Replace with a new Plasmacluster Ion
Generating Unit.
• Approx. 17,500 hours to approx. 19,000 hours:
Unit Replacing Light (red) is flashing.
•
More than approx. 19,000 hours: Unit Replacing Light
(red) is flashing faster and stops operation.
• Plasmacluster Ions are not released.
• Is any dust on the electrode section of the unit? Clean the
electrode section with the attached unit cleaning brush or
commercial cotton swabs. If cleaning is insufficient, the
light may start flashing again.
• Is the Plasmacluster Ion Generating Unit installed
correctly? Remove the unit, fully inserted again and
set the Operation Switch to turn ON. If the Operation
Light (blue) flashes repeatedly, contact the store you
purchased or Sharp Service Center.
•
Filter is getting dirty. Clean the filter.
After cleaning the filter, press the Filter Reset
Button for 3 seconds.
• The Filter Clean Light blinks twice and it turns off.
A discontinuous noise is heard.
A clicking or ticking sound
comes from the unit.
•
Clicking or ticking sound may be audible when the unit
is generating ions.
Color of the spotlight •
Although the color of the spotlight may differ slightly
depending on the product, there is no problem with the
intensity.
The spotlight cannot be turned on. • Is a plug connected properly?
Please be connected definitely.
•
Is the operation switch at the “ ” position?
Move the operation switch to the “ ” position.
The discharged air has odor. • Filter is getting dirty. Clean the filter.
•
The Plasmacluster Ion Generator releases a small
trace of ozone which may produce odor. This is not
detrimental to health.
TROUBLESHOOTING
Before calling for service, please review the TROUBLESHOOTING chart below.
The problem may not be unit malfunctions.
Flashing
(red)
FILTER
CLEAN
UNIT
RESET
3 Sec.
Press
Flashing
(blue)
Press for
3 sec.
Lighting
(orange)
FILTER
CLEAN
UNIT
RESET
3 Sec.
Press
IG-DL1Yen.inddSec1:12IG-DL1Yen.inddSec1:12 2011/09/309:40:102011/09/309:40:10

INDONESIAN
IN-1
INDONESIAN
Terima kasih atas pembelian Generator Ion Plasma SHARP.
Bacalah petunjuk ini dengan baik sebelum menggunakan Generator Ion Plasmacluster.
Setelah membaca, simpanlah petunjuk ini di tempat yang sesuai untuk
referensi di masa depan.
Informasi yang disediakan pada petunjuk ini dapat berubah tanpa
pemberitahuan.
ISI
PETUNJUK KESELAMATAN PENTING.....................IN-2
• PERINGATAN.....................................................................IN-2
• PERINGATAN MENGENAI PENGOPERASIAN.................IN-2
• PETUNJUK PEMASANGAN...............................................IN-2
NAMA BAGIAN.................................................................IN-3
• UNIT UTAMA / BELAKANG / TAMPILAN............................IN-3
• AKSESORIS.......................................................................IN-3
POSISI PEMASANGAN..................................................IN-4
PEMAKAIAN......................................................................IN-6
PEMBERSIHAN DAN PERAWATAN...........................IN-8
• FILTER................................................................................IN-8
• UNIT....................................................................................IN-9
• UNIT UTAMA ......................................................................IN-9
PENGGANTIAN UNIT GENERATOR ION PLASMACLUSTER
...IN-10
BAGAIMANA CARA MENGGANTI UNIT GENERATOR ION PLASMACLUSTER
..IN-11
SPESIFIKASI...................................................................IN-11
PENYELESAIAN MASALAH.......................................IN-12
• Meskipun IG-DL1Y dapat menginaktivasi dan mengurangi virus
dan kontaminan yang ada di udara, tetapi tidak dapat menciptakan
lingkungan yang steril secara sempurna. SHARP tidak menjamin
kemampuannya dalam mencegah infeksi mikrobial.
• Untuk membuat kandungan tinggi ion Plasmacluster beremisi stabil,
Unit Generator Ion Plasmacluster yang dipasang dalam IG-DL1Y
perlu diganti secara berkala*.
*Penggantian diperlukan sekitar 2 tahun sekali (17.500 jam) jika dioperasikan 24 jam
sehari. IG-DL1Y akan berhenti beroperasi setelah sekitar 26 bulan (19.000 jam) jika
Unit Generator Ion Plasmacluster tidak diganti.
IG-DL1Yin.inddSec1:1IG-DL1Yin.inddSec1:1 2011/10/119:53:452011/10/119:53:45

IN-2
PETUNJUK KESELAMATAN PENTING
Jika menggunakan peralatan listrik, peringatan dasar untuk keselamatan harus dipatuhi, termasuk hal berikut:
PERINGATAN - Mengurangi resiko kejutan listrik, kebakaran atau cedera:
• Bacalah semua petunjuk sebelum menggunakan unit ini.
• Gunakan hanya stop kontak 220-240 volt.
•
Jangan merusak atau memodifikasi kabel listrik. Selain itu, jangan menggunakan kabel listrik yang rusak.
• Jangan melepas steker apabila tangan anda basah.
•
Jangan gunakan produk jika kabel listrik atau steker rusak, atau sambungan ke stop kontak longgar.
• Masukkan steker secara pasti ke dalam soket listrik sampai berhenti.
• Waktu membersihkan unit, hentikan operasi dan cabut steker dari stop kontak.
• Secara rutin bersihkan debu dari steker.
• Jika muncul cacat (bau hangus, dll.), hentikan pengoperasian dan cabut steker dari stop kontak.
(Melakukannya dapat menyebabkan kebakaran atau sengatan listrik.) Hubungi toko tempat Anda
membeli alat ini dan/atau Pusat Servis Sharp.
• Jangan memasukkan jari atau benda asing ke dalam celah masuk udara atau celah keluar udara.
• Jangan memodifikasi produk. Selain itu, tidak ada seorang pun, selain teknisi reparasi yang ditunjuk,
yang boleh mengurus atau memperbaiki produk. (Melakukannya dapat menyebabkan kebakaran,
sengatan listrik atau cedera.) Hubungi toko tempat anda membeli atau Pusat Servis Sharp.
• Jangan menggunakan atau memasang unit ini pada tempat yang tidak stabil. (Unit dapat jatuh,
mengakibatkan cedera atau kerusakan.)
• Jangan meletakkan unit ini di dalam air, jangan memercikkan air terhadap unit, atau jangan meletakkan
air langsung pada unit. (Melakukannya dapat menyebabkan kebakaran atau sengatan listrik.)
•
Jangan menggunakan bahan berbahan dasar klorin atau deterjen asam untuk membersihkan.
(Melakukannya bisa mengakibatkan keluarnya gas beracun dari deterjen, sehingga merugikan kesehatan.)
•
Jangan menutup unit dengan benda yang mudah terbakar seperti kertas atau kain, atau jangan
meletakkannya dekat dengan unit.
• Perangkat ini tidak diperuntukan untuk digunakan oleh orang (termasuk anak-anak) yang memiliki
keterbatasan fisik, panca indera atau kapabilitas mental, atau kurang berpengalaman dan
pengetahuan, kecuali mereka mendapat pengawasan atau pengarahan penggunaan oleh orang yang
bertanggung jawab. terhadap keselamatannya.
• Anak-anak harus diawasi untuk memastikan mereka tidak bermain-main dengan unit ini.
PERINGATAN MENGENAI PENGOPERASIAN:
• Jangan menarik kabel ketika mencabut steker. (Melakukannya dapat menyebabkan kebakaran atau
sengatan listrik.)
• Jika anda tidak menggunakan produk untuk waktu yang lama, keluarkan steker dari stop kontak.
• Jangan menggunakan produk di tempat-tempat berikut.
• Tempat di mana air dapat terpercikkan atau tempat yang lembab seperti kamar mandi.
• Tempat di mana komponen minyak, seperti minyak goreng, mengambang.
•
Tempat di mana hair spray atau bahan kimia digunakan, seperti di toko cukur rambut atau salon rambut, atau binatu.
• Jangan melihat lamput sorot atau jangan meletakkan lampu langsung pada mata. (Melakukannya
bisa mengakibatkan kerusakan pada mata.)
• Waktu memasangnya pada tempat tidur atau meja, hindari tempat yang tidak sesuai untuk
pemasangan. (Unit ini dapat jatuh.)
• Jangan memutar, menarik, menekuk unit ini secara paksa atau mengenainya guncangan atau getaran.
• Jangan membawa atau menggerakkan unit dengan penegak (atau penjepit) yang terpasang. (Unit
dapat jatuh, mengakibatkan cedera atau kerusakan.)
• Jangan menggunakan item dari produk yang mengandung silikon* di dekat unit. Fluororesin atau
silikon dapat masuk ke dalam unit, menghalangi unit untuk memproduksi ion plasmacluster. Jika hal
ini terjadi, hilangkan debu dari jarum elektroda Unit Generator Ion Plasmacluster. (Lihat IN-9)
* Produk perawatan rambut (pelindung ujung rambut pecah, mousse rambut, perawatan rambut, dll.),
kosmetik, deodorant, produk anti listrik statis, spray tahan air, polish, pembersih kaca, kain yang basah
oleh bahan kimia, wax, dll.
PETUNJUK PEMASANGAN:
• Jangan menghalangi celah masuk atau keluar udara.
• Letakkan setidaknya 2 m dari peralatan yang menggunakan gelombang elektronik, seperti televisi
atau radio untuk menghindari gangguan listrik ketika menggunakan unit ini.
• Suhu ruang yang sesuai adalah antara 0 - 35ºC.
• Pasang penjepit pada tempat yang dapat menahan pengencangan penjepit atau pengoperasian
lengan. Ketebalan yang dapat dijepit adalah dari 25 mm sampai 50 mm.
IG-DL1Yin.inddSec1:2IG-DL1Yin.inddSec1:2 2011/10/2516:42:342011/10/2516:42:34

INDONESIAN
IN-3
NAMA BAGIAN
AKSESORIS
UNIT UTAMA / BELAKANG / TAMPILAN
ON
OFF
FILTER
CLEAN
UNIT
RESET
3 Sec.
Press
Celah Keluar
Udara (Celah
Keluar Ion)
Steker
Lampu Sorot
Lengan
Tab Pemasangan
Bagian
Penyambungan
Penjepit
Gagang untuk
Mengencangkan Penjepit
•Sikat Pembersih Unit •Petunjuk Pemakaian
Topi Filter
Saklar Operasi
(Lihat IN-6)
(Lihat IN-4)
(Lihat IN-5)
(Lihat IN-6)
BELAKANG
TAMPILAN
Celah Masuk
Udara
Topi
Filter
Unit *
Kaitan Topi
Tombol Reset Filter
Lampu Bersihkan
Filter (oranye)
Lampu Operasi
(biru)
Lampu Penggantian
Unit (merah)
(Terdapat di dalam
topi filter.)
* Unit yang dimaksud adalah Unit Generator
Ion Plasmacluster. (Selanjutnya sama)
Jangan melepas unit kecuali untuk
membersihkan elektroda dan menggantinya.
TERMASUK
Gunakan sikat pembersih
unit hanya untuk
membersihkan unit.
Penegak
IG-DL1Yin.inddSec1:3IG-DL1Yin.inddSec1:3 2011/09/299:11:232011/09/299:11:23

IN-4
POSISI PEMASANGAN
Pastikan bahwa bagian penyambungan dimasukkan penuh ke bagian masuk dari
penegak atau penjepit. Produk ini termasuk penegak dan penjepit, yang memungkinkan
dua cara memasang. Periksa setiap cara memasang sebelum memasang.
Pemasangan menggunakan penegak
①
②
Pastikan bahwa bagian penyambungan dimasukkan penuh ke bagian
masuk dari penegak.
Pemasangan penegak pada tempat yang stabil dan rata.
Catatan:
Untuk melepas unit dari penegak, tekan dan pegang kedua sisi (kiri dan kanan) tab
pemasangan dan angkat.
Pastikan tab pengencangan dari bagian penyambungan dimasukkan dan terkunci dalam
penegak. (Anda dapat mendengar bunyi klik.)
Bagian penyambungan
Tab pemasangan
(kanan dan kiri)
Tab pengencangan
(kanan dan kiri)
Penegak
Bagian masuk
Masuk
IG-DL1Yin.inddSec1:4IG-DL1Yin.inddSec1:4 2011/09/299:11:232011/09/299:11:23

INDONESIAN
IN-5
Pemasangan menggunakan penjepit
①
②
Pasang penjepit (Lihat instruksi di bawah.)
Pastikan bahwa bagian pemasangan dimasukkan penuh ke bagian
masuk dari penjepit.
Catatan:
Untuk melepas unit dari penegak, tekan dan pegang kedua sisi (kiri dan kanan) tab pemasangan
dan angkat.
Pastikan bahwa bagian penyambungan dimasukkan penuh ke bagian masuk dari
penjepit. (Anda dapat mendengar bunyi klik.)
Hindari pemasangan sebagaimana ditunjukkan di bawah ini.
Ada dua cara pemasangan menggunakan penjepit. Ini dapat disetel ke vertikal atau horisontal.
<Pemasangan vertikal penjepit> <Pemasangan horisontal penjepit>
Bagian
penyambungan
Instalasi
bagian
25 - 50
mm
Penjepit
Bagian
masuk
Gagang untuk
mengencangkan
penjepit
Masuk
Bagian
penyambungan
Instalasi
bagian
25 - 50
mm
Penjepit
Bagian
masuk
Gagang untuk
mengencangkan
penjepit
Masuk
Penunjang
penjepit
tidak cukup
Papan
terlalu
tipis
Papan
terlalu
tebal
Pipa
bundar
Pemasangan
dari sisi
bawah
Tempat
yang
tidak rata
Pemasangan di mana
bagian pemasangan
menghadap samping
Bagian penyambungan
(Untuk sadaran tempat
tidur, dsb.)
(Untuk meja sisi, dsb.)
IG-DL1Yin.inddSec1:5IG-DL1Yin.inddSec1:5 2011/09/299:11:242011/09/299:11:24

IN-6
PEMAKAIAN
1
2
3
Masukkan steker ke stop kontak
Set saklar operasi menjadi
ON (HIDUP)
Untuk menggunakan lampu sorot,
setel saklar operasi untuk “ ”
Steker
Lampu Operasi (biru)
Lampu sorot
Saklar Operasi
Saklar Operasi
Lampu Operasi (biru) pada sisi belakang
dinyalakan, dan ion Plasmacluster dilepaskan.
Lampu sorot dinyalakan. Ion Plasmacluster
dilepaskan terus-menerus (Lampu Operasi
(biru) menyala.)
ON
OFF
UNIT
ON
OFF
Waktu tidur, ion plasmacluster densitas tinggi dapat
dikirimkan secara intensif dekat wajah dengan memasang
unit pada kepala tempat tidur. Pasang unit sehingga jarak
dari celah keluar ke sprei (kasur) menjadi sekitar 70 cm.
IG-DL1Yin.inddSec1:6IG-DL1Yin.inddSec1:6 2011/09/299:11:242011/09/299:11:24
Table of contents
Languages:
Other Sharp Air Cleaner manuals

Sharp
Sharp FU-28H User manual

Sharp
Sharp Plasmacluster FP-P30U User manual

Sharp
Sharp IG-A40EK-W Manual

Sharp
Sharp FP-J30M User manual

Sharp
Sharp FP-J80E Manual

Sharp
Sharp FU-60SE-TA User manual

Sharp
Sharp Plasmacluster FP-N25CX User manual

Sharp
Sharp FP-H30A User manual

Sharp
Sharp FU-Y30J-W User manual

Sharp
Sharp FP-JM40B User manual

Sharp
Sharp KC-F31R User manual

Sharp
Sharp IG-A10UR User manual

Sharp
Sharp Plasmacluster IG-A10EU User manual

Sharp
Sharp FU-28H-S User manual

Sharp
Sharp FZ-R60SF User manual

Sharp
Sharp FZ-C70HFE User manual

Sharp
Sharp Plasmacluster FP-A40C User manual

Sharp
Sharp UA-HG40E User manual

Sharp
Sharp KC-A60E User manual

Sharp
Sharp FP-J30TA User manual