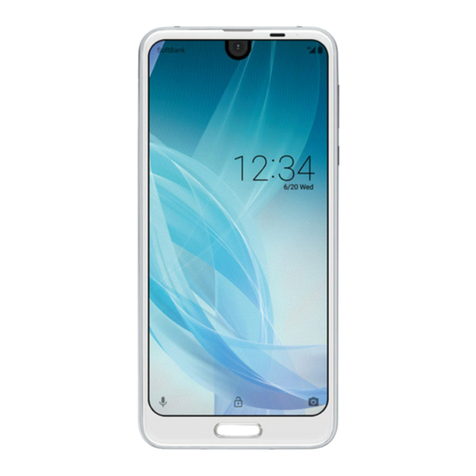
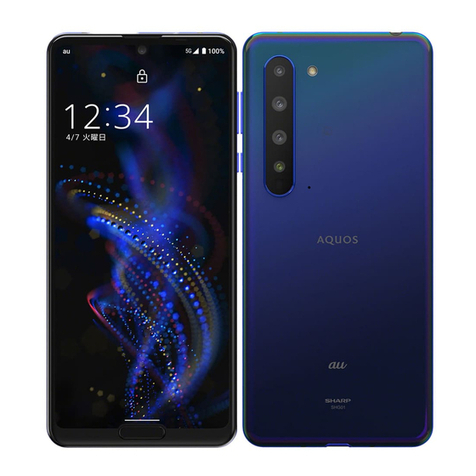
Sharp AQUOS sense2 User manual

Ver. 1.1
Set Rental
Thank you for using our service. This document includes
information on a selection of basic operations you’ll want to
know including the various settings, how to acquire a Google™
account, how to install apps, and how to use the camera.
* In order to use the handset safely, download the “Notes and
Precautions” from the website below and thoroughly read
the contents so you have a good understanding of it before
you start using the handset.
http://k-tai.sharp.co.jp/rental/index.html
* The screens and menus may change if the version of the
Android™ OS is updated.
SH-M08
User Guide

- 1 -
Before Using the Handset
Part Names and Functions
1 Front camera
2 nanoSIM card and microSD card tray
3 Earphone/Microphone terminal
4 Earpiece/Speaker

- 2 -
5 Proximity sensor/Brightness sensor
zThe proximity sensor detects the distance to the face and prevents
inadvertent operation of touch panel during a call.
zThe brightness sensor detects the brightness of the surrounding area
and adjusts the brightness of the backlight.
zDo not cover the sensor area with your hand or paste a sticker etc. on
the sensor area. The sensor may not work properly.
6 Incoming/Charging lamp
7 Display/Touch panel
8 Fingerprint sensor
zUse to unlock the touch panel etc. by fingerprint authentication.
9 Back camera
a Mobile light/Air vent port
zA mobile light with an air vent port to maintain performance.
b 1/2: Volume up/down key
zAdjusts each volume.
c 3: Power key
zPress this for at least 3 seconds to turn the power on while the power
is turned off. Also, press it for at least 2 seconds to use menus such as
[Power off], [Restart], and [Think if it might be a malfunction?] while the
power is turned on.
zUse to turn the display on/off.
d # mark
zIC card is contained (It cannot be removed).
e Built-in antenna*
f USB Type-C™ connection jack
zUse to charge the handset etc.
g Mouthpiece/Microphone
zUse as a microphone when recording videos or talking to EMOPA.
h GPS/Wi-Fi/Bluetooth®antenna*
* The antenna of back is built into the main body. Covering the antenna area
with your hand may influence the communication quality.
zThe back cover cannot be removed. Removing it forcibly may cause
damage or a malfunction.
zThe battery is built into the handset and you cannot replace it by yourself.

- 3 -
Inserting/Removing the Card
microSD
card
nanoSIM
card
Display side
Insert in
the tray
zWhen inserting/removing a nanoSIM card or microSD card, make sure to
insert/remove the card into/from the correct location in the correct direction
after you turn off the power.
zThe tray is installed in the handset.
zThe tray is required to load the nanoSIM card. Make sure not to lose it.
zHook the tip of your finger into the groove and pull the card tray out toward
you.
zWhen inserting the nanoSIM card, load it onto the tray and insert the tray
into the handset.
zWhen inserting the tray, return it to its original location. Be sure not to
insert it into another place.
zTo maintain waterproof/dustproof performance, securely push in the tray
and make sure there is no space between the handset and the tray.
zSH-M08 is compatible with commercially available microSD cards of up to
2 GB, microSDHC cards of up to 32 GB, and microSDXC cards of up to
512 GB (as of March 2019)*.
* Up to Class 10 of SD Speed Class and Class 1 (DDR50) of UHS Speed
Class can be used.
* Speed Class as stated above indicates the performance of a microSD
card. All the operations related to the performance indicated by Speed
Class are not completely guaranteed.
zSince the rental smartphone uses a data SIM, you cannot make calls to an
emergency number (110, 119 or 118).

- 4 -
Charging
The internal battery is not fully charged. Be sure to charge the battery
before use.
Cautions while charging
zThe battery can also be charged with the handset turned on (While
charging, the battery icon appears with [ ] superimposed).
zDo not charge for a long time with the power left turned on.
zIf the handset is left for a long time even after the charging is completed, the
battery level may decrease.
zWhen the battery is empty and the handset is being charged, the charging
lamp may not illuminate immediately. However, charging is in progress.
zIf the battery empty alert is displayed and the power cannot be turned on,
charge the battery for a while.
zWhile charging, the handset may not be turned on even when the charging
lamp is illuminated in red. Charge longer and try turning the power on again.
zFrequently recharging the battery when its power is still remaining enough
may shorten the usable life of the internal battery. It is recommended to use
the battery to a certain level (e.g. after the battery level decreases) before
recharging.
zWhen the battery becomes warm, charging may automatically stop even
if the battery has not been fully charged. Charging automatically resumes
after the temperature lowers to an appropriate temperature.
Charging with AC adapter
zThe specified adapter (SH-AC04) supports from 100 to 240 V AC.
zWhen you start charging, the charging lamp illuminates. Even when the
battery is fully charged, the charging lamp does not turn off.(Refer to page
5)
zThe shape of the plug for the specified AC adapter is for 100V AC (for
domestic use).
zNote that inserting or removing the equipment forcibly may cause damage
to the USB Type-C connection jack and the Type-C plug or result in a
malfunction.
Charging with USB Type-C cable
zYou can charge the handset by connecting the handset to a PC with the
specified SH-AC04 USB Type-C cable.
- 5 -
Turning Power On/Off
Turning power on
1 3(Power key) (for at least 3 seconds)
Turning power off
1 3(Power key) (for at least 2 seconds)
2 [Power off]
Turning display on/off
The display is turned off when 3(Power key) is pressed or the handset is not in
use for a set length of time.
Press 3(Power key) while the display is turned off to turn it on.
Touch panel lock
When the power or the display is turned on, the touch panel is locked.
Swipe [
] upward to unlock.
Incoming/Charging lamp
The incoming/charging lamp notifies you that there is a missed call, the
handset is being charged, etc. by illuminating or flashing.
State of lamp Color State of handset
Illuminating Red Charging in progress (Battery level is approx.
94% or less)
Illuminating Green Charging in progress (Battery level is approx.
95% or more)
Flashing Red Charging unavailable
Flashing White Missed call

- 6 -
AQUOS Home
AQUOS Home is a home app that consists of a home screen (Desktop
Sheet and Favorites Tray) and an app list screen.
On the Desktop Sheet of the home screen, you can register shortcuts for
apps, functions, and widgets, while on the Favorites Tray of the home
screen, you can register shortcuts for apps and functions. On the app list
screen, the installed apps are displayed.
Viewing AQUOS Home
Swipe or flick the home screen upward to switch to the app list screen.
Swipe or flick downward at the top of the app list screen to switch to the
home screen.
Desktop Sheet
Favorites T
ray
Displays the app list screen
Flick the screen to the left or
right to switch pages.
Tap to switch to the app list
screen.
Basic Operation
This section describes the basic operations of the handset such as
operations of the touch panel and navigation keys, and operations for
shooting screenshot.
Operation of touch panel
The operations to use the display (touch panel) are described below.
zOperations may differ depending on the function and screen in use.
zOperations may be interrupted if you touch an area other than a
confirmation screen or the status bar while the confirmation screen etc.
is displayed.

- 7 -
Touch
Touch a key or an item displayed on the screen and then
release your finger from it to select or set it.
Touch and hold
When you keep your finger on the touch panel, a menu
may appear depending on the function and screen in use.
Slide (Swipe)/Drag
Move your finger while keeping it on the touch panel to
scroll the screen or move an icon, a widget, etc. to the
desired position.
In addition, when you touch a menu or an item by mistake,
move your finger away from it to cancel the selection.
Flick
Move your finger like sweeping the touch panel in the
home screen etc. to switch pages.
Pinch out/Pinch in
You may be able to zoom the screen in/out etc. by putting
two fingers on the touch panel and moving them with
putting a distance between two fingers apart (pinch out)/
closer (pinch in) depending on the function and screen
in use.
Operation while using function
Navigation bar
Use the keys displayed on the navigation bar at the bottom of the screen to
perform the basic operations.
1 A/@: Back key/Close key
zReturn to the previous screen.
zClose the keyboard.
2 B: Home key
zDisplay the home screen.
3 C/D: Recent Apps key/Multi Window key
zDisplay Recent Apps.
zIndicates you are using Multi Window.

- 8 -
Screen Display/Icons
Icons displayed on the status bar at the top of the screen give you
various kinds of information, such as the status of the handset or the
presence of missed calls. You can check the detailed information by
displaying the status panel.
Viewing icons
Notification icon Status icon
Status bar
Main notification icon list
: Missed call
: New SMS
: New email
: New Gmail™
: Error
zDisplayed when an error has occurred.
: Data communication disabled
zDisplayed when data usage volume reaches to the limit.
: Alarm information
: Schedule notification from Calendar
Phone
: Making a call/Receiving a call/Talking on the handset
: Putting a call on hold
: Answering memo information
: microSD card

- 9 -
: Available space on the handset memory being run out
Bluetooth
: Receiving registration/connection request from Bluetooth device
: Data reception request
Data transmission and reception
: Transmission
: Reception
Application
: App update available
: Finished installing app
: Open network
Tethering
: [USB tethering] enabled
: [Portable Wi-Fi hotspot] enabled
: [Bluetooth tethering] enabled
: Multiple tethering enabled
: VPN connected
: System update available
: [RelaxAuto setting] running
: Notification icon (not appearing)

- 10 -
Main status icon list
: Alarm set
z
The icon color becomes light while the manner mode is set to [Total silence].
Battery level
to : Approx. 100 to 6%
: Approx. 5% or less
zWhile charging, the battery icon appears with [ ] superimposed.
zPercentage of the remaining battery level appears on the left side of the
battery icon. Display/Hide the percentage with [Battery percentage] in
Battery.
Signal strength
to *: Signal level (five steps)
: Outside the service area
: nanoSIM card not inserted
Wi-Fi signal strength
to *: Signal level (five steps)
: Airplane mode
3G data communication status
: 3G available
: Receiving data via 3G
: Sending data via 3G
: Sending and receiving data via
3G
GSM data communication status
: GSM available
: Receiving data via GSM
: Sending data via GSM
: Sending and receiving data via
GSM
4G (LTE) data communication status
: 4G (LTE) available
: Receiving data via 4G (LTE)
: Sending data via 4G (LTE)
: Sending and receiving data via
4G (LTE)

- 11 -
HSPA data communication status
: HSPA available
: Receiving data via HSPA
: Sending data via HSPA
: Sending and receiving data via
HSPA
: International roaming
: NFC/Osaifu-Keitai lock is set
: [Reader/Writer, P2P] enabled
Manner mode
: Standard manner
: Total silence
: Alarms only
: Priority only
During a call
: Talking with a hands-free call
: Mute set
Bluetooth
: Connection stand-by
: Connected
: Measuring location information via GPS
Answering memo
: Answering memo is set; there are no memo recorded
: Answering memo is set; there are 1 to 49 memos recorded
: Answering memo is set; there are 50 memos recorded
* The signal strength icon appears with [ ] superimposed like [ ]/[ ]
while you connect to an access point which is not connected to the Internet.

- 12 -
App list
zYou can check functions, operation procedures, etc. in Help depending on
the app.
zA separate paid subscription will be required for using some apps.
zThe following apps are installed.
Icon App Description
Album You can sort images and videos by event and
location and use them.
エモパー
(EMOPA) Based on your information and settings of
EMOPA registered in advance, the handset
delivers various information through voice or
the screen display in the lock screen of the
touch panel.
Osaifu-Keitai You can use Osaifu-Keitai.
Camera Shoots with the camera.
KARADA MATE An app to record the number of steps, weight,
etc. You can also display the history of the
number of steps taken or your weight in a
graph and compare it on a daily or monthly
basis ( “KARADA MATE” on P.59).
Calendar Manages the schedule.
Contents Manager An app to manage contents such as images/
videos/audio in the handset memory or the
microSD card and downloaded data.
Settings Makes various settings for the handset.
Calculator You can use the calculator.
Phone An app that enables you to use the phone and
make settings for calls.
Address Book You can use the address book.

- 13 -
Icon App Description
Clock You can use the alarm, world clock, timer and
stopwatch.
Drive Save images, videos, etc. on Google Drive™
or share them.
Photos Manages images and videos.
Maps You can measure your present location, use
the navigation function to check how to get to
your destination in detail, etc.
Email You can use email.
Message You can use SMS.
Chrome Displays websites via packet communication
or Wi-Fi function.
Duo Use video call.
Gmail You can use an email service provided by
Google or email provided by general service
providers.
Google Uses quick search box.
OfficeSuite You can use OfficeSuite.
zFor details on supported files, refer to help
by displaying the “app list screen” in the
home screen u[
ツール/情報
] (Tools/
Information) u[OfficeSuite] u [ ] u
[Help and Feedback] u[Help].
Play Store Uses Google Play™.
Play Movies & TV You can rent and watch movies.
Play Music*1 *2 Plays music.

- 14 -
Icon App Description
SHSHOW An app to introduce various information or
content for handling AQUOS smartphones
and tablets.
YouTube You can view YouTube™.
*1 The handset supports playback with high resolution audio. Commercially
available headphones or speakers supporting high resolution are needed to
play high resolution sound. (The handset is compatible with output from the
earphone/microphone terminal.)
*2 The handset supports playback with Qualcomm®aptX™ audio.
zDepending on the app, you need to download it for the first time. Separate
packet communication charges are incurred for downloading apps.
zSome of the apps installed can be uninstalled. You may be able to download
uninstalled apps again from the Play Store etc.
Useful apps
You can download useful apps from the following website.
http://k-tai.sharp.co.jp/rental/index.html
* The URL and contents are subject to change without prior
notice.
* Note that Sharp does not handle inquiries regarding useful
apps.

- 15 -
Users & accounts
Setting up Google account etc.
zYou can use Google services such as Gmail and Google Play if you set up
Google account.
1 Home screen u [ ] u[Users & accounts] u
[Add account]
2 Select an account type
3 Set up an account
zIn the home screen, select [ ] u[Users & accounts] to find the added
account on the displayed menu.
zWhen activating the app that requires an account without setting one up,
the account setup screen appears.
zSelect Google to display the Google account creation screen. Follow the
instructions and enter the required information to create an account.
zKeep a separate memo of the set account and password.

- 16 -
Deleting your account
1 Home screen u [ ] u[Users & accounts]
2 Select an account u[REMOVE ACCOUNT] u
[REMOVE ACCOUNT]
zOperation methods may differ depending on the account.
Retrieving your Google account password
If you forget your Google account password, retrieve it.
1 Home screen u [ ]
2 Enter “https://www.google.co.jp” in the URL
entry field u[Go] u[Sign in]
3 Enter email address u[Next] u[Forgot
password?] ufollow the instructions on the
screen and operate
zOperation methods may differ depending on the using conditions.

- 17 -
Email/Web Browser
You can send and receive messages using SMS, Gmail, etc., and display
websites using Chrome.
SMS
You can send and receive text messages with mobile phone numbers
serving as destinations.
1 Home screen u [ ]
2 [ ]
3 Enter the destination and message u [ ]
zWhen sending an SMS to a device that uses overseas network operators,
enter “+”, the country code and the recipient’s mobile phone number. If the
phone number begins with “0”, omit the first “0”. Alternatively, enter “010”,
the country code and the phone number.
zHalf-width katakana and special symbols in SMS messages may not
appear correctly for recipient.
zSMS cannot be sent when “186” or “184” is added.
zSeparate communication charges will be incurred to use the SMS service.
Note that there are high communication charges for receiving from and
sending to overseas destinations.
Displaying a message
1 Home screen u [ ]
2 Select a thread
3 Check the message
Replying to a message
1 Home screen u [ ]
2 Select a thread
3 Enter the message
u [ ]

- 18 -
Email
You can send and receive email by setting up an email account provided
by a service provider.
Setting up email account
zSetting items may differ depending on the account to use.
1 Home screen udisplay the “app list screen” u
[Email]
zOnly when an account is not set up, the account setup screen appears.
2 Enter email address u [ ]
3 Enter password u [ ]
zProvider information is preset for some email accounts, and a receiving
email server and a sending email server are automatically set.
zWhen you use an account whose provider information is not preset, it
is necessary to set a receiving email server and a sending email server
manually. For details on those settings, contact your Internet service
provider.
4 Set up an account u [ ]
5 Enter an account name and your name u [ ]

- 19 -
Sending email
1 Home screen udisplay the “app list screen” u
[Email]
2 [ ]
3 Compose an email
Account
Destination
Subject
Text
Add destinations
File attachment
(Up to approx. 5 MB)
4 [ ]
Displaying email
zThe screen may appear different depending on the account to use.
1 Home screen udisplay the “app list screen” u
[Email]
2 Select an email
Mail
Email search
Star icon
Name of box/
folder being
displayed
Newly create email
Table of contents
Other Sharp Cell Phone manuals

Sharp
Sharp AQUOS sense3 Service manual

Sharp
Sharp AQUOS K Service manual

Sharp
Sharp Aquos SHL23 Installation guide

Sharp
Sharp SoftBank 932SH User manual

Sharp
Sharp GX30 User manual

Sharp
Sharp AQUOS SH-02L User manual

Sharp
Sharp GX34 User manual

Sharp
Sharp Aquos SH-02K User manual

Sharp
Sharp PV300G User manual

Sharp
Sharp 701SH User manual