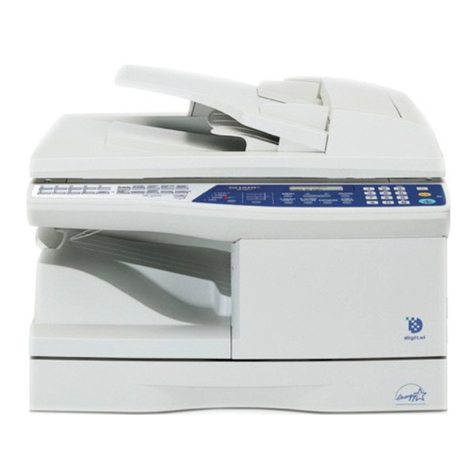
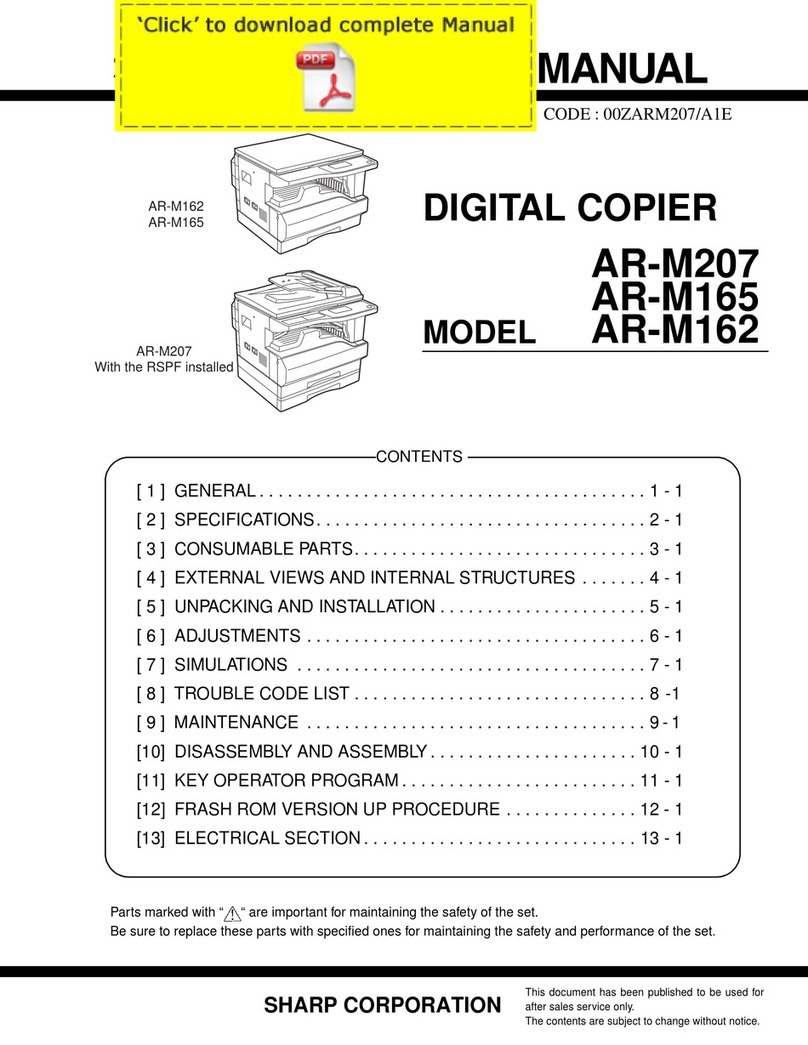
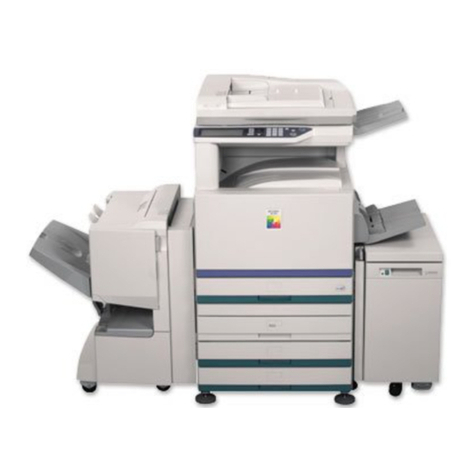
Sharp AR-287 User manual

•GETTING STARTED
•MAKING COPIES
•SPECIAL FUNCTIONS
•SUPPLIES
•COPIER TROUBLE?
•GENERAL
INFORMATION
•OPTIONAL EQUIPMENT
1-1
2-1
3-1
4-1
5-1
6-1
7-1
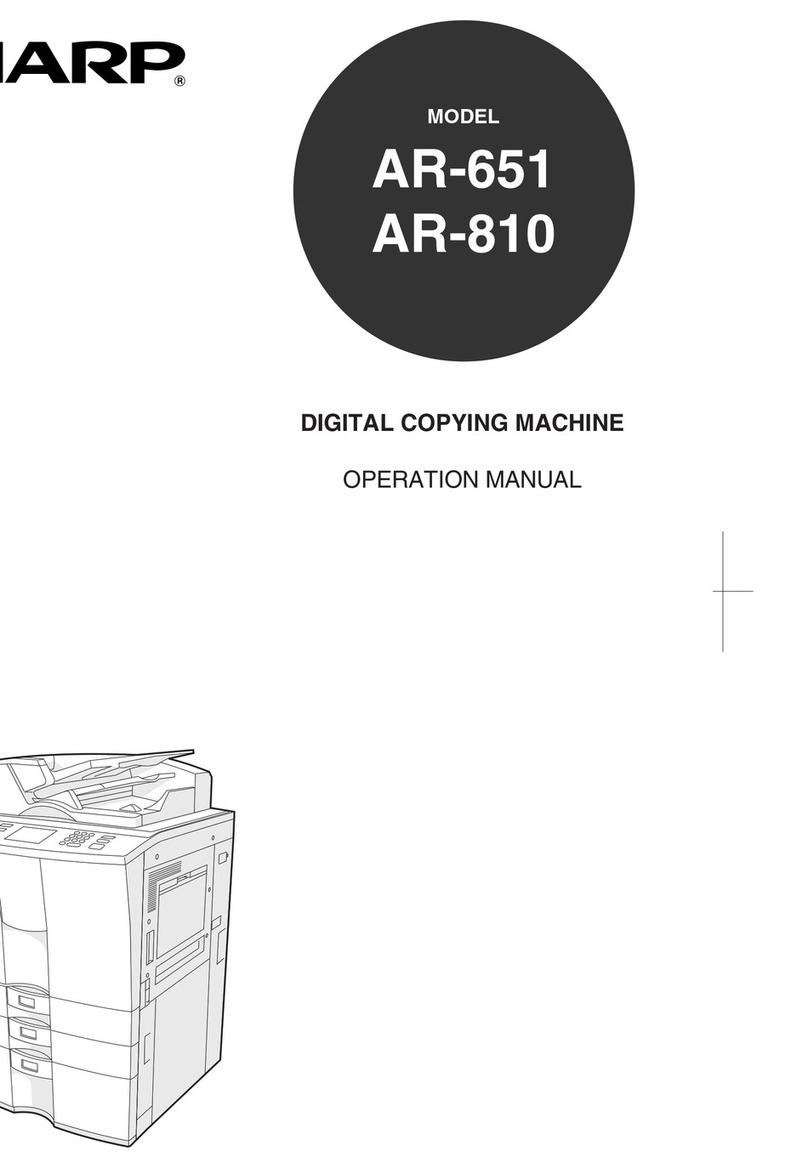
DIGITAL COPYING MACHINE
OPERATION MANUAL
Page
AR-407
AR-287/AR-337
MODEL
AR-287
AR-337
AR-407

❧❧❧❧❧❧❧❧❧❧❧❧❧❧❧❧❧❧❧❧❧❧❧❧❧❧❧❧❧❧❧❧❧❧❧❧❧❧❧❧❧❧❧❧❧❧❧
❧
❧❧❧❧❧❧❧❧❧❧❧❧❧❧❧❧❧
❧
❧❧❧❧❧❧❧❧❧❧❧❧❧❧❧❧❧❧❧❧❧❧❧❧❧❧❧❧❧❧❧❧❧❧❧❧❧❧❧❧❧❧❧❧❧❧❧
❧
❧❧❧❧❧❧❧❧❧❧❧❧❧❧❧❧❧
❧
➢➣➢➣➢➣➢➣➢➣➢➣➢➣➢➣➢➣➢➣➢➣➢➣➢➣➢➣➢➣➢➣
➢
➣➢➣➢➣➢➣➢➣➢➣➢➣➢➣➢➣➢➣
➢
➣➢➣➢➣➢➣➢➣➢➣➢➣➢➣➢➣➢➣➢➣➢➣➢➣➢➣➢➣➢➣➢➣
➢
➣➢➣➢➣➢➣➢➣➢➣➢➣➢➣➢➣➢➣
➢
➣
The power switch positions are marked “I” to indicate power “ON” and
“” to indicate stand-by.
In the stand-by position, power is being supplied to a drying heater within
the optical system of the copier.
Caution:
For complete electrical disconnection, pull out the main plug.
The socket-outlet shall be installed near the equipment and shall be
easily accessible.
FOR YOUR RECORDS ...
To protect against loss or theft, record and retain for reference the
copier’s serial number located on the left hand side at the rear corner of
the copier.
Model Number AR-287/AR-337/AR-407
Serial Number
Date of Purchase
Place of Purchase
Authorized Sharp Copier
Service Department Number
CINSE1949FC51

1
CHAPTER 4
SUPPLIES
●PAPER .......................... 4-2
Types and sizes of copy paper ......... 4-2
Loading copy paper ................. 4-2
●ADDING TONER ................... 4-5
●USED TONER DISPOSAL ............ 4-7
●STORAGE OF SUPPLIES ............ 4-8
CHAPTER 5
COPIER TROUBLE?
●MISFEED REMOVAL................ 5-2
●MAINTENANCE REQUIRED ......... 5-11
●TROUBLESHOOTING .............. 5-12
CHAPTER 6
GENERAL INFORMATION
●PART NAMES AND FUNCTIONS....... 6-2
Exterior .......................... 6-2
Interior .......................... 6-3
Operation panel .................... 6-4
Touch panel (Basic screen) ........... 6-5
●USER MAINTENANCE .............. 6-6
●TOUCH PANEL CONTRAST
ADJUSTMENT .................... 6-7
●SPECIFICATIONS .................. 6-8
CHAPTER 7
OPTIONAL EQUIPMENT
●SYSTEM CONFIGURATION .......... 7-2
●FINISHER (AR-FN1N) ............... 7-3
●FINISHER (AR-FN2) ............... 7-19
●LARGE CAPACITY TRAY (AR-LC1N)... 7-30
●STAND/500-SHEET PAPER DRAWER
(AR-DE1N) ...................... 7-34
●DUAL TRAY OUTPUT UNIT (AR-TR1) .. 7-37
●INTRODUCTION .................... 2
●USING THIS MANUAL................ 2
CHAPTER 1
GETTING STARTED
●INSTALLATIONREQUIREMENTS ...... 1-2
●CAUTIONS ....................... 1-3
●POWER ON AND OFF............... 1-5
Power save modes ................. 1-5
●INFORMATION FUNCTION ........... 1-7
●USING THE TOUCH PANEL .......... 1-8
How to use the touch panel ........... 1-8
Selection of function................. 1-8
Function setting icons ............... 1-9
CHAPTER 2
MAKING COPIES
●AUDITING ACCOUNTS .............. 2-2
●USING THE RADF ................. 2-3
●COPYING FROM THE DOCUMENT
GLASS .......................... 2-8
●REDUCTION/ENLARGEMENT/ZOOM .. 2-11
●SPECIAL PAPERS (manual feed) ...... 2-14
Two-sided copying with bypass tray .... 2-15
●EXPOSURE ADJUSTMENTS......... 2-16
●SORT/GROUP ................... 2-17
●JOB MEMORY ................... 2-18
●INTERRUPTING A COPY RUN ....... 2-20
CHAPTER 3
SPECIAL FUNCTIONS
●XY ZOOM ........................ 3-2
●MARGIN SHIFT.................... 3-4
●ERASE .......................... 3-6
●DUAL PAGE COPYING .............. 3-8
●MULTI SHOT .................... 3-10
●COVERS ....................... 3-13
●TRANSPARENCY FILM WITH
INSERT SHEETS ................. 3-15
●PAMPHLET COPY ................ 3-17
●IMAGE EDITING FUNCTIONS ........ 3-20
Job build ........................ 3-20
Centering ....................... 3-22
Repeat copy ..................... 3-24
B/W reverse ..................... 3-27
Binding change ................... 3-29
●TEXT STAMP .................... 3-32
Date ........................... 3-32
Select stamp ..................... 3-35
Watermark ...................... 3-38
Page number..................... 3-41
●TANDEM COPY .................. 3-44
●SETTING REVIEW ................ 3-46
Page
Page
CONTENTS
CHAPTER1CHAPTER2CHAPTER3CHAPTER4CHAPTER5CHAPTER6CHAPTER7
2
INTRODUCTION
The AR-287, AR-337 and AR-407 copiers are digital image processing copiers
which provide high productivity and convenient features including intelligent
image-editingfunctions.
Amongst their many useful features and functions are the document feeder,
various special functions such as dual page copying, margin shift, erase, XY
zoom, and black and white reverse functions, photo copying, and an internal
auditor. If this copier is connected with another copier of the same model
equipped with the same options through the tandem-connection cable (AR-
CA1), copying can be performed using the two copiers allowing copying to be
twice as fast as copying on one copier when makig multiple copies (tandem
copying). Also, the JOB BUILD mode allows copies to be made of multipage
documentsof upto 120pages (thelimit, however,might beup to60 pagesof 8-1/2"
x14" or11" x 17" paper size whenthe copieris equipped with some option) by
dividing the document into sections small enough (50 pages or less) and
sequentially feeding through the document feeder. The digital processing
system of the copiers allows multiple sets of copies to be sorted without the aid
of a sorter. These copiers can be equipped with an optional large capacity tray
whichholds3,000sheetsofcopypaper.Themachinecanalsobeequippedwith
an optional finisher to provide finished copy sets ready for distribution.
These copiers were also designed with ease of use in mind. The easy-to-
understand operation panel with touch panel system and INFORMATION
function will guide the user through most operations. In order to gain the
maximumbenefitofallthefeaturesofthecopiers,itisrecommendedthatusers
first read this manual to become familiar with all the features of the copiers.
NOTE:
●The tandem copying function is not available for the AR-287.
●This manual describes only copier features. For a description of optional
printer features and scanner features, see the separate relevant manual.
●The illustrations in this manual are mainly drawn for the AR-407.
USINGTHIS MANUAL
This manual is intended as an operation guide for both general users and key
operators.
For General Users
It is recommended that you read the GETTING STARTED, MAKING COPIES,
and SPECIAL FUNCTIONS sections to become familiar with the available
features and functions of your copier. Then refer to the manual as needed to
become thoroughly familiar with those features you will normally use.
For Key Operators
Please read all sections thoroughly to become familiar with all features and
functions of your copier. Throughout the manual, information which is relevant
to key operator functions is noted by “★KEY OPERATOR.” Please pay close
attentiontothesenotesandtotheSUPPLIES,COPIERTROUBLE?,GENERAL
INFORMATION, and OPTIONAL EQUIPMENT sections so you can ensure
smooth and efficient operation of your machine.
A separate KEY OPERATOR’S GUIDE has been written especially for you. It
containstheprogramsandprogramminginformationthatwillenableyoutotailor
functions for maximum benefit to your company.

1-1
CHAPTER1
CHAPTER 1
GETTING STARTED
Thischapterdescribesthebasicinformationontheuseofthiscopier.
Page
●●
●●
●INSTALLATION REQUIREMENTS ..................... 1-2
●●
●●
●CAUTIONS ...................................... 1-3
●●
●●
●POWER ON AND OFF .............................. 1-5
Power save modes ................................. 1-5
●●
●●
●INFORMATION FUNCTION .......................... 1-7
●●
●●
●USINGTHETOUCH PANEL .......................... 1-8
How to use the touch panel ........................... 1-8
Selection of function ................................ 1-8
Function setting icons ............................... 1-9

1-2
CHAPTER1
INSTALLATION REQUIREMENTS
Toensuresafetyandpropermachineperformance,pleasenotethefollowing
before initial installation and whenever the machine is to be relocated.
1. Thecopiershould beinstalled near anaccessible power outletfor easy
connection.
2. Besure to connect the power cord only to a power outlet that meets the
specified voltage and current requirements.
Also make certain the outlet is properly grounded.
3. Do not install the machine where it is:
●damp or humid,
●exposed to direct sunlight,
●extremely dusty,
●poorly ventilated,
●subjecttoextremetemperatureorhumiditychanges(e.g.,nearanair
conditioner or heater).
4. Sinceaharddiskdriveisbuiltintothiscopier,placethecopieronafirm,
level surface. Choose an area which is not subject to any vibration.
5. Besuretoallowtherequiredspacearoundthemachineforservicingand
properventilation.
A small amount of ozone is produced within the copier during operation.
The emission level is insufficient to cause any health hazard.
NOTE:
The present recommended long term exposure limit for ozone is 0.1 ppm
(0.2 mg/m3) calculated as an 8 hr. time-weighted average concentration.
However,sincethesmallamountthatisemittedmayhaveanobjectionable
odor, it is advisable to place the copier in a ventilated area.
GETTING STARTED Installation requirements
11-13/16"
(30 cm)
23-5/8"
(60 cm)
23-5/8"
(60 cm) 11-13/16"
(30 cm)

1-3
CHAPTER1
CAUTIONS
1. Do not touch the photoconductive drum. Scratches or
smudges on the drum will cause dirty copies.
2. The fusing unit is extremely hot. Exercise care in this area.
3. Since a hard disk drive is built into the copier, be sure to turn the
powerswitch tothe “OFF” position when movingthe copier.Take
care not to subject the copier to any vibration or shock.
4. Do not look directly at the light source. Doing so may
damage your eyes.
5. Four installation adjusters are provided on the optional
stand/500-sheet paper drawer.
When moving the machine with the optional stand/500-
sheetpaperdrawer,besuretoraisetheinstallationadjusters.
Aftermovingthemachine,lowerthefourinstallationadjusters
untiltheyreachthefloorandlockthetwocastersatthefront
of the copier.
6. When copying is interrupted (for example, because the
INTERRUPTfunction has been used, paper or tonerhas run out,
a misfeed has occurred, etc.), this copier will store the image
data of the originals read prior to the interruption. If copying of
secret documents is interrupted due to the above reasons, be
sure to either resume the interrupted copying by pressing the
START key, or clear the image data by pressing the CLEAR ALL
key after the interrupt copying is completed or the trouble is
cleared, because the stored data may be printed by other
operators.
“BATTERY DISPOSAL”
CONTAINS MANGANESE DIOXIDE LITHIUM BATTERY.
MUST BE DISPOSED OF PROPERLY. CONTACT YOUR
SHARP DEALER OR SERVICER FOR INSTRUCTIONS.
GETTING STARTED Cautions
Fusing unit
Photoconductive
drum
Lock Release
Adjuster
Lock
Caster
Release

1-4
CHAPTER1
CAUTIONS
GETTING STARTED Cautions
Cautions on laser
Wave length 785 nm +10 nm
-15 nm
Pulse times (2.274 µs ±2.3 ns)/7 mm
Output power 0.24 mW - 0.60 mW
SAFETY PRECAUTIONS
This Digital Copier is rated Class 1 and complies with 21 CFR
1040.10 and 1040.11 of the CDRH standards. This means that
the copier does not produce hazardous laser radiation. For your
safety, observe the precautions below.
●Do not remove the cabinet, operation panel or any other
covers.
●The copier’s exterior covers contain several safety interlock
switches. Do not bypass any safety interlock by inserting
wedges or other items into switch slots.
Caution
Useofcontrolsoradjustmentsorperformanceofproceduresother
than those specified herein may result in hazardous radiation
exposure.

1-5
CHAPTER1
POWER ON AND OFF
The power switch is located on the left side of the copier. When the
power switch is turned to the “ON” position, the message “WARMING
UP. PLEASE WAIT.” will appear in the message display. Warming
uptakesabout65secondsfortheAR-287/337andabout75seconds
for the AR-407. Once the copier is ready, the message display will
changeto“READY TO COPY.”,andtheSTARTkeyindicatorwilllight
up, indicating that copying is possible.
Ifthecopierhasbeenprogrammedintheauditingmode,themessage
“ENTER YOUR ACCOUNT NUMBER. -----”willappearafterwarming
up. Once a valid account number has been entered, copying will
become possible.
Power save modes
The copier has two power save modes to reduce overall power
consumptionandtherebyreducethecostofoperationandtoconserve
natural resources to help reduce environmental pollution. The two
power save modes are preheat mode and auto power shut-off mode.
★KEY OPERATOR
Thepreheat activationtimeand theautopower shut-offtimehavebeen
preset at the factory to 15 min. for preheat mode and 60 min. for auto
powershut-offmode.Thesetimescanbechangedasdescribedinthekey
operator’sguide.Itissuggestedthatyousetappropriatetimesaccording
to the actual usage of the copier.
GETTING STARTED Power on and off
Power on
Power off

1-6
CHAPTER1GETTING STARTED Power on and off
Auto power shut-off mode
If the auto power shut-off mode is enabled, the copier will
automatically turn off the power once a programmed length of time
has elapsed without any copier operation after the last copy of a run
is made or the power is first turned on. The power switch will
automatically be turned to the “OFF” position.
To turn the power back on, simply turn the power switch to the “ON”
position.
★KEY OPERATOR Seepage21oftheKEYOPERATOR’SGUIDEfor
setting the auto power shut-off timer. See page 27 of the KEY
OPERATOR’SGUIDEforenablingordisablingtheautopowershut-off
mode.
Preheat mode
Thecopier willenter the mode once theset timehas elapsed without
any copier operation after the last copy of a run is made or power is
turned on.
When the copier enters the preheat mode, the message “PREHEAT
MODE. PLACE ORIGINALS.” will appear.
In this condition, the fuser in the copier is maintained at a lower heat
level thereby saving power. The preheat level is, however, high
enough to allow the copier to come to a ready condition or begin
copying approximately 30 seconds after any key input is made.
Tocopy from the preheat mode,make desired copier selections and
press the START key using the normal copying procedure.
★KEY OPERATOR See page 22 of the KEY OPERATOR’S GUIDE for
information on setting the preheat mode.
As an ENERGY STAR®Partner,
SHARP has determined that this
product meets the ENERGY
STAR®guidelines for energy
efficiency.
POWER ON AND OFF

1-7
CHAPTER1
1Press the INFORMATION ( ) key in the standby mode.
●The screen for the information categories will appear.
2Select the “COPIER” key to display the first screen of
the copier feature items.
●If the toner supply is not low, this screen is not displayed.
Proceed to step 3.
3Select the feature you would like to know about by
pressing a copier feature item key on the touch panel.
●Ifthefeatureyouwouldliketoknowaboutisnotdisplayedonthe
touch panel, press the scroll ( ) key on the touch panel until
the feature is displayed.
●If a copier feature item key is pressed, the description for that
featurewillappear.Usethescroll( )keytodisplayadditional
informationuntilallinformationforthatfeaturehasbeendisplayed.
●To return to the copier feature item screen, press the “INDEX”
key.
●To exit the INFORMATION mode, press the “EXIT” key on the
touch panel.
INFORMATION FUNCTION
The information function provides a quick reference guide to the use
of the various features and functions of this copier. The information
mode can be entered when the copier is in the standby mode.
GETTING STARTED Information function
1
4
EXIT
MAKING 2-SIDED COPIES (2-SIDED COPY)
INFORMATION
SORTING COPIES INTO SETS OR STAPLING
FINISHED SETS OF COPIES (OUTPUT)
USING THE DOCUMENT FEEDER
(DOCUMENT FEEDER)
REDUCTION/ENLARGEMENT/ZOOM
(COPY RATIO)
STORING FREQUENTLY USED JOB PROGRAMS
(PROGRAM)
1/5
EXIT
INFORMATION
SELECT INFORMATION.
COPIER
ADDING TONER
INSTRUCTIONS

1-8
CHAPTER1
USINGTHETOUCH PANEL
How to use the touch panel
READY TO COPY.
AUTO
EXPOSURE PAPER SELECT
100%
COPY RATIO
AUTO 8/ 11
12
1.8/ 11
2.11 17
12
READY TO COPY.
SPECIAL MODES
MARGIN SHIFT
MULTI SHOT
PAMPHLET COPY
ERASE
COVERS
IMAGE EDIT TEXT STAMP
TRANSPARENCY
INSERTS
DUAL PAGE
COPY
OK
AUTO
EXPOSURE PAPER SELECT
100%
COPY RATIO
AUTO 8/ 11
12
You can set or cancel a function displayed on the touch
panel by pressing (touching) a key with a finger. The touch
key operation can be confirmed with a beep tone (and
highlighted display).
★★
★★
★KEY OPERATOR For the beep tone to be heard, the beep tone must be
enabledbyakeyoperatorprogram.Seepage27oftheKEYOPERATOR’S
GUIDE.
Ifanykeysaredisplayedgray,thekeyshavebeendisabled.
If you press these keys, two short beeps will be sounded.
Selection of function
To register the selected settings for a function, press the
“OK” key on the setting screen. The settings indicated by
ahighlighteddisplaywillberegisteredasaselectedfunction.
Some special functions can be selected by pressing the
relevant keys on the SPECIAL MODES screen (page 3-4) or
on the IMAGE EDIT menu (page 3-21) to highlight the keys.
To cancel these functions, press the relevant keys again to
return the keys to the normal display. These functions are:
Dual page copying, Centering, B/W reverse, and Binding
change.
GETTING STARTED Using the touch panel
STORE/DELETE
RECALL
ERASE
EDGE ERASE
CENTER ERASE
EDGE+CENTER
ERASE
CANCEL
1/2
OK
OK
(0~1)
inch

1-9
CHAPTER1
READY TO COPY.
1.8/ 11
2.11 17
12
Function setting icons
Selectedspecialfunctions areindicated withtheir iconson
thebasic screen.The setting screenfor aselected function
can be easily called by pressing its icon.
If multiple special functions are selected, up to six icons
will be displayed.
The function setting icons are listed below. The content of
the icons indicated by *1 will change depending upon the
particular settings for these functions.
USINGTHE TOUCH PANEL
GETTING STARTED Using the touch panel
READY TO COPY.
ERASE
EDGE ERASE
CENTER ERASE
EDGE+CENTER
ERASE
CANCEL
1/2
OK
OK
(0~1)
inch
*
1
Margin shift (p.3-4)
*
1
Erase (p.3-6)
Dual page copying (p.3-8)
*
1
Multi shot (p.3-10)
*
1
Covers (p.3-13)
*
1
Transparency film with insert sheets
(p.3-15)
Pamphlet copy (p.3-17)
Job build (p.3-20)
Centering (p.3-22)
*
1
Repeat copy (p.3-24)
B/W reverse (p.3-27)
Binding change (p.3-29)
Date (p.3-32)
Select stamp (p.3-35)
Watermark (p.3-38)
Page number (p.3-41)
Tandem copy (p.3-44)


2-1
CHAPTER2
CHAPTER 2
MAKING COPIES
This chapter describes the basic copying functions such as normal
copying, reduction/enlargement, and exposure adjustments.
Page
●●
●●
●AUDITING ACCOUNTS ............................. 2-2
●●
●●
●USINGTHE RSPF ................................. 2-3
●●
●●
●COPYING FROMTHE DOCUMENT GLASS.............. 2-8
●●
●●
●REDUCTION/ENLARGEMENT/ZOOM ................. 2-11
●●
●●
●SPECIAL PAPERS (manual feed) .................... 2-14
Two sided copying with bypass tray .................... 2-15
●●
●●
●EXPOSURE ADJUSTMENTS ........................ 2-16
●●
●●
●SORT/GROUP ................................... 2-17
●●
●●
●JOB MEMORY ................................... 2-18
●●
●●
●INTERRUPTING A COPY RUN ....................... 2-20

2-2
CHAPTER2
AUDITING ACCOUNTS
If this copier has been programmed in the auditing mode, it will not
function until an assigned 5-digit account number has been entered.
★KEY OPERATOR See page 9 of the KEY OPERATOR’S GUIDE
for setting the auditing mode.
MAKING COPIES Auditing accounts
The initial status of the message display will be:
ENTER YOUR ACCOUNT NUMBER. -----
●Enter your account number using the 10-key pad.
●Aseachdigitisentered,thedashesinthe display willchangeto
asterisks.
The following message will appear after the number is entered.
ACCOUNT STATUS: COPIES MADE 000,000
COPIES REMAINING 000,000
“COPIES REMAINING” will appear only if account limit has been
set using a key operator program.
★★
★★
★KEY OPERATOR See page 12 of the KEY OPERATOR’S
GUIDE for account limit settings.
The message, however, will not be displayed when the printer
auditing mode is enabled by the key operator program with the
optional printer expansion kit installed. Then the account limit
setting will be canceled.
★★
★★
★KEY OPERATOR See page 46 of the AR-PB2A operation
manual for the printer auditing mode setting.
●Themessagewillbedisplayedforseveralseconds,thenchange
to the following message.
READY TO COPY.
●When a copy run is performed, the following message will
appear.
READY TO COPY.
PRESS [AUDIT CLEAR] WHEN FINISHED.
●In the interrupt copy mode (see page 2-20), the following
message will appear instead of the message above.
READY TO COPY. WHEN COPYING IS
FINISHED, PRESS [INTERRUPT].
NOTE:
Ifanunassignednumberisentered,themessagedisplaywillshow
“ENTER YOUR ACCOUNT NUMBER.-----”, indicating that the
number was not accepted.
When the key operator program of account number security has
been set:
If an unassigned number is entered three successive times, the
copier will not accept another number for one minute, and the
following message will appear.
PLEASE SEE YOUR KEY OPERATOR FOR
ASSISTANCE.
★★
★★
★KEY OPERATOR See page 13 of the KEY OPERATOR’S
GUIDE for account number security.
12 3
4 5
6
789
0C
P
CLEAR
PROGRAM
AUDIT CLEAR
INTERRUPT

2-3
CHAPTER2
USINGTHE RADF
●Imageloss(max.13/64"(5mm))canoccuralongthe
leading and trailing edges of the copies. Also image
loss(max.13/64"(5mm)intotal)canoccuralongthe
other edges of the copies.
●The RADF can handle a maximum of 50 originals of
5-1/2" x 8-1/2" to 8-1/2" x 11" sizes and 30 originals
of 8-1/2" x 14" to 11" x 17" sizes.
●2-sided to 1-sided copying and 2-sided to 2-sided
copying can be performed in these models.
●The originals must be set face up in the document
feeder tray.
●Different size originals with the same width can be
placedinthedocumentfeedertrayandautomatically
copied onto copy paper of their respective sizes.
Theautomaticcopyratioselectionwillnotfunctionin
this case.
The RADF (reversing automatic document feeder) will
handle multiple originals.
●Before loading originals into the document feeder
tray, be sure to remove any staples or paper clips
from them.
●Damaged or crumpled originals or originals which
havebeenfoldedmaymisfeedintheRADForcause
incorrectsizedetection.Itisrecommendedthatthese
becopiedfromthedocumentglassandthecopiesbe
used as original documents.
●When feeding originals which have closely spaced
binding holes punched along an edge, place the
originalssothatthepunchededgeispositionedtothe
right or along the side guides.
●Specialoriginalssuchastransparencyfilmandtracing
papershouldnotbefedfromtheRADF,butshouldbe
placed on the document glass.
●Duplex copying will not work when a non-standard
sized paper or 5-1/2" x 8-1/2" paper is used.
●If the orientation of the originals does not match that
of the copy paper when both the originals and copy
paperareofstandardsizesandtheautopaperselect
mode or automatic copy ratio select mode is on, the
imageofthe originals willbeautomatically rotatedto
match the copy paper. However, if enlargement
copying onto a paper size larger than 8-1/2" x 11" is
performed, the image will not be rotated.
Stream feeding mode
If the stream feeding mode has been enabled using a key operator
program,themessage“NEWLY PLACED ORIGINALS WILL BE FED
AND COPIED AUTOMATICALLY.” will appear and the original feed
indicator will continue to blink for approximately 5 seconds after
feedingofalloriginalsiscompleted.Whilethismessageisdisplayed,
anynew originalsplaced inthe document feeder tray will be fed and
copiedautomatically.
★KEY OPERATOR See page 17 of the KEY OPERATOR’S GUIDE
for information on setting the stream feeding mode.
MAKING COPIES Using the RADF

2-4
CHAPTER2
1-sided copies of 1-sided originals
1Adjusttheoriginalguidestothesizeoftheoriginalsand
set the originals face up in the document feeder tray.
●The original size will be indicated on the touch panel, and the
papertraywiththecorrespondingpapersizewillbeautomatically
selected.
●Besure to remove any original from the document glass before
settingtheoriginals inthedocument feeder tray.If an originalis
left on the document glass, the original reminder indicator will
blink. Removetheoriginalfromthedocumentglassinthiscase.
●If copy paper of the required size is not installed in any of the
trays, the following message will appear.
LOAD " x " PAPER.
If a tray of the required size is not installed, use the bypass tray
andpressthe“PAPERSELECT”keyonthetouchpaneltoselect
the bypass tray.
●To copy onto a different size paper, use the “PAPER SELECT”
key to make the selection.
2Ensure that the 1-sided to 1-sided copying mode is
selected on the touch panel.
●Whennoiconisdisplayedintheareaindicatedintheillustration
(), the 1-sided to 1-sided copying mode is selected.
●If the 1-sided to 1-sided mode is not selected, press the
2-SIDED COPY key and then press the 1-sided to 1-sided key
() on the touch panel. Press the “OK” key to return to the
basic screen.
3Use the 10-key pad to enter the desired number of
copies.
●The number will be shown in the copy quantity display of the
touch panel.
●UsetheCLEAR( C)keytocancelanentryifamistakehasbeen
made.
●Ifyousetamultiplenumberofcopies,thecopieswillbedelivered
collated.TodeliverintheGROUPmode,presstheOUTPUTkey
and then select “GROUP” on the touch panel. See page 2-17.
4Press the START key.
●Tocancel acopy run,press theCLEAR ALL( CA ) key. Copying
willstopandtheRADFwilloutputanyoriginalswhichhavebeen
fed.Also,thenumberinthecopyquantitydisplaywillberesetto
0.
MAKING COPIES Using the RADF
USINGTHE RADF
READY TO COPY. (DOCUMENT FEEDER MODE)
AUTO
EXPOSURE PAPER SELECT
100%
COPY RATIO
AUTO 8/ 11
12
1.8/ 11
2.11 17
12
8/ 11
12
ORIGINAL
12 3
4 5
6
789
0C
P
CLEAR
PROGRAM
AUDIT CLEAR
INTERRUPT
C
CLEAR
INTERRUPT
CA
CLEAR ALL
START

2-5
CHAPTER2MAKING COPIES Using the RADF
USING THE RADF
2-sided copies from 1-sided originals
1Adjusttheoriginalguidestothesizeoftheoriginalsand
set the originals face up in the document feeder tray.
2Press the 2-SIDED COPY key.
3Press the key on the touch panel.
4Press the “OK” key.
5Enter the desired number of copies.
6Press the START key.
●To cancel a copy run during duplex copying, press the CLEAR
ALL ( CA ) key.
AUTO
Maximum height
line
12 3
4 5
6
789
0P
PROGRAM
AUDIT CLEAR
INT
CA
CLEAR ALL
START
READY TO COPY.(DOCUMENT FEEDER MODE)
2-SIDED COPY
OK
AUTO
EXPOSURE PAPER SELECT
100%
COPY RATIO
AUTO 8/ 11
12
READY TO COPY.(DOCUMENT FEEDER MODE)
2-SIDED COPY
AUTO
EXPOSURE PAPER SELECT
100%
COPY RATIO
OK
AUTO 8/ 11
12

2-6
CHAPTER2MAKING COPIES Using the RADF
USINGTHE RADF
2-sided copies from 2-sided originals
1Adjusttheoriginalguidestothesizeoftheoriginalsand
set the originals face up in the document feeder tray.
2Press the 2-SIDED COPY key.
3Press the key on the touch panel.
4Press the “OK” key.
5Enter the desired number of copies.
6Press the START key.
●To cancel a copy run during duplex copying, press the CLEAR
ALL ( CA ) key.
AUTO
12 3
4 5
6
789
0P
PROGRAM
AUDIT CLEAR
INT
CA
CLEAR ALL
START
Maximum height
line
READY TO COPY.(DOCUMENT FEEDER MODE)
2-SIDED COPY
OK
AUTO
EXPOSURE PAPER SELECT
100%
COPY RATIO
AUTO 8/ 11
12
READY TO COPY.(DOCUMENT FEEDER MODE)
2-SIDED COPY
OK
AUTO
EXPOSURE PAPER SELECT
100%
COPY RATIO
AUTO 8/ 11
12
Other manuals for AR-287
1
This manual suits for next models
2
Table of contents
Other Sharp Copier manuals

Sharp
Sharp MX 5500N - Color Laser - Copier User manual

Sharp
Sharp MX-2300 G User manual

Sharp
Sharp AR-203E User manual

Sharp
Sharp AR-280 User manual

Sharp
Sharp AR-5520 User manual

Sharp
Sharp AR-162 User manual

Sharp
Sharp SF-2020 User manual

Sharp
Sharp AR-235 User manual

Sharp
Sharp AR-C330 Key operators User manual

Sharp
Sharp AR-507 User manual