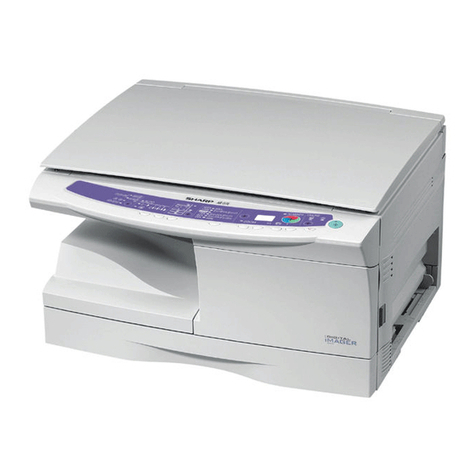
Sharp AL-1000 Series User manual

SERVICE MANUAL
CODE:00ZAL1000/A1E
DIGITAL COPIER
AL-1000
MODEL AL-1010
CONTENTS
SHARP CORPORATION This document has been published to be used for
after sales service only.
The contents are subject to change without notice.
Parts marked with " " is important for maintaining the safety of the set. Be sure to replace these parts with specified
ones for maintaining the safty and performance of the set.
[ 1 ] GENERAL. . . . . . . . . . . . . . . . . . . . . . . . . . . . . . . . . . . . . . . . . . . . . 1 – 1
[ 2 ] SPECIFICATIONS . . . . . . . . . . . . . . . . . . . . . . . . . . . . . . . . . . . . . . 2 – 1
[ 3 ] CONSUMABLE PARTS . . . . . . . . . . . . . . . . . . . . . . . . . . . . . . . . . . 3 – 1
[ 4 ] EXTERNAL VIEWS AND INTERNAL STRUCTURE. . . . . . . . . . . . 4 – 1
[ 5 ] UNPACKING AND INSTALLATION . . . . . . . . . . . . . . . . . . . . . . . . 5 – 1
[ 6 ] COPING PROCESS. . . . . . . . . . . . . . . . . . . . . . . . . . . . . . . . . . . . . 6 – 1
[ 7 ] OPERATIONAL DESCRIPTIONS . . . . . . . . . . . . . . . . . . . . . . . . . . 7 – 1
[ 8 ] DISASSEMBLY AND ASSEMBLY. . . . . . . . . . . . . . . . . . . . . . . . . . 8 – 1
[ 9 ] ADJUSTMENTS. . . . . . . . . . . . . . . . . . . . . . . . . . . . . . . . . . . . . . . . 9 – 1
[10] SIMULATION,TROUBLE CODES . . . . . . . . . . . . . . . . . . . . . . . . . 10 – 1
[11] USER PROGRAMS . . . . . . . . . . . . . . . . . . . . . . . . . . . . . . . . . . . . 11 – 1
[12] ELECTRICAL SECTION . . . . . . . . . . . . . . . . . . . . . . . . . . . . . . . . 12 – 1
[13] CIRCUIT DIAGRAM . . . . . . . . . . . . . . . . . . . . . . . . . . . . . . . . . . . 13 – 1
AL-1000/1010

CAUTION
This product is a class 1 laser product that complies with 21CFR 1040.10 and 1040.11 of the CDRH
standard and IEC825. This means that this machine does not produce hazardous laser radiation. The use
of controls, adjustments or performance of procedures other than those specified herein may result in
hazardous radiation exposure.
This laser radiation is not a danger to the skin, but when an exact focusing of the laser beam is achieved
on the eye’s retina, there is the danger of spot damage to the retina.
The following cautions must be observed to avoid exposure of the laser beam to your eyes at the time of
servicing.
1) When a problem in the laser optical unit has occurred, the whole optical unit must be exchanged as a
unit, not as individual parts.
2) Do not look into the machine with the main switch turned on after removing the developer unit, toner
cartridge, and drum cartridge.
3) Do not look into the laser beam exposure slit of the laser optical unit with the connector connected
when removing and installing the optical system.
4) The middle frame contains the safety interlock switch.
Do not defeat the safety interlock by inserting wedges or other items into the switch slot.
LASER WAVE – LENGTH : 780 ~ 795
Pulse times : 0.481ms/6mm
Out put power : 0.20 ±0.03mW
CAUTION
INVISIBLE LASER RADIATION,
WHEN OPEN AND INTERLOCKS DEFEATED.
AVOID EXPOSURE TO BEAM.
VORSICHT
UNSICHTBARE LASERSTRAHLUNG,
WENN ABDECKUNG GEÖFFNET UND
SICHERHEITSVERRIEGELUNG ÜBERBRÜCKT.
NICHT DEM STRAHL AUSSETZEN.
VARO !
AVATTAESSA JA SUOJALUKITUS
OHITETTAESSA OLET ALTTIINA
NÄKYMÄTTÖMÄLLE LASERSÄTEILYLLE ÄLÄ
KATSO SÄTEESEEN.
ADVARSEL
USYNLIG LASERSTRÅLNING VED ÅBNING, NÅR
SIKKERHEDSBRYDERE ER UDE AF
FUNKTION. UNDGÅ UDSAETTELSE FOR
STRÅLNING.
VARNING !
OSYNLIG LASERSTRÅLNING NÄR DENNA DEL
ÄR ÖPPNAD OCH SPÄRREN ÄR URKOPPLAD.
BETRAKTA EJ STRÅLEN. – STRÅLEN ÄR
FARLIG.
AL-1000/1010

At the production line, the output power
of the scanner unit is adjusted to 0.57
MILLI-WATT PLUS 20 PCTS and is
maintained constant by the operation of
the Automatic Power Control (APC).
Even if the APC circuit fails in operation
for some reason, the maximum output
power will only be 15 MILLI-WATT 0.1
MICRO-SEC. Giving and accessible
emission level of 42 MICRO-WATT
which is still-less than the limit of
CLASS-1 laser product.
The foregoing is applicable only to the 220V
model
,
230V model and 240V model.
VAROITUS! LAITTEEN KÄYTTÄMINEN MUULLA
KUIN TÄSSÄ KÄYTTÖOHJEESSA MAINITULLA
TAVALLA SAATTAA ALTISTAA KÄYTTÄJÄN
TURVALLISUUSLUOKAN 1 YLITTÄVÄLLE
NÄKYMÄTTÖMÄLLE LASERSÄTEILYLLE.
VARNING - OM APPARATEN ANVÄNDS PÅ ANNAT
SÄTT ÄN I DENNA BRUKSANVISNING
SPECIFICERATS, KAN ANVÄNDAREN UTSÄTTAS
FÖR OSYNLIG LASERSTRÅLNING, SOM
ÖVERSKRIDER GRÄNSEN FÖR LASERKLASS 1.
Caution
This product contains a low power laser
device. To ensure continued safety do not
remove any cover or attempt to gain access
to the inside of the product. Refer all
servicing to qualified personnel.
LUOKAN 1 LASERLAITE
KLASS 1 LASER APPARAT
AL-1000/1010

[1] GENERAL
1. General . . . . . . . . . . . . . . . . . . . . . . . . . . . . . . . . . . . . . . 1-1
2. Target User Copy Volume. . . . . . . . . . . . . . . . . . . . . . . . 1-1
3. Main features. . . . . . . . . . . . . . . . . . . . . . . . . . . . . . . . . . 1-1
(1) High-speed laser copying . . . . . . . . . . . . . . . . . . . . 1-1
(2) High-quality digital image. . . . . . . . . . . . . . . . . . . . . 1-1
(3) Substantial copying functions . . . . . . . . . . . . . . . . . 1-1
4. Environmental
(1) Normal operating condition . . . . . . . . . . . . . . . . . . . 1-1
(2) Acceptable condition . . . . . . . . . . . . . . . . . . . . . . . . 1-1
(3) Optional condition . . . . . . . . . . . . . . . . . . . . . . . . . . 1-1
(4) Supply storage condition . . . . . . . . . . . . . . . . . . . . . 1-1
[2] SPECIFICATIONS
1. Basic specifications . . . . . . . . . . . . . . . . . . . . . . . . . . . . . 2-1
2. Operation specification . . . . . . . . . . . . . . . . . . . . . . . . . . 2-1
3. Copy performance. . . . . . . . . . . . . . . . . . . . . . . . . . . . . . 2-3
4. Others . . . . . . . . . . . . . . . . . . . . . . . . . . . . . . . . . . . . . . . 2-4
[3] CONSUMABLE PARTS
1. Supply system table . . . . . . . . . . . . . . . . . . . . . . . . . . . . 3-1
2. Production control number (lot No.)identification. . . . . . . 3-1
[4] EXTERNAL VIEWS AND INTERNAL STRUCTURES
1. Appearance. . . . . . . . . . . . . . . . . . . . . . . . . . . . . . . . . . . 4-1
2. Operation panel. . . . . . . . . . . . . . . . . . . . . . . . . . . . . . . . 4-2
3. Internal. . . . . . . . . . . . . . . . . . . . . . . . . . . . . . . . . . . . . . . 4-3
4. Motors and solenoids . . . . . . . . . . . . . . . . . . . . . . . . . . . 4-4
5. Sensors and switches . . . . . . . . . . . . . . . . . . . . . . . . . . . 4-5
6. PWB unit . . . . . . . . . . . . . . . . . . . . . . . . . . . . . . . . . . . . . 4-6
7. Cross sectional view . . . . . . . . . . . . . . . . . . . . . . . . . . . . 4-7
[5] UNPACKING AND INSTALLATION
1. A WORD ON COPIER INSTALLATION . . . . . . . . . . . . . 5-1
2. CHECKING PACKED COMPONENTS AND
ACCESSORIES. . . . . . . . . . . . . . . . . . . . . . . . . . . . . . . . 5-1
3. UNPACKING. . . . . . . . . . . . . . . . . . . . . . . . . . . . . . . . . . 5-2
4. REMOVING PROTECTIVE PACKING MATERIAlS . . . . 5-2
5. INSTALLING THE TD CARTRIDGE . . . . . . . . . . . . . . . . 5-2
6. LOADING COPY PAPER (installing the paper tray) . . . . 5-3
7. PLUGGING IN THE COPIER . . . . . . . . . . . . . . . . . . . . . 5-3
[6] PRINTING PROCESS
(1) Functional diagram . . . . . . . . . . . . . . . . . . . . . . . . . 6-1
(2) Outline of print process . . . . . . . . . . . . . . . . . . . . . . 6-2
(3) Actual print process . . . . . . . . . . . . . . . . . . . . . . . . . 6-3
[7] OPERATIONAL DESCRIPTIONS
(1) Outline of operation . . . . . . . . . . . . . . . . . . . . . . . . . 7-1
(2) Scanner section. . . . . . . . . . . . . . . . . . . . . . . . . . . . 7-2
(2) Laser Unit . . . . . . . . . . . . . . . . . . . . . . . . . . . . . . . . 7-3
Fuser section . . . . . . . . . . . . . . . . . . . . . . . . . . . . . . . . . . . . . 7-4
Paper feed section and paper transport section. . . . . . . . . . . 7-5
Process unit new drum detection mechanism . . . . . . . . . . . . 7-8
[8] DISASSEMBLY AND ASSEMBLY
1. High voltage section . . . . . . . . . . . . . . . . . . . . . . . . . . . . 8-1
2. Operation panel section. . . . . . . . . . . . . . . . . . . . . . . . . . 8-3
3. Optical section . . . . . . . . . . . . . . . . . . . . . . . . . . . . . . . . . 8-3
4. Fusing section . . . . . . . . . . . . . . . . . . . . . . . . . . . . . . . . . 8-5
5. Tray paper feed/transport section . . . . . . . . . . . . . . . . . . 8-7
6. Manual paper feed section. . . . . . . . . . . . . . . . . . . . . . . 8-12
7. Rear frame section. . . . . . . . . . . . . . . . . . . . . . . . . . . . . 8-16
8. Power section . . . . . . . . . . . . . . . . . . . . . . . . . . . . . . . . 8-17
[9] ADJUSTMENTS
1. Optical section . . . . . . . . . . . . . . . . . . . . . . . . . . . . . . . . . 9-1
(1) Image distortion adjustment. . . . . . . . . . . . . . . . . . . 9-1
(2) Copy magnification ratio adjustment . . . . . . . . . . . . 9-4
(3) Lens unit attachment reference . . . . . . . . . . . . . . . . 9-6
(4) Image position adjustment. . . . . . . . . . . . . . . . . . . . 9-7
2. Copy density adjustment . . . . . . . . . . . . . . . . . . . . . . . . . 9-8
(1) Copy density adjustment timing . . . . . . . . . . . . . . . . 9-8
(2) Note for copy density adjustment. . . . . . . . . . . . . . . 9-8
(3) Necessary tool for copy density adjustment. . . . . . . 9-8
(4) Features of copy density adjustment . . . . . . . . . . . . 9-9
(5) Copy density adjustment procedure. . . . . . . . . . . . . 9-9
3. High voltage adjustment . . . . . . . . . . . . . . . . . . . . . . . . 9-10
(1) Main charger (Grid bias)
(2) DV bias adjustment . . . . . . . . . . . . . . . . . . . . . . . . 9-10
[10] SIMULATION , TROUBLE CODES
1. Entering the simulation mode . . . . . . . . . . . . . . . . . . . . 10-1
2. List of simulation . . . . . . . . . . . . . . . . . . . . . . . . . . . . . . 10-2
3. Contents of simulations . . . . . . . . . . . . . . . . . . . . . . . . . 10-3
4. Trouble codes . . . . . . . . . . . . . . . . . . . . . . . . . . . . . . . 10-11
[11] USER PROGRAMS
Function which can be set with the user program. . . . . . . . . 11-1
Charge the setting. . . . . . . . . . . . . . . . . . . . . . . . . . . . . . . . . 11-1
[12] ELECTRICAL SECTION
1. Block diagram . . . . . . . . . . . . . . . . . . . . . . . . . . . . . . . . 12-1
2. Circuit descriptions. . . . . . . . . . . . . . . . . . . . . . . . . . . . . 12-3
A. Main PWB(MCU) . . . . . . . . . . . . . . . . . . . . . . . . . . . . . . . 12-3
(1) CPU signal table . . . . . . . . . . . . . . . . . . . . . . . . . . 12-3
(2) ASIC. . . . . . . . . . . . . . . . . . . . . . . . . . . . . . . . . . . . 12-6
(3) Reset circuit . . . . . . . . . . . . . . . . . . . . . . . . . . . . . 12-13
(4) Heater lamp control circuit . . . . . . . . . . . . . . . . . . 12-14
(5) Driver circuit (solenoid). . . . . . . . . . . . . . . . . . . . . 12-15
(6) Toner supply motor drive circuit. . . . . . . . . . . . . . 12-15
(7) Main motor drive circuit . . . . . . . . . . . . . . . . . . . . 12-15
(8) Mirror motor circuit . . . . . . . . . . . . . . . . . . . . . . . . 12-16
(9) Power circuit block diagram . . . . . . . . . . . . . . . . . 12-17
(10) CI invertor PWB (circuit). . . . . . . . . . . . . . . . . . . 12-20
(11) CCD PWB operational description. . . . . . . . . . . 12-20
Operation section . . . . . . . . . . . . . . . . . . . . . . . . . . . . . . . . 12-21
[13] CIRCUIT DIAGRAM
AC INTERLOCK . . . . . . . . . . . . . . . . . . . . . . . . . . . . . . . . . . 13-1
MCU . . . . . . . . . . . . . . . . . . . . . . . . . . . . . . . . . . . . . . . . . . . 13-2
OPU . . . . . . . . . . . . . . . . . . . . . . . . . . . . . . . . . . . . . . . . . . . 13-8
POWER SUPPLY . . . . . . . . . . . . . . . . . . . . . . . . . . . . . . . . . 13-9
ACTUAL WIRING DIAGRAM . . . . . . . . . . . . . . . . . . . . . . . 13-10
CONTENTS
AL-1000/1010
[1] GENERAL
1. General
This model is a digital personal copier produced with key words
of “Comfort able copy, Clear copy, Easy copy” providing high
copy performances and copy productivity.
2. Target User Copy Volume: Monthly
Average
Copies: 300 ∼600 (Max. 800)
Prints: 300 ∼600 (Max. 800)
3. Main features
(1) High-speed laser copying
●Since warm-up time is zero, copying can be started imme-
diately after the power switch is turned on.
●First-copy time is only 9.6 seconds (normal mode).
●Copying speed is 10 copies/min., which adapts to business
use, allowing improvement of working efficiency.
(2) High-quality digital image
●High-quality image copying at 600 dpi can be performed.
●In addition to the automatic exposure mode, the manual ex-
posure can be adjusted in five steps.
●The photo mode copying function allows clear copying of
delicate halftone original images such as monochrome
photos and color photos.
(3) Substantial copying functions
●Zoom copying from 50% to 200% in 1% increments can be
performed.
●Continuous copying of maximum 99 sheets can also be per-
formed.
●Toner save mode reduces toner consumption by ap-
proximately 10%.
●User programs allow setting/modification of functions for
customer’s needs.
4. Environmental
The environmental conditions for assuring the copy quality and
the machine operations are as follows:
(1) Normal operating condition
Temperature:20˚C~25
Humidity:65 ±5%RH
(2) Acceptable operating condition
(3) Optical condition
(4) Supply storage condition
Humidity (RH)
85%
60%
20%
10˚C 30˚C 35˚C
Humidity (RH)
90%
60%
15%
–25˚C 30˚C 40˚C
Humidity (RH)
90%
20%
–5˚C 45˚C
AL-1000/1010
1-1

[2] SPECIFICATIONS
1. Basic Specifications
item
type Desktop
Copy system Dry, electrostatic
Segment (class) Digital personal copier
External dimensions (W ×D ×H)
(mm) H293 ×W518 ×D445mm
Weight Approx. 43.3lbs (19.6kg), TD and drum cartridges included
2. Operation specification
Section, item Details
Paper
feed
section
Paper
feed
system
1 tray (250 sheet) single bypass
1tray (250 sheet) + multi bypass (50 sheet)
AB
system
Tray paper feed
section
Paper size A4, B5, A5 (Landscape)
Paper weight 56 – 80g/m2
Paper feed capacity 250 sheets
Kinds Standard paper, specified paper, recycled paper
Remark User adjustment of paper guide available
Multi bypass
paper feed
section
Paper size A4, B5, A5, B6, A6 (Landscape)
Paper weight 52 – 130g/m2
Paper feed capacity 50 sheets
Kinds Standard paper, specified paper, recycled paper,
OHP, Label, Postal card
Remark User adjustment of paper guide available
Single bypass
paper feed
section
Paper size A4, B5, A5, B6, A6 (Landscape)
Paper weight 52 – 130g/m2
Paper feed capacity 1 sheet
Kinds Standard paper, specified paper, recycled paper,
OHP, Label, Postal card
Remark User adjustment of paper guide available
Inch
system
Tray paper feed
section
Paper size 8-1/2″×14″, 8-1/2 ×11″, 8-1/2″×5-1/2″(Landscape)
Paper weight 15 – 21 lbs.
Paper feed capacity 250 sheets
Kinds Standard paper, specified paper, recycled paper
Remark User adjustment of paper guide available
Multi bypass
paper feed
section
Paper size 8-1/2″×14″, 8-1/2 ×11″, 8-1/2″×5-1/2″, 3-1/2″×5-
1/2″(Landscape)
Paper weight 14 – 34.5 lbs.
Paper feed capacity 50 sheets
Kinds Standard paper, specified paper, recycled paper,
OHP, Label, Postal card
Remark User adjustment of paper guide available
Single bypass
paper feed
section
Paper size 8-1/2″×14″, 8-1/2 ×11″, 8-1/2″×5-1/2″(Landscape)
Paper weight 14 – 34.5 lbs.
Paper feed capacity 1 sheet
Kinds Standard paper, specified paper, recycled paper,
OHP, Label, Postal card
Remark User adjustment of paper guide available
AL-1000/1010
2-1

Section, item Details
Paper exit section Exit way Face down
Capacity of
output tray 100 sheets
Originals
Original set Center Registration (left edge)
Max. original
size B4 (10″×14″)
Original kinds sheet, book
Original size
detection None
Optical
section
Scanning
section
Scanning system CCD sensor scanning by lighting lamp scanner
CCD sensor Resolution 400 dpi
Lighting lamp Type Xenon lamp
Voltage 1.5kV
Power consumption 11 ±3W
Writing
section Writing system Writing to OPC drum by the semiconductor laser
Laser unit Resolution 600 dpi
Gradation 256 gradations/8bit
Image forming
Photoconductor type OPC (30φ)
Life 18k
Charger Charging system Saw -tooth charging with a grid, / (–) scorotron
discharge
Transfer system (+) DC corotron system
Separation system (–) DC corotron system
Developing Developing system Dry, 2-component magnetic brush development
system
Cleaning Cleaning system Counter blade system (Counter to rotation)
Fusing section
Fusing system Heat roller system
Upper heat roller type Teflon roller
Lower heat roller type Silicon rubber roller
heater lamp type Halogen lamp
Voltage 100V
Power consumption 800W
Electrical section
Power source Voltage 100V, 110V, 120/127V, 230V, 240V
Frequency Common use for 50 and 60Hz
Power
consumption
Max. 1000W
Average (during
copying) 260Wh/H *1)
Average (stand-by) 70Wh/H *1)
Pre-heat mode 40Wh/H *1)
Auto power shut-off
mode 18Wh/H *1)
*1) May fluctuate due to environmental conditions and the input voltage.
AL-1000/1010
2-2

3. Copy performance
Section, item Details
Copy magnification
Fixed magnification
ratios 3R + 2E (AB system : 50, 70, 81, 100, 141, 200%)
(Inch system : 50, 64, 78, 129, 100, 200%)
Zooming
magnification ratios 50 ∼200% (151 steps in 1% increments)
Manual steps (manual,
photo) 5 steps
Copy speed First copy time Tray paper feed 9.6 sec. (Pre-heat mode:16 sec. or below / Auto
power-shut-off mode : 23 sec. or below)
AB system : A4
(Landscape) Copy speed (CPM)
Manual paper feed Single : 10.0 sec. / Multi : 8.0sec (Pre-heat
mode:16 sec. or below / Auto power-shut-off mode :
23 sec. or below)
Same size 10
Enlargement 10
Reduction 10
B5 (Landscape) Copy speed (CPM) Same size 10
Enlargement 10
Reduction 10
Inch system 8-
1/2″×14″
(Landscape) Copy speed (CPM) Same size 10
Enlargement 10
Reduction 10
8-1/2″×11″
(Landscape) Copy speed (CPM) Same size 10
Enlargement 10
Reduction 10
Max. continuous copy
quantity 99
Void
Void area
leading edge 1 ∼4mm
Trailing edge 4mm or less
Side edge void
area 3mm or less/per side
Image loss
leading edge same size: 3.0mm or less / Enlarge (200%): 1.5mm
or less / Reduction (50%): 6.0mm or less
Trailing edge same size: 3.0mm or less / Enlarge (200%): 1.5mm
or less / Reduction (50%): 6.0mm or less
Side edge void
area same size: 3.0mm or less / Enlarge (200%): 1.5mm
or less / Reduction (50%): 6.0mm or less
Warm-up time 0 sec.
Power save mode
reset time 0 sec.
Paper jam recovery
time 0 sec.
AL-1000/1010
2-3

4. Others
Section, item Remark
Additional
function
Toner save mode Can be set or canceled with user
simulation. Yes
Pre-heat mode Can be set or canceled with user
simulation. Yes
Auto power shut off mode Can be set or canceled with user
simulation. Yes
Accessories
Subsidiaries SEC SECL SEEG SUK SCA EX AB EX Inch
Tray (Universal) Yes Yes Yes Yes Yes Yes Yes
Drum cartridge Yes Yes Yes Yes Yes Yes Yes
TD cartridge Yes Yes Yes Yes Yes No* No*
AC power cord Yes Yes Yes Yes Yes Yes Yes
Tool for corona
cleaning Yes Yes Yes Yes Yes Yes Yes
Operation
manual English1 English1
French
QB/QE:
Multi
language English2 English2
Ex.)
English
French
Arabic
Ex.)
English
Spanish
*Except some
AL-1000/1010
2-4

[3] CONSUMABLE PARTS
1. Supply system table
Common to all destinations
No. Name Content Life Product name Package
1 Develop cartridge (Black) ×1 Toner/developer cartridge
(Toner: Net weight 220g)
(Developer: Net weight 190g)
×1 6K
(5% document) AL-100TD 5
2 Drum cartirdge Drum cartridge 18K AL-100R 5
2. Production control number(lot No.) identification
〈Developing cartridge〉
∗:Destination
Division No.
Japan option 1
Ex option 2
Japan, same pack 6
Ex, same pack 7
〈Drum cartridge〉
The label on the drum cartridge shows the date of production.
Division No.
Ex production 1
Option 2
Same pack 3
A
The end digit of production year
January
September
October
November
December
1
9
0
X
Y
Indicates production in China.
Destination
(∗)Serial number
(00001-99999) Production
month
~
~
1
The end digit of production year
January
September
October
November
December
1
9
0
X
Y
Factory
Serial number (for each
month) (00001-99999) Production
month
~
~
Ver. A
Production control
lavel attachment position
Production control
lavel attachment position
AL-1000/1010
3-1

[4] EXTERNAL VIEWS AND INTERNAL STRUCTURES
1. Appearance
(1) Original table (2) Original cover (3) Side cover
(4) Operation panel (5) Front cover (6) Paper tray
(7) Side cover open button (8) Paper guides (9) Handle
(10) Paper output tray (11) Paper output tray extension (12) Power cord socket
(13) Power switch
(1)
(4)
(6)
(5) (7)
(2)
(3)
(12)
(13) (9)
(9)
(8)
(10)
(11)
AL-1000/1010
4-1

2. Operational panel
(1) Exposure mode selector key
and indicators (2) Light and dark keys and
exposure indicators (3) Alarm indicators∗1
(4) Copy ratio selector key and
copy ratio indicators (5) Zoom indicator (6) Copy ratio display (%) key
(7) Display (8) ON LINE indicator (9) Power save indicator
(10) Zoom keys (11) Copy quantity keys (12) Clear key
(13) Print key and ready indicator
∗1 Drum replacement required indicator
When the drum counter reaches 17,000 copies, the indicator lights up. After 1,000 additional copies are made, the indicator starts
blinking and machine will hard-stop (after current job) until a new cartridge is installed.
Misfeed indicator
TD cartridge replacement required indicator
When toner density is lower than a specified level, the TONER DEVELOPER CARTRIDGE REPLACEMENT indicator lights up
to warn the user.
If toner is not added after approximately 10 sheets are copied, the indicator starts blinking and machine starts to supply
toner.(Toner Developer cartridg replacement indicator keeps lighting up)
If toner density is not back to specific level after two minutes, the READ indicator goes out and Toner Developer indicator starts
blinking, and the copier stops.
∗2 ON: Indicates that the machine is in the energy saving (pre-heat) mode.
Blink: Indicates that the machine is in the process of resetting from the energy saving mode or just after supplying the power.
OFF: Indicates that resetting from the energy saving mode is completed and that the fusing temperature is in ready state.
The combinations of the above display lamps are as follows: (●= ON, ✕= OFF)
Lamp Immediately after power ON Ready Copying
Pre-heat lamp Blink ✕✕
Ready lamp ●●✕
Other lamps ●●●
Lamp Energy saving mode (Pre-
heating) Energy saving mode
(Auto power shut off) Resetting from energy
saving mode
Copy is started during
resetting from energy
saving mode
Pre-heat lamp ●●Blink Blink
Ready lamp ●✕●✕
Other lamps ●✕●●
50%
64%
78%
100%
129%
200%
100%
MAX.
MIN.
5
1
/
2
8
1
/
2
x
5
1
/
2
8
1
/
2
x
8
1
/
2
11
x
8
1
/
2
11
x
8
1
/
2
14
x
8
1
/
2
11
x
ZOOM
(1) (2) (4)
(11)
(10)
(3) (5) (6) (7)
(13)
(12)
(9)(8)
AL-1000/1010
4-2

3. Internal
(1) TC cartridge lock release button (2) TD cartridge (3) Drum cartridge
(4) Drum cartridge handle (5) Paper feed roller (6) Fusing unit release lever
(7) Charger cleaner (8) Transfer charger
(8)
(1)
(2)
(3)
(4)
(5) (6) (7)
AL-1000/1010
4-3

4. Motors and solenoids
No. Part name Control signal Function,operation
(1) Main motor MM Drives the copier.
(2) Mirror motor MRMT Drives the optical mirror base (scanner unit).
(3) Toner motor TM Supplies toner.
(4) Cooling fan motor VFM Cools the optical section.
(5) Resist roller solenoid RRS Resist roller rotation control solenoid
(6) Paper feed solenoid CPFS1 Cassette Paper feed solenoid
(7) Multi paper feed solenoid MPFS Multi manual pages feed solenoid
(1)
(2)
(3)
(4)
(5)
(7)
(6)
AL-1000/1010
4-4

5. Sensors and switches
No. Name Signal Type Function Output
(1) Mirror home position
sensor MHPS Transmission sensor Mirror (scanner unit)
home position detection “H” at home position
(2) POD sensor POD Transmissions sensor Paper exitdetection “H” at paper pass
(3) PPD2 sensor PPD2 Transmission sensor Paper transport
detection 2 “L” at paper pass
(4) Cassette detection
switch CED1 Microswitch Cassette installation
detection “H” at cassette insertion
(5) Manual feed detection
switch MFD Transmission sensor Manual feed paper
detection (single only) “L” at paper detection
(6) PPD1 sensor PPD1 Transmission sensor Paper transport
detection 1 “L” at paper pass
(7) Door switch DSW Micro switch Door open/close
detection (safety switch
for 5V)
1 or 0V of 5V at door
open
(8) Door switch DSW Micro switch Door open/close
detection (safety switch
for 24V)
1 or 0V of 24V at door
open
(9) Drum reset switch DRST Micro switch New drum detection
switch Instantaneously “H” at
insertion of new drum
(1)
(2)
(3)
(4)
(5)
(6)
(7)
(9) (8)
AL-1000/1010
4-5

6. PWB unit
No. Name Function
(1) Exposure lamp invertor PWB Exposure lamp (Xenon lamp) control
(2) Main PWB (MCU) Copier control
(3) Operation PWB Operation input/display
(4) Power PWB AC power input, DC voltage control, High voltage control
(5) CCD sensor PWB For image scanning
(6) LSU motor PWB For polygon motor drive
(7) TCS PWB For toner sensor control
(8) LSU PWB For laser control
(1) (2)
(3)
(4)
(5)
(7)
(6)
(8)
AL-1000/1010
4-6

7. Cross sectional view
No. Part name Function and operation
(1) Scanner unit Illuminates the original with the copy lamp and passes the reflected light to the lens unit
(CCD).
(2) Exposure lamp Exposure lamp (Xenon lamp) Illuminates original
(3) Lens unit Scans the original image with the lens and the CCD.
(4) LSU (Laser unit) Converts the original image signal into laser beams and writes onto the drum.
(5) Paper exit roller Roller for paper exit
(6) Main charger Provides negative charges evenly to the drum surface.
(7) Heat roller Fuses toner on the paper. (Teflon roller)
(8) Pressure roller Fuses toner on the paper. (Silicon rubber roller)
(9) Drum Forms images.
(10) Transfer unit Transfers images onto the drum.
(11) Pickup roller Picks up the manual feed paper. (In multi feed only)
(12) Manual paper feed
tray Tray for manual feed paper
(13) Manual paper feed
roller Transport the paper from the manual paper feed port.
(14) PS roller unit Takes synchronization between the lead edge and the rear edge of the paper.
(15) Paper feed roller Picks up a sheet of paper from the cassette.
(2) (4)
(1) (3)
(5) (6)
(7)
(8)
(9)
(10)
(11)
(13) (12)
(14)
(15)
AL-1000/1010
4-7

[5] UNPACKING AND INSTALLATION
1. A WORD ON COPIER INSTALLATION
Improper installation may damage the copier. Please note the
following during initial installation and whenever the copier is
moved.
Do not install your copier in areas that are:
●damp, humid, or very dusty
●exposed to direct sunlight
●poorly ventilated
●subject to extreme temperature or humidity changes, e.g.,
near an air conditioner or heater.
Be sure to allow the required space around the machine for
servicing and proper ventilation.
2. CHECKING PACKED COMPONENTS AND
ACCESSORIES
Open the carton and check if the following components and ac-
cessories are included.
8"(20cm)
4"
(10cm) 4"
(10cm)
8"(20cm)
Copier
Power cord
TD cartridge
Drum cartridge
(installed in copier)
Operation manual
AL-1000/1010
5-1

3. UNPACKING
Unpack the copier and carry it to the installation location by
holding the handles on both sides of the copier.
4. REMOVING PROTECTIVE PACKING
MATERIALS
(1) Remove pieces of tape (a), (b), (c), (d), (e), (f), (g) and (h)
and protective cover (i). Then open the original cover and
remove protective materials (j) and (k).
(2) Use a coin (or suitable object) to remove the screw.
Store the screw in the paper tray because it will be used if
the copier has to be moved.
5. INSTALLING THE TD CARTRIDGE
(1) Open the side cover while pressing the side cover open
button.
(2) Remove the CAUTION tape from the front cover and
remove the two protective pins from the fusing unit by pull-
ing the strings upward one at a time.
(3) Push gently on both sides of the front cover to open the
cover.
(4) Remove the TD cartridge from the bag. Remove the
protective paper. Hold the cartridge on both sides and
shake it horizontally four or five times.
(5) Hold the tab of the protective cover and pull the tab to your
side to remove the cover.
(6) Gently insert the TD cartridge until it locks in place, while
pushing the lock button.
Lock button
a
b
c
e
h
f
g
d
Protective pins
CAUTION tape
AL-1000/1010
5-2

(7) Close the front cover and then the side cover by pressing
the round projections near the side cover open button.
6. LOADING COPY PAPER (installing the
paper tray)
(1) Raise the handle of the paper tray and pull the paper tray
out until it stops.
(2) Remove the pressure plate lock. Rotate the pressure plate
lock in the direction of the arrow to remove it while pressing
down the pressure plate of the paper tray.
(3) Store the pressure plate lock which has been removed in
step 2 and the screw which has been removed when un-
packing (see page 5-2, step 2 of REMOVING PROTEC-
TIVE PACKING MATERIALS) in the front of the paper tray.
To store the pressure plate lock, rotate the lock to fix it on
the relevant location.
(4) Adjust the paper guides on the paper tray to the copy paper
width and length.Squeeze the lever of paper guide (A) a
and slide the guide to match with the width of the paper.
Move paper guide (B) to the appropriate slot as marked on
the tray.
(5) Fan the copy paper and insert it into the tray. Make sure
the edges go under the corner hooks.
(6) Gently push the paper tray back into the copier.
7. PLUGGING IN THE COPIER
(1) Ensure that the power switch of the copier is in the OFF
position. Insert the attached power cord into the power cord
socket at the rear of the copier.
(2) Plug the other end of the power cord into the nearest outlet.
Pressure plate lock Screw
Paper guide (A)
Paper guide (B)
AL-1000/1010
5-3
Other manuals for AL-1000 Series
4
This manual suits for next models
1
Table of contents
Other Sharp Copier manuals

Sharp
Sharp AR-C250 User manual

Sharp
Sharp Z-21 User manual

Sharp
Sharp AL-1000 Series User manual

Sharp
Sharp AR-201 User manual

Sharp
Sharp AR-M250 series Online Setup guide

Sharp
Sharp AR-C330 Key operators User manual

Sharp
Sharp AL-1550 User manual

Sharp
Sharp AR-160 User manual

Sharp
Sharp AR-RP7 User manual

Sharp
Sharp AR-651 User manual