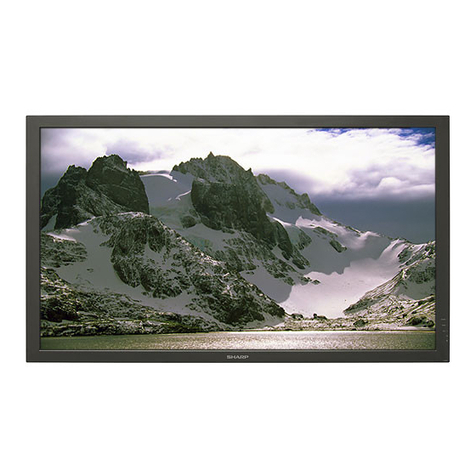
Sharp 8M-B80AX1E User manual

LCD MONITOR
MONITOR LCD
ÉCRAN LCD
LCD MONITOR
MONITOR LCD
ЖК-МОНИТОР
MONITOR LCD
Setup Guide
Guía de configuración
Guide d’installation
Bedienungsanleitung
Guida per l’utilizzo
Руководство по установке
Kurulum Kılavuzu
TINS-H160WJZZ
ENGLISHDEUTSCH ESPAÑOLITALIANO FRANÇAISРУССКИЙPOLSKI
SHARP CORPORATION
Printed in China
TINS-H160WJZZ
18P02-CH-NY
8M-B80AX1E
8M-B80AX1U
8M-B80AX1E / 8M-B80AX1U

2
ENGLISHDEUTSCH ESPAÑOLITALIANO FRANÇAISРУССКИЙPOLSKI
Thank you for your purchase of a SHARP LCD product. To ensure safety and many years of
trouble-free operation of your product, please read the Safety Precautions carefully before using
this product.
SAFETY PRECAUTIONS
Electricity is used to perform many useful functions, but it can also cause personal injuries and property
damage if improperly handled. This product has been engineered and manufactured with the highest priority
on safety. However, improper use can result in electric shock and/or fire. In order to prevent potential danger,
please observe the following instructions when installing, operating and cleaning the product. To ensure your
safety and prolong the service life of your LCD product, please read the following precautions carefully before
using the product.
1. Read instructions — All operating instructions must be read and understood before the product is
operated.
2. Keep this manual in a safe place — These safety and operating instructions must be kept in a safe place
for future reference.
3. Observe warnings — All warnings on the product and in the instructions must be observed closely.
4. Follow instructions — All operating instructions must be followed.
5. Cleaning — Unplug the power cord from the AC outlet before cleaning the product. Use a dry cloth to
clean the product. Do not use liquid cleaners or aerosol cleaners. Do not use dirty cloths. Doing so may
damage the product.
6. Attachments — Do not use attachments not recommended by the manufacturer. Use of inadequate
attachments can result in accidents.
7. Water and moisture — Do not use the product near water. Do not install the product in a place where
water may splash onto it. Be careful of equipment which drains water such as an air-conditioner.
8. Ventilation — The vents and other openings in the cabinet are designed for ventilation. Do not cover or
block these vents and openings since insufficient ventilation can cause overheating and/or shorten the
life of the product. Do not place the product on a sofa, rug or other similar surface, since they can block
ventilation openings. Do not place the product in an enclosed place such as a bookcase or rack, unless
proper ventilation is provided or the manufacturer’s instructions are followed.
9. Power cord protection — The power cords must be routed properly to prevent people from stepping on
them or objects from resting on them.
10. The LCD panel used in this product is made of glass. Therefore, it can break when the product is dropped
or applied with impact. Be careful not to be injured by broken glass pieces in case the LCD panel breaks.
11. Overloading — Do not overload AC outlets or extension cords. Overloading can cause fire or electric
shock.
12. Entering of objects and liquids — Never insert an object into the product through vents or openings. High
voltage flows in the product, and inserting an object can cause electric shock and/or short internal parts.
For the same reason, do not spill water or liquid on the product.
13. Servicing — Do not attempt to service the product yourself. Removing covers can expose you to high
voltage and other dangerous conditions. Request a qualified service person to perform servicing.
14. Repair — If any of the following conditions occurs, unplug the power cord from the AC outlet, and request
a qualified service person to perform repairs.
a. When the power cord or plug is damaged.
b. When a liquid was spilled on the product or when objects have fallen into the product.
c. When the product has been exposed to rain or water.
d. When the product does not operate properly as described in the operating instructions.
Do not touch the controls other than those described in the operating instructions. Improper adjustment
of controls not described in the instructions can cause damage, which often requires extensive
adjustment work by a qualified technician.
e. When the product has been dropped or damaged.
DEAR SHARP CUSTOMER SAFETY PRECAUTIONS
f. When the product displays an abnormal condition. Any noticeable abnormality in the product indicates
that the product needs servicing.
15. Replacement parts — In case the product needs replacement parts, make sure that the service person
uses replacement parts specified by the manufacturer, or those with the same characteristics and
performance as the original parts. Use of unauthorized parts can result in fire, electric shock and/or other
danger.
16. Safety checks — Upon completion of service or repair work, request the service technician to perform
safety checks to ensure that the product is in proper operating condition.
17. Wall mounting — When mounting the product on a wall, be sure to install the product according to the
method recommended by the manufacturer.
18. Heat sources — Keep the product away from heat sources such as radiators, heaters, stoves and other
heat-generating products (including amplifiers).
19. Batteries — Incorrect use of batteries may cause the batteries to burst or ignite. A leaky battery may
corrode the equipment, dirty your hands or spoil your clothing. In order to avoid these problems, make
sure to observe the precautions below:
• Use the specified batteries only.
• Install the batteries with due attention to the plus (+) and minus (-) sides of the batteries according to the
instructions in the compartment.
• Do not mix old and new batteries.
• Do not mix batteries of different types. Voltage specifications of batteries of the same shape may vary.
• Replace an exhausted battery with a new one promptly.
• If you will not use the remote control for a long time, remove the batteries.
• If leaked battery fluid gets on your skin or clothing, rinse immediately and thoroughly. If it gets into your
eye, bathe your eye well rather than rubbing and seek medical treatment immediately. Leaked battery
fluid that gets into your eye or your clothing may cause a skin irritation or damage your eye.
20. Usage of the Monitor must not be accompanied by fatal risks or dangers that, could lead directly to death,
personal injury, severe physical damage or other loss, including nuclear reaction control in nuclear facility,
medical life support system, and missile launch control in a weapon system.
21. Do not stay in contact with the parts of the product that become hot for long periods of time. Doing so
may result in low-temperature burns.
22. Do not modify this product.
23. Do not place vases or any other water-filled containers on this product.
WARNING:
To prevent the spread of fire, keep candles or other open flames
away from this product at all times.
WARNING:
This is a Class A product. In a domestic environment this product may cause radio interference in
which case the user may be required to take adequate measures.
To maintain compliance with EMC regulations, use shielded cables to connect to the following
terminals: PC/AV HDMI input terminal.
Where the mains plug or an appliance coupler is used as the disconnect device, the disconnect
device shall remain readily operable.

3
TIPS AND SAFETY INSTRUCTIONSWARNING
If a Monitor is not positioned in a sufficiently stable location, it can be potentially hazardous due to
falling. Many injuries, particularly to children, can be avoided by taking simple precautions such as:
• Using fixing devices like wall mount brackets recommended by the manufacturer.
• Only using furniture that can safely support the Monitor.
• Ensuring the Monitor is not overhanging the edge of the supporting furniture.
• Not placing the Monitor on tall furniture (for example, cupboards or bookcases) without anchoring
both the furniture and the Monitor to a suitable support.
• Not standing the Monitor on cloth or other materials placed between the Monitor and supporting furniture.
• Educating children about the dangers of climbing on furniture to reach the Monitor or its controls.
• If your existing product is being retained and relocated, the same considerations as above should
be applied.
Especially for child safety
– Don’t allow children to climb on or play with the Monitor.
– Don’t place the Monitor on furniture that can easily be used as steps, such as a chest of drawers.
– Remember that children can become excited while watching a program, especially on a “larger than
life” Monitor. Care should be taken to place or install the Monitor where it cannot be pushed, pulled
over, or knocked down.
– Care should be taken to route all cords and cables connected to the Monitor so that they cannot be
pulled or grabbed by curious children.
TIPS AND SAFETY INSTRUCTIONS
– The TFT color LCD panel used in this Monitor is made with the application of high precision technology.
However, there may be minute points on the screen where pixels never light or are permanently lit. Also, if
the screen is viewed from an acute angle there may be uneven colors or brightness. Please note that these
are not malfunctions but common phenomena of LCDs and will not affect the performance of the Monitor.
– Do not display a still picture for a long period, as this could cause a residual image.
– Never rub or tap the Monitor with hard objects.
– Please understand that SHARP CORPORATION bears no responsibility for errors made during use by
the customer or a third party, nor for any other malfunctions or damage to this product arising during use,
except where indemnity liability is recognized under law.
– This Monitor and its accessories may be upgraded without advance notice.
– Do not use the Monitor where there is a lot of dust, where humidity is high, or where the Monitor may come
into contact with oil or steam. Do not use in an environment where there are corrosive gases (sulfur dioxide,
hydrogen sulfide, nitrogen dioxide, chlorine, ammonia, ozone, etc.). As this could lead to fire.
– Ensure that the Monitor does not come into contact with water or other fluids. Ensure that no objects such
as paper clips or pins enter the Monitor as this could lead to fire or electric shock.
– Do not place the Monitor on top of unstable objects or in unsafe places. Do not allow the Monitor to receive
strong shocks or to strongly vibrate. Causing the Monitor to fall or topple over may damage it.
– Do not use the Monitor near heating equipment or in places where there is likelihood of high temperature, as
this may lead to generation of excessive heat and outbreak of fire.
– Do not use the Monitor in places where it may be exposed to direct sunlight.
– Please be sure to constantly remove dust and garbage that has attached to the ventilation opening. If dust
collects in the ventilation opening or the inside of the Monitor, it may lead to excessive heat, outbreak of fire,
or malfunction.
Please request a cleaning of the inside of the Monitor from an authorized SHARP servicing dealer or service
center.
– Continuous operating time and warranty. This product is designed for a maximum daily use of 16 hours.
Continual use in excess of 16 hours per day is not covered by the warranty.
– The AC outlet shall be installed near the equipment and shall be easily accessible.
The Power Cord
– Use only the power cord supplied with the Monitor.
– Do not damage the power cord nor place heavy objects on it, stretch it or over bend it. Also, do not add
extension cords. Damage to the cord may result in fire or electric shock.
– Do not use the power cord with a power tap.
Adding an extension cord may lead to fire as a result of overheating.
– Do not remove or insert the power plug with wet hands. Doing so could result in electric shock.
– Unplug the power cord if it is not used for a long time.
– Do not attempt to repair the power cord if it is broken or malfunctioning. Refer the servicing to the service
representative.
LED Backlight
• The LED backlight in this product has a limited lifetime.
* If the screen gets dark or does not turn on, it may be necessary to replace the LED backlight.
* This LED backlight is exclusive to this product and must be replaced by an authorized SHARP servicing
dealer or service center. Please contact an authorized SHARP servicing dealer or service center for
assistance.
MOUNTING PRECAUTIONS
• This product is for use indoors.
• A mounting bracket compliant with VESA specifications is required.
• Since the Monitor is heavy, consult your dealer before installing, removing or moving the Monitor.
• Mounting the Monitor on the wall requires special expertise and the work must be performed by an
authorized SHARP dealer. You should never attempt to perform any of this work yourself. Our company will
bear no responsibility for accidents or injuries caused by improper mounting or mishandling.
• Use the Monitor with the surface perpendicular to a level surface. If necessary, the Monitor may be tilted up
to 20 degrees upward or downward.
• This Monitor should be used at an ambient temperature between 0°C and 40°C. Provide enough space
around the Monitor to prevent heat from accumulating inside.
• If it is difficult to provide sufficient space for any reason such as the installation of the Monitor inside a
housing, or if the ambient temperature may be outside of the range of 0°C to 40°C, install a fan or take
other measures to keep the ambient temperature within the required range.
• Temperature condition may change when using the Monitor together with the optional equipments
recommended by SHARP. In such cases, please check the temperature condition specified by the optional
equipments.
• Do not block any ventilation openings. If the temperature inside the Monitor rises, this could lead to a
malfunction.
• Do not place the Monitor on a device which generates heat.
200 [7-7/8]
Unit: mm [inch]
7 [5/16]
50
[2]
50 [2]
50
[2]

4
ENGLISHDEUTSCH ESPAÑOLITALIANO FRANÇAISРУССКИЙPOLSKI

29
Accessories/Accesorios/Accessoires/Zubehör/Accessori/Принадлежности/Akcesoria
ENGLISH
Supplied Accessories
Make sure the following
accessories are provided with
the product.
NOTE
• The supplied AC cord is
dedicated for this product. Do
not use it for other equipment.
• The illustrations above may vary
from the actual accessories,
which will not affect use of the
product.
1Remote control unit (x 1)
2“AAA” size battery for
remote control unit (x 2)
3A Stand body (x 1)
B Stand support (x 2)
C Screw for assembling
stand (x 8)
M5 (25 mm length)
D Screw for attaching stand
(x 4)
M5 (12 mm length)
4AC cord (Type BF x 1,
Type C x 1, Type A x 1)
AC code types differ
depends on region.
E Europe/United Kingdom
F North America
5AV terminal conversion cable
(x 1)
Setup Guide (this document) (x 1)
•
ESPAÑOL
Accesorios incluidos
Asegúrese de que los
siguientes accesorios se
suministran con el producto.
NOTA
• El cable de CA suministrado
debe usarse exclusivamente con
este producto. No lo use con
otros equipos.
• Las ilustraciones de arriba
pueden ser distintas a los
accesorios reales, lo que no
afectará al uso del producto.
1Mando a distancia (x 1)
2Pila de tipo “AAA” para el
mando a distancia (x 2)
3 A Base del soporte (x 1)
B Varilla de soporte (x 2)
C Tornillo para el montaje
del soporte (x 8)
M5 (25mm de longitud)
D Tornillo para fijar el
soporte (x 4)
M5 (12mm de longitud)
4Cable de CA (tipo BF x 1,
tipo C x 1, tipo A x 1)
Los tipos de códigos de CA
difieren según la región.
E Europa/Reino Unido
F Norteamérica
5Cable de conversión para la
terminal de AV
(x 1)
Guía de instalación (este
documento) (x 1)
•
FRANÇAIS
Accessoires fournis
S'assurer que les accessoires
suivants sont fournis avec le
produit.
REMARQUE
• Le cordon secteur fourni
est réservé à ce produit. Ne
pas l'utiliser pour d'autres
équipements.
• Les illustrations ci-dessus
peuvent varier des accessoires
réels, ce qui n'affectera pas
l'utilisation du produit.
1Télécommande (x 1)
2Piles AAA pour la
télécommande (x 2)
3 A Pied (x 1)
B Support du pied (x 2)
C Vis pour l'assemblage du
support (x 8)
M5 (25 mm de long)
D Vis pour fixer le support
(x 4)
M5 (12 mm de long)
4
Cordon secteur (Type BF x 1,
Type C x 1, Type A x 1)
Les codes CA diffèrent
d'une région à l'autre.
E Europe/Royaume-Uni
F Amérique du Nord
5câble de conversion du
terminal AV (x 1)
Guide d'installation (ce
document) (x 1)
DEUTSCH
Bereitgestelltes Zubehör
Stellen Sie sicher, dass das
folgende Zubehör mit dem
Produkt in der Lieferung
enthalten ist.
HINWEIS
• Das mitgelieferte Netzkabel ist
für dieses Produkt vorgesehen.
Verwenden Sie es nicht für
andere Geräte.
• Die obigen Abbildungen
können von den tatsächlichen
Zubehörteilen abweichen, welche
die Verwendung des Produkts
nicht beeinträchtigen.
1Fernbedienungseinheit (x 1)
2Batterien des Typs „AAA“ für
die Fernbedienungseinheit
(x 2)
3 A Standkörper (x 1)
B Standaufnahme (x 2)
C Schraube zur
Ständermontage (x 8)
M5 (25 mm Länge)
D Schraube zur
Ständeranbringung (x 4)
M5 (12 mm Länge)
4Netzkabel (Typ BF x 1,
Typ C x 1, Typ A x 1)
Die AC-Codetypen
unterscheiden sich je nach
Region.
E Europa/Grosbritannien
F Nordamerika
5AV-Anschluss-Adapterkabel
(x 1)
Installationsanleitung (dieses
Dokument) (x 1)
•
ITALIANO
Accessori in dotazione
Assicurarsi che i seguenti
accessori siano in dotazione
con il prodotto.
NOTA
• Il cavo CA in dotazione è
dedicato a questo prodotto.
Non utilizzarlo per altre
apparecchiature.
• Le illustrazioni riportate in
precedenza possono variare
dagli accessori effettivi, ciò non
influisce sull'uso del prodotto.
1Telecomando (x 1)
2Batterie tipo "AAA" per
telecomando (x 2)
3 A Corpo del piedistallo (x 1)
B Supporto del piedistallo
(x 2)
C Vite per assemblaggio
del supporto (x 8)
M5 (25 mm di lunghezza)
D Vite per applicazione del
supporto (x 4)
M5 (12 mm di lunghezza)
4Cavo di alimentazione CA
(tipo BF x 1, tipo C x 1,
tipo A x 1)
I tipi di codice AC variano in
base alla regione.
E Europa/Regno Unito
F Nord America
5Cavo di conversione
terminale AV (x 1)
Guida alla configurazione (il
presente documento) (x 1)
•
РУССКИЙ
Поставляемые
в комплекте
принадлежности
Убедитесь втом, что кизделию
прилагаются перечисленные
ниже принадлежности.
ПРИМЕЧАНИЕ
• Поставляемый вкомплекте шнур
электропитания специально
предназначен для этого изделия.
Не используйте его сдругим
оборудованием.
• Фактически используемые
принадлежности могут не совпадать
сизображенными на приведенных
выше иллюстрациях, что не влияет
на эксплуатацию изделия.
1 Пульт дистанционного
управления (x 1)
2
Батарейка размера "AAA"
для пульта дистанционного
управления (x 2)
3 A Основание подставки
(x 1)
B Опора подставки (x 2)
C Винт для сборки
подставки (x 8)
M5 (длиной 25 мм)
D Винт для крепления
подставки (x 4)
M5 (длиной 12 мм)
4 Шнур электропитания
(тип BF x 1, тип C x 1,
тип A x 1)
Код AC отличается в
зависимости от региона.
E Европа/Соединенное
Королевство
F Северная Америка
5 Переходный кабель для
терминала AV (x 1)
Руководство по установке
(этот документ) (x 1)
POLSKI
Załączone akcesoria
Upewnić się, że wraz z
urządzeniem wykorzystywane
są poniższe akcesoria.
UWAGA
• Załączony przewód AC jest
przeznaczony dla niniejszego
urządzenia. Nie używać go dla
innego sprzętu.
• Powyższe rysunki mogą
różnić się od rzeczywistych
akcesoriów, co nie ma wpływu
na użytkowanie urządzenia.
1Pilot (x 1)
2Bateria AAA do pilota (x 2)
3 A Podstawa (x 1)
B Wspornik podstawy (x 2)
C Śruba do stojaka
montażowego (x 8)
M5 (długość 25mm)
D Śruba do mocowania
stojaka (x 4)
M5 (długość 12mm)
4Przewód AC (typ BF x 1,
typ C x 1, typ A x 1)
Typy kodów AC różnią się w
zależności od regionu.
E Europa/Wielka Brytania
F Ameryka Północna
5Kabel AV (x 1)
Podręcznik konfiguracji (niniejszy
dokument) (x 1)
14
AF
E
C
B
D
25
3

30
ENGLISHDEUTSCH ESPAÑOLITALIANO FRANÇAISРУССКИЙPOLSKI

EN 1
Preparation and How to Use Remote Control Unit
Inserting Batteries into the Remote
Control Unit
1Open the battery cover on the back side of the
remote control unit.
• Lift the cover with your finger from the part with
the mark.
2Insert the supplied “AAA” size batteries.
• Make sure to insert the batteries all the way so
that they are not dislocated.
• Do not mix old and new batteries.
• Use two batteries of the same type.
• Insert the batteries from the (minus) side.
3Close the battery cover.
• Press the battery cover until it clicks.
• Make sure the battery cover is closed completely.
NOTE
Notes on using the remote control unit
• Do not apply impact on the remote control unit. Avoid water
and do not place the product in areas with high humidity.
• If the remote control unit occasionally does not respond, the
batteries may be running out. Replace them ahead of time.
The supplied batteries may run out in a short period of time
depending on the storage condition.
• Do not use rechargeable batteries (such as nickel metal
hydride batteries). It may lead to malfunctioning.
• Check the cell batteries of the remote control unit once in
six month for abnormality such as leakage and distortion.
The remote control may not function properly after a
leakage occurs.
1
2
3
30°
30°
18°
30°
17´ (5 m)
Remote control sensor
Range of Remote Control Operation
• Check the range and distance of both the remote
control unit and the Monitor, and press one button on
the remote control unit at a time.
CAUTION
Do not place objects in the area under the Monitor.
Obstacles may interrupt the receiver of the remote control and
may result in misoperation.
r
.

EN 2
ENGLISHDEUTSCH ESPAÑOLITALIANO FRANÇAISРУССКИЙPOLSKI
1
2R
L
3
CAUTION
• Since this product is heavy, be sure that
it is unpacked and carried by at least
two people. Carrying it by yourself may
lead to injury.
• Use a commercially available screwdriver
and tighten the screws securely.
• When using an electric screwdriver, set the
tightening torque to 2.0 N·m (20 kgf·cm).
Assembly of the Stand Unit
1Place the TOP-C packaging material
on a level surface as shown in the
illustration below.
2Install the stand mounting brackets
into the grooves of the packaging
material.
• Pay attention to their right/left sides
and orientation.
3Remove the front cover of the stand
base and install it according to the
shape of the packaging material.
• Remove 2 screws on the stand base.
• Slide the front cover along the shape
of the stand base.
Attaching the Stand
4Fix the stand base and stand
mounting brackets using the 8 screws
(large) for stand assembly. Then,
attach the front cover.
• Slide the front cover along the shape
of the stand base.
• Slide and attach the front cover in the
arrow direction in such way that the
"projections on the rear surface of the
front cover" are put into the "tabs on
the rear cover".
• Fix the front cover using 2 screws that
have been removed in Step 3 above.
• Do not use an electric screwdriver for
these screws. Tighten them slowly with
your hand.
5Prepare a table and lay the display
down on it.
• To prevent damage to the LCD panel
and LED part, place a soft cloth such
as a blanket on the table, etc. and lay
the display down on it.
• Do not remove the protective sheet of
the main body until the completion of
the installation.
6Insert the stand and fix it using 4
mounting screws (small) for the stand.
The attaching of the stand is now
complete.
When standing the TV main body
upright
• Be careful not to press the TV screen too
hard with fingers.
When removing the stand
• When moving this Monitor to another
location, remove the stand using the
reverse order of the attaching procedures
in "Attaching the Stand". Be careful of the
projection on the LED part of the front side
of the display.
• To prevent damage to the LCD panel
and LED part, place a soft cloth such as
a blanket on a table, etc. and place this
Monitor on it.
4
Gap between
the cover and
metal: About
1.6mm
6

EN 3
Connecting an 8K Video Device
Connecting with Four HDMI Cables (for 8K Output Compatible Device)
Connecting to an 8K output compatible device
• To connect the product to an 8K output (with 7680 x 4320
resolution) compatible device, use four Premium HDMI Cables.
• Connect so that the output signals of the 8K output compatible
device are output to the proper positions.
• The display positions for the HDMI input terminals are shown
on the right.
• INPUT7 (A to D) are terminals dedicated for 8K input.
• 8K video input terminals are not supported for multi-display.
• When input signals to INPUT7 (A to D) are all synchronized,
8K display is available.
• By factory default, the Monitor uses the audio to INPUT7-A.
• To change the setting, after switching to INPUT7, go to the Setup menu, select Setup > (Option) >
Terminal setting>INPUT7 audio select,and then select a terminal to input audio.
• Also refer to the operating instructions of the device to be connected.
• Commercially available Premium HDMI Cables are necessary.
• In the installation procedure, be careful not
to catch your fingers between the Monitor
set and the floor.
• Do not remove the stand from the
Monitor unless using an optional wall
mount bracket to mount it.
• After attaching the stand to the
Monitor, do not hold the stand when
you put up, set up, move or lay down
the Monitor.
Positions when holding the product
• When lifting or carrying, hold the product by the positions in the illustration, not by the stand or panel
surface.
Attaching the Stand (Continue)
INPUT7-A INPUT7-B
INPUT7-C INPUT7-D
CAUTION
• It is very dangerous to remove the
stand fixing screws while this Monitor is
standing as it can result in toppling over
of this Monitor.
To reduce loads on the
terminals and prevent
breakage, thread the HDMI
cables through the cable
clamps to secure.
Rear side of Monitor
Premium HDMI cable
(Commercial Item)
8K output compatible device
INPUT7
(8K signal terminal)

EN 4
ENGLISHITALIANO DEUTSCHESPAÑOL FRANÇAISTÜRKÇEРУССКИЙ
Connecting with Another Device
Connecting with an HDMI Cable
Connected to an HDMI terminal
HDMI output terminal-equipped device
Input 1, input 2, input 3,
input 4 terminals
Rear side of Monitor
HDMI cable
(commercial item)
To HDMI
output
terminal
Be sure to use a commercially available certified HDMI cable (high-speed type) that meets the
standards.
• Connect a 4K compatible device to input 1 of the Monitor. To view 4K 60p HDR/SDR video, connect with a Premium
HDMI Cable.
If a cable that does not meet the standards is used, image display, audio output, and AQUOS LINK may not be
performed properly or noises may occur in images.
NOTE
• See page EN 3 to connect to an 8K output compatible device.
Connecting an 8K Video Device (Continue)
Supported format
• 7680 x 4320 (24Hz, 25Hz, 30Hz, 50Hz, 60Hz)
How to switch to 8K video input
• PressINPUTon the remote control unit.While the
menu for input switching is displayed, usea/b/c/d
to select“INPUT7”and press ENTER.
Channel indication when 8K video input is used
• When 8K signal synchronized with INPUT7(A to D) is
input, “4320p” is indicated as the video information.
NOTE
• If a signal that is not supported by this Monitor is input,
“Out of range” is indicated. If this is the case, refer to the
operating instructions of your PC or other devices to set an
input signal supported by the Monitor.
• If the input signals are not synchronized, video images are
not displayed properly.
Supported audio signal
• Type:
Linear PCM
• Sampling frequency:
48kHz/44.1kHz/32kHz

EN 5
Connecting AC Cord
Choosing a power cord
AC code types differ depends on region.
TYPE C
Germany, France, Spain, Austria, Italy, Russia, Netherlands, Poland,
Sweden, and other continental European countries.
TYPE BF
United Kingdom
TYPE A
North America
NOTE
• If you are not sure of which type to use, contact your local service personnel.
• Illustration of the plug above may not be an exact resemblance of the actual plug.
Connecting AC Cord
Do not turn on the power before completing connection.
IMPORTANT
• Connect the plug of the AC cord securely so that it is not dislocated.
• Do not disconnect the power plug or turn off the power supply suddenly while the product is in use. It may result in product
damage.
Connect the supplied AC cord to “AC INPUT” of the Monitor, and connect the plug into the power outlet.
Power input terminal
Plug for TV main body Plug for outlet
• Place the Monitor in a location near
a power outlet and make sure the
power plug can be reached easily.
Power
outlet
Rear side of Monitor
NOTE
• Turning off the power of the Monitor may take a while. (This time is required for storing the Monitor's internal information to the
memory.)
Power consumption
• There is small power consumption while the AC cord is connected even after power has been turned off by the
power button of the Monitor.
Securing the connected cables and cord
• Pulling the cable connected to the Monitor forcefully by accident may damage the terminals. To reduce the load of
the terminals and prevent breakage, secure the cables using the cable tie.
11Attach the supplied cable tie and
bundle the cables using it.
2To loosen the cable tie, hold the lever
to release the lock and pull the cable
tie.

EN 6
ENGLISHITALIANO DEUTSCHESPAÑOL FRANÇAISTÜRKÇEРУССКИЙ
Introduction
Initial Installation
Perform the following steps before you
press POWER on the remote control unit.
1Insert the batteries into the remote
control unit.
2Plug in the AC cord to the AC outlet.
Easy Setup
1Press
a//c/dto select the
desired language listed on the screen,
and then press ENTER.
2Press
c/dto select "HOME" or
"STORE(DEMO)" , and then press
ENTER.
GB313WJSA
BCDA
EXIT
RETURN
ENTER
POWER
APPS
DISPLAY
Viewing the Built-in Operation Manual
You can display the built-in operation manual by selecting "Information" > "Manual" from the menu screen.
ENG 1-1

EN 7
Names of Monitor Parts and Remote Control Buttons
Parts of the Monitor
Front
POWER lamp
• White: ON
• Off: Power OFF
Brightness sensor/remote control receiver
=> Page EN 1
• Point the remote control unit toward this part.
Main body controls
If a message “The operation with remote control is prohibited” appears on the screen
Release the lock using the operation buttons on the main body.
1) Press the home button on the main body.
2) Select Setup using the volume buttons on the main body and then press the INPUT button.
3) Select Ecology > “Operation Lock” using the volume buttons and selection buttons, and
then press the INPUT button.
4) Select Off and press the INPUT button.
MENU button
forward/backward buttons
Volume (+/-) buttons
• On the Setup menu => “Right/Left cursor” button
• “+” button functions as “Right cursor”, and
“-” button functions as “Left cursor”.
Power button
• On the Setup menu => “Enter” button
INPUT button
• On the Setup menu => “Upward/Downward
cursor” button
• “” button functions as “Upward cursor”, and
“” button functions as “Downward cursor”.
Rear
Headphone jack
(I3.5 stereo mini jack)
• Audio can be output from the speakers even
when headphones are connected. (Refer to
“Menu Operation” in the built-in Operation
Manual.)
USB1 terminal
• Use this terminal to view photos, music, and
video stored in USB memory.
Input 7 A~D (HDMI)
• 8K signal terminal
USB2 terminal
Analog audio output terminal
(I3.5 stereo mini jack)
Input 6
Digital audio output terminal
(optical)
Input 5
• AV INPUT
• AUDIO IN FOR INPUT1/INPUT6/INPUT7/INPUT8
LAN terminal (10BASE-T/100BASE-TX)
• Use this terminal for IP control, etc.
Input 1 to 4 (HDMI)
Input 8
(HDMI)

EN 8
ENGLISHITALIANO DEUTSCHESPAÑOL FRANÇAISTÜRKÇEРУССКИЙ
Part Names
Remote Control Unit
GB313WJSA
BCDA
EXIT
RETURN
ENTER
POWER
APPS
DISPLAY
8
10
11
12
13
14
15
9
7
1
2
3
4
5
6
1POWER: Switch the Monitor power on or enter
standby.
2• (DOT): Used for setting.
3AUDIO: Select the audio mode during multichannel
audio.
4EXIT: Turn off the menu screen.
5VOL+/-: Set the volume.
6MUTE: Mute the sound.
7APPS: Display the Application menu.
8DISPLAY: Display the information.
90–9: Input number.
10 MENU: Display the menu screen.
11 INPUT: Select a Monitor input source.
12 RETURN: Return to previous menu screen.
13 a/b/c/d/ENTER: Select a desired item on the
screen.
14 CH: Select the next and previous channel.
15 A/B/C/D: Playback control.
Check the following before requesting repairs.
Problem Possible Solution
• Power is not turned on. • Check if the AC cord is connected properly and plugged securely into the
outlet.
• When the lamp is not lit, turn on the power using the power button on the
main body.
• An indication Temperature
or Temperature of Monitor
blinks, and power is turned off
automatically.
• The temperature of the Monitor has risen. Get rid of the causes of the
increased temperature (such as direct sunlight or hot air).
• Check if the Monitor is installed in a condition or location where the
temperature rise occurs easily. Do not cover the ventilation opening on the
back of the main body when installing.
• Frequently remove dust from internal equipment or ventilation opening if it
can be removed from the outside. For removing dust inside the equipment,
consult your dealer.
Troubleshooting

EN 9
Dealing with Problems Specifications, etc.
When Operation Becomes Unavailable
• When strong external noise (excessive static electricity, electrical surge of power supply due to lightening, etc.)
occurs or when wrong operation is performed, the Monitor may not be able to accept any operation.
• If this is the case, press the power button on the main body to turn off the power, turn on the power again, and then
perform the operation again.
• If the operation is still unavailable, hold down the power button on the main body for at least five seconds. After the
Monitor is shut off, wait for approximately one minute. Then press the power button again to turn on the power and
perform the operation again. Settings including channel settings, menus, and reservations are retained after this
procedure.
NOTE
• Since data loading is performed immediately after turning on the power, it will take a while until images are displayed on the
screen.
Checking System Status and Software Version
• You can check the status of the Monitor by confirming the software version or system status.
31Press MENU and select Setup using
a/b/c/dbuttons, and confirm with
ENTER.
2Press
a/b/c/dto select
(Information) > Identification, and
confirm with ENTER.
3Select "Start" and confirm with ENTER.
• The system status will be displayed.
Setting the Monitor on the Wall
SCREW
CABINET
DEPTH OF
MOUNTING HOLES
MOUNTING
HOLES
WALL MOUNT
UNIT
For the screws, refer to the table shown below.
Unit: inch
(mm)
Standard screws M8 (Use 1.25 pitch screws.)
Length (Depth of mounting holes) 15/32 (12)
Quantity 4 pcs.
NOTE
• To use this Monitor mounted on a wall, remove the cable tie as needed.
• Do not use screws that do not comply with the VESA standard screw specifications.
• Do not use screws that are longer than the standard length. Screws that are too long may cause damage to the inside of the
Monitor.
• Do not fasten the screws too firmly or loosely. This may damage the product or cause the product to fall, leading to personal
injury. SHARP is not liable for these kinds of accidents.
• SHARP is not liable for product damage or personal injury when a non-VESA or non-specified wall mount is used or the
consumer fails to follow the product installation instructions.
Do not install the wall mount kit while your Monitor is turned on. It may result in personal injury due to electric shock.

EN 10
ENGLISHDEUTSCH ESPAÑOLITALIANO FRANÇAISРУССКИЙPOLSKI

ENGLISH
IMPORTANT:
Toaidreportingincaseoflossortheft,pleaserecordthe
Monitor'smodelandserialnumbersinthespaceprovided.
ThenumbersarelocatedattherearandleftsideoftheMonitor.
ModelNo.:
SerialNo.:
WARNING: TO REDUCE THE RISK OF FIRE OR ELECTRIC
SHOCK, DO NOT EXPOSE THIS PRODUCT TO
RAIN OR MOISTURE.
CAUTION
RISKOFELECTRICSHOCK
DONOTOPEN
CAUTION:TOREDUCETHERISKOFELECTRICSHOCK,
DONOTREMOVECOVER(ORBACK).
NOUSER-SERVICEABLEPARTSINSIDE.
REFERSERVICINGTOQUALIFIEDSERVICE
PERSONNEL.
CAUTION:TOPREVENTELECTRICSHOCK,MATCHWIDEBLADEOFPLUGTOWIDE
SLOT,FULLYINSERT.
WARNING: FCCRegulationsstatethatanyunauthorizedchangesormodificationstothis
equipmentnotexpresslyapprovedbythemanufacturercouldvoidtheuser'sauthority
tooperatethisequipment.
CAUTION:ThisproductsatisfiesFCCregulationswhenshieldedcablesandconnectorsareusedto
connecttheunittootherequipment.Topreventelectromagneticinterferencewithelectric
appliancessuchasradiosandtelevisions,useshieldedcablesandconnectors
forconnections.
Thelightningflashwitharrow-head
symbol,withinanequilateral
triangle,isintendedtoalertthe
usertothepresenceof
uninsulated"dangerousvoltage"
withintheproduct'senclosurethat
maybeofsufficientmagnitudeto
constituteariskofelectricshock
topersons.
Theexclamationpointwithina
triangleisintendedtoalertthe
usertothepresenceofimportant
operatingandmaintenance
(servicing)instructionsinthe
literatureaccompanyingthe
product.
IMPORTANT INFORMATION
NOTE:
ThisequipmenthasbeentestedandfoundtocomplywiththelimitsforaClassAdigitaldevice,
pursuanttoPart15oftheFCCRules.Theselimitsaredesignedtoprovidereasonableprotection
againstharmfulinterferencewhentheequipmentisoperatedinacommercialenvironment.This
equipmentgenerates,uses,andcanradiateradiofrequencyenergyand,ifnotinstalledandusedin
accordancewiththeinstructionmanual,maycauseharmfulinterferencetoradiocommunications.
Operationofthisequipmentinaresidentialareaislikelytocauseharmfulinteferenceinwhichcase
theuserwillberequiredtocorrecttheinterferenceathisownexpense.
INFORMATION:
Thereisnoguaranteethatinterferencewillnotoccurinaparticularinstallation.Ifthisequipmentdoes
causeharmfulinterferencetoradioortelevisionreception,whichcanbedeterminedbyturningthe
equipmentoffandon,theuserisencouragedtotrytocorrecttheinterferencebyoneormoreofthe
followingmeasures:
Reorientorrelocatethereceivingantenna.
Increasetheseparationbetweentheequipmentandreceiver.
Connecttheequipmentintoanoutletonacircuitdifferentfromthattowhichthereceiverisconnected.
Consultthedealeroranexperiencedradio/TVtechnicianforhelp.
DECLARATION OF CONFORMITY:
SHARPCOMMERCIALLCDMonitor,MODEL8M-B80AX1U
ThisdevicecomplieswithPart15oftheFCCRules.Operationissubjecttothefollowingtwo
conditions:
(1)Thisdevicemaynotcauseharmfulinterference,and(2)thisdevicemustacceptanyinterference
received,includinginterferencethatmaycauseundesiredoperation.
RESPONSIBLEPARTY:
SHARPELECTRONICSCORPORATION
100ParagonDriveSuite#100
Montvale,NJ07645USA
ForBusinessCustomers:URLhttp://siica.sharpusa.com/
ForUSAcustomersonly
THREEYEAREND-USERCOMMERCIALAPPLICATIONLIMITEDWARRANTY
SHARPELECTRONICSCORPORATIONwarrantstothefirstenduserpurchaser(the“Purchaser”)thatthiscommercialapplication
Sharpbrandproduct(the“Product”),whenshippedinitsoriginalcontainer,willbefreefromdefectiveworkmanshipandmaterials,and
agreesthatitwill,foraperiodofthree(3)yearsfromthedateofpurchase,replacethedefectiveProductorpartthereofwithanewor
equivalentatnochargetothePurchaserfortheperiod(s)setforthbelow.
Inordertoenforcetherightsunderthislimitedwarranty,thePurchasershouldfollowthestepssetforthbelow.ThePurchasermust
beabletoprovideproofofpurchasetotheSharp,whichproofmustincludethedateofpurchase,modelandserialnumber
Totheextentpermittedbyapplicablestatelaw,thewarrantiessetforthareinlieuof,andexclusiveof,allotherwarranties,express
orimplied.SpecificallyALLOTHERWARRANTIESOTHERTHANTHOSESETFORTHABOVEAREEXCLUDED,ALLEXPRESS
ANDIMPLIEDWARRANTIESINCLUDINGTHEWARRANTIESOFMERCHANTABILITY,FITNESSFORUSE,ANDFITNESSFORA
PARTICULARPURPOSEARESPECIFICALLYEXCLUDED.IF,UNDERAPPLICABLESTATELAW,IMPLIEDWARRANTIESMAYNOT
VALIDLYBEDISCLAIMEDOREXCLUDED,THEDURATIONOFSUCHIMPLIEDWARRANTIESISLIMITEDTOTHEPERIOD(S)FROM
THEDATEOFPURCHASESETFORTHBELOW.THISWARRANTYGIVESYOUSPECIFICLEGALRIGHT.YOUMAYALSOHAVE
OTHERRIGHTSWHICHVARYFROMSTATETOSTATE.
ThewarrantiesgivenhereinshallbethesoleandexclusivewarrantiesgrantedbySharpandshallbethesoleandexclusiveremedy
availabletothePurchaserandonlyforthetimeperiodssetforthherein.Correctionofdefects,inthemannerandfortheperiodoftime
describedherein,shallconstitutecompletefulfillmentofallliabilitiesandresponsibilitiesofSharptothePurchaserwithrespecttothe
Product,andshallconstitutefullsatisfactionofallclaims,whetherbasedoncontract,negligence,strictliabilityorotherwise.
Exclusions-ThisLimitedWarrantydoesnotapplytoanycosmeticorconsumableitemsoftheProductoriftheserialnumberormodel
numberaffixedtotheProducthasbeenremoved,defaced,changed,alteredortamperedwith.ThisLimitedWarrantydoesnotcover
installationorsignalreceptionproblems.SharpdoesnotwarrantnorshallSharpbeliable,orinanywayresponsible,forProducts
whichhavebeensubjecttoabuse(including,butnotlimitedto,impropervoltage),accident,misuse,negligence,lackofreasonable
care,alteration,modification,tampering,improperinstallation,operationormaintenanceoranydamagesordefectsintheProduct
whichwerecausedbyrepairsorattemptedrepairsperformedbyanyoneotherthanaSharppersonnelorSharpauthorizedservicer.
ThisLimitedWarrantyalsoexcludesanydamagetoProductglassduetopressure,abrasion,scratchesoractionsotherwisebeyond
normaloperationoftheProduct.NorshallSharpbeliableorinanywayresponsibleforanyincidentalorconsequentialeconomicor
propertydamage.Somestatesdonotallowlimitsonwarrantiesoronremediesforbreachincertaintransactions;insuchstates,the
limitshereinmaynotapply.
THIS LIMITED WARRANTY IS VALID ONLY IN THE FIFTY (50) UNITED STATES, THE DISTRICT OF COLUMBIA, AND PUERTO RICO.
Model Specific Section
Your Product Model Number & Description: 8M-B80AX1U
CommercialLCDMonitor
(BesuretohavethisinformationavailablewhenyouneedserviceforyourProduct.)
Warranty Period for this Product: Three(3)yearsfromdateofpurchase.
Additional Exclusions from
Warranty Coverage (if any):
Anylaborandmaterialsrequiredtoremove,packageand/orreinstalltheProductare
theresponsibilityofthePurchaser.
ImageRetentionresultingfromafixedimagebeingdisplayedforlongperiodsof
timeisnotcoveredbythisLimitedWarranty(seeOperationManualonhowto
preventthis).
What to do to Obtain Service: ToobtainservicecallSharptollfreeat1-888-GO-SHARP.Sharpwillprovide
instructionsonserviceoptionsavailableforyourProduct.BesuretohaveModel,
SerialNumberandProofofPurchaseavailablewhencontactingSharp.
IfitisdeemedtheProductmeetsLimitedWarrantyterms,Sharpwillprovide
instructionsforreturnandreplacement.Pleasebesuretoadheretothesafety
guidelinesinyourProductManualanduseadequatenumberofpersonsto
carrytheProduct.PleaseensurethattheProductistransportedcarefullyinthe
packagingprovidedwiththereplacementProductandensurethattheProductis
coveredtoavoidscratchesanddamage.Sharpshallnotberesponsibleforlost,
stolenormisdirectedshipmentsorfordamagetotheproductincurredduring
shipping.
TO OBTAIN PRODUCT INFORMATION OR ACCESSORIES, VISIT www.SharpUSA.com
LIMITED WARRANTY
SharpElectronicsofCanadaLtd.(“Sharp”)warrantstothefirstpurchaserforthisSharpbrandproduct(“Product”),whenshippedinits
originalcontainerandsoldordistributedinCanadabySharporbyanauthorizedSharpdealer,andProductwasnotsold“asis ”or“sales
final”thattheProductwillduringtheapplicablewarrantyperiod,befreefromdefectsinmaterialandworkmanship,andwithintheapplicable
warrantyperiod,willeitherrepairthedefectiveProduct,providearefundtothefirstpurchaser,orprovidethefirstpurchaserareplacement
ofthedefectiveProduct.
Conditions:Thislimitedwarrantyshallnotapplyto:
(a)Anydefectscausedorrepairsrequiredasaresultofabusiveoperation,negligence,accident,improperinstallationorina ppropriateuse
asoutlinedintheownerʼsmanualorotherapplicableProductdocumentation.
(b)AnydefectscausedorrepairsrequiredasaresultofanyProductthathasbeentamperedwith,modified,adjustedorrepairedbyany
personotherthanSharp,aSharpauthorizedservicecentreoraSharpauthorizedservicingdealer.
(c)AnydefectscausedorrepairsrequiredasaresultoftheuseoftheProductwithitemsnotspecifiedorapprovedbySharp,includingbut
notlimitedtochemicalcleaningagentsorotherforeignsubstances.
(d)Anyreplacementofaccessories,consumableorperipheralitemsrequiredthroughnormaluseoftheProduct,includingbutnotlimited
to,remotecontrols,ACadapters,batteries,cables.
(e)AnycosmeticdamagetotheProductsurfaceorexteriorthathasbeendefacedorcausedbynormalwearandtear.
(f) Anydefectscausedorrepairsrequiredasaresultofdamagecausedbyanyexternalorenvironmentalconditions,including butnot
limitedto,transmissionline/powerlinevoltageorliquidspillageoractsofGod.
(g)IftheserialnumberormodelnumberaffixedtoProducthasbeenremoved,defaced,changed,alteredortamperedwith.
(h)Anyinstallation,delivery,setupand/orprogrammingcharges
How to get service:WarrantyservicemaybeobtainedbycontactingSharpandprovidingproofofpurchase(includingdateofpurchase)
andacopyofthislimitedwarrantystatement,asnotedbelow.AtSharpʼsdiscretion,malfunctioningproductsmaybereplacedbya
refurbishedmodelormayberepaired.Theservicermayifnecessarytaketheunitforrepairattheservicer'sfacility.Nootherperson
(includinganySharpdealerorservicecentre)isauthorizedtoextend,enlargeortransferthiswarrantyonbehalfofSharp.Thepurchaser
willberesponsibleforanyandallremoval,reinstallation,transportationandinsurancecostsincurred.
Theexpresswarrantiesinthislimitedwarrantyare,exceptforpurchasersdomiciledinQuebec,inlieuofand,excepttotheextentprohibited
byapplicablelaw,Sharp disclaimsallotherwarrantiesandconditions,expressorimplied,whetherarising bylaw,statute,bycourseof
dealingorusageoftrade,including,withoutlimitation,impliedwarrantiesorconditionsofmerchantabilityand/orquality,fitnessforaparticu-
laruseorpurpose,and/ornon-infringement.Limitations (notapplicabletopurchasersdomiciledinQuebectotheextentprohibitedunder
Quebeclaw):(a)Sharpshallnotbeliableforanyincidental,special,consequential,economic,exemplaryorindirectdamagesofanykindor
nature(includinglostprofitsordamagesforlossoftimeorlossofuseorlossofdata)arisingfromorinanyconnectionwiththeuseor
performanceofaProductorafailureofaProduct,evenifSharpisawareoforhasbeenadvisedofthepossibilityofsuchdamages;(b)the
remediesdescribedinthislimitedwarrantyconstitutecompletefulfillmentofallobligationsandresponsibilitiesofSharptothepurchaserwith
respecttotheProductandshallconstitutefullsatisfactionofallclaims,whetherbasedoncontract,negligence,strictliabilityorotherwise.
Someprovincesmaynotallowtheexclusionorlimitationofcertaindamages,orlimitsonthedurationorvoidingofimpliedwarrantiesor
conditions;insuchprovinces,theexclusionsandlimitshereinmaynotapply.Thislimitedwarrantyis,exceptforpurchasersdomiciledin
Quebec,governedbythelawsoftheProvinceinCanadainwhichthepurchaserhaspurchasedtheProduct.Forpurchasersdomiciledin
QuebecthislimitedwarrantyisgovernedbythelawsofQuebec.
WARRANTY PERIODS (calculatedfromthedateoforiginalpurchase): Parts&Labour(exceptionsnoted)
sraey3ROTINOMDCL
To obtain the name and address of the nearest Authorized Sharp Dealer, or for more information on this
Limited Warranty, Sharp Extended Warranty Offers, Sharp Canada Products or Accessory Sales, please
contact Sharp
By writing to Sharp Electronics Of Canada Ltd. at 335 Britannia Road East Mississauga,
Ontario L4Z 1W9
Calling: at 1-866-731-7730
Visiting our Web site: www.sharp.ca
Revision: 01/04/2017
Commercial Electronics Products
GARANTIE LIMITÉE
Produits électroniques commerciaux
Bravo! Vous venez de faire un excellent achat!
SharpÉlectroniqueduCanadaLtée(«Sharp»)garantitàlʼacheteurinitialdeceproduitdemarqueSharp(le«produit»)que, sʼilest
emballédanssoncontenantoriginaletsʼilestvenduoudistribuéauCanadaparSharpouparundétaillantautoriséSharp,etsʼilnʼapas
étévendu«telquel»ousʼilnesʼagissaitpasdʼune«venteferme»,leproduitestexemptdedéfautdefabricationetdevicedematériau
pourlapériodedegarantiestipuléeetsʼengageauprèsdelʼacheteurinitialetdurantladitepériodeàréparerladéfectuosité,àlui
accorderunremboursementouàremplacerleproduitdéfectueux.
(a)Auxdommagescausésouauxréparationsrequisessurlesappareilsquiontfaitlʼobjetdʼunemploiabusif,denégligence,d ʼun
accident,dʼuneinstallationinadéquateoudʼuneutilisationnonappropriée,telquʼilestmentionnédanslemanueldupropriétaireou
danstouteautredocumentationapplicablesurleproduit;
(b)AuxdommagescausésouauxréparationsrequisessurlesproduitsSharptrafiqués,modifiés,réglésouréparésparuneentitéautre
queSharp,uncentreagréédeserviceSharpouundétaillantautoriséauserviceSharp;
(c)Auxdommagescausésouauxréparationsrequisesàlasuitedelʼutilisationduproduitavecdesarticlesnondésignésouapprouvés
parSharp,ycompris,maissansenêtrelimité,desagentsdenettoyagechimiquesoudʼautressubstancesétrangères;
(d)Auremplacementdesaccessoires,desarticlesconsommablesoudespériphériques,devenunécessaireàlasuitedʼuneutilisation
normaleduproduit,ycompris,maissansenêtrelimité,lestélécommandes,lesadaptateursc.a.,lespilesetlescâbles;
(e)Auxdéfautscosmétiquesàlasurfaceouauboîtierextérieurduproduit,etquisontattribuablesàladétériorationouàlʼusurerésultant
dʼunusagenormal;
(f) Auxdéfectuositéscauséesouauxréparationsrequisesàlasuitededommagescauséspardesconditionsextérieuresetrelativesà
lʼenvironnement,ycompris,maissansenêtrelimité,unetensiondelaligneélectriqueoudetransmissiontropélevée,duliquide
répanduouunecatastrophenaturelle;
(g)Silenumérodesérieoudemodèleindiquésurleproduitaétéenlevé,maquillé,modifié,altéréoutrafiqué;
(h)Auxcoûtsdʼinstallation,delivraison,deconfigurationet(ou)deprogrammation.
Pour obtenir un service après-vente :LaréparationsousgarantiepeutêtreobtenueencommuniquantavecSharpetenfournissantla
preuvedʼachat(surlaquelleestindiquéeladatedʼachat)etunecopiedelaprésentegarantielimitée,commeilestindiquéci-après.Àla
discrétiondeSharp,lesproduitsdéfectueuxsontsoitremplacésparunmodèleremisàneuf,soitréparés.Letechnicienpeut,aubesoin,
ramenerlʼappareilàsonatelierpourenfairelaréparation.Aucuneautreentité(ycomprislesdétaillantsetlescentresde serviceSharp)
nʼestautoriséeàprolongerladuréedelagarantie,àfournirdesgarantiesautresouàtransférercettegarantieaunomdeSharp.
Lʼacheteurdoitassumertouslescoûtsdedémontage,deréinstallation,detransportetdʼassurancedelʼappareil.
Lesgarantiesexpressesdelaprésentegarantielimitéeremplacent,saufpourlesacheteursdomiciliésauQuébec,etSharpdécline,à
lʼexceptiondescasoùlaloienvigueurlʼinterdit,touteslesautresgarantiesetconditions,expressesouimplicites,découlantdelaloi,
dʼunrèglement,delaconduitehabituelleoudelʼusageducommerce,ycompris,maissansenêtrelimité,lesgarantiesoules conditions
implicitesdequalitémarchandeetdʼadaptabilitéàuneutilisationouàunefinparticulière,et/oudʼabsencedecontrefaçon.Limites (non
aucun
casresponsabledesdommagesaccessoires,spéciaux,consécutifs,économiques,exemplairesouindirectsdequelquetypeounature
quecesoit(ycomprislapertedeprofitsoulesdommagesparsuitedelapertedetemps,dʼutilisationoudedonnées)découlantde
lʼutilisationoudurendementdʼunproduitoudeladéfectuositédʼunproduit,mêmesiSharpestinforméouaétéavisédelapossibilité
bligations
etresponsabilitésdeSharpenverslʼacheteuràlʼégardduproduitetconstitueralasatisfactionentièredetouteslesréclamations,
quʼellessoientenfonctiondʼuncontrat,dʼunenégligence,dʼuneresponsabilitéstricteouautrement.;Danscertainesprovinces,ilest
interditdʼexclureoudelimiterlʼapplicationdecertainsdommagesoudecertaineslimitessurladuréeoulʼannulationdecertaines
garantiesouconditionsimplicite.Parconséquent,danscesprovinces,lesexclusionsetleslimitesindiquéesauxprésentespeuventne
passʼappliquer.Laprésentegarantielimitéeest,saufpourlesacheteursdomiciliésauQuébec,régieparlesloisdelaprovince
canadiennedanslaquellelʼacheteuraacquisleproduit.PourlesacheteursdomiciliésauQuébec,laprésentegarantielimitée estrégie
parlesloisduQuébec.
PÉRIODES DE GARANTIE Piècesetmain-dʼœuvre(exceptionsrelevées)
sna3DCLRUETINOM
Pour connaître le nom et l’adresse du détaillant autorisé Sharp le plus près, ou pour obtenir davantage de
renseignements sur la présente garantie limitée, sur les offres de garantie prolongée de Sharp ou sur les ventes
de produits ou d’accessoires Sharp, veuillez communiquer avec Sharp :
En écrivant à Sharp Électronique du Canada Ltée, 335 Britannia Road East,
Mississauga (Ontario) L4Z 1W9
En appelant au 1-866-731-7730
En visitant notre site Web : www.sharp.ca
Révision: 2017-01-04
IMPORTANT INFORMATION
FCC Compliance Statement
Thisdevicecomplieswithpart15oftheFCCRules.Operationissubjecttothefollowingtwoconditions:
(1)Thisdevicemaynotcauseharmfulinterference,and(2)thisdevicemustacceptanyinterference
received,includinginterferencethatmaycauseundesiredoperation.
Wireless Radio
ForproductavailableintheUSA/Canadamarket,onlychannel1‒11canbeoperated.Selectionof
otherchannelsisnotpossible.Thisdeviceisgoingtobeoperatedin2.412‒2.462GHzfrequencyrange.
Important: Anychangesormodificationsnotexpresslyapprovedbythepartyresponsiblefor
compliancecouldvoidtheuserʼsauthoritytooperatetheequipment.
FCC Radiation Exposure Statement: ThisequipmentcomplieswithFCCradiationexposurelimitsset
forthforanuncontrolledenvironment.Thisequipmentshouldbeinstalledandoperatedwithminimum
distance20cmbetweentheradiator&yourbody.
Industry Canada Statement
ThisClassAdigitalapparatuscomplieswithCANICES-003(A)/NMB-3(A)
Wireless Radio
ForproductavailableintheUSA/Canadamarket,onlychannel1‒11canbeoperated.Selectionof
otherchannelsisnotpossible.
Thedevicecouldautomaticallydiscontinuetransmissionincaseofabsenceofinformationtotransmit,
oroperationalfailure.
Notethatthisisnotintendedtoprohibittransmissionofcontrolorsignalinginformationortheuseof
repetitivecodeswhererequiredbythetechnology.
Important: Anychangesormodificationsnotexpresslyapprovedbythepartyresponsiblefor
compliancecouldvoidtheuserʼsauthoritytooperatetheequipment.
IC Radiation Exposure Statement: ThisdevicecomplieswithICRSS-210rules;Operationissubject
tothefollowingtwoconditions:
(1)Thisdevicemaynotcauseharmfulinterference,and(2)thisdevicemustacceptinterference
recieved,includinginterferencethatmaycauseundesiredoperation.
"NotetoCATVsysteminstaller:ThisreminderisprovidedtocalltheCATVsysteminstaller'sattention
toArticle820oftheNationalElectricalCodethatprovidesguidelinesforpropergroundingand,in
particular,specifiesthatthecablegroundshallbeconnectedtothegroundingsystemofthebuilding,
asclosetothepointofcableentryaspractical."
TCAUZA805WJZZ
ThankyouforyourpurchaseoftheSharpCommercialLCDMonitor.Toensuresafetyandmany
yearsoftrouble-freeoperationofyourproduct,pleasereadtheImportantSafetyInstructions
carefullybeforeusingthisproduct.
IMPORTANT SAFETY INSTRUCTIONS
Electricityisusedtoperformmanyusefulfunctions,butitcanalsocausepersonalinjuriesand
propertydamageifimproperlyhandled.Thisproducthasbeenengineeredandmanufacturedwith
thehighestpriorityonsafety.However,improperusecanresultinelectricshockand/orfire.Inorder
topreventpotentialdanger,pleaseobservethefollowinginstructionswheninstalling,operatingand
cleaningtheproduct.ToensureyoursafetyandprolongtheservicelifeofyourCommercialLCD
Monitor,pleasereadthefollowingprecautionscarefullybeforeusingtheproduct.
1)Readtheseinstructions.
2)Keeptheseinstructions.
3)Heedallwarnings.
4)Followallinstructions.
5)Donotusethisapparatusnearwater.
6)Cleanonlywithdrycloth.
7)Donotblockanyventilationopenings.Installinaccordancewiththemanufacturer'sinstructions.
8)Donotinstallnearanyheatsourcessuchasradiators,heatregisters,stoves,orotherapparatus
(includingamplifiers)thatproduceheat.
9)
Donotdefeatthesafetypurposeofthepolarizedorgrounding-typeplug.Apolarizedplughastwo
bladeswithonewiderthantheother.Agroundingtypeplughastwobladesandathirdgrounding
prong.Thewidebladeorthethirdprongareprovidedforyoursafety.Iftheprovidedplugdoesnotfit
intoyouroutlet,consultanelectricianforreplacementoftheobsoleteoutlet.
10)Protectthepowercordfrombeingwalkedonorpinchedparticularlyatplugs,convenience
receptacles,andthepointwheretheyexitfromtheapparatus.
11)Onlyuseattachments/accessoriesspecifiedbythemanufacturer.
12)Useonlywiththecart,stand,tripod,bracket,ortablespecifiedbythemanufacturer,or
soldwiththeapparatus.Whenacartisused,usecautionwhenmovingthecart/
apparatuscombinationtoavoidinjuryfromtip-over.
13)Unplugthisapparatusduringlightningstormsorwhenunusedforlongperiodsoftime.
14)Referallservicingtoqualifiedservicepersonnel.Servicingisrequiredwhenthe
apparatushasbeendamagedinanyway,suchaspower-supplycordorplugisdamaged,liquid
hasbeenspilledorobjectshavefallenintotheapparatus,theapparatushasbeenexposedto
rainormoisture,doesnotoperatenormally,orhasbeendropped.
Additional Safety Information
15)
PowerSourcesThisproductshouldbeoperatedonlyfromthetypeofpowersourceindicated
onthemarkinglabel.Ifyouarenotsureofthetypeofpowersupplytoyourhome,consultyour
productdealerorlocalpowercompany.Forproductsintendedtooperatefrombatterypower,or
othersources,refertotheoperatinginstructions.
16)OverloadingDonotoverloadwalloutlets,extensioncords,orintegralconveniencereceptacles
asthiscanresultinariskoffireorelectricshock.
17)ObjectandLiquidEntryNeverpushobjectsofanykindintothisproductthroughopeningsas
theymaytouchdangerousvoltagepointsorshort-outpartsthatcouldresultinafireorelectric
shock.Neverspillliquidofanykindontheproduct.
18)DamageRequiringServiceUnplugthisproductfromthewalloutletandreferservicingto
qualifiedservicepersonnelunderthefollowingconditions:
a)WhentheACcordorplugisdamaged,
b)Ifliquidhasbeenspilled,orobjectshavefallenintotheproduct,
c)Iftheproducthasbeenexposedtorainorwater,
d)
Iftheproductdoesnotoperatenormallybyfollowingtheoperatinginstructions.
Adjustonlythosecontrolsthatarecoveredbytheoperatinginstructionsasanimproperadjustmentof
othercontrolsmayresultindamageandwilloftenrequireextensiveworkbyaqualifiedtechnicianto
restoretheproducttoitsnormaloperation,
e)Iftheproducthasbeendroppedordamagedinanyway,and
f)Whentheproductexhibitsadistinctchangeinperformance-thisindicatesaneedfor
service.
19)ReplacementPartsWhenreplacementpartsarerequired,besuretheservicetechnicianhas
usedreplacementpartsspecifiedbythemanufacturerorhavethesamecharacteristicsasthe
originalpart.Unauthorizedsubstitutionsmayresultinfire,electricshock,orotherhazards.
20)SafetyCheckUponcompletionofanyserviceorrepairstothisproduct,asktheservice
techniciantoperformsafetycheckstodeterminethattheproductisinproperoperating
condition.
21)WallorceilingmountingWhenmountingtheproductonawallorceiling,besuretoinstallthe
productaccordingtothemethodrecommendedbythemanufacturer.
•WaterandMoistureDonotusethisproductnearwater-forexample,nearabathtub,washbowl,
kitchensink,orlaundrytub;inawetbasement;ornearaswimmingpool;andthelike.
•StandDonotplacetheproductonanunstablecart,stand,tripodortable.Placingtheproductonan
unstablebasecancausetheproducttofall,resultinginseriouspersonalinjuriesaswellasdamagetothe
product.Useonlyacart,stand,tripod,bracketortablerecommendedbythemanufacturerorsoldwith
theproduct.Whenmountingtheproductonawall,besuretofollowthemanufacturer'sinstructions.Use
onlythemountinghardwarerecommendedbythemanufacturer.
•SelectingthelocationSelectaplacewithnodirectsunlightandgoodventilation.
•VentilationTheventsandotheropeningsinthecabinetaredesignedforventilation.Donotcover
orblocktheseventsandopeningssinceinsufficientventilationcancauseoverheatingand/orshorten
thelifeoftheproduct.Donotplacetheproductonabed,sofa,rugorothersimilarsurface,sincethey
canblockventilationopenings.Thisproductisnotdesignedforbuilt-ininstallation;donotplacethe
productinanenclosedplacesuchasabookcaseorrack,unlessproperventilationisprovidedorthe
manufacturer'sinstructionsarefollowed.
•Thefrontpanelusedinthisproductismadeofglass.Therefore,itcanbreakwhentheproductisdropped
orappliedwithimpact.Becarefulnottobeinjuredbybrokenglasspiecesincasethepanelbreaks.
•HeatTheproductshouldbesituatedawayfromheatsourcessuchasradiators,heatregisters,
stoves,orotherproducts(includingamplifiers)thatproduceheat.
•TheLiquidCrystalpanelisaveryhightechnologyproductwith33,177,600pixels,givingyoufinepicture
details.Occasionally,afewnon-activepixelsmayappearonthescreenasafixedpointofblue,greenor
red.Pleasenotethatthisdoesnotaffecttheperformanceofyourproduct.
•LightningForaddedprotectionforthisMonitorequipmentduringalightningstorm,orwhenitisleft
unattendedandunusedforlongperiodsoftime,unplugitfromthewalloutlet.Thiswillpreventdamage
totheequipmentduetolightningandpower-linesurges.
•PowerLinesAnoutsideantennasystemshouldnotbelocatedinthevicinityofoverheadpower
linesorotherelectriclightorpowercircuits,orwhereitcanfallintosuchpowerlinesorcircuits.When
installinganoutsideantennasystem,extremecareshouldbetakentokeepfromtouchingsuchpower
linesorcircuitsascontactwiththemmightbefatal.
•Topreventfire,neverplaceanytypeofcandleorflamesonthetoporneartheMonitorset.
•Topreventfireorshockhazard,donotplacetheACcordundertheMonitorsetorotherheavyitems.
•Donotdisplayastillpictureforalongtime,asthiscouldcauseanafterimagetoremain.
•Topreventfireorshockhazard,donotexposethisproducttodrippingorsplashing.
Noobjectsfilledwithliquids,suchasvases,shouldbeplacedontheproduct.
•Donotinsertforeignobjectsintotheproduct.Insertingobjectsintheairventsorother
openingsmayresultinfireorelectricshock.Exercisespecialcautionwhenusingthe
productaroundchildren.
Precautions when transporting the Monitor
•WhentransportingtheMonitor,nevercarryitbyholdingorotherwiseputting
pressureontothedisplay.BesuretoalwayscarrytheMonitorbytwopeople
holdingitwithtwohands.
•WhentransportingtheMonitor,nevercarryitbystandbase.
IMPORTANT SAFETY INSTRUCTIONS
Caring for the cabinet
•Useasoftcloth(cotton,flannel,etc.)andgentlywipethesurfaceofthecabinet.
•Usingachemicalcloth(wet/drysheettypecloth,etc.)maydeformthecomponentsofthemainunitcabinet
orcausecracking.
•Wipingwithahardclothorusingstrongforcemayscratchthesurfaceofthecabinet.
•Ifthecabinetisverydirty,wipewithasoftcloth(cotton,flannel,etc.)soakedinneutraldetergentdiluted
withwaterandthoroughlywrungout,andthenwipewithasoftdrycloth.
•Avoidusingbenzene,thinner,andothersolvents,asthesemaydeformthecabinetandcausethepaint
topeeloff.
•Donotapplyinsecticidesorothervolatileliquids.
Also,donotallowthecabinettoremainincontactwithrubberorvinylproductsforalongperiodoftime.
Plasticizersinsidetheplasticmaycausethecabinettodeformandcausethepainttopeeloff.
Caring for the front panel
•TurnoffthemainpowerandunplugtheACcordfromthewalloutletbeforehandling.
•Gentlywipethesurfaceofthefrontpanelwithasoftcloth(cotton,flannel,etc.).
Toprotectthefrontpanel,donotuseadirtycloth,liquidcleaners,orachemical
cloth(wet/drysheettypecloth,etc.).Thismaydamagethesurfaceofthefront
panel.
•Wipingwithahardclothorusingstrongforcemayscratchthesurfaceofthefront
panel.
•Useasoftdampclothtogentlywipethefrontpanelwhenitisreallydirty.(Itmayscratchthesurfaceof
thefrontpanelwhenwipedstrongly.)
•Ifthefrontpanelisdusty,useananti-staticbrush,whichiscommerciallyavailable,tocleanit.
•Toavoidscratchingtheframeorscreen,pleaseuseasoft,lintfreeclothforcleaning.Approvedcleaning
clothsareavailabledirectlyfromSharpinsingle(00Z-LCD-CLOTH)ortriple(00Z-LCD-CLOTH-3)packs.
Call1-877-PRO-ADV1(1-877-776-2381)forordering,orVISIThttp://siica.sharpusa.com/
Do not install the Monitor in a location in which it will be subject to water drops
such as underneath an air conditioning unit or in the vicinity of a humidifier
•WaterdropsfallingontotheMonitorandwaterenteringinsideitmayresultinfire,electricshock,or
malfunctions.
•WerecommendthatyouinstalltheMonitoratleast
3.3ft(1m)awayfromtheoutletofanairconditioner.
Morethan3.3ft(1m).
Especially for child safety
‒ DonʼtallowchildrentoclimbonorplaywiththeMonitor.
‒ DonʼtplacetheMonitoronfurniturethatcaneasilybeusedassteps,suchasachestofdrawers.
‒ Rememberthatchildrencanbecomeexcitedwhilewatchingaprogram,especiallyona“larger
thanlife”Monitor.CareshouldbetakentoplaceorinstalltheMonitorwhereitcannotbepushed,
pulledover,orknockeddown.
‒ CareshouldbetakentorouteallcordsandcablesconnectedtotheMonitorsothattheycannot
bepulledorgrabbedbycuriouschildren.
WARNING
Neverplaceamonitorsetinanunstablelocation.Amonitorsetmayfall,causingseriouspersonal
injuryordeath.
Manyinjuries,particularlytochildren,canbeavoidedbytakingsimpleprecautionssuchas:
‒ Usingcabinetsorstandsrecommendedbythemanufacturerofthemonitorset.
‒ Onlyusingfurniturethatcansafelysupportthemonitorset.
‒ Ensuringthemonitorsetisnotoverhangingtheedgeofthesupportingfurniture.
‒ Notplacingthemonitorsetontallfurniture(forexample,cupboardsorbookcases)without
anchoringboththefurnitureandthemonitorsettoasuitablesupport.
‒ Notplacingthemonitorsetonclothorothermaterialsthatmaybelocatedbetweenthemonitor
setandsupportingfurniture.
‒ Educatingchildrenaboutthedangersofclimbingonfurnituretoreachthemonitorsetorits
controls.
Ifyourexistingmonitorsetisbeingretainedandrelocated,thesameconsiderationsasaboveshould
beapplied.
FCC
Thisdevicecomplieswithpart15oftheFCCRules.Operationissubjecttothefollowingtwoconditions:
(1)Thisdevicemaynotcauseharmfulinterference,and(2)thisdevicemustacceptanyinterferencereceived,including
interferencethatmaycauseundesiredoperation.Changesormodificationsnotexpresslyapprovedbytheparty
responsibleforcompliancecouldvoidtheuserʼsauthoritytooperatetheequipment.TocomplywiththeFCCRF
exposurecompliance
requirements,thisdeviceanditsantennamustnotbeco-locatedoroperatedinconjunctionwithanyotherantennaor
transmitter.
DEAR SHARP CUSTOMER
Printed in China
TCAUZA805WJZZ
This manual suits for next models
1
Table of contents
Other Sharp Monitor manuals

Sharp
Sharp PN-L803CA User guide

Sharp
Sharp PN-HW751 User manual

Sharp
Sharp aquos PN-L703B User guide

Sharp
Sharp AQUOS 4T-C65DL1X Manual

Sharp
Sharp PN-H801 User guide

Sharp
Sharp InGlass PN-LA862 User manual

Sharp
Sharp PN-S525P - 52" LCD Flat Panel Display User manual

Sharp
Sharp PN-C805B User guide

Sharp
Sharp PN-S525 User manual

Sharp
Sharp PN-T321 User manual

Sharp
Sharp PN-65TH1 User guide

Sharp
Sharp PN-E471 User manual

Sharp
Sharp LL-S201A User manual

Sharp
Sharp PN-V602 User guide

Sharp
Sharp PN-60TW3A User manual

Sharp
Sharp LL-T17A4-H User manual

Sharp
Sharp PN-V601A User manual

Sharp
Sharp LCD MONITOR User manual

Sharp
Sharp PN-K321 User manual

Sharp
Sharp PN-H701 User guide