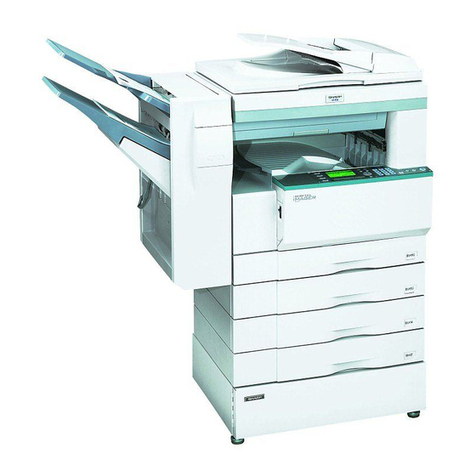
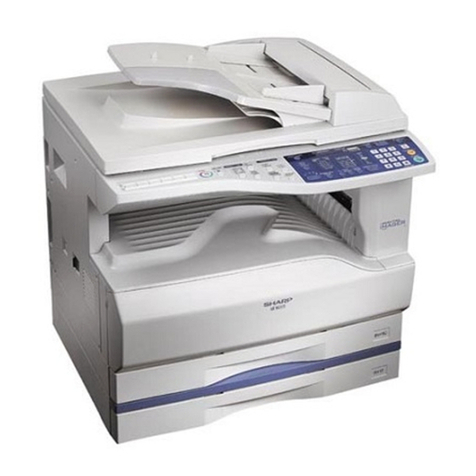
Sharp AR-C200P - Color Laser Printer User manual

Network Interface Guide
Digital full colour Printer
Model
AR-C200P

1
PREFACE
Every effort has been made to ensure that the information in this document is complete,
accurate, and up-to-date. The manufacturer assumes no responsibility for the results of
errors beyond its control. The manufacturer also cannot guarantee that changes in
software and equipment made by other manufacturers and referred to in this guide will
not affect the applicability of the information in it. Mention of software products
manufactured by other companies does not necessarily constitute endorsement by the
manufacturer.
While all reasonable efforts have been made to make this document as accurate and
helpful as possible, we make no warranty of any kind, expressed or implied, as to the
accuracy or completeness of the information contained herein.
Copyright © 2004. All rights reserved.
Microsoft, MS-DOS and Windows are registered trademarks of Microsoft Corporation.
Apple, Macintosh, Mac and Mac OS are registered trademarks of Apple Computer.
Other product names and brand names are registered trademarks or trademarks of
their proprietors.
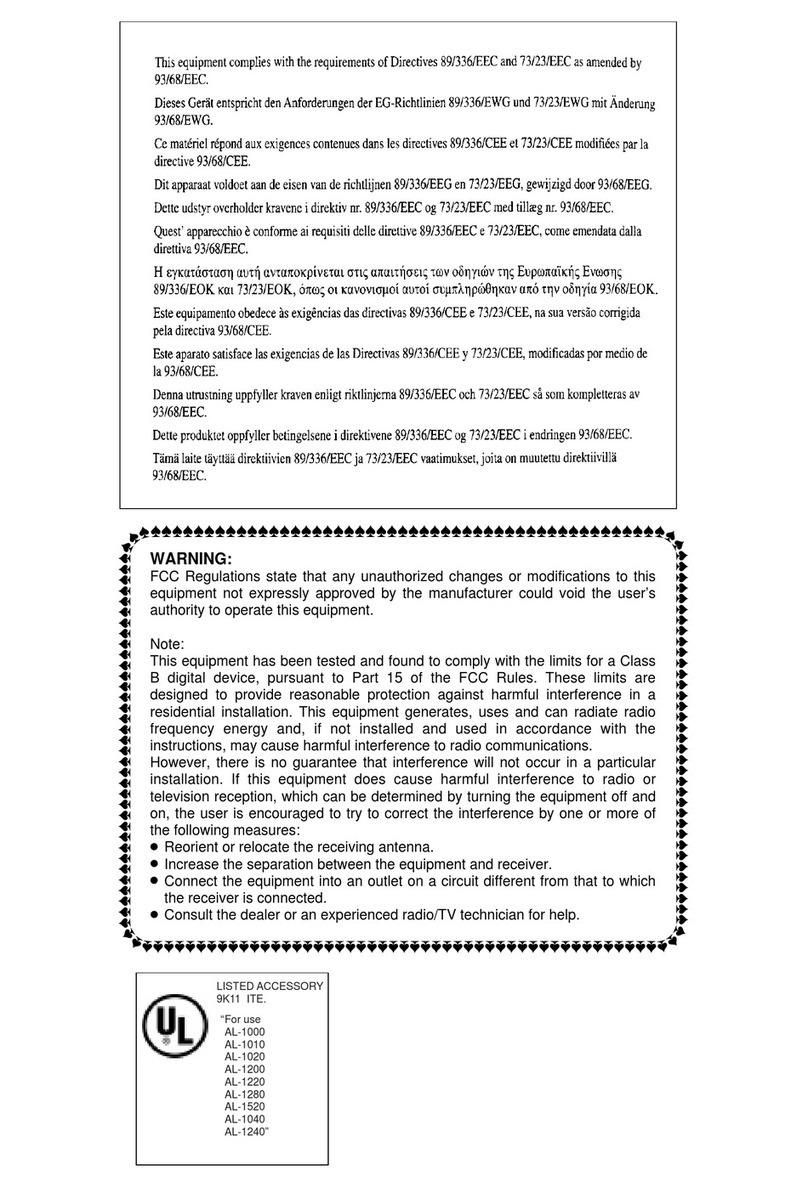
This product complies with the requirements of the Council
Directives 89/336/EEC (EMC) and 73/23/EEC (LVD) as amended
where applicable on the approximation of the laws of the member
states relating to electromagnetic compatibility and low voltage.

2
TABLE OF CONTENTS
Microsoft Windows . . . . . . . . . . . . . . . . . . . . . . . . . . . . . . . . .5
Overview . . . . . . . . . . . . . . . . . . . . . . . . . . . . . . . . . . . . . .5
Installation of TCP/IP Protocol . . . . . . . . . . . . . . . . . . . . .6
Windows 95/98/Me . . . . . . . . . . . . . . . . . . . . . . . . . . . . .7
Windows NT 4.0 . . . . . . . . . . . . . . . . . . . . . . . . . . . . . . . .7
Windows 2000 . . . . . . . . . . . . . . . . . . . . . . . . . . . . . . . . .8
Windows XP. . . . . . . . . . . . . . . . . . . . . . . . . . . . . . . . . . . .8
Network printer IP address configuration . . . . . . . . . . . .9
Windows 95/98/Me . . . . . . . . . . . . . . . . . . . . . . . . . . . 11
Windows NT 4.0 . . . . . . . . . . . . . . . . . . . . . . . . . . . . . . 12
Windows 2000 . . . . . . . . . . . . . . . . . . . . . . . . . . . . . . . 13
Windows XP. . . . . . . . . . . . . . . . . . . . . . . . . . . . . . . . . . 16
Novell Netware IPX . . . . . . . . . . . . . . . . . . . . . . . . . . . . . . . 19
NetBEUI Protocol. . . . . . . . . . . . . . . . . . . . . . . . . . . . . . 19
Windows 95/98/Me . . . . . . . . . . . . . . . . . . . . . . . . . . . 20
Windows NT 4.0 . . . . . . . . . . . . . . . . . . . . . . . . . . . . . . 20
Windows 2000 . . . . . . . . . . . . . . . . . . . . . . . . . . . . . . . 21
Windows XP. . . . . . . . . . . . . . . . . . . . . . . . . . . . . . . . . . 21
Printer driver configuration . . . . . . . . . . . . . . . . . . . . . 22
Network Configuration . . . . . . . . . . . . . . . . . . . . . . . . . . . . 25
Introduction. . . . . . . . . . . . . . . . . . . . . . . . . . . . . . . . . . 25
Specification . . . . . . . . . . . . . . . . . . . . . . . . . . . . . . 26
Self-diagnostic test. . . . . . . . . . . . . . . . . . . . . . . . . 27
Configuration utility . . . . . . . . . . . . . . . . . . . . . . . . . . . 28
Available utilities . . . . . . . . . . . . . . . . . . . . . . . . . . 28
Using Quick Setup . . . . . . . . . . . . . . . . . . . . . . . . . . . . 29
Using AdminManager . . . . . . . . . . . . . . . . . . . . . . . . . . 30
Installation . . . . . . . . . . . . . . . . . . . . . . . . . . . . . . . . . . 31
Interface. . . . . . . . . . . . . . . . . . . . . . . . . . . . . . . . . . . . . 32
File menu . . . . . . . . . . . . . . . . . . . . . . . . . . . . . . . . . 32
Status Menu . . . . . . . . . . . . . . . . . . . . . . . . . . . . . . 32
Setup Menu . . . . . . . . . . . . . . . . . . . . . . . . . . . . . . . 33
Device Setup . . . . . . . . . . . . . . . . . . . . . . . . . . . . . . 34
Create a NetWare Queue. . . . . . . . . . . . . . . . . . . . . 46
Delete NetWare Object . . . . . . . . . . . . . . . . . . . . . . 48
IP Address Setup. . . . . . . . . . . . . . . . . . . . . . . . . . . 48
Option Menu . . . . . . . . . . . . . . . . . . . . . . . . . . . . . . 49
Help Menu . . . . . . . . . . . . . . . . . . . . . . . . . . . . . . . . 49
Using a Web browser . . . . . . . . . . . . . . . . . . . . . . . . . . 50
3
Microsoft Internet Explorer. . . . . . . . . . . . . . . . . . . 50
Netscape Navigator. . . . . . . . . . . . . . . . . . . . . . . . . 50
Default user name and password . . . . . . . . . . . . . 50
Adjusting printer settings. . . . . . . . . . . . . . . . . . . . 51
Using TELNET. . . . . . . . . . . . . . . . . . . . . . . . . . . . . . . . . 52
Using SNMP. . . . . . . . . . . . . . . . . . . . . . . . . . . . . . . . . . 59
Novell NetWare . . . . . . . . . . . . . . . . . . . . . . . . . . . . . . . . . . 61
Overview . . . . . . . . . . . . . . . . . . . . . . . . . . . . . . . . . . . . 61
Supported Versions and Modes. . . . . . . . . . . . . . . 61
Remote Printer Mode . . . . . . . . . . . . . . . . . . . . . . . 61
Print Server Mode (Recommended) . . . . . . . . . . . . 61
Setup Utilities . . . . . . . . . . . . . . . . . . . . . . . . . . . . . . . . 63
UNIX . . . . . . . . . . . . . . . . . . . . . . . . . . . . . . . . . . . . . . . . . . . 65
Overview . . . . . . . . . . . . . . . . . . . . . . . . . . . . . . . . . . . . 65
Configuration. . . . . . . . . . . . . . . . . . . . . . . . . . . . . . 65
Operating system configuration. . . . . . . . . . . . . . . 68
Apple Macintosh . . . . . . . . . . . . . . . . . . . . . . . . . . . . . . . . . 81
Overview . . . . . . . . . . . . . . . . . . . . . . . . . . . . . . . . . . . . 81
Supported Versions . . . . . . . . . . . . . . . . . . . . . . . . . . . 81
Setup Utilities for Mac OS 8.x and 9.x. . . . . . . . . . . . . 82
Configuration . . . . . . . . . . . . . . . . . . . . . . . . . . . . . . . . 82
AppleTalk Configuration . . . . . . . . . . . . . . . . . . . . . 82
Macintosh OS X . . . . . . . . . . . . . . . . . . . . . . . . . . . . 83
Troubleshooting . . . . . . . . . . . . . . . . . . . . . . . . . . . . . . . . . 85
Self-diagnostic test. . . . . . . . . . . . . . . . . . . . . . . . . . . . 85
TCP/IP . . . . . . . . . . . . . . . . . . . . . . . . . . . . . . . . . . . . . . 86
NetWare . . . . . . . . . . . . . . . . . . . . . . . . . . . . . . . . . . . . . 87
EtherTalk . . . . . . . . . . . . . . . . . . . . . . . . . . . . . . . . . . . . 88
NetBEUI . . . . . . . . . . . . . . . . . . . . . . . . . . . . . . . . . . . . . 89
Glossary. . . . . . . . . . . . . . . . . . . . . . . . . . . . . . . . . . 91
Appendix– E-Mail Alert Function . . . . . . . . . . . . . . . . . . . . 93

4

Microsoft Windows 5
MICROSOFT WINDOWS
Overview
This chapter provides guidelines on how to print over the network
from various Microsoft Windows platforms. There are numerous ways
of printing from Windows and the exact set-up will vary depending
upon your environment. There are also numerous versions of
Windows, which can be configured as either a client, server or both.
Although there are many variants of Windows, the principles of
network printing are the same. Microsoft provides on-line help with
all of their operating systems and this is a good reference point for the
exact details of each configuration option within Windows.
The network printer supports the following protocols that can be used
in conjunction with the Windows operating system:
>TCP/IP
>IPX(NovellNetWare)
>NetBEUI

Microsoft Windows 6
Installation of TCP/IP Protocol
There are a number of options available when printing using TCP/IP
for Windows. The following table lists the options:
1
These functions are built into Windows and are displayed as options when using the Add Printer Wizard.
Although there are some differences in configuration options
between the various Windows platforms, the procedure for printing
using TCP/IP is the same.
1. Ensure that the TCP/IP protocol has been installed in Windows.
This can be confirmed by checking the network settings from
within the Control Panel. If TCP/IP has not been installed refer to
the section below Installation of TCP/IP protocol.
2. If not already configured, a suitable IP address, Subnet Mask
and Gateway address should be configured. Please refer to the
on-line help if necessary. It is vital that the IP address entered is
unique and valid. Entering an incorrect IP address may cause
severe network problems. Please check the address with the
network administrator.
3. If your network environment uses domain names, DNS should
be enabled and configured on your system. However, this step is
not essential to enable network printing.
4. Restart the operating system.
Windows Version Method
Win 95/98/Me LPR Utility
NT 4.0 LPR Utility
Microsoft LPR1
Windows 2000/ Windows XP LPR Utility
Microsoft LPR1
Port 91001
IPP1

Microsoft Windows 7
Windows 95/98/Me
1. Click the [Start] button, select [Settings] and then click on
[Control Panel].
2. In the [Control Panel] double-click on the [Network] icon.
3. In the [Network] dialogue box click the [Configuration Panel].
4. If the [Client for Microsoft Networks] is not listed, click the [Add]
button.
5. In the [Select Network Component Type] dialogue box, select
[Protocol] then click the [Add] button.
6. In the [Select Network Protocol] dialogue box, select [Microsoft]
from the list of manufacturers, then select [TCP/IP] from the list
of network protocols, then click [OK].
7. The Windows installation CD-ROM may be required. Follow the
remaining dialogue box prompts.
Windows NT 4.0
1. Click the [Start] button, select [Settings] and then click on
[Control Panel].
2. Double-click the [Network] icon.
3. In the Network dialogue box, click the [Protocols] tab.
4. If the [TCP/IP Protocol] is not listed, click the [Add] button.
5. In the [Select Network Protocol] dialogue box, select [TCP/IP
Protocol] and click [OK].
6. The Windows NT installation CD-ROM may be required. Follow
the remaining dialogue box prompts.

Microsoft Windows 8
Windows 2000
1. Click the [Start] button, select [Settings] and then click on
[Network and Dial-up Connections].
2. Double-click the [Local Area Connection] icon. In the [Local Area
Connection Status] dialogue box, click the [Properties] button.
3. If the TCP/IP protocol is not listed, in the [Local Area Connection
Properties] dialogue box, click the [Install] button.
4. In the [Select Network Component Type] dialogue box, select
[Protocol] and click the [Add] button.
5. In the [Select Network Protocol] dialogue box, select [TCP/IP
Protocol] and click the [OK] button.
6. Click the [Close] button in the [Local Area Connection Properties]
dialogue box.
7. Click the [Close] button in the [Local Area Connection Status]
dialogue box.
Windows XP
1. Click the [Start] button and select [Control Panel].
2. Select [Network and Internet Connection] and [Network
Connection].
3. Double-click [Local Area Connection] and click [Properties] in the
[Location Area Connection Status] dialogue box.
4. If the [Internet Protocol (TCP/IP)] is not listed, click [Install..]
button.
5. In the [Select Network Component Type] dialogue box, select
[Protocol] then click the [Add] button.

Microsoft Windows 9
6. In the [Select Network Protocol] dialogue box, select [Internet
Protocol (TCP/IP)] then click [OK].
7. The Windows XP installation CD-ROM may be required. Follow
the remaining dialogue box prompts.
Once the protocol has been installed and configured in Windows, the
next step is to configure the TCP/IP parameters in the network printer.
Network printer IP address configuration
Use the Standard Set-up Utility to configure the IP Address, Subnet
Mask and Gateway.
Note: Some steps may not display depending on the network
protocols installed.
1. Connect the printer to the network and turn on.
2. Place the “Drivers” CD in the CD-ROM drive. The set-up utility
should start automatically. If the set-up utility does not start,
double-click on setup.exe in the Windows folder of the CD-ROM.
3. Select [Driver Installation].
4. Select [Network Card Quick Set-up].
5. Click [Next] at Welcome screen.
6. If you agree to the User Licence Agreement, click [Next].
7. Select the appropriate network card, using the Ethernet address
to identify it, and click [Next].
The Ethernet address of the printer can be found on the self-
diagnostic printout, which can be printed by pressing the push-button
on the network card panel for three seconds and then releasing it.
Do you use the TCP/IP protocol?

Microsoft Windows 10
When using lpr in UNIX and other TCP/IP environments, please select
[Yes]. To use in a TCP/IP environment, an IP address should be
assigned to the Ethernet board.
If [Yes] has been selected and TCP/IP is the only working protocol and
the IP address has not already been assigned, you can either obtain
an IP address automatically or assign an IP address.
When [Obtain an IP address automatically] is selected, the device IP
address will be automatically assigned by the DHCP server. In an
environment without a DHCP server, please assign the IP address
manually.
If you are assigning an IP address, you need to enter:
> An IP address
>Submitmask
> Gateway address.
8. Click [Next].
Do you use the NetWare protocol?
9. Consult your network manager to ensure that the NetWare file
server is properly installed and working on the network. Make
sure that NetWare Client32 or IntranetWare Client is installed on
your computer.
On selecting [Yes] you will be asked if [You set-up the queue from
the Wizard]?
Do you use the EtherTalk protocol?
EtherTalk is the required protocol for printing data from the Macintosh
environment.
Do you use the NetBEUI protocol?
Using NetBEUI makes it easy to manage your equipment and print
within the network environment of Windows.

Microsoft Windows 11
10. Confirm your configuration. If everything is correct, select
[Execute] to apply the configuration. Set-up has now been
completed. Select [Finish].
Now that both Windows and the printer have been configured to use
TCP/IP, the next step is to configure Windows to print to the network
printer.
Windows 95/98/Me
When printing using TCP/IP the LPR utility is the only option to use.
The following procedure should be used.
When installing the driver, ensure it is installed as a local printer and
not a network printer. Ensure the appropriate printer driver has been
installed in Windows.

Microsoft Windows 12
Windows NT 4.0
With Windows NT 4.0, you have two options for printing using TCP/IP.
They are:
>LPR
>MicrosoftLPR
In order to use Microsoft LPR, it must first be installed into your
operating system.
NT 4.0 requires administrator privileges.
LPR
Please follow the procedure described in the Windows 95/98/Me
section on page 11.
Microsoft LPR
To install this port, the following needs to be carried out.
1. Select [Start], [Settings], [Control Panel] and then select
[Printers].
2. Select [Add Printer] Wizard.
3. Select [My Computer] and then [Next].
4. Select [Add Port].
5. Select [LPR Port] and then [OK].
6. In [Name or address of server providing lpd] type the host name
or IP address of the host for the printer you are adding.
7. In [Name of printer or print queue on that server] type the logical
printer name "lp" and then click [OK].
8. Follow the instructions on the screen to finish installing the LPR-
compatible printer.

Microsoft Windows 13
If the LPR port is not available, install the Microsoft TCP/IP Printing
Service.
Insert the printer driver for Windows NT4.0.
1. Select [Start], [Settings], [Control Panel] and then double-click
the [Network] icon.
2. In the Network dialogue box, click the [Services] tab.
3. If the [Microsoft TCP/IP Printing] is not listed, click the [Add]
button.
4. In the [Select Network Service] dialogue box, select [Microsoft
TCP/IP Printing] and click [OK].
5. The Windows NT installation CD-ROM may be required. Follow
the remaining dialogue box prompts.
Windows 2000
Windows 2000 requires administrator privileges.
With Windows 2000, there are four options for printing using TCP/IP.
>LPR
>MicrosoftLPR
> Port 9100
>IPP
In order to use Microsoft LPR, it must first be installed on your system.
LPR
Please follow the procedure described in the Windows 95/98/Me
section on page 11.
Microsoft LPR
To install this port, the following needs to be carried out:

Microsoft Windows 14
1. Select [Start], [Settings], [Control Panel and Printers].
2. Open the [Printers] folder.
3. Double-click [Add Printer] and then select [Next].
4. Select [Local Printer], clear the [Automatically detect my printer]
check box, and then select [Next].
5. Select [Create a new port] and then [LPR Port].
6. Select [Next] and then provide the following information:
In [Name or address of server providing LPD] enter the host name
or Internet Protocol (IP) address of the host for the printer you are
adding.
In [Name of printer or print queue on that server] type "lp".
Follow the instructions on the screen to finish installing the TCP/
IP printer.
Port 9100
1. Select [Start], [Settings], [Control Panel].
2. Open the [Printers] folder.
3. Double-click [Add Printer] and then select [Next].
4. Select [Local Printer], clear the [Automatically detect my printer]
check box and then click [Next].
5. Select [Create a New Port] and select [Standard TCP/IP Port].
6. Select [Next].
7. The [Welcome to the Add Standard TCP/IP Printer Port Wizard]
will appear.

Microsoft Windows 15
8. Select [Next] and provide the following information. Enter
[Printer name] or IP address, for example: 192.168.1.31. If the
above IP address is entered, the Port Name will default to
IP_192.168.1.31.
9. Select [Next]. Additional port information will be required.
10. Under [Device Type], select [Custom] then [Settings].
11. Ensure [Protocol] is set to [Raw].
12. Ensure [Port Number] is 9100 and [SNMP Status Enabled] is
deselected.
13. Select [OK].
14. Select [Follow the instructions on the screen to finish installing
the printer.]
IPP
1. Select [Start], [Settings], [Control Panel and Printers].
2. Open the [Printers Folder].
3. Double-click [Add Printer] and then select [Next].
4. Select [Network Printer].
5. Select [Next].
6. Type printer URL in text box labelled [Connect to a printer in the
Internet or your Intranet], e.g. http://192.168.1.31/ipp/ip].
7. Select [Next].
8. Install printer driver.

Microsoft Windows 16
Windows XP
Windows XP requires administrator privileges.
With Windows XP, there are four options for printing using TCP/IP.
>LPR
>MicrosoftLPR
> Port 9100
>IPP
In order to use Microsoft LPR, it must first be installed on your system.
LPR
Please follow the procedure described in the Windows 95/98/Me
section on page 11.
Microsoft LPR
To install this port, the following needs to be carried out:
1. Select [Start], [Settings], [Control Panel]. and [Printers and Other
Hardware].
2. Select [Printers and Faxes].
3. Click [Add Printer] and then select [Next].
4. Select [Local printer attached to this computer], clear the
[Automatically detect and install my Plug and Play printer] check
box, and then select [Next].
5. Select [Create a New Port] and [Type Standard TCP/IP Port].
6. Select [Next].
7. The [Welcome to the Add Standard TCP/IP Printer Port Wizard]
will appear.

Microsoft Windows 17
8. Select [Next] and provide the following information. Enter
[Printer name or IP address], for example: 192.168.1.31. If the
above IP address is entered, the Port Name will default to
IP_192.168.1.31.
9. Select [Next]. [Additional Port Information Required] is
displayed.
10. Under [Device Type], select [Custom] then [Settings].
11. Ensure [Protocol] is set to [LPR].
12. Ensure [Queue Name] is "lp" and [SNMP Status Enabled] is
deselected.
13. Select [OK].
14. Follow the instructions on the screen to finish installing the
printer.
Port 9100
1. Select [Start], [Settings], [Control Panel]. and [Printers and Other
Hardware].
2. Select [Printers and Faxes].
3. Click [Add Printer] and then select [Next].
4. Select [Local printer attached to this computer], clear the
[Automatically detect and install my Plug and Play printer] check
box, and then select [Next].
5. Select [Create a New Port] and select [Type Standard TCP/IP
Port].
6. Select [Next].
7. The [Welcome to the Add Standard TCP/IP Printer Port Wizard]
will appear.

Microsoft Windows 18
8. Select [Next] and provide the following information. Enter
[Printer name or IP address], for example: 192.168.1.31. If the
above IP address is entered, the Port Name will default to
IP_192.168.1.31.
9. Select [Next]. [Additional Port Information Required] is
displayed.
10. Under [Device Type], select [Custom] then [Settings].
11. Ensure [Protocol] is set to [Raw].
12. Ensure [Port Number] is 9100 and [SNMP Status Enabled] is
deselected.
13. Select [OK].
14. Follow the instructions on the screen to finish installing the
printer.
IPP
1. Select [Start], [Settings], [Control Panel]. and [Printers and Other
Hardware].
2. Select [Printers and Faxes].
3. Click [Add Printer] and then select [Next].
4. Select [A network printer, or a printer attached to another
computer].
5. Select [Next].
6. Select [Connect to a printer on the Internet or on a home or
office network] and type printer URL in text box, e.g. http://
192.168.1.31/ipp/ip.
7. Select [Next].

Novell Netware IPX 19
8. Install printer driver
NOVELL NETWARE IPX
IPX is used with Novell NetWare. The printer supports Novell 3, 4, 5
and 6, and allows print jobs to be directed to the appropriate Novell
print queue. Please refer to the relevant section of this manual for
additional information.
NetBEUI Protocol
NetBEUI is a protocol that was designed for use on small workgroups
or LANs. Within Windows, NetBEUI is used for file and printer sharing
between computers. It provides a simple method of printing but the
protocol does have limitations and is not as robust as TCP/IP or IPX.
Typically it is employed in small or home networks.
Network Printer Settings
There are three configurable items under NetBEUI within the printer.
These can be configured using the standard set-up utility described in
Chapter 1.
1
Although the workgroup name can be changed, it is recommended that it remains as PrintServer.
Although there are some differences in configuration options
between the various Windows platforms, the procedure for printing
using NetBEUI is the same.
Please ensure the NetBEUI protocol has been installed in Windows.
This can be confirmed by checking the network settings. If NetBEUI
has not been installed please refer to the section below.
The relevant Windows installation CD-ROM may be required and you
should follow the on-screen dialogue box prompts.
Computer Name: Name assigned to the printer
Workgroup: PrintServer1
Comment: User definable description
Other manuals for AR-C200P - Color Laser Printer
2
Table of contents
Other Sharp Printer manuals

Sharp
Sharp AR-C200P - Color Laser Printer User manual

Sharp
Sharp BP-50C26 User manual

Sharp
Sharp AR-200M User manual

Sharp
Sharp AR-TE3 User manual

Sharp
Sharp MX-B427PW User manual

Sharp
Sharp MX-B427PW User manual

Sharp
Sharp DP-750 User manual

Sharp
Sharp AR-D29 User manual

Sharp
Sharp AR-FX5 User manual

Sharp
Sharp AJ-2100 User manual

Sharp
Sharp AR-N275 User manual

Sharp
Sharp AR-M451N User manual

Sharp
Sharp AR-M350 Imager User manual

Sharp
Sharp AJ-2200 Setup guide

Sharp
Sharp AR-350 User manual

Sharp
Sharp AJ-2200 Setup guide

Sharp
Sharp MX-C300PE Guide

Sharp
Sharp MX-M350 User manual

Sharp
Sharp MX-B467P User manual

Sharp
Sharp AR-M350 Imager Manual