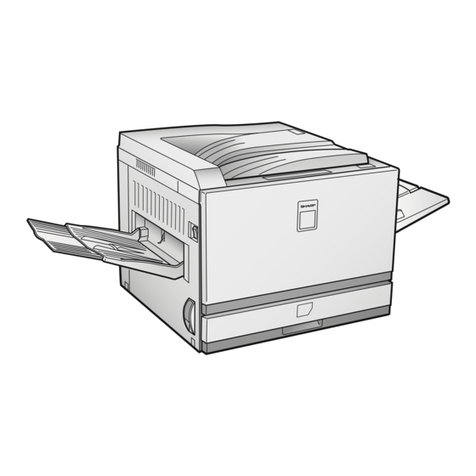
Sharp AR-N275 User manual

SERVICE MANUAL
CODE: 00ZARN275/A1E
DIGITAL MULTIFUNCTIONAL
SYSTEM
(For U.S.A)
MODEL AR-N275
CONTENTS
This Service Manual describes only the differences from 00ZAR2 5//A1E.
The items which are not described in this Manual are common with the
00ZAR2 5//A1E.
[1] NOTE FOR SERVICING. . . . . . . . . . . . . . . . . . . . . . . . . . . . . . . . . 1-1
[2] SYSTEM CONFIGURATION . . . . . . . . . . . . . . . . . . . . . . . . . . . . . 2-1
[3] SPECIFICATIONS . . . . . . . . . . . . . . . . . . . . . . . . . . . . . . . . . . . . . 3-1
[4] CONSUMABLE PARTS . . . . . . . . . . . . . . . . . . . . . . . . . . . . . . . . . 4-1
[5] UNPACKING AND INSTALLATION . . . . . . . . . . . . . . . . . . . . . . . . 5-1
[6] EXTERNAL VIEW AND INTERNAL STRUCTURE . . . . . . . . . . . . 6-1
[ ] ADJUSTMENTS, SETTING . . . . . . . . . . . . . . . . . . . . . . . . . . . . . . -1
[8] SIMULATION . . . . . . . . . . . . . . . . . . . . . . . . . . . . . . . . . . . . . . . . . 8-1
[9] TROUBLE CODE LIST. . . . . . . . . . . . . . . . . . . . . . . . . . . . . . . . . . 9-1
[10] DISASSEMBLY, ASSEMBLY AND MAINTENANCE . . . . . . . . . . 10-1
[11] OTHERS. . . . . . . . . . . . . . . . . . . . . . . . . . . . . . . . . . . . . . . . . . . . 11-1
Parts marked with “ ” are important for maintaining the safety of the set. Be sure to replace these parts with
specified ones for maintaining the safety and performance of the set.
SHARP CORPORATION This document has been published to be used
for after sales service only.
The contents are subject to change without notice.

This product is a class 1 laser product that complies with 21CFR 1040.10 and 1040.11 of the CDRH standard and IEC825. This means that this
machine does not produce hazardous laser radiation. The use of controls, adjustments or performance of procedures other than those specified
herein may result in hazardous radiation exposure.
This laser radiation is not a danger to the skin, but when an exact focusing of the laser beam is achieved on the eye’s retina, there is the danger of spot
damage to the retina.
The following cautions must be observed to avoid exposure of the laser beam to your eyes at the time of servicing.
1) When a problem in the laser optical unit has occurred, the whole optical unit must be exchanged as a unit, not as individual parts.
2) Do not look into the machine with the main switch turned on after removing the developer unit, toner cartridge, and drum cartridge.
3) Do not look into the laser beam exposure slit of the laser optical unit with the connector connected when removing and installing the optical
system.
4) The middle frame contains the safety interlock switch.
Do not defeat the safety interlock by inserting wedges or other items into the switch slot.
CAUTION
Warning!
This product is a class A product.
If it is operated in households, offices or similar surroundings, it can produce radio interferences at other
appliances, so that the user has to take adequate countermeasures.
CLASS 1 LASER PRODUCT
LASER KLASSE 1
LUOKAN 1 LASERLAITE
KLASS 1 LASERAPPARAT
VAROITUS!
LAITTEEN KÄYTTÄMINEN MUULLA KUIN TÄSSÄ
KÄYTTÖOHJEESSA MAINITULLA TAVALLA SAATTAA
ALTISTAA KÄYTTÄJÄN TURVALLISUUSLUOKAN 1
YLITTÄVÄLLE NÄKYMÄTTÖMÄLLE
LASERSÄTEILYLLE.
VARNING
OM APPARATEN ANVÄNDS PÅ ANNAT SÄTT ÄN I
DENNA BRUKSANVISNING SPECIFICERATS, KAN
ANVÄNDAREN UTSÄTTAS FÖR OSYNLIG
LASERSTRÅLNING, SOM ÖVERSKRIDER GRÄNSEN
FÖR LASERKLASS 1.
CAUTION
INVISIBLE LASER RADIATION,
WHEN OPEN AND INTERLOCKS DEFEATED. AVOID
EXPOSURE TO BEAM.
VORSICHT
UNSICHTBARE LASERSTRAHLUNG,
WENN ABDECKUNG GEÖFFNET UND
SICHERHEITSVERRIEGELUNG ÜBERBRÜCKT. NICHT
DEM STRAHL AUSSETZEN.
VARO !
AVATTAESSA JA SUOJALUKITUS OHITETTAESSA OLET
ALTTIINA NÄKYMÄTTÖMÄLLE LASERSÄTEILYLLE ÄLÄ
KATSO SÄTEESEEN.
ADVARSEL
USYNLIG LASERSTRÅLNING VED ÅBNING, NÅR
SIKKERHEDSBRYDERE ER UDE AF
FUNKTION. UNDGÅ UDSAETTELSE FOR
STRÅLNING.
VARNING !
OSYNLIG LASERSTRÅLNING NÄR DENNA DEL ÄR
ÖPPNAD OCH SPÄRREN ÄR URKOPPLAD. BETRAKTA EJ
STRÅLEN. – STRÅLEN ÄR FARLIG.
CLASS 1
LASER PRODUCT
LASER KLASSE 1
Disconnect the AC cord before servicing the unit.
LASER WAVE – LENGTH : 795 ± 15 mm
Pulse times : 0.481 ms/6 mm
Out put power : 5 mW
CAUTION
VORSICHT
ADVARSEL
ADVERSEL
VARNING
VARO!
INVISIBLE LASER RADIATION WHEN OPEN AND INTERLOCKS DEFEATED.
AVOID EXPOSURE TO BEAM.
UNSICHTBARELASERSTRAHLUNG, WENN ABDECKUNG GEÖFFNETUND
SICHERHEITSVERRIEGELUNGÜBERBRÜCKT. NICHT DEM STRAHLAUSSETZEN.
USYNLIG LASERSTRÅLNING VED ÅBNING, NÅR SIKKERHEDSBRYDERE ER
UDE AF FUNKTION. UNDGÅ UDSAETTELSE FOR STRÅLNING.
USYNLIG LASERSTRÅLING NÅR DEKSEL ÅPNES OG SIKKERHEDSLÅS BRYTES.
UNNGÅ EKSPONERING FOR STRÅLEN.
OSYNLIG LASERSTRÅLNING NÄR DENNA DEL ÄR ÖPPNAD OCH SPÄRREN ÄR
URKOPPLAD. BETRAKTA EJ STRÅLEN. – STRÅLEN ÄR FARLIG.
AVATTAESSA JA SUOJALUKITUS OHITETTAESSA OLET ALTTIINA NÄKYMÄTTÖMÄLLE
LASERSÄTEILYLLE ÄLÄ KATSO SÄTEESEEN.
Laserstrahl

The AR-N275 is a model based on the AR-275.
The changed points of the AR-N275 from the AR-275 are as shown in the table below.
AR-275 AR-N275
Item Page Content Content of change Remar s
[1] NOTE FOR SERVICING No change
[2] SYSTEM CONFIGURATION
2 - 2 2. System outline (Options) Change (The following functions are changed from optional
functions to standard functions.)
• The printer function (PCL5e/PCL6) is a standard
provision. (AR-P11)
• The print server card is a standard provision. (AR-NC5J)
• The networ scanner is a standard provision. (AR-NS2)
• AR-N275, one expansion DIMM slot has been already
loaded with 128MB-memory module. (Total: 160MB)
[3] SPECIFICATIONS No change
[4] CONSUMABLE PARTS No change
[5] UNPACKING AND INSTALLATION The following setup is added.
1. Printer setup
2. Print server card setup
3. Networ scanner setup
Refer to page 5-1
of the appendix.
[6] EXTERNAL VIEW AND INTERNAL STRUCTURE No change
[7] ADJUSTMENTS, SETTING No change
[8] SIMULATION No change
[9] TROUBLE CODE LIST No change
[10] DISASSEMBLY, ASSEMBLY AND MAINTENANCE No change
[11] OTHERS No change

AR-N275 UNPACKING AND INSTALLATION - 1
[5] UNPACKING AND INSTALLATION
1. Printer setup
Insert the power plu of the copier to the outlet and turn on the
main switch. Then, carry out the followin procedure.
1) Check for the PCL PWB
Press the PRINT key on the operation panel to check to see if the
copier enters the print mode
2) Check for printing
For installation of printer drivers on a computer, see the supplied
operation manual
Then, connect a parallel cable to the computer and execute print-
ing to check to see if printing can be executed properly
2. Print server card setup
A. Connection to a network
To connect the print server card to a network, the following items are
required
• For connection in the 100BASE-TX environment, a hub conforming
to 100BASE-TX and a shield-type, twisted-pair cable (Category 5)
are required
1) Check that the printer power is off, and connect the shield-type,
twisted-pair cable to the 10/100BASE connector of the print server
card
2) Connect the other end of the cable to the hub
3) Turn on the printer power, and check that the printer operates nor-
mally
B. LAN cable connection and setup
Turn off the main switch of the copier and then remove the power
plu of the copier from the outlet.
1) Connect the cable to the control PWB
Connect a LAN cable to the connector of the print server card
Insert the power plu of the copier to the outlet and turn on the
main switch. Then, carry out the followin procedure.
2) Check for the print server card
Use the keys on the operation panel to print a configuration page
Check that the network interface card has been installed
3) Check for printing
Peform setup of the environmental variables
(For installation of printer drivers on a computer and network set-
tings (IP address input), see the supplied operation manual )
Execute printing to check to see if printing can be executed prop-
erly
3. Network scanner setup
This machine allows the use of a network scanner
If the use of a scanner is disabled for some reasons, reset the machine
in the following procedures:
To enable the scanner function, the product key must be acquired (For
the method of acquiring the product key, contact the SHARP autho-
rized dealer )
1) Enable the network scanner feature
To enable the system configuration, use the keys on the copier to
set the mode
• Enter the product key
Enter the product key that has been acquired in the display using
the numeric keys and press the [OK] key
The message "SCANNER KEY OK" will appear in the display
Setting of the product key is complete To update the system, press
the [CA] key to exit the setting mode
2) Paste the label
If an SPF or RSPF is installed, paste the label on the SPF or
RSPF
Hub Shield-type, twisted-pair cable
12345678
LAN cable
2
C06 1
#
Orientation indication label


All rights reserved.
Printed.
No part of this publication may be reproduced,
stored in a retrieval system, or transmitted,
in any form or by any means,
electronic; mechanical; photocopying; recording or otherwise
without prior written permission of the publisher.
Trademark Acknowledgments
Microsoft Windows, MS-DOS, Windows NT, Windows 2000 are trademarks of Microsoft
Corporation in the U. S. A. and other countries.
Macintosh, Power Macintosh, Mac OS, LaserWriter, and AppleTalk are registered trademarks of
Apple Computer, Inc.
IBM, PC/ AT, and PowerPC are trademarks of International Business Machines Corporation.
Pentium is a registered trademark of Intel Corporation.
PCL is a trademark of the Hewlett- Packard Company.
PostScriptis a registered trademark of Adobe Systems Incorporated.
NetWare is a registered trademark of Novell, Inc.
All other trademarks and copyrights are the property of their respective owners.
SHARP CORPORATION
Digital Document Systems Group
Products Quality Assurance Department
Yamato oriyama, Nara 639-1186, Japan
2001 October Printed
Table of contents
Other Sharp Printer manuals

Sharp
Sharp DP-750 User manual

Sharp
Sharp BP-50C26 User manual

Sharp
Sharp MZ-80P6 User manual

Sharp
Sharp AJ-2200 Manual instruction

Sharp
Sharp JX-8200 User manual

Sharp
Sharp AR-122E N User manual

Sharp
Sharp BP-70M75 Guide

Sharp
Sharp CE-126P User manual

Sharp
Sharp MX-M350-U User manual

Sharp
Sharp SD-2060 User manual

Sharp
Sharp Network Scanner User manual

Sharp
Sharp AJ-2200 Setup guide

Sharp
Sharp JX-9500 User manual

Sharp
Sharp AR-M351N User manual

Sharp
Sharp SX 1075 User manual

Sharp
Sharp MX-M350-U User manual

Sharp
Sharp MX-B400P Installation and operating manual

Sharp
Sharp MX-B400P User manual

Sharp
Sharp MX-C507P User manual

Sharp
Sharp AJ-1805 Setup guide