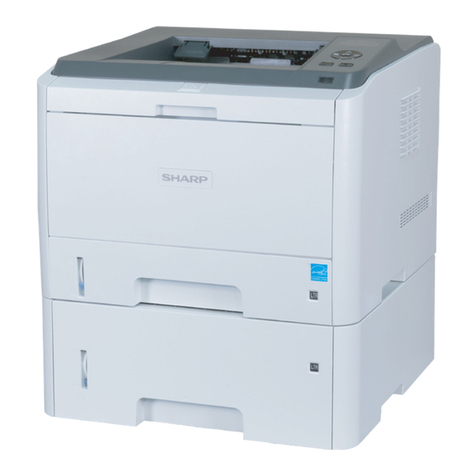
Sharp DX-B351PL User manual

SHARP DX-B351PL
Monochrome Laser Printer
It is recommended that you read this Guide carefully before using the printer.
User Guide

I
Preface
This manual explains how to use the SHARP DX-B351PL laser printer.
Please read and understand the manual in order to use the product correctly.
Keep this manual in a convenient location for reference whenever needed.
Legal Notice
Trademark
Microsoft®, Windows®, Windows Server®, and Windows Vista® are trademarks registered by Microsoft
Corporation in the United States or other countries/regions.
Mac and the Mac logo are trademarks of Apple Inc., registered in the U.S. and other countries.
AirPrint® and the AirPrint® logo are trademarks of Apple Inc.
The software named in this Guide is owned by its respective companies in accordance with their licensing
agreements and are referenced for instruction only.
All other product names and trademark or service marks of their respective owners, and they are
referenced for instructions only.
Copyright
The Copyright of this User Guide is owned by HCS Audio Technology Limited.
It is prohibited to copy, translate, modify and transmit this User Guide by any means or in any
form without the prior written consent of HCS Audio TechnologyLimited.
Version: V1.0
Disclaimer
For a better user experience, HCS Audio Technology Limited. reserves the right to make
changes to the User Guide. The information contained herein is subject to change without notice.
Users are responsible for any damages arising from failure tofollow this User Guide. Except the
express warranty made in the product maintenance manual or service commitment, HCS Audio
Technology Limited. does not make any express or implied warranty or guarantee to this User
Guide (including composing of words).
Using this product to copy, print, scan certain documents or images or make other forms of
operations may be prohibited by the local laws. If you are uncertain about the legality of using this
product for certain documents or images, you should consult your legal advisor in advance.
The product can only be used safely in the non-tropical areas at an altitude no higher than
2,187 yards.

II
Safety Precautions
Laser Safety
Laser radiation is harmful to the human body. Since laser components are completely
sealed in the printer, laser radiation will not leak. To avoid laser radiation, please do not
randomly disassemble the printer!
The printer follows the provisions of Class 1 laser products under CFR standard. The
printer has a Class III b laser diode, which has no laser radiation leakage among laser
components.
The laser components shall comply with the requirements of U.S. Code of Federal
Regulations, 21 CFR 1040, IEC 60825-1.
The following label is attached to the laser components inside the printer:
Safety Warning
Please note the following safety warnings before using the printer:
Warning
There is high-voltage electrode inside the printer.
Before cleaning the printer, make sure the power is turnedoff!
Plugging and unplugging the power cord plug with a wet
hand can result in an electric shock.
The fuser unit is hot duringand after printing. Touching the
fuser unit (the shaded area as shown) may cause burns!
The fuser unit is attached with a high-temperature warning
label. Please do not remove or damage this label.

III
Precautions
Precautions before Using the Printer:
1. Read and understand all instructions.
2. Familiarize yourself with the basic principles associated with operating electrical appliances.
3. Comply with all warnings and instructions marked on the equipment or specified in the manual
supplied with the equipment.
4. If the operating instructions conflict with the safety information, please refer to the safety
information, as you may have misunderstood the operating instructions. If you cannot resolve the
conflicts, please call the Customer Service Hotline or contact a service representative for help.
5. Before cleaning the equipment, remove the power cord from the AC power supply outlet. Do not use
liquid or aerosol cleaners.
6. Please make sure that the equipment is put on a stable desktop surface to avoid serious damage
caused by the falling of the equipment.
7. Do not put the equipment near a radiator, an air conditioner, or a ventilation pipe.
8. Do not put any articles on the power cord. Do not put the equipment at the place where its power cord
could be stepped on by people.
9. Outlets and extension cords must not be overloaded. This may reduce performance and could result in
fire or electric shock.
10. Do not allow pets to chew on the AC power cord or the computer interface cable.
11. To avoid contact with the high voltage errors that may result in fire or electric shock, do not allow sharp
objects to pierce the equipment power supply. Do not spill liquids onto the equipment.
12. To avoid the risk of electric shock, do not disassemble the equipment. Necessary repairs may only be
carried out by professional maintenance personnel. Opening or removing the cover could result
in an electric shock or other potential hazards. Incorrect disassembly and assembly could also result in
an electric shock during future use.
13. If any one of the following occurs, disconnect the equipment from the computer and pull out the
power cord from the AC wall socket and contact a qualified member of the service personnel for
maintenance:
•
Liquid has been spilled into the equipment.
•
The equipment has been exposed to rain or water.
•
The equipment falls, or the cover is damaged.
•
Significant changes in the equipment's performance.
14. Only adjust the controls mentioned in the instructions. Incorrect adjustment of other controls may result
in damage and the need for professional service representative support.
15. To avoid the risk of electric shock, do not use the equipment in a thunderstorm. If possible, pull out the
AC power cord during a thunderstorm.
16. If you continuously print multiple pages, the surface of the tray will become very hot. Take care not to
touch this surface and keep children away from this surface.
17. The signal wire of the device connected with the printer cannot be connected to the outdoors.
18. Please ensure timely ventilation in case of a prolonged use or printing huge amounts of documents in
a poorly ventilated room.
19. In standby status, the product will automatically enter the power saving (sleep) mode if it does
not receive any job for a period (such as 1 minute). It can recognize zero power consumption
only if it has not been connected to an external input power supply.
20. As the Class 1 equipment, the product must be connected to the power supply outlet with a protective
grounding line when using.
21. Thisproductshouldbeplacedaccordingtotheshippingmarksontheproductpackageboxduringdelivery.

IV
22. This is a low-voltage device. When using the device below its specified voltage, if the toner comes off the
printed contents, or the equipment starts up slowly, please refer to the product precautions or call
SHARP Service Center.
23. This product is sold as a complete machine. The consumers can go to SHARP Service Center to
purchase parts they need. If the product sold is inconsistent with the package list, please go to the
specified Service Center to solve theproblem.
24. Installthisproductinaplacewhere thetemperature isbetween50 and 90° Fandtherelative humidity
between 20% and80%.
25.
This device complies with Part 15 of the FCC Rules and Industry Canada licence-exempt RSS
standard(s).
The operation is subject to the following two conditions:
1)
this device may not cause harmful interference, and
2)
this device must accept any interference received, including interference that may cause
undesired operation.
26.
This equipment has been tested and found to comply with the limits for a Class B digital device,
pursuant to Part 15 of the FCC Rules. These limits are designed to provide reasonable protection
against harmful interference in a residential installation. This equipment generates, uses and can
radiate radio frequency energy and, if not installed and used in accordance with the instructions,
may cause harmful interference to radio communications. However, there is no guarantee that
interference will not occur in a particular installation.
If this equipment does cause harmful interference to radio or television reception, which can be
determined by turning the equipment off and on, the user is encouraged to try to correct the
interference by one or more of the following measures:
•Reorient or relocate the receiving antenna.
•Increase the separation between the equipment and receiver.
•Connect the equipment into an outlet on a circuit different from that to which the receiver is
connected.
•Consult the dealer or an experienced radio/TV technician for help.
27.
Changes or modification not expressly approved bythe party responsible for compliance could void
the user’s authority to operate the equipment.
28.
Shielded cables must be used with this unit to ensure compliance with the Class B FCC limits.
29.
This Class B digital apparatus complies with Canadian ICES-013.
30.
Please store this User Guide properly.

V
Legal Information
Supplier’s Declaration of Conformity
47 CFR § 2.1077 Compliance Information
Unique Identifier: Trade Name: Sharp, Model No.: DX-B352P
Responsible Party - U.S. Contact Information
Sharp Electronics Corporation
100 Paragon Drive, Montvale, New Jersey, United States 07645
Telephone number: +1-201-529-8984
FCC Compliance Statement
This device complies with Part 15 of the FCC Rules.
Operation is subject to the following two conditions: (1) This device may not cause harmful interference,
and (2) this device must accept any interference received, including interference that may cause
undesired operation.
Products that have earned the ENERGY STAR® are designed to protect the
environment through superior energy efficiency.

VI
Table of Contents
1.Before Using the Printer .................................................................................................................................1
1.1. Product series introduction......................................................................................................................1
1.2. Supplied Accessories..............................................................................................................................2
1.3. Product View ...........................................................................................................................................3
1.4. Laser Toner Cartridge.............................................................................................................................5
1.5. Control Panel...........................................................................................................................................6
1.5.1.0
verview of control panel................................................................................................................6
1.5.2.Indicator function of control panel.........................................................................................................8
2.Paper and Print Media...................................................................................................................................10
2.1. Paper Specification ...............................................................................................................................10
2.2. Special Paper........................................................................................................................................11
2.3. Loading Paper.......................................................................................................................................12
2.3.1. Loading into the Automatic Feeder Tray........................................................................................12
2.3.2. Install manual feed tray ..................................................................................................................13
2.4. Non-printable Area................................................................................................................................15
2.5. Paper application rules..........................................................................................................................15
3.
Driver installation anduninstallation ..............................................................................................................16
3.1. Driver installation based on Windows system.......................................................................................16
3.1.1. Installation via USB connection......................................................................................................16
3.1.2. Installation via wired network connection.......................................................................................17
3.1.3. Driver uninstallation ........................................................................................................................18
3.2. Driver installation based on Mac system...............................................................................................18
3.2.1. Driver installation ............................................................................................................................18
3.3.Add printer to Mac system.....................................................................................................................20
4. Wired network setup.....................................................................................................................................21
4.1. Set IP Address ......................................................................................................................................21
4.1.1. Automatic Setting............................................................................................................................21
4.1.2. Manual Setting................................................................................................................................21
5.Web server ....................................................................................................................................................22
5.1. Visit the embedded Web server ............................................................................................................22
5.2. Use Web server to manage printer.......................................................................................................22
5.2.1.IP address setup.................................................................................................................................23
5.2.1.1. IPv4 setup...................................................................................................................................23
5.2.1.2. IPv6 setup...................................................................................................................................24
5.2.2. Machine setup ................................................................................................................................24
5.2.2.1. Set up e-mail notification ............................................................................................................24
5.2.2.2. Sleep time setup.........................................................................................................................25
5.2.2.3. Recover factory settings via Web server....................................................................................25
6.
Print...............................................................................................................................................................26
6.1. Print Function ........................................................................................................................................26
6.2. Print Settings .........................................................................................................................................27
6.3. Cancel printing.......................................................................................................................................27
6.4. Printing Mode ........................................................................................................................................27
6.4.1. Printing with the Automatic Feeder Tray..........................................................................................27
6.4.2. Printing with manual feed tray ........................................................................................................28
6.5. Automatic Two-Sided Printing...............................................................................................................29
6.5.1. Duplex printing unit setup...............................................................................................................29
6.5.2. How to carry out auto duplex printing.............................................................................................30

VII
6.6. Fine mode printing.................................................................................................................................32
6.7. Mute printing..........................................................................................................................................33
6.8. Auto shut-off setting...............................................................................................................................34
6.9. Open Help Document............................................................................................................................35
7.General Settings............................................................................................................................................36
7.1. System Setting.......................................................................................................................................36
7.1.1. Language Setting............................................................................................................................36
7.1.2. Sleep Time Setting...........................................................................................................................37
7.1.3. Toner Save .....................................................................................................................................37
7.1.4. Mute printing...................................................................................................................................38
7.1.5. Restore Factory Settings................................................................................................................39
7.1.6. Auto shut-off setting........................................................................................................................39
7.2. Network Settings ...................................................................................................................................40
7.3. Network Information ..............................................................................................................................41
7.4. Print information report..........................................................................................................................42
8.Routine Maintenance.....................................................................................................................................43
8.1. Cleaning the Printer...............................................................................................................................43
8.2. Toner cartridge and drum component maintenance.............................................................................45
8.2.1. About toner cartridge and drum component...................................................................................45
8.2.2. Replace toner cartridge and drum component...............................................................................45
9. Troubleshooting ..........................................................................................................................................49
9.1. Cleaning Jammed Paper.......................................................................................................................49
9.1.1. Paper jam of auto feed tray ............................................................................................................49
9.1.2. Paper jam of manual feed tray ......................................................................................................50
9.1.3. Middle jam.......................................................................................................................................51
9.1.4. Paper Jam in the Fuser Unit...........................................................................................................53
9.1.5. Duplex Unit Jam .............................................................................................................................54
9.2. Software Failure ....................................................................................................................................55
9.3. Common Troubleshooting.....................................................................................................................56
9.3.1. Common Problems.........................................................................................................................56
9.3.2. Image Defects.................................................................................................................................57
1O.Menu Structure
...........................................................................................................................................60
11.Product Specifications.................................................................................................................................61
11.1.Overview of the Specifications ................................................................................................................61

1
1.Before Using the Printer
1.1.Product series introduction
Product series parameters
USB •
Interface
Type
Language
Panel
Automatic Two-Sided Printing
•
MutePrinting
•
(●: Support; Blank: Unsupport)
This product series is subject to additions or changes without prior notice.
NET
•
Print
PDL
•
Control
LCD
•
A4
Print
33ppm
•
Speed
Letter
35ppm
•

2
1.2.Supplied Accessories
Name Parts
Toner cartridge
Drum component
USB Interface Cable
Power Cord
CD-ROM

3
1.3.Product View
Side view
1 Output Bin Stores the printed paper.
2 Control Panel Indicate printer status to conduct set operation.
3 Output Tray Prevents the printed paper from falling.
4 Front Cover Open the front cover to take out the laser toner cartridge.
5 Manual feed tray Place mediums to be printed in manual feed tray.
6 Power switch
Turn the power on or off and press this button under
Ready state to enter energy-saving mode.
Press and hold this button for more than 2s to turn the printer
power off.
7 Automatic Feeder Tray Place mediums to be printed in the auto feed tray.
8 Paper deflector of
manual feed tray
Slide paper deflector to adapt to paper width.

4
9
Paperwidthdeflectorof
auto feed tray
10
Paperlengthdeflector
of auto feed tray
Clip ofextended tray of
11
auto feed tray
Slide paper width deflector to adapt to paper width.
Slide paper length deflector to adapt to paper length.
Adjustment of length extension of the tray.
Rear View
1 USBInterface
Connects product to the computer with USB cable.
2 Network Interface Connects product to network with a network cable.
3 Power Interface Connects product to power with power cord.
4 Rear Cover Paper release when it gets jammed.
5 Duplex Printing Unit Paper feed at duplex printing and paper release when paper
gets jammed at duplex printing.

5
1.4.Laser Toner Cartridge
Laser toner cartridge is composed of drum component and toner cartridge.
Service life of drum component
Type Average Print Volume
Longevity of drum
component
About 12000 Pages
(Based on ISO 19752 standard)
Service life of toner cartridge
Type Average Print Volume
Standard-volume
toner cartridge
High-volumetoner
cartridge
About 1500 Pages
(Based on ISO 19752 standard)
About 3000 Pages
(Based on ISO 19752 standard)
•SHARP does not recommend using consumables other than the
original consumables provided, as any damages caused bynon-original
consumables are not covered by the scope ofwarranty.
•
C
onsumable’s capacity may vary based on printing volume.
•Toner cartridge appearance may differ based on volume and models,
so the schematic diagram is only for your reference.

6
1.5.Control Panel
1.5.1.0
Overview of control panel
The layout of the printer control panel is shown below:
LCD control panel
No. Name Functions
1 LCD Display Display operation interface and product information
Save toner
2 indicator
Indicate the on/off of save toner function(Please refer
to Chapter 1.5.2).
3 Tonercartridge/
status indicator
Indicate the status of toner cartridge and printer (please refer
to Chapter 1.5.2).
4 Menu Open the main menu of the control panel.
5 OK Confirm the selection on the screen.
6 UP
Scroll up through the menus and options.
Change the numeric value by cycle accumulating.

7
7 Down
Scroll down through the menus and options.
Shift the entry positions from left to right, for example, to input IP
address entry.
8 Back Return to the previous menu.
9 save toner key Open save toner function.
10 Cancel Exit operation.

8
1.5.2. Indicator function of control panel
Display meanings of save toner indicator are as follows:
No.
Save
toner indicator
Status
Status description
1
Die out
2 Blue indicator
blinks
Turn save toner
state function and
sleep mode
None
3 Blue indicator
normally on
Turn on save
toner function
Display meanings of toner cartridge / status indicator are as follows:
No.
Display oftoner
cartridge/status
indicator
Status Status description
1 Die out Sleep mode
2 Green indicatorblinks
Warming up,
printing, print
cancelling
3 Green indicator normally on Printer is ready

9
4 Orange indicator blinks Low toner warning
5 Orange indicator
normally on
6 Red indicator normallyon
Toner cartridge error
(uninstalled ink cartridge,
non-matching ink cartridge,
invalid toner cartridge)
Printer errors such as
paper error (paper out,
paper jam, paper feed
failure), opened front cover

10
2.Paper and Print Media
2.1.Paper Specification
Media
Type
Plain paper (19-28 lb. bond), thin paper (16-19 lb. bond)
Automatic
Feeder
Tray
Media
size
Media
weight
A4, Letter, A5, Legal, Statement, JIS B5, Folio, Oficio, Executive,
ISO B5, A6, B6, 16K, Big 16K, 32K, Big 32K, Custom
16-28 lb. bond
Maximum
capacity
of the
tray
Media
Type
250 pages
Plain paper (19-28 lb. bond), thin paper (16-19 lb. bond), thick
paper (
28 lb. bond- 74 lb. cover
), transparent film, carton paper,
label paper, envelope
Manual
feed tray
Media
size
Media
weight
A4, Letter, Legal, Folio, Oficio, Statement, Executive, JIS B5, ISO B5,
A5, A6, B6, Monarch Env, DL Env, C5 Env, NO.10 Env, C6 Env,
Japanese Postcard, ZL, 16K, Big 16K, 32K, Big 32K, Yougata4,
Postcard, Younaga3, Nagagata3, Yougata2, Custom
16 lb. bond- 74 lb. cover
Maximum
capacity
of the
tray
1 pages
•It is not recommended to use special paper extensively, which may affect the
service life of the printer.
•The print media that does not meet the guidelines listed in this User Guide may
result in poor print quality, increased paper jam and excessive wear of the printer.
•Properties such as weight, composition, texture and humidity are important
factors affecting the printer performance and output quality.

11
Please note the following matters when selecting the print media:
1. Desired print effect: The print media selected should meet the requirement of the print tasks.
2.Surface smoothness: The smoothness of the print media may affect the sharpness of the print
outcome.
3.Some print media may meet all the use guidelines contained herein, but they still cannot
bring satisfactory effect. This may be due to incorrect operation, inappropriate temperature
and humidity, or other factors beyond the control of SHARP. Before purchasing large
quantities of print media, make sure that the print media meets the specifications specified in
this User Guide.
2.2.Special Paper
This printer supports using the special paper for printing. Special paper includes: label paper,
envelope, transparent film, thick paper, carton paper, thin paper.
and size in the print settings to get the best print effect.
Please observe the following standards:
Types of
Print Media Correct Practices Incorrect Practices
Label
Paper
Use labels with no
exposed lining paper only.
Labels shall be placed flat
when using.
Use labels on full sheet only.
There is no guarantee thatall
the labels in the market can
meet corresponding
requirements.
Use wrinkled, blistered or damaged
label papers.
Envelope Envelopes should beloaded
evenly.
Use wrinkled, nicked, stuck or damaged
envelopes.
Use envelopes with clips, snaps,
windows, or coated linings.
Use envelopes with self-adhesive
stickers or other synthetic materials.
Transparent
Film
Only use transparentfilms
approved for use in laser
printers.
Use transparent print media that is not
suitable for laser printers.
Thick Paper,
carton paper
Only use heavy paper that is
approved for use in laser
printers and meets the weight
specifications of thisprinter.
Use the paper whose weight is more
than the specification of the media
recommended for this printer, unless the
paper is approved for use in this printer.

12
2.3.Loading Paper
2.3.1. Loading into the Automatic Feeder Tray
1. Slide out the automatic feeder tray from the printer.
2. Slide the clip of extended tray of auto feed tray, paper length deflector and paper width
deflector to the slot suitable for paper size, in order to match paper length and width.
Note
:
•Do not overly squeeze the "paper length guide" and "paper width guide",
otherwise it could lead to deformation ofpaper.
3. Before loading paper, please unfold the stacked paper to avoid a paper jam or feed error,
and then load the paper into the tray print-side down. The automatic feeder tray can be
loaded up to 250 pages, 21 lb. bond paper.
Table of contents
Other Sharp Printer manuals

Sharp
Sharp AR-215 User manual

Sharp
Sharp BP-1200S User guide

Sharp
Sharp BP-50C26 User manual

Sharp
Sharp MX-C400P User manual

Sharp
Sharp AR-D29 User manual

Sharp
Sharp JX-9600 User manual

Sharp
Sharp DX-B350P User manual

Sharp
Sharp MX-B557P User manual

Sharp
Sharp AR-M280 User manual

Sharp
Sharp JX-9460 User manual

Sharp
Sharp MX-B400P Installation and operating manual

Sharp
Sharp AR-215 User manual

Sharp
Sharp JX-8200 User manual

Sharp
Sharp AR-C260P User manual

Sharp
Sharp AR-C260P User manual

Sharp
Sharp MZ-80P5 User manual

Sharp
Sharp CE-140P User manual

Sharp
Sharp DM-3551 User manual

Sharp
Sharp AR-C200P - Color Laser Printer User manual

Sharp
Sharp CE-129P User manual