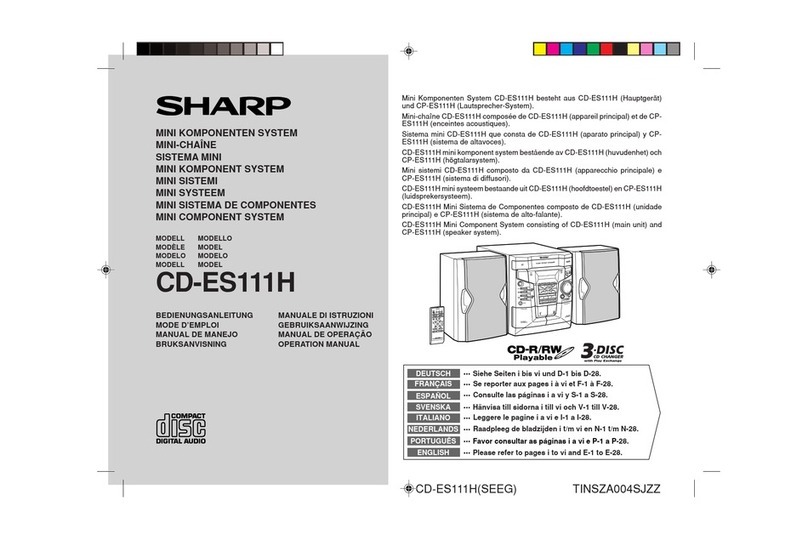
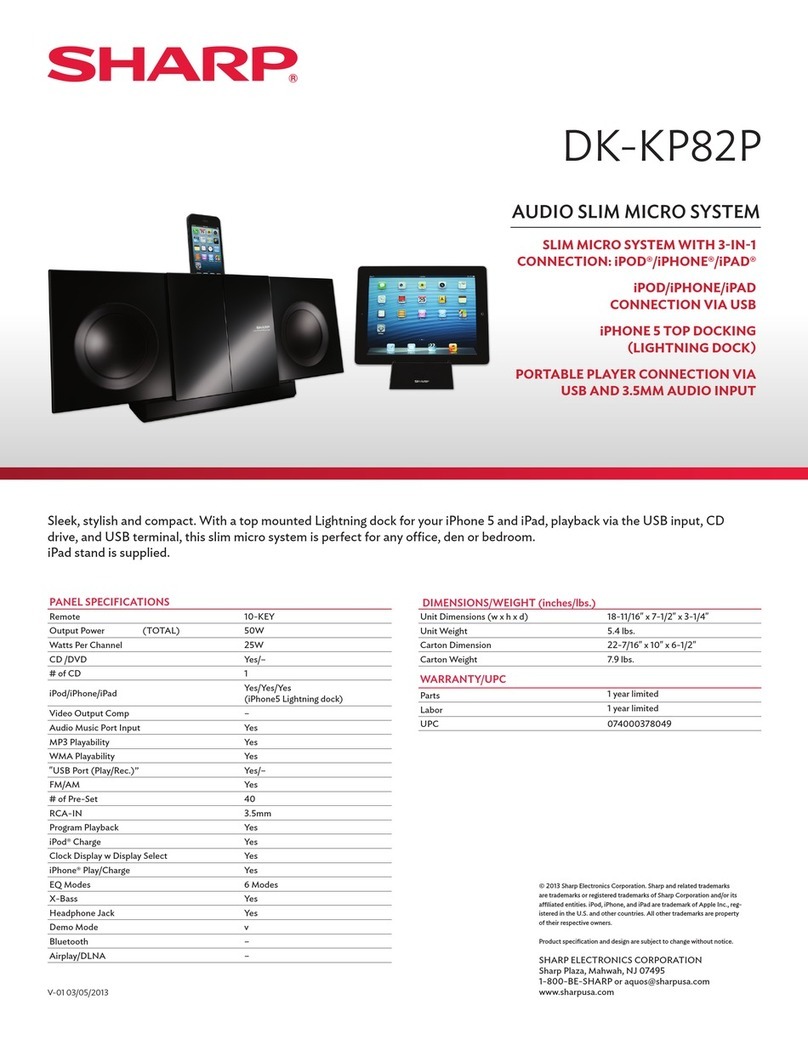
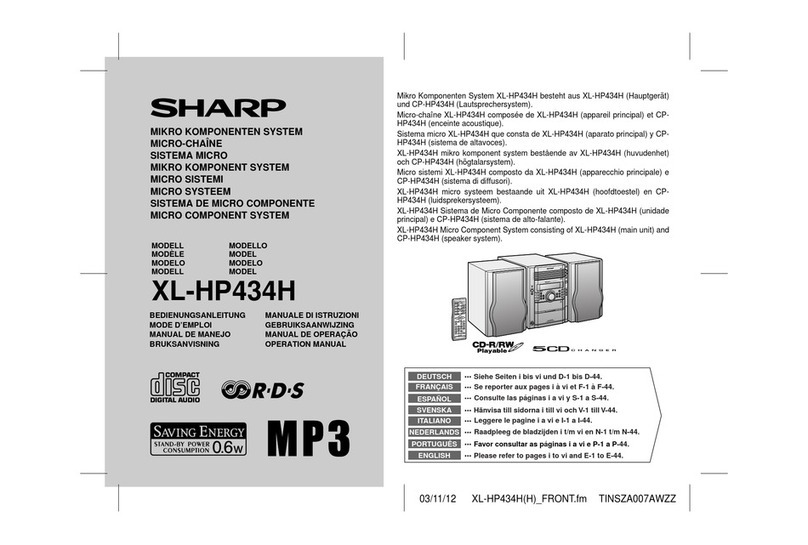
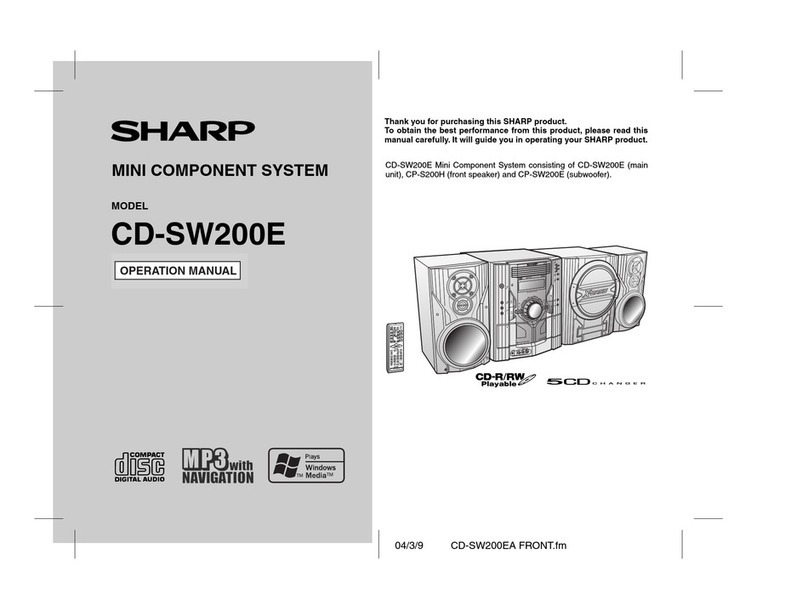
Sharp XL-60H User manual

MICRO COMPONENT SYSTEM
OPERATION MANUAL
Thank you for purchasing this SHARP product.
To obtain the best performance from this product
please read this manual carefully.
It will guide you in operating your SHARP product.
XL-60H/XL-70HMicroComponentSystemconsist-
ing of XL-60H/XL-70H (main unit) and CP-XL60H/
CP-XL70H (speaker system).
MODEL
XL-60H
XL-70H
XL-60H
XL-70H
60H/70H(SUK).FRONT 00.1.7, 5:07 PM1

1
SPECIAL NOTES
NOTE FOR USERS IN THE U.K.
The mains lead of this product is fitted with a non-
rewireable(moulded)plugincorporatinga3Afuse.
Shouldthefuseneedtobereplaced,a BSI orASTA
approved BS 1362 fuse marked or and of
the same rating as above, which is also indicated
on the pin face of the plug must be used.
Alwaysrefitthe fuse cover after replacing the fuse.
Never use the plug without the fuse cover fitted.
In the unlikely event of the socket outlet in your
homenot being compatible with theplug supplied,
cut-off the mains plug and fit an appropriate type.
DANGER:
The fuse from the cut-off plug should be removed
and the cut-off plug destroyed immediately and
disposed of in a safe manner.
Under no circumstances should the cut-off plug
be inserted elsewhere into a 13A socket outlet as
a serious electric shock may occur.
To fit an appropriate plug to the mains lead, follow
the instructions below:
IMPORTANT:
The wires in the mains lead are coloured in ac-
cordance with the following code:
Blue : Neutral
Brown : Live
As the colours of the wires in the mains lead of
thisproduct may not correspondwith the coloured
markings identifying the terminals in your plug,
proceed as follows:
●The wire which is coloured blue must be con-
nected to the plug terminal which is marked N
or coloured black.
●The wire which is coloured brown must be con-
nectedto the plug terminal whichis marked L or
coloured red.
Ensure that neither the brown nor the blue wire is
connected to the earth terminal in your three pin
plug.
Before replacing the plug cover, make sure that:
●If the new fitted plug contains a fuse, its value is
the same as that removed from the cut-off plug.
●The cord grip is clamped over the sheath of the
mains lead and not simply over the lead wires.
IF YOU HAVE ANYDOUBT, CONSULTAQUALI-
FIED ELECTRICIAN.
SERVICE INFORMATION
In the unlikely event of your equipment requiring
repair, please contact the dealer or supplier from
whom it was purchased. Where this is not possi-
ble, please contact the telephone number listed
below.
You will then be given details of how to obtain ser-
vice. - 0345-125387 -
Please note; all calls will be charged at local rate.
Certain replacement parts and accessories may
be obtained from our main parts distributor.
WILLOW VALE ELECTRONICS LTD.
MANCHESTER 0161-682-1415
READING 01189-876444
In the unlikely event of this equipment requiring
repair during the guarantee period, you will need
to provide proof of the date of purchase to the re-
pairing company.
Please keep your invoice or receipt, which is sup-
plied at the time of purchase.
60H/70H(SUK)01-07 00.1.5, 11:38 AM1

2
(Continued)
CAUTION
Useofcontrols,adjustmentsorperformanceofpro-
cedures other than those specified herein may re-
sult in hazardous radiation exposure.
As the laser beam used in this compact disc player
is harmful to the eyes, do not attempt to disassem-
blethe cabinet. Refer servicing toqualified person-
nel only.
Warning:
●To prevent fire or shock hazard, do not expose
this appliance to dripping or splashing. No ob-
jects filled with liquids, such as vases, shall be
placed on the apparatus.
●Recording and playback of any material may
requireconsent,whichSHARPisunable to give.
Please refer particularly to the provisions of the
Copyright Act 1956, the Dramatic and Musical
Performers ProtectionAct 1958, the Performers
Protection Acts 1963 and 1972 and to any sub-
sequent statutory enactments and orders.
●This equipment complies with the requirements
of Directives 89/336/EEC and 73/23/EEC as
amended by 93/68/EEC.
●When the ON/STAND-BY button is set at
STAND-BYposition,mainsvoltageisstill present
inside the unit.
When the ON/STAND-BY button is set at
STAND-BYposition, the unit may be brought into
operation by the timer mode or remote control.
Warning:
●This unit contains no user serviceable parts.
Never remove covers unless qualified to do so.
This unit contains dangerous voltages, always
remove mains plug from the socket before any
service operation and when not in use for a long
period.
60H/70H(SUK)01-07 00.1.5, 11:38 AM2

3
Page
ACCESSORIES ................................................. 3
PRECAUTIONS .............................................. 4-5
NAMES OF CONTROLS AND INDICATORS .. 5-7
PREPARATION FOR USE ...........................8-10
SOUND CONTROL .................................... 10-11
SETTING THE CLOCK ................................... 12
COMPACT DISC OPERATION ..................13-15
CASSETTE OPERATION ................................ 16
CONTENTS
Page
RADIO OPERATION .................................. 17-18
RDS (Radio Data System) OPERATION
..
19-26
RECORDING ................................................... 27
HOW TO USE THE BUILT-IN TIMER.........27-29
USING EXTERNAL UNITS......................... 30-31
RESETTING THE MICROCOMPUTER........... 31
MAINTENANCE .............................................. 31
SPECIFICATIONS ........................................... 32
PRECAUTIONS
■General
●Please ensure that the equipment is positioned
in a well ventilated area and ensure that there is
at least 10cm (4”) of free space along the sides
and back. There must also be a minimum of
20cm (8”) of free space on the top of the unit.
●Do not use oil, solvents, petrol, paint thinners or
insecticides on the unit.
●Do not expose the unit to moisture, to tempera-
tureshigherthan60°C(140°F) or to extreme low
temperatures.
●Keep the unit away from direct sunlight, strong
magnetic fields, excessive dust, humidity and
electronic/electrical equipment (home comput-
ers, facsimiles, etc.) which generate electrical
noise.
●Hold the AC power plug by the head when re-
moving it from theAC socket, as pulling the lead
can damage internal wires.
ACCESSORIES
● FM aerial ×1
● Remote control ×1 ● AM loop aerial ×1
●When cleaning the heads, pinch roller, etc., re-
move theAC power plug from the wall socket as
the unit contains high voltages.
Do not remove the outer cover, as this may re-
sult in electric shock. Refer internal service to
your local SHARP service facility.
●Use the unit on a firm, level surface free from vi-
bration, and do not place anything on the top of
the unit.
●If an electrical storm is taking place near you, it
is suggested that you disconnect the AC power
lead from the AC socket for safety.
●The ventilation should not be impeded by cover-
ing the ventilation openings with items, such as
newspapers, tablecloths, curtains, etc.
●No naked flame sources, such as lighted can-
dles, should be placed on the apparatus.
●Attention should be drawn to the environmental
aspects of battery disposal.
●The apparatus is designed for use in moderate
climate.
Note:
Parts and equipment mentioned in this operation manual other than
those in the drawing are not included.
● AC power lead ×1
60H/70H(SUK)01-07 00.1.5, 11:38 AM3
4
(Continued)
■Cassette tape
●For playback, use normal or low-noise tape for
the best sound. (Metal or CrO2tape is not rec-
ommended.)
For recording, use only normal tape.
●Do not use C-120 tapes, tapes with large diam-
eter reels, or poor-quality tapes, as they may
cause malfunctions.
●Before loading a tape into the cassette compart-
ment, tighten the slack with a pen or pencil.
●Cassettes have removable tabs which prevent
accidentalrecording or erasing from taking place.
Removing the tab will protect the corresponding
sidefrom being erased. Cover the tab holes with
adhesive tape to erase or record again.
Warning:
The voltage used must be the same as that speci-
fied on this unit. Using this product with a higher
voltage than that which is specified is dangerous
and may result in a fire or other type of accident
causing damage.
SHARP will not be held responsible for any dam-
age resulting from use of this unit with a voltage
other than that which is specified.
■Volume control
Thesound level at a givenvolume setting depends
onacombinationof speaker efficiency, location and
various other factors.
It is advisable to avoid exposure to high volume
levels, which occur whilst turning the unit on with
the volume control setting up high, or whilst con-
tinually listening at high volumes.
Warning:
CD players use a laser pickup which can damage
theeyesif viewed directly. Do not look atthepickup,
and do not touch the pickup directly.
■Care of compact discs
Compactdiscs are fairly resistant todamage, how-
ever mistracking can occur due to the accumula-
tion of dirt on the disc surface.
Follow the guidelines below for maximum enjoy-
ment from your CD collection and player.
●Do not write on either side of the disc, particu-
larly the non-label side. Signals are read from
the non-label side. Do not mark this surface.
●Keep your discs away from direct sunlight, heat,
and excessive moisture.
●Alwayshold the CDs bythe edges. Fingerprints,
dirt, or water on the CDs can cause noise or
mistracking.IfaCDisdirtyordoesnotplayprop-
erly, clean it with a soft, dry cloth, wiping straight
out from the centre, along the radius.
■Condensation
Sudden temperature changes, storage or opera-
tioninanextremelyhumidenvironmentmaycause
condensation inside the cabinet (CD pickup, tape
heads, etc.) or on the transmitter LED on the re-
mote control.
Condensation can cause the unit to malfunction.
If this happens, leave the power on with no disc
(or cassette) in the unit until normal playback is
possible (about 1 hour). Wipe off any condensa-
tion on the remote control transmitter LED with a
soft cloth before operating the unit.
NO
YES
Correct
Side A (1)
Tab for side B (2) Tab for sideA(1)
60H/70H(SUK)01-07 00.1.5, 11:38 AM4

5
NAMES OF CONTROLS AND INDICATORS
■Front panel
1. Timer Indicator
2. Record Indicator
3. Sleep Indicator
4. (CD) Random Indicator
5. (CD/TUNER) Memory Indicator
6. RDS Indicator
7. Traffic Programme Indicator
8. Traffic Announcement Indicator
9. FM Stereo Mode Indicator
10. FM Stereo Indicator
11. (CD) Play Indicator
12. (CD) Repeat Indicator
13. EON Indicator
14. Programme Type Indicator
15. Traffic Information Indicator
16. Surround Indicator
17. CD Compartment
18. EON Button
19. On/Stand-by Button
20. Programme Type/Traffic Information
Search Button
21. Surround Button
22. CD Open/Close Button
23. ASPM Button
24. Remote Control Sensor
25. Display Mode Selector Button
26. Volume Select Button
27. (CD/TAPE) Stop Button
(TUNER) Memory Clear Button
28. Record Pause Button
29. Bass/Treble Selector Button
30. Memory/Set Button
31. Clock/Timer/Sleep Button
32. Band Selector Button
33. (CD) Review Button
(TAPE) Rewind Button
(TUNER) Tuning Down Button
34. Function Selector Button
35. Headphone Socket
36. (CD) Play/Pause Button
(TAPE) Play Button
37. Jog Dial
38. (CD) Cue Button
(TAPE) Fast Forward Button
(TUNER) Tuning Up Button
39. Volume/Jog Dial Selector Button
40. Cassette Compartment
123 456789
12 13 14 15
16
11 10
17
18
19
20
21
22
23
24
25
26
27
28
29
30
36
37
38
39
40
31
32
33
34
35
60H/70H(SUK)01-07 00.1.5, 11:38 AM5

6
(Continued)
1
2
3
4
5
6
■Rear panel
1. CD Digital Output Socket
2. AC Power Input Socket
3. FM 75 ohms Aerial Socket
4. AM Loop Aerial Input Socket
5. Video/Auxiliary (Audio Signal) Input Sock-
ets
6. Speaker Terminals
■Speaker section
1. Tweeter
2. Woofer
3. Bass Reflex Duct
4. Speaker Wire
1
2
4
3
1
2
4
3
1. Tweeter
2. Woofer
3. Bass Reflex Duct
4. Speaker Wire
CP-XL60H
CP-XL70H
60H/70H(SUK)01-07 00.1.5, 11:38 AM6

7
■Remote control
1. Remote Control Transmitter LED
●Tuner control section
2. Programme Type/Traffic Information
Search Button
3. Preset Up/Down Buttons
●CD control section
4. Clear Button
5. Random/Repeat Button
6. Memory Button
7. Stop Button
8. Play/Pause Button
9. Track Down/Review Button
10. Track Up/Cue Button
●Tape control section
11. Record Pause Button
12. Rewind Button
13. Stop Button
14. Play Button
15. Fast Forward Button
●Common section
16. Surround Button
17. Sleep Button
18. Bass Up/Down Buttons
19. Function Selector Buttons
20. On/Stand-by Button
21. Timer Button
22. Clock Button
23. Treble Up/Down Buttons
24. Volume Up/Down Buttons
2
4
5
6
11
12
3
7
8
9
10
13
14
15
22
24
17
18
19
20
21
23
1
16
(Continued)
60H/70H(SUK)01-07 00.1.5, 11:38 AM7

8
PREPARATION FOR USE
Connect each speaker wire to the SPEAKER termi-
nals as shown.
Use speakers with an impedance of 4 ohms or
more.
Use of speakers with an impedance less than 4
ohms may damage your unit.
Notes:
●Connect the wire with the white line to the minus
(-) terminal and the plain wire to the plus (+) ter-
minal.
●Do not mix the right channel and left channel
wiring when connecting the speakers to the unit.
●Do not let the bare speaker wires touch each
other as this may damage the amplifier and/or
speakers.
●Donot allow any objects tofallintoor to be placed
in the bass reflex ducts.
●Unplug theAC power lead from theAC socket
before connecting or disconnecting any com-
ponent.
■Speaker connection
2
13
Right speaker Left speaker
White
line
■Removing the speaker grilles
1Removethe lower part of the speakergrille first.
2Remove the upper part of the speaker grille.
Caution:
Whenthespeaker grilles are removed, the speaker
diaphragmsare exposed. Make sure nothingcomes
into contact with the speaker diaphragms.
■Mounting the speaker grilles
Fit the four posts on the speaker grille into the
mountingholesand push them lightly with thepalm
of your hand to secure.
*60H/70H(SUK)08-12 00.1.5, 11:39 AM8

9
(Continued)
■Aerial connection
123
External FM aerial
Use an external FM aerial if you need better recep-
tion.
Consult your dealer.
Supplied FM aerial
Connect the FM aerial wire to the FM 75 OHMS
socket and position the FM aerial wire in the direc-
tion where the strongest signal can be received.
Supplied AM loop aerial
Connect the AM loop aerial wire to the AM LOOP
socket. Position theAM loop aerial for optimum re-
ception.
Place the AM loop aerial on a shelf, etc., or attach
it to a stand or wall with screws (not supplied).
Notes:
●Donot place the aerial onthe main unit as itmay
resultin noise pickup fromtheinternaldigital elec-
tronics.
Place the aerial away from the unit for better re-
ception.
●If the AM loop aerial and the FM aerial wire are
placed near theAC power lead, it may cause in-
terference in radio reception.
FM aerial AM loop aerial
External FM aerial
■Connecting the AC power lead
AC 230 V, 50Hz
To an AC socket
To AC INPUT
Connect the AC power lead to the AC power input
socket, then connect theAC power lead plug to an
AC socket.
Notes:
●Unplug theAC power lead from theAC socket if
the unit is not to be used for a prolonged period
of time.
●Never use a power lead other than the one sup-
plied. Otherwise, a malfunction or an accident
may occur.
10 cm (4") 10 cm (4")
20 cm (8")
10 cm (4")
■Placing the system
●Besuretokeep space between the units for ven-
tilation.
●Keep the top of this unit at least 20 cm (8") away
from the wall, and the back at least 10 cm (4")
away.
Note:
●Do not place the system or speakers near the
television set as the magnetic fields produced
may cause irregular colours to be displayed.
*60H/70H(SUK)08-12 00.1.5, 11:39 AM9

10
15
15
●When inserting or removing the batteries, push
them towards the ëbattery terminals.
●Installingthe batteries incorrectly may cause the
unit to malfunction.
Precautions for battery use:
●Insert the batteries according to the direction in-
dicated in the battery compartment.
●Replace all old batteries with new ones at the
same time.
●Do not mix old and new batteries.
●Remove the batteries if they are weak or if the
unitwill not be used for longperiods of time.This
willpreventpotentialdamage due to battery leak-
age.
Caution:
Donotuserechargeablebatteries(nickel-cadmium
battery, etc.).
Notes concerning use:
●Replacethe batteries if theoperating distance is
reduced or if the operation becomes erratic.
●Periodically clean the transmitter LED on the re-
mote control and the sensor on the main unit
with a soft cloth.
●Exposing the sensor on the main unit to strong
light may interfere with operation. Change the
lighting or the direction of the unit.
●Keep the remote control away from moisture,
excessive heat, shock, and vibrations.
●2 “AA” size batteries (UM/SUM-3, R6, HP-7
or similar)
●Batteries are not included.
0.2m - 6m
(8” - 20”)
■Remote control
(Continued)
■Volume
MIN 15 MAX
(Main unit operation)
WhentheVOLUMEcontrol is turned clockwise, the
volume will increase. When it is turned anti-clock-
wise, the volume will decrease.
(Remote control operation)
Press the VOLUME button to increase the vol-
ume and the VOLUME button to decrease the
volume.
(Main unit) (Remote control)
Servo Powered Volume:
●The jog dial automatically comes out when the
poweris turned on, and goesback when the unit
is set to the stand-by mode.
●When the power is turned on, you can put the
jog dial in and out by pressing the VOLUME
SELECT button.
Note:
Do not push in the jog dial forcibly with your finger.
SOUND CONTROL
*60H/70H(SUK)08-12 00.1.5, 11:39 AM10

11
(Continued)
-5 0 5
(Main unit operation)
1Press the BASS/TREBLE button to select
“BASS”.
2Turn the jog dial to adjust the bass.
(Remote control operation)
Press the BASS ( or ) button to adjust the
bass.
(Remote control)
(Main unit)
(Main unit operation)
1Press the BASS/TREBLE button to select
“TRE”.
2Turn the jog dial to adjust the treble.
(Remote control operation)
Press the TREBLE ( or ) button to adjust the
treble.
(Remote control)
(Main unit)
-5 0 5
■Treble
■Bass ■Surround
“Surround” refers to an acoustical effect similar to
the ambience of a concert hall, where the listener
hasthefeelingof being “surrounded” by the sound.
(Main unit) (Remote control)
To enjoy the surround effect:
Press the SURROUND button to activate it.
●“SURROUND” will light.
Note:
●The surround effect cannot be obtained from
monaural sound signals.
SURROUND
*60H/70H(SUK)08-12 00.1.5, 11:39 AM11

12
SETTING THE CLOCK
1Press the CLOCK/TIMER/SLEEP button to en-
ter the time check mode.
2Within3 seconds, press the MEMORY/SETbut-
ton.
3Turn thejogdialto select the time display mode.
0:00 AM 12:00
“0:00” →The 24-hour display will appear.
(0:00 - 23:59)
“AM 12:00” →The 12-hour display will appear.
(AM 12:00 - PM 11:59)
●Note that this can only be set when the unit is
first installed or it has been reset (see page 31).
4Press the MEMORY/SET button.
5Adjust the hour by turning the jog dial.
●When the jog dial is turned one click clockwise,
thetimewill increase by 1 hour.Whenitisturned
one click anti-clockwise, the time will decrease
by 1 hour.
Keepturningthejogdialtochangethetimecon-
tinuously.
●When the 12-hour display is selected, “AM” will
change automatically to “PM”.
(Main unit operation)
In this example, the clock is set for the 24-hour
(0:00) system.
CLOCK/TIMER/
SLEEP
MEMORY/SET
Jog dial
6Press the MEMORY/SET button.
7Adjust the minutes by turning the jog dial.
●When the jog dial is turned one click clockwise,
the time will increase by 1 minute. When it is
turned one click anti-clockwise, the time will de-
crease by 1 minute.
Keepturningthejogdialtochangethetimecon-
tinuously.
●The hour setting will not advance even if min-
utes advance from “59” to “00”.
8Press the MEMORY/SET button.
●Theclock starts operating from“0”second.(Sec-
onds are not displayed.)
Note:
●In the event of a power failure or when the AC
powerleadisdisconnected, the clock display will
go out.
WhentheAC power supplyis restored, the clock
display will flash on and off to indicate the time
when the power failure occurred or when theAC
power lead was disconnected.
If this happens, follow the procedure below to
change the clock time.
To change the clock time:
Perform steps 1, 2 and 4 - 8 above.
To change the time display mode:
1Perform steps 1 - 3 in the section “RESETTING
THE MICROCOMPUTER”, on page 31.
2Perform steps 1 - 8 above.
*60H/70H(SUK)08-12 00.1.5, 11:39 AM12

13
COMPACT DISC OPERATION
■CD playback 1Press the ON/STAND-BY button to turn the
power on.
2Press the FUNCTION button until “CD” or “NO
DISC” appears in the display.
●Press the CD button on the remote control.
●Ifno disc is loaded, the display will be“NODISC”
instead of “CD”.
3Press the 7OPEN/CLOSE button to open the
CD compartment.
4Place a compact disc on the spindle, label side
up.
5Close the CD compartment by pushing the 7
OPEN/CLOSE button.
●The total number of tracks and the total playing
time will be displayed.
6Press the
0
/ CD
6
(
0 6
) button to start play-
back from track 1.
●Whenthe last track on the dischasfinishedplay-
ing, the unit will stop automatically.
To interrupt playback:
➀Press the 0/ CD 6(
0 6
) button.
➁Press the 0/ CD 6(
0 6
) button again to
resume playback from the same point.
To stop playback:
Press the ■button.
After use:
PresstheON/STAND-BYbutton to enter the stand-
by mode.
Caution:
●Do not push the compartment cover whilst it
is moving.
●Be careful not to jam your fingers in the CD
compartment cover.
●Ifthepower fails whilst the compartment is open,
wait until the power is restored.
●If the disc is damaged, dirty, or loaded upside
down, “NO DISC” or “READ ERR” will appear in
the display.
Clean, replace, or reload the disc properly.
●KeepforeignobjectsoutoftheCDcompartment.
●Subjecting the unit to shock or vibration may
cause mistracking.
●Whenthe unit is not beingused, be sure to close
the CD compartment. If it is left open, the lens
maybecome covered with dust and the unit may
not operate properly.
●Playing certain compact discs at a high volume
may cause mistracking. In this case, listen at
lower volume.
●If TV or radio interference occurs during CD op-
eration, move the unit away from the TV or ra-
dio.
1
2
6
4
2
1
6
/CD
5
3
7
OPEN/CLOSE
Label side up
60H/70H(SUK)13-17 00.1.5, 11:39 AM13

14
RANDOM/
REPEAT
VOLUME
/
JOG
Jog dial
(Continued)
■APSS (Auto Program Search System)
APSS automatically locates the beginning of any
track.
To listen again to the track being played:
(Main unit operation)
1Press the VOLUME/JOG button.
●The track number will flash.
2Whilst the track number is flashing, turn the jog
dial anti-clockwise.
(Remote control operation)
Press the 5 3 button for less than 0.5 seconds
during playback.
To move to the beginning of the next track:
(Main unit operation)
1Press the VOLUME/JOG button.
●The track number will flash.
2Whilst the track number is flashing, turn the jog
dial clockwise.
(Remote control operation)
Press the 2 4 button for less than 0.5 seconds
during playback.
●To skip a number of tracks at one time, press the
5 3 or 2 4 button on the remote control
repeatedly until the desired track number is
shown.
●To start playing at a desired track, press the 5
3or2 4 button on the remote control whilst
in the stop mode to select the track number, and
then press the 0/ CD 6(0 6) button.
■Cue and review
1Load a disc and begin playback.
2Hold the 2button down for audible fast for-
ward, and hold the 3button down for audible
fast reverse.
3Normal playback will resume when the 2or
3button is released.
Notes:
●When the end of the disc is reached whilst
cueing, the “END” will appear in the display and
CD operation is paused. Press the ■button to
stop CD operation.
●If the beginning of the disc is reached whilst re-
viewing,playbackwill start when you release the
3button.
■Repeat and random play
(Remote control operation)
1Press the RANDOM/REPEAT button.
●Each time this button is pressed, the mode will
change in the following order:
Repeat play Random play Normal play
2Press the 0 / CD( 0 6 ) button to start play-
back.
To cancel repeat or random play:
Press the RANDOM/REPEAT button until “ R“ or
“RANDOM” disappears.
To repeat playback of selected tracks:
After entering the programme for the tracks you
want to listen to using “APMS”, select repeat play
and start playback.
Notes:
●If you press the 2 4 button during random
play,you can move to the next track. On the other
hand, the 5 3 button does not allow you to
move to the previous track. The beginning of the
track being played will be located.
●When using random play or repeat play, be sure
to press the ■button after you are through lis-
tening.Otherwise,thediscwillplay continuously.
●DuringAPMS operation, random playis not pos-
sible.
60H/70H(SUK)13-17 00.1.5, 11:39 AM14

15
(Continued)
●The CD can be programmed to play the tracks
in any order, or skip certain tracks.
1Load a compact disc and close the CD com-
partment.
2Press the MEMORY/SET (MEMORY) button to
prepare for programming.
●“MEMORY” will flash.
3Within 30 seconds, turn the jog dial on the main
unit or press the 5 3 or 2 4 button on
the remote control to select the desired track.
4Press the MEMORY/SET (MEMORY) button.
●Theselected track number and the programmed
playback order will be displayed.
●After 2 seconds, the total playing time of the
programmed tracks will be displayed automati-
cally.
5Repeat steps 3 - 4 for any other track. Up to 20
tracks can be programmed.
●If you make a mistake whilst in the program-
ming mode (when MEMORY is flashing) or if
you change your mind, the programmed tracks
can be cleared by pressing the CLEAR button
ontheremote control.Thetrackswillbe cleared
sequentially starting with the last entered track.
6Press the
0
/ CD
6
(
0 6
) button to start play-
back of programmed selections.
To clear all the programmed selections:
To cancel a programmed sequence, press the
CLEARbutton on the remote control whilstthe disc
is stopped and the “MEMORY” indicator is lit.
Notes:
●OpeningtheCDcompartment automatically can-
cels the programmed sequence.
●Even if you press the ON/STAND-BY button to
enter the stand-by mode or the function is
changed from CD to some other function, the
programmed selections will not be cleared.
●Programmingis not possible during CDplayback.
It must be performed whilst the CD is stopped.
●When in the random play mode (whilst “RAN-
DOM” is lit), programming is not possible.
To perform any programming, cancel the random
play mode.
CLEAR
6
2,4
3
6
3
2,4
■APMS (Automatic Programmable
Music Selector)
Selected track number Playback order
Total playing time
60H/70H(SUK)13-17 00.1.5, 11:40 AM15

16
CASSETTE OPERATION
1Press the ON/STAND-BY button to turn the
power on.
2Press the FUNCTION button until “TAPE” ap-
pears in the display.
●Press the TAPE button on the remote control.
3Open the cassette door by pushing the area
marked “7PUSH EJECT”.
4Load the cassette into the cassette compart-
ment.
5Press the
0
button.
To stop playback:
Press the ■button.
Fast forward/rewind:
To advance the tape, press the 2button. To re-
wind, press the 3button.
Caution:
●When removing the cassette tape, press the ■
button,and then open the cassette compartment.
●Before changing from one tape operation to an-
other, press the ■button.
●If a power failure occurs during tape operation,
the tape head will remain engaged with the tape
and the cassette door will not open. In this case,
wait until power is restored.
●Even if the
0
/ CD 6button is pressed during
tape playback, the unit will not enter the pause
mode.
The pause mode is only active during synchro-
nised operation of the cassette deck and CD.
In the normal cassette mode, use the ■button.
1
2
5
3
4
2
1
5
■Tape playback
60H/70H(SUK)13-17 00.1.5, 11:40 AM16

17
RADIO OPERATION
To enter stations into memory:
1Perform steps 1 - 6 in the “Tuning” section.
2Press the MEMORY/SET button.
●“MEMORY” will flash.
3Within 5 seconds, turn the jog dial to make the
preset channel number flash in the display.
●Store the stations in memory, in order, starting
with preset channel 1.
4Within 5 seconds, press the MEMORY/SET
button to store that station in the selected sta-
tion preset number memory.
●If the “MEMORY” and preset number indicators
go out before the station is memorised, repeat
the operation from step 2.
5Repeat steps 1 - 4 to set other preset stations,
or to change a preset station.
After use:
PresstheON/STAND-BYbutton to enter the stand-
by mode.
■Tuning
3,5,6
2
14
1Press the ON/STAND-BY button to turn the
power on.
2Press the FUNCTION button until “FM” or “AM”
appears in the display.
3PresstheBANDbuttontoselect the desired fre-
quency band. (FM ST, FM or AM)
4Press the TUNING (Xor W) button to tune in to
the desired station.
Manual tuning:
Press the TUNING (Xor W) button as many times
as required to adjust the frequency shown on the
display to the frequency of the desired station.
Auto tuning:
When the TUNING (Xor W) button is pressed for
more than 0.5 seconds, scanning will start auto-
matically and the tuner will stop at the first receiv-
able broadcast station.
Notes:
●Whenradiointerferenceoccursduringauto scan
tuning, auto scan tuning may stop automatically
at that point.
●Ifa weak station signal isfound during auto scan
tuning, the station will be skipped.
●To stop the auto tuning, press the TUNING (X
or W) button again.
●When an RDS (Radio Data System) station is
tunedin,the frequency will be displayed firstand
then the RDS indicator will light. Finally, the sta-
tion name will appear.
5To receive an FM stereo transmission, press the
BAND button so that the “ST” indicator on the
display lights up.
●“j” will appear when an FM broadcast is in
stereo.
6If the FM reception is weak, press the BAND
button so that the “ST” indicator goes out.
●The reception changes to monaural, the sound
becomes clearer.
Note:
●The last station tuned in will be recalled, even
after changing the tuning band or the function,
or after switching the unit to the stand-by mode.
■Preset tuning
You can store up to 30 stations in memory (30 sta-
tions consisting of any combination of FM andAM
stations you like) and recall them.
3
2,4
60H/70H(SUK)13-17 00.1.5, 11:40 AM17

18
(Continued)
(Main unit operation)
1Press the VOLUME/JOG button.
●The preset channel number will flash.
2Whilst the preset channel number is flashing,
turn the jog dial to select the desired station.
(Remote control operation)
Press the PRESET ( or ) button for less than
0.5 seconds to select the desired station.
●The stations (preset channel number, frequency
and frequency band) which have been stored in
memory will appear in the display in numerical
order, irrespective of the frequency bands.
Note:
When searching for a memorised station, do not
press the PRESET button for more than 0.5 sec-
onds.
WhenthePRESET button is pressed for more than
0.5 seconds, the unit will enter the preset memory
scan mode.
To recall a memorised station:
12
( )
PRESET
To clear a memorised station:
4
31
2
1Press the VOLUME/JOG button.
2Turn the jog dial to select the preset channel
number you want to erase.
3Press the MEMORY/SET button.
4Within 5 seconds, press the TUN CLEAR button.
1,2
1To scan the preset stations, press the PRESET
( or ) button for more than 0.5 seconds.
●The station preset number flashes and pro-
grammed stations are sequentially received for
5 seconds each.
2Press the PRESET ( or ) button again to
stop the memory scan at the desired station.
Note:
When the preset memory does not have any sta-
tions stored in it, the preset memory scan will not
function.
Backup function:
The backup function protects all station presets for
a few hours should there be a power failure or the
AC power lead is removed from the AC socket.
■Preset memory scan
The stations saved in the preset memory can be
scanned automatically.
60H/70H(SUK)18-22 00.1.5, 11:40 AM18

19
RDS (Radio Data System) OPERATION
RDS is a broadcasting service which a growing
number of FM stations are now providing. It allows
these FM stations to send additional signals along
with their regular programme signals. For exam-
ple, the stations send their station names, and in-
formation about what type of programme they
broadcast, such as sports or music, etc.
When tuned to an FM station providing the RDS
service,RDS will appear,thestationfrequency (and
then the station name if sent) will be displayed.
The TP(Traffic Programme) will appear on the dis-
playwhenthe received broadcast carries traffican-
nouncements, and the TA (TrafficAnnouncement)
will appear whilst a traffic announcement is being
received.
EON will appear whilst the EON (Enhanced Other
Networks information) data is being broadcast.
Note:
When the TP and TA appear at the same time, an
announcement is being made.
When only the TA appears, an announcement is
not being made. (See page 26.)
■Information Provided by RDS
Withthe XL-60H/XL-70H, you can display two types
of RDS service. To show them in the display, press
the DISPLAY MODE button.
Each time you press the DISPLAY MODE button,
the display will change to show the following in-
formation.
Station names commonly
known will be displayed.
"NO PS" appears if no
signal is being received.
Programme type will be
displayed.
"NO PTY" appears if no
signal is being received.
Station frequencies.
PS
(Programme Service):
PTY
(Programme Type):
Station Frequency:
Descriptions of the PTY (Programme Type)
codes, TP (Traffic Programme) and TA (Traffic
Announcement)
With the XL-60H/XL-70H, you can search for and
receive the following PTY, TP and TA signals.
NEWS: Short accounts of facts, events and
publicly expressed views, reportage
and actuality.
AFFAIRS: Topical programme expandingor en-
larging upon the news, generally in
different presentation style or con-
cept, including debate, or analysis.
INFO: Programmeswhosepurposeis to im-
part advice in the widest sense.
SPORT: Programme concerned with any as-
pect of sport.
EDUCATE: Programme intended primarily to
educate,of which the formal element
is fundamental.
DRAMA: All radio plays and serials.
CULTURE: Programmesconcernedwith any as-
pect of national or regional culture,
including language, theatre, etc.
SCIENCE: Programmes about the natural sci-
ences and technology.
VARIED: Used for mainly speech-based pro-
grammes usually of light-entertain-
ment nature, not covered by other
categories. Examples include: quiz-
zes, panel games, personality inter-
views.
POP M: Commercialmusic,whichwould gen-
erally be considered to be of current
popularappeal,oftenfeaturing in cur-
rent or recent record sales charts.
ROCK M: Contemporary modern music, usually
written and performed by young mu-
sicians.
EASY M: Current contemporary music consid-
ered to be “easy-listening”, as op-
posed to Pop, Rock or Classical, or
one of the specialised music styles,
Jazz, Folk or Country. Music in this
category is often but not always, vo-
cal, and usually of short duration.
DISPLAY
MODE
60H/70H(SUK)18-22 00.1.5, 11:40 AM19
Other manuals for XL-60H
1
This manual suits for next models
2
Table of contents
Other Sharp Stereo System manuals

Sharp
Sharp CD-ES111H User manual

Sharp
Sharp CD-G10000 User manual

Sharp
Sharp XL-HF201P User manual

Sharp
Sharp XL-30V User manual

Sharp
Sharp CD-BK260V User manual

Sharp
Sharp XL-HP700H User manual

Sharp
Sharp XL-T300H User manual

Sharp
Sharp XL-E80 User manual

Sharp
Sharp CP-BK137W User manual

Sharp
Sharp CD-C811W User manual

Sharp
Sharp CD-ES222H User manual

Sharp
Sharp AQUOS CD-BA250 User manual

Sharp
Sharp XL-B510 User manual

Sharp
Sharp VZ-2000H User manual

Sharp
Sharp CD-SW440N User manual

Sharp
Sharp CD-XP500A User manual

Sharp
Sharp CD-ES9 User manual

Sharp
Sharp CD-SW340 User manual

Sharp
Sharp XL-E12H User manual

Sharp
Sharp CD-C440W User manual