Shure Incorporated
5/18
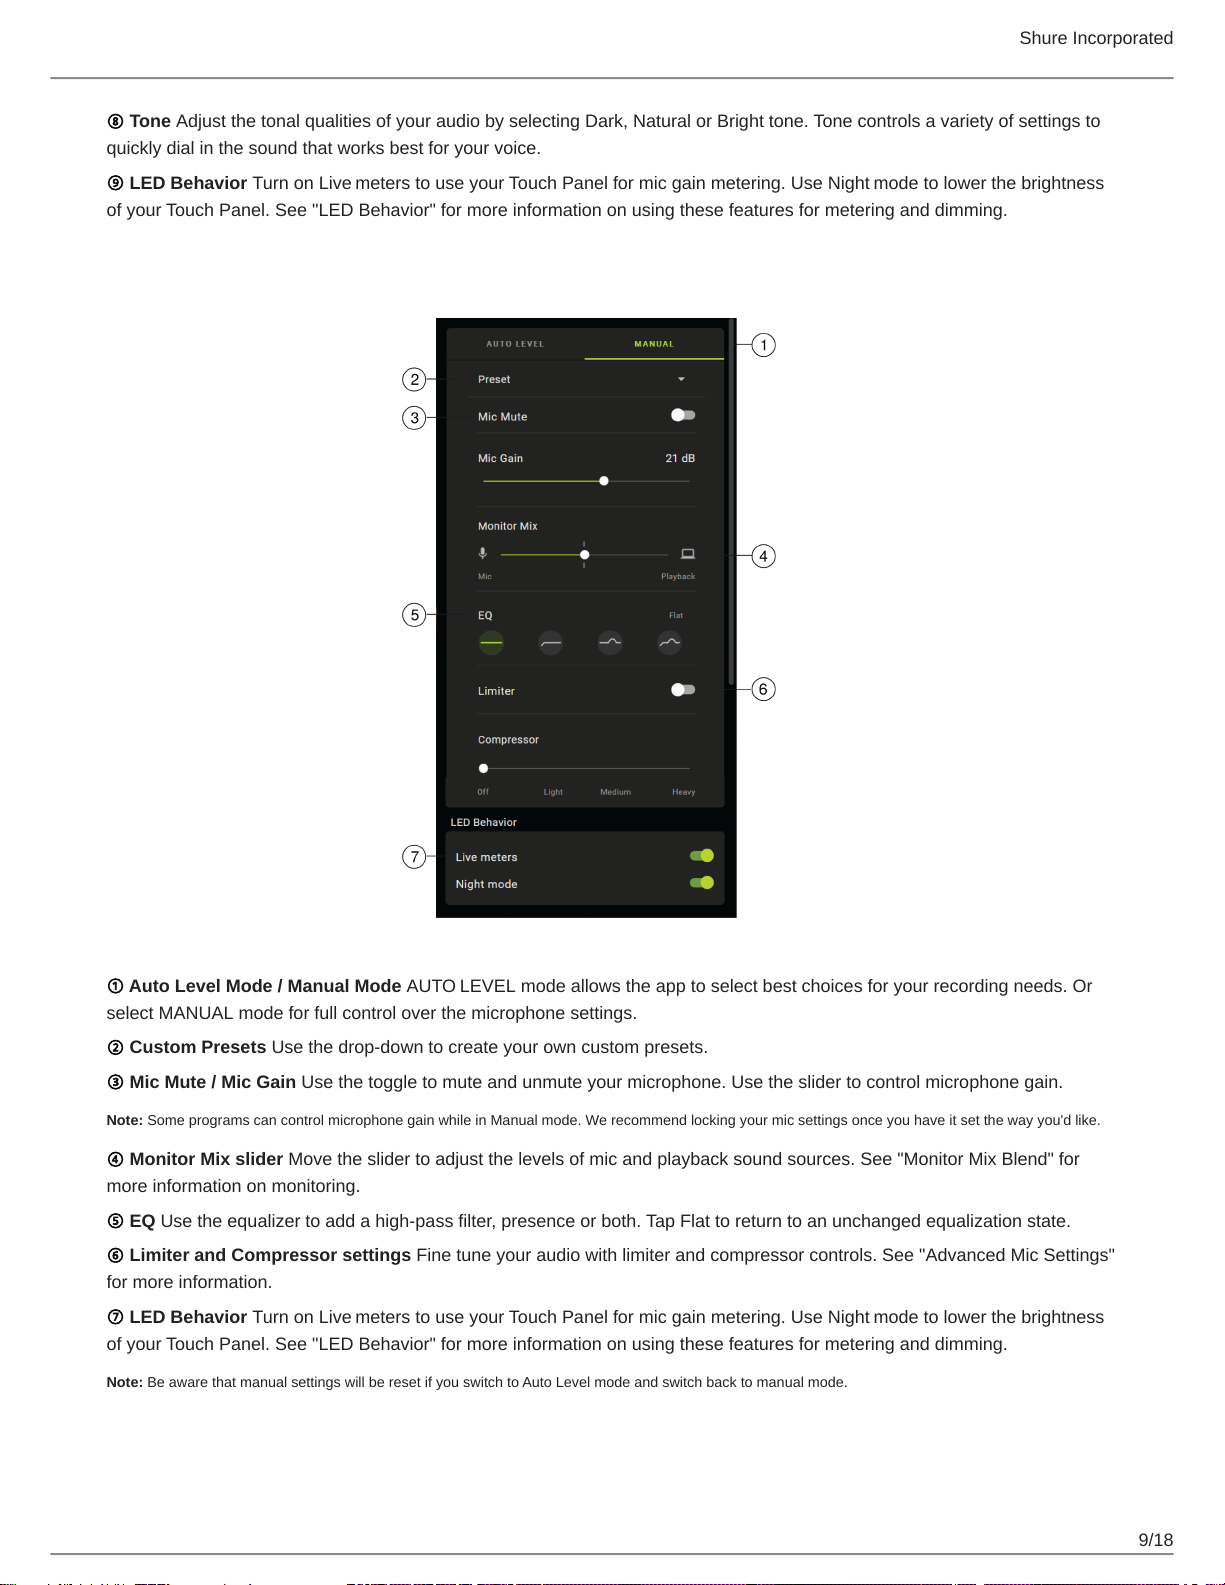
•
•
•
④Monitor Toggle Press the mode/headphone button to toggle between microphone (green) and headphone (orange) volume
controls.Longpresstoactivatemonitormixcontrols(bothgreenandorange).Anotherlongpresstoreturntoseparatemicro-
phone and headphone volume controls.
⑤Lock Indicator Displays whether the settings lock is on or off. Settings lock prevents changes to microphone settings from
accidental touches. When Lock mode is on, the microphone settings screen is grayed out on the desktop application.
Controls
Adjust monitor mix: Press and hold Monitor Toggle for 2 seconds to access monitor mix controls. Swipe left to hear more mic
audio (green) or swipe right to hear more playback audio (orange). Press and hold Monitor Toggletoreturntoseparatemicro-
phone and headphone volume controls.
Settings lock: Press and hold both Mute and Monitor Toggle for 2 seconds to lock and unlock settings.
Exit Auto Level Mode: Press and hold Mute for 2 seconds
Note: Auto Level Mode can only be enabled through the MOTIV Desktop Application.
LED Behavior
Live meters: TurnyourTouchPanelLEDsintoavisualvolumemeterforeasymonitoring.IfareusingManualmodeandno-
tice the level reaches the input meter peak, switch to Auto Level or lower the mic gain.
Night mode: Select the Night mode to lower the brightness of the Touch Panel LEDs from a bright display (Normal) to less
bright (Dim). The Night mode display option is ideal for discreet recording in low-light situations.
Access the Live meters and Night mode toggles by going to Settings > LED Behavior in the MOTIV app settings tab.
Note: For information on dB values related to the Touch Panel slider, see the Touch Panel Values table in the Specifications appendix.
The MV7 Microphone
The MV7 features a dynamic capsule with a cardioid pattern, which uses Voice Isolation Technology to pick up sound directly in
front of the microphone.
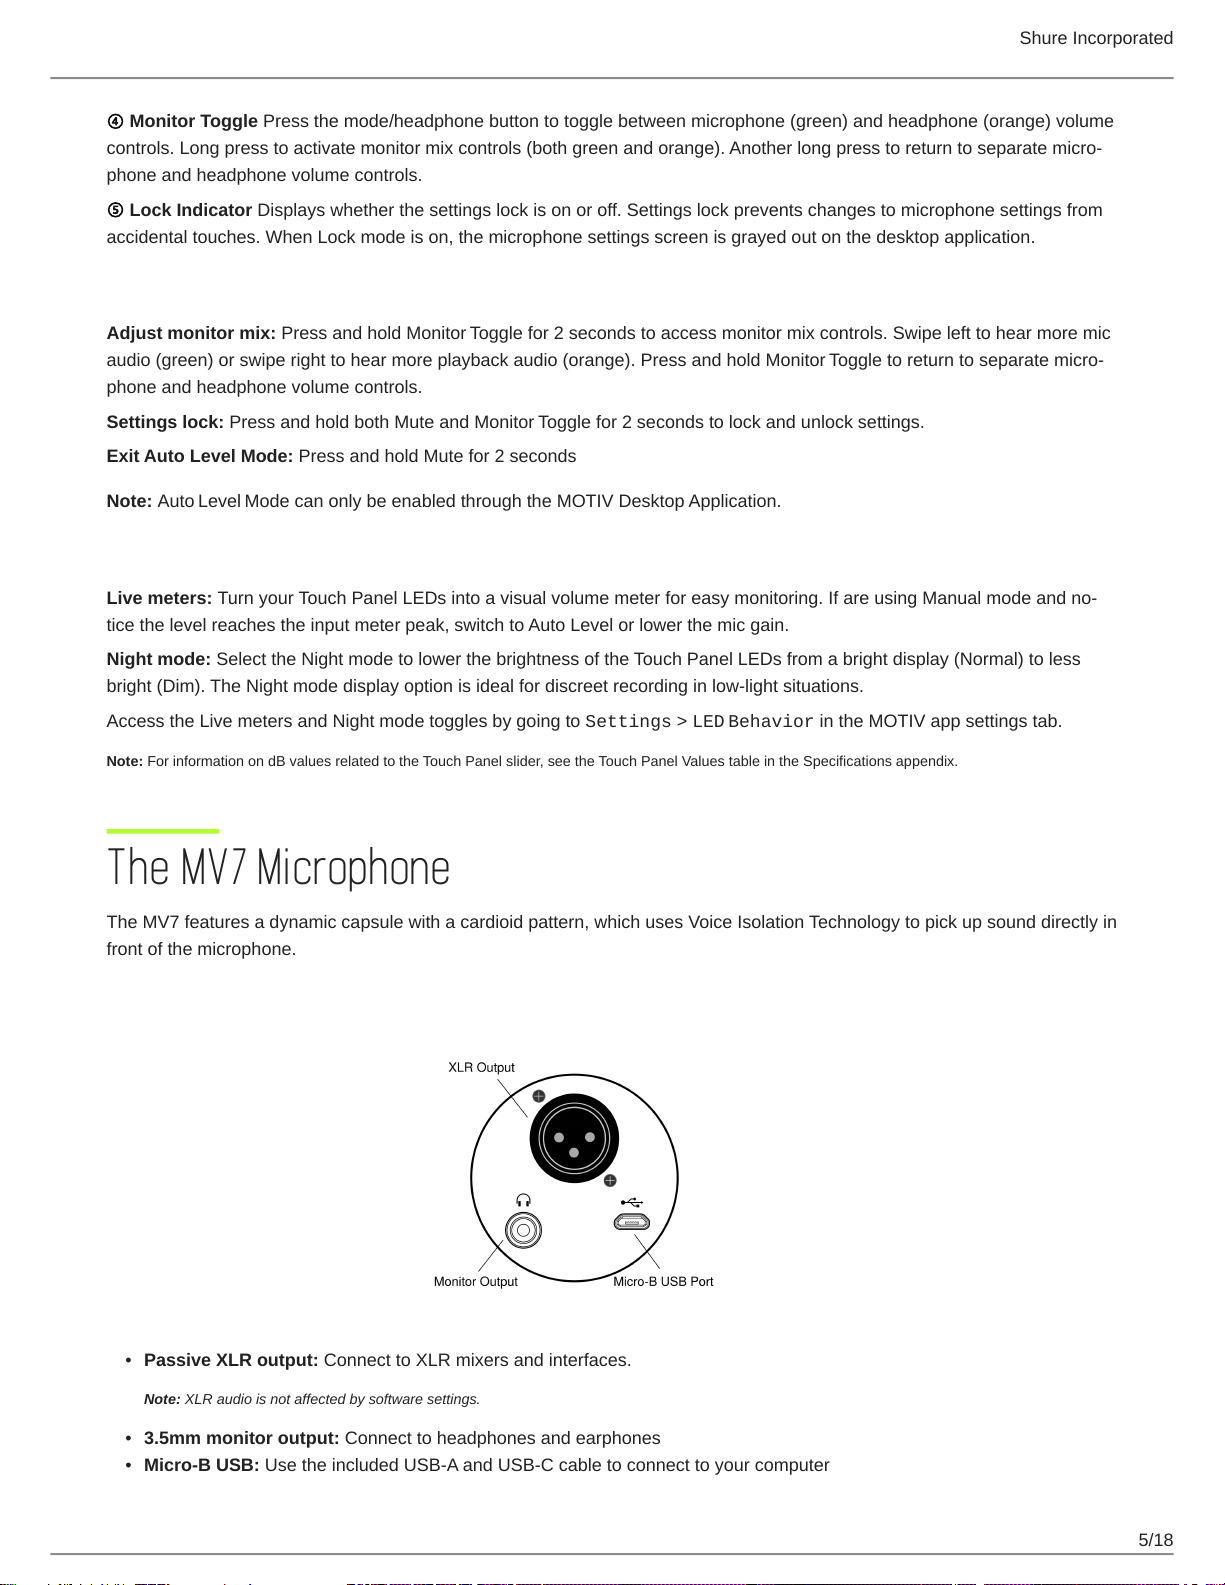
MV7 Outputs
Passive XLR output: Connect to XLR mixers and interfaces.
Note: XLR audio is not affected by software settings.
3.5mm monitor output: Connect to headphones and earphones
Micro-B USB: Use the included USB-A and USB-C cable to connect to your computer