Shure PSM 900 Programming manual

1/30
PSM900 -- Wireless Personal Monitor Sys-
tem
IMPORTANT SAFETY INSTRUCTIONS
1. READ these instructions.
2. KEEP these instructions.
3. HEED all warnings.
4. FOLLOW all instructions.
5. DO NOT use this apparatus near water.
6. CLEAN ONLY with dry cloth.
7. DO NOT block any ventilation openings. Allow sufficient distances for adequate ventilation and install in accor-
dance with the manufacturer’s instructions.
8. DO NOT install near any heat sources such as open flames, radiators, heat registers, stoves, or other appara-
tus (including amplifiers) that produce heat. Do not place any open flame sources on the product.
9. DO NOT defeat the safety purpose of the polarized or grounding type plug. A polarized plug has two blades
with one wider than the other. A grounding type plug has two blades and a third grounding prong. The wider
blade or the third prong are provided for your safety. If the provided plug does not fit into your outlet, consult an
electrician for replacement of the obsolete outlet.
10. PROTECT the power cord from being walked on or pinched, particularly at plugs, convenience receptacles,
and the point where they exit from the apparatus.
11. ONLY USE attachments/accessories specified by the manufacturer.
12. USE only with a cart, stand, tripod, bracket, or table specified by the manufacturer, or sold with the apparatus.
When a cart is used, use caution when moving the cart/apparatus combination to avoid injury from tip-over.
13. UNPLUG this apparatus during lightning storms or when unused for long periods of time.
14. REFER all servicing to qualified service personnel. Servicing is required when the apparatus has been dam-
aged in any way, such as power supply cord or plug is damaged, liquid has been spilled or objects have fallen
into the apparatus, the apparatus has been exposed to rain or moisture, does not operate normally, or has
been dropped.
15. DO NOT expose the apparatus to dripping and splashing. DO NOT put objects filled with liquids, such as vas-
es, on the apparatus.
16. The MAINS plug or an appliance coupler shall remain readily operable.
17. The airborne noise of the Apparatus does not exceed 70dB (A).
18. Apparatus with CLASS I construction shall be connected to a MAINS socket outlet with a protective earthing
connection.

Shure Incorporated
2/30
19. To reduce the risk of fire or electric shock, do not expose this apparatus to rain or moisture.
20. Do not attempt to modify this product. Doing so could result in personal injury and/or product failure.
21. Operate this product within its specified operating temperature range.
WARNING
LISTENING TO AUDIO AT EXCESSIVE VOLUMES CAN CAUSE PERMANENT HEARING DAMAGE. USE AS
LOW A VOLUME AS POSSIBLE. Over exposure to excessive sound levels can damage your ears resulting in
permanent noise-induced hearing loss (NIHL). Please use the following guidelines established by the Occupation-
al Safety Health Administration (OSHA) on maximum time exposure to sound pressure levels before hearing dam-
age occurs.
90dBSPL
at 8 hours
95dBSPL
at 4 hours
100dBSPL
at 2 hours
105dBSPL
at 1 hour
110dBSPL
at ½ hour
115dBSPL
at 15 minutes
120dBSPL
Avoid or damage may occur
HEARING PRECAUTIONS
To prevent possible hearing damage, do not listen at high volume levels for long peri-
ods.
SAFETY PRECAUTIONS
The possible results of incorrect use are marked by one of the two symbols—"WARNING" and "CAUTION"—de-
pending on the imminence of the danger and the severity of the damage.
WARNING: Ignoring these warnings may cause severe injury or death as a result of incorrect
operation.
CAUTION: Ignoring these cautions may cause moderate injury or property damage as a result
of incorrect operation.

Shure Incorporated
3/30
WARNING
•If water or other foreign objects enter the inside of the device, fire or electric shock may result.
•Do not attempt to modify this product. Doing so could result in personal injury and/or product failure.
WARNING: Battery packs shall not be exposed to excessive heat such as sunshine, fire, or the like.
CAUTION
•Never disassemble or modify the device, as failures may result.
•Do not subject to extreme force and do not pull on the cable or failures may result.
•Keep the product dry and avoid exposure to extreme temperatures and humidity.
低功率電波輻射性電機管理辦法
第十二條
經型式認證合格之低功率射頻電機,非經許可,公司、商號或使用者均不得擅自變更頻率、加大功率或變更原設計
之特性及功能。第十四條
低功率射頻電機之使用不得影響飛航安全及干擾合法通信;經發現有干擾現象時,應立即停用,並改善至無干擾時
方得繼續使用。前項合法通信,指依電信法規定作業之無線電通信。低功率射頻電機須忍受合法通信或工業、科學
及醫療用電波輻射性電機設備之干擾。
PSM 900
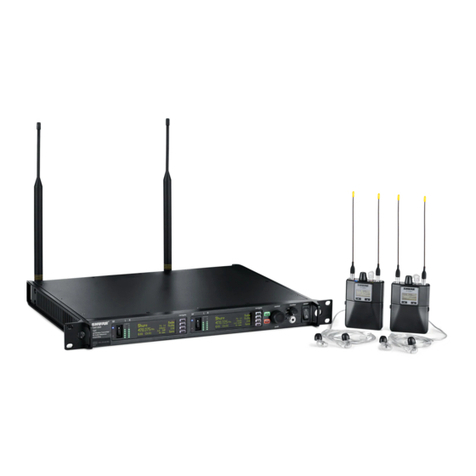
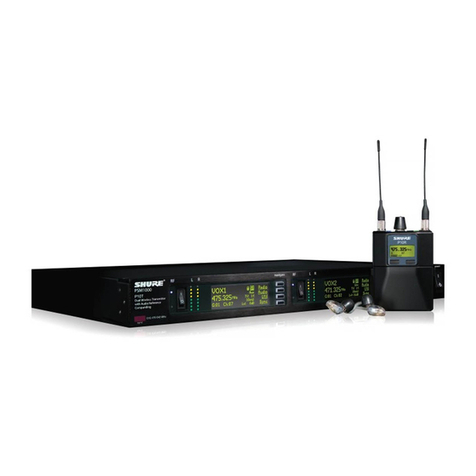
The Shure PSM 900 Wireless Personal Monitor System offers an unprecedented combination of superb audio
quality, robust RF performance, and category-leading features for the most demanding professional applications.
Patented Audio Reference Companding and advanced digital signal processing technology provide excellent
stereo separation and audio clarity. Exceptional transmitter linearity vastly reduces frequency intermodulation, al-
lowing more channels per frequency band. Patented CueMode technology enables the sound engineer to monitor
different stage mixes with the touch of a button.
Features
Unparalleled Audio Quality
•Bodypack receivers with advanced digital signal processing technology deliver more headroom, improved
stereo separation, and higher audio fidelity.
•Patented Audio Reference Companding offers natural and transparent sound.
• Available with Shure SE425 Sound Isolating™ earphones featuring dual high-definition MicroDrivers for accu-
rate and balanced audio response.
Robust RF Performance
•P9RA+ bodypack receivers offer enhanced signal reception and range.
•Precision front-end RF filtering significantly reduces RF interference for a cleaner, stronger RF signal, fewer
dropouts, and fewer audible artifacts.
®

Shure Incorporated
4/30
• Exceptional transmitter linearity vastly reduces frequency intermodulation and allows up to 20 compatible chan-
nels per frequency range.
•Automatic RF gain control prevents signal distortion due to RF overload before it can affect performance.
Category-Leading Setup and Operation Features
• CueMode allows monitoring of different stage mixes and storing of up to 20 separate channels on one body-
pack for quick and easy reference.
•Front panel RF mute switch enables or disables RF transmission during setup.
•Scan and Sync scans the RF environment with the bodypack and assigns an identified group and channel to
your system over wireless IR link.
•MixMode technology allows the bodypack user to combine two separate audio channels for simultaneous lis-
tening in both ears, or can transmit two independent IFB program feeds. Balance control on the bodypack ad-
justs the relative levels for each audio signal.
•Four-band parametric EQ gives the user the choice to adjust frequencies for a fully customized sound.
Advanced Rechargeability Options
•The SB900A lithium-ion rechargeable battery provides extended usage times and precise tracking of remaining
life and charge cycle details.
•The SCB800-US eight-bay charger brings up to eight SB900 batteries to full charge within two hours and has
charge status LEDs for each battery.
•The SBC200 dual-docking charger works with SB900A, P3RA, P9RA+, P10R+, QLX-D Digital Wireless Sys-
tems, and ULX-D Digital Wireless Systems, available with and without power supply.
•The SBC220 networked dual-docking charger works with SB900A, PSM 300 (P3RA only), PSM 900 (P9RA+
only), PSM 1000 (P10R+ only), QLX-D Digital Wireless Systems, ULX-D Digital Wireless Systems, and Axient
Digital (AD1 and AD2 only), available with and without power supply. When the SBC220 is connected to a net-
work, battery information for each transmitter can be viewed remotely.
Components
•P9T: Rack Unit Transmitter
•P9RA+: Bodypack Receiver
•PS43: Power supply
•Protective bumpers with 8 screws
Rackmount supplies
①Short rack ear
②Long rack ear
③Link bar to mount to similar rack unit
④2 antenna hole plugs
⑤8 rack ear screws
⑥4 rack mount screws with washers
⑦Extension cables and connectors for front-mounting antennas
®
®
®
®

Shure Incorporated
5/30
Quickstart Instructions
Rack Mount Transmitter
1. Connect to a power outlet using the supplied power adapter.
2. Attach the supplied antennas to the antenna out BNC connectors.
3. Connect the audio source, such as the output of a mixer, to the audio inputs. You can use both input jacks or
choose either one for a mono source.
◦For mono (one input), access the Audio menu and select Mono.
◦Set the input sensitivity to match the source by selecting Audio INPUT from the LCD configuration menu:
Aux (-10dBV) or Line (+4dBu).
4. Make sure the RF switch is OFF. Turn the power ON.
5. Adjust the audio source level so that, for the average input signal level, the top two yellow LEDs flicker and the
lower LEDs are solid.
◦ If the red clip LED illuminates, the inputs are overdriven. Decrease the level using the ▼▲ buttons or
change the input sensitivity to +4 dBu.
◦If the signal level is too low, change the input sensitivity to –10 dBV

Shure Incorporated
6/30

Shure Incorporated
7/30
Bodypack
Insert batteries and attach antenna. Turn on using the volume knob. The battery light illuminates.
Scan and Sync
1. On the bodypack, press the scan button. The display flashes SYNC NOW....
2. Align the IR windows on the bodypack and rack unit and press the sync button. The rack unit Level LEDs flash,
and it displays SYNC SUCCESS.
3. Turn the RF switch on. The blue RF LED illuminates on the bodypack to indicate that it is detecting the trans-
mitter. The bodypack also displays the RF signal strength (RF).
4. Important: Turn bodypack volume down before plugging in earphones.
5. Insert the earphones and slowly turn up the volume.

Shure Incorporated
8/30

Shure Incorporated
9/30
Rack Unit Transmitter
Front Panel Controls
①Input Level Control and Display
Use the ▼▲ buttons to adjust the audio so that, for the average input signal level, the top two yellow LEDs flicker
and the lower LEDs are solid. The red clip LED indicates the inputs are overdriven. Reduce the level at the audio
source or change the input sensitivity of the rack unit from the AUDIO > INPUT menu.
②Status Display and Menu Controls
Use the enter and exit buttons and the menu wheel to access the configuration menu. Push the menu wheel to
move the cursor to the next item. Turn the menu wheel to change a parameter—the enter button flashes. Press it
to save the value. Press the exit button to cancel changes and return to the previous menu.
③Synchronization Button
Press the sync button while rack unit and bodypack IR windows are aligned to transfer settings.
④Headphone Monitoring

Shure Incorporated
10/30
The volume control adjusts signal output to the 3.5 mm headphone jack. NOTE: it does not affect rear panel out-
puts.
⑤RF switch
Mutes RF output. For setting up multiple systems or adjusting settings without transmitting unwanted RF or audio
signals.
⑥Power Button
Turns the unit on and off.
Rear Panel Connectors
⑦Power
Connect the transmitter to a power outlet using the supplied power adapter.
⑧LOOP OUT
Sends a copy of the audio signal going into the transmitter to another device. See LOOP Applications.
⑨Audio Inputs
Connect to balanced or unbalanced outputs. Use either connector for mono input. Accepts both 1/4-inch or male
XLR connectors.
⑩Antenna (BNC)
Attach supplied antenna. If you are rack mounting, use a front panel or remote mounting kit from Shure.
Configuration Menu
Note: Configuration menu items may vary with regional model variations.
RF Settings
RADIO
G
Sets the group number
CH
Sets the channel number

Shure Incorporated
11/30
888.888MHz
Manual frequency selection
RF POWER
Select from 10, 50, or 100 mW (varies by region)
Audio Settings
AUDIO > MODE
Selects monitor mode
STEREO/MX
Transmits both channels
MONO
Transmits a mono signal to bodypack
AUDIO > INPUT
Sets nominal input level
LINE +4 dBu
line level
AUX -10dBV
aux level
Utilities and Display Settings
UTILITIES
EDIT NAME
Changes the name on the LCD display (this name is uploaded to the bodypack with sync)
DISPLAY
Changes the display format
CONTRAST
Changes the display contrast
CUSTOM GROUP
For creating custom frequency groups
UTILITIES > LOCK PANEL
Locks front panel controls. To unlock, press exit, select OFF, and press enter.
MENU+LEVEL
Locks menu and level controls.

Shure Incorporated
12/30
MENU ONLY
Locks only the configuration menu (menu controls).
MENU+SWITCH
Locks all controls except for the level buttons (including the RF and power switches).*
ALL
Locks all controls (including the RF and power switches).*
*RF is automatically activated when locked. When you unlock the unit, RF and power turns off if the swithes are
off.
UTILITIES > RX SETUP
These settings are sent to the bodypack during a sync (when the sync direction is from the transmitter). The de-
fault KEEP parameter will not change the bodypack settings.
LOCK
Lock bodypack
V LIMIT
Volume limiter
LIM VAL
Volume limiter value
MODE
Stereo (ST) or MixMode (MX)
BAL MX
CH. 1 (L) and CH. 2 (R) mix for MixMode
BAL ST
Left (L) and right (R) balance for stereo mode
HIBOOST
high frequency boost
UTILITIES > RESET SYSTEM
Returns all settings to the factory defaults
NO
Exit and do not reset system.
YES
Reset system settings.

Shure Incorporated
13/30
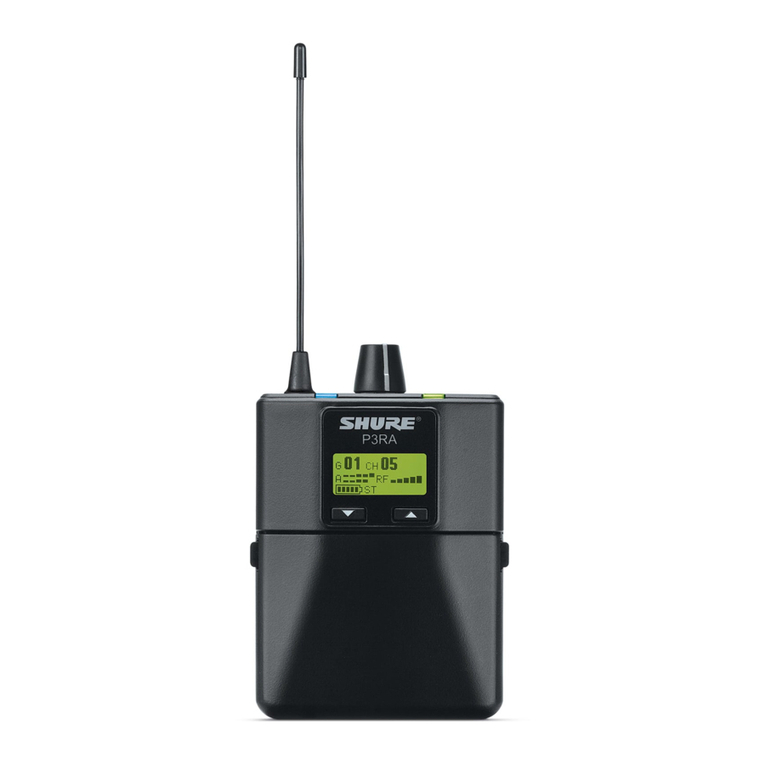
Bodypack Receiver
①Power Switch and Volume Control
Turns the bodypack on and off and adjusts earphone volume.
②3.5 mm Earphone Jack
Insert earphones here.
③Scan Button
Press the scan button to find an available frequency. Press and hold for two seconds to find the group with the
most available channels.
④IR Window
For transmitting settings between bodypack and rack unit.
⑤Battery Compartment
Requires 2 AA batteries or Shure rechargeable battery. Open by pressing the latches on both sides and pulling.
⑥Menu buttons
Use in conjunction with the ▼▲ buttons to access the configuration menus.
⑦▼▲Buttons
Use to adjust the audio mix (in MixMode only), or in conjunction with the menu buttons to change settings.
⑧LCD Screen
Displays current settings and menus.

Shure Incorporated
14/30
⑨Tri-Color Battery LED
Illuminates green, amber, or red to indicate battery power. When red, change battery immediately.
⑩Blue RF LED
Indicates the bodypack is receiving a signal from the transmitter.
⑪SMA Connector
For detachable antennas.
⑫Removable AA Adapter
Remove to use with a Shure SB900 rechargeable battery.
Note: To remove adapter, open door and slide out. To reinstall adapter, place over the clip and press, there will be
an audible click when seated.
Battery Life
Battery Indica-
tor
Tri-Color
Battery
LED
Approximate Hours Remaining (h:mm)
Alkaline Shure SB900A Rechargeable Bat-
tery
Volume Level Volume Level
4 6 8 4 6 8
Green 6:00 to 3:50 4:20 to 2:45 3:15 to 2:05 8:00
to
3:45
6:45 to 3:45 6:00 to 3:45
Green 3:50 to 2:50 2:45 to 2:00 2:05 to 1:30 3:45
to
2:45
3:45 to 2:45 3:45 to 2:45
Green 2:50 to 1:15 2:00 to 1:00 1:30 to 0:50 2:45
to
1:45
2:45 to 1:45 2:45 to 1:45
Green 1:15 to 0:25 1:00 to 0:20 0:50 to 0:20 1:50
to
0:55
1:50 to 0:55 1:50 to 0:55
Amber 0:25 to 0:15 0:20 to 0:10 0:20 to 0:10 0:55
to
0:25
0:55 to 0:25 0:55 to 0:25

Shure Incorporated
15/30
Red < 0:15 < 0:10 < 0:10 <
0:25
< 0:25 < 0:25
Total Battery Life 6:00 4:20 3:15 8:00 6:45 6:00
Power-save mode: When there are no earphones plugged in for 5 minutes, the receiver enters power-save mode
to preserve battery life. The LED slowly fades on/off in this mode and continues to display the color that represents
the remaining battery life.
Note: Battery life using Energizer brand AA Alkaline batteries and the following conditions:
•Receiver audio set to V LIMIT = 0dB
•Transmitter audio INPUT set to Line+4 dBu and Level set to −9 dB
•Audio input to the transmitter: pink noise at +8.7 dBV
• Audio output at receiver: 115 dB SPL in ear with SE425 earphones (impedance at 22 Ώ) set at volume level 4.
Note: Using lower-impedance earphones or ones with different sensitivity, different battery types, and higher gain
settings in the PSM system may cause the receiver battery life to be different than specified.
Pink noise is a signal with a frequency spectrum such that the power spectral density is inversely proportional to
the frequency. In pink noise, each octave carries an equal amount of noise power.
Configuration Menu
RF Settings
Access the following RF settings from the RADIO menu.
RADIO

Shure Incorporated
16/30
G:
Group number. Each group contains channels selected to work well together in a single installation.
CH:
Channel number. Sets the receiver to a channel in the selected group.
888.888 MHz
Displays the frequency to which the receiver is set. Highlight and use the ▼▲ buttons to set to a specific frequen-
cy.
SQUELCH
Adjusts the squelch setting.
RF PAD
Attenuates antenna signals in 3 dB increments.
Audio Settings
Access the following audio settings from the Audio menu.
Output Mode (MODE)
STEREO
Receive left and right inputs as a stereo signal
MIXMODE
Set your receiver to combine the left and right channel for simultaneous listening in both ears or pan to listen to on-
ly the left or right channel
Four-Band Parametric Equalizer (EQ)
The parametric equalizer is divided into four frequency bands: LOW, LOW MID, HIGH MID, and HIGH. When the
EQ is enabled, the following parameters are adjustable:
FREQUENCY
Select the center frequency of the band to boost/cut
Q
Adjusts the width and slope of the frequency band (measured in octaves)
GAIN
Adjustable in 2 dB increments from -6 dB (cut) to +6 dB (boost)
NOTE: HIGH and LOW are shelf filters, and therefore do not have adjustable Q widths. The HIGH shelf is fixed at
10 kHz; the LOW shelf is fixed at 100 Hz.
®

Shure Incorporated
17/30
Volume Limiter (V LIM)
V LIM
Set a value (OFF to -48 dB, adjustable in 3 dB increments) to attenuate the highest possible volume level. Turning
the volume knob through its entire range of motion still affects volume; the limit simply narrows the range of dB ad-
justment.
Note: The volume limit does not compress the audio signal.
Volume Lock (V LOCK)
ON
The volume is locked to the physical position of the volume knob
V LOCK remains on until the receiver is power cycled
Input EQ Preset (EQPre)
Input EQ affects the signal after it is sent to the receiver, but before the headphone output, modifying the overall
sound of the entire system.
Match (default)
Matches the frequency response of legacy PSM receivers, allowing for matched audio with mixed-inventory setups
Flat
Offers a flat frequency response curve
Off
Audio bypasses input EQ
Balance (BAL ST / BAL MIX)
BAL ST / BAL MX
Balance
▼▲Buttons
Left and right balance for earphones when in stereo mode, or mix of left and right channel for MixMode

Shure Incorporated
18/30
Utilities and Display Settings
Access the following settings from the UTILITIES menu.
UTILITIES
CUEMODE
Enters CUEMODE (to exit, press enter and select EXIT CUEMODE)
DISPLAY
Change the display settings on the bodypack
CONTRAST
Sets display brightness to high, low, or medium.
LOCK PANEL
Locks all controls except power and volume. To unlock, press exit, select OFF, and press enter.
BATTERY
Displays the following: Hrs: Min Left, temperature, Status, Cycle Count, and Health.
RESTORE
Returns receiver to factory default settings.
Multiple System Setup
When setting up multiple systems, designate a single bodypack to scan for available frequencies and download
them to all the rack units.
The bodypack must be from the same frequency band as all the transmitters.
1. Power on all the rack units. Turn off the RF. (This prevents them from interfering with the frequency scan.)
Note: Turn on all other wireless or digital devices as they would be during the performance or presentation (so
the scan will detect and avoid any interferance they generate).
2. Use the bodypack to scan for a group by pressing and holding the scan button for two seconds. The body-
pack displays the group and the number of available channels, and flashes SYNC NOW....
Important: Note the number of available channels. If you have more rack units than available channels, elimi-
nate potential sources of interference and try again, or call Shure Applications for assistance.
3. Sync the bodypack with the first rack unit by aligning the IR windows and pressing sync.
4. Press scan again on the bodypack to find the next available frequency.
5. Sync the bodypack with the next rack unit.
6. Repeat with all the rack units.
7. Sync each performer's bodypack to its respective rack unit by aligning the IR windows and pressing snyc. DO
NOT press scan on the bodypacks.
8. Turn on the RF on all rack units. The systems are ready to use.

Shure Incorporated
19/30
CueMode
CueMode allows you to upload the name and frequency settings from multiple rack units and store them as a list
on a single bodypack. You can then, at any time, scroll through that list to hear the audio mix from each transmit-
ter, just as each performer does during a show.
CueMode lists are retained even if CueMode is exited, the bodypack is turned off, or batteries are removed.
Note: Set the channel frequency and assign display names for each transmitter before creating your CueMode
list.
Adding Transmitters to the CueMode List
Note: The transmitter must be from the same frequency band as the bodypack.
1. Open the battery door and press the enter button.
2. From the main menu, scroll to UTILITIES and press enter. Select CueMode and press enter again.
3. Align IR windows and press sync on the rack unit.
The LCD displays SYNC SUCCESS after frequency and name data are uploaded to the CueMode list. It also
displays the CueMode number for that transmitter and the total number of transmitters.
4. Repeat the above step for each transmitter.
Note: Syncing while in CueMode does not change any of the settings on the bodypack.
Auditioning Mixes
1. Enter CueMode from the UTILITIES menu.
2. Use the ▼▲ buttons to scroll through your CueMode list to hear the mixes.
Exiting CueMode
Exit CueMode by pressing enter and selecting EXIT CUEMODE.
Managing CueMode Mixes
While in Cue Mode, you can access the following menu by pressing enter:
REPLACE MIX
Select and press sync on a rack unit to upload new data for the current mix (for example, if you have changed the
transmitter frequency).
DELETE MIX
Removes the selected mix.
DELETE ALL
Removes all mixes.

Shure Incorporated
20/30
EXIT CUEMODE
Exits CueMode and returns the bodypack to the previous frequency setting.
Frequency Scan
Use a frequency scan to analyze the RF environment for interference and identify available frequencies.
•Channel Scan Press the scan button on the bodypack. Finds the first available channel.
•Group Scan Press and hold the scan button for two seconds. Finds the group with the greatest number of
available channels. (Each group contains a set of frequencies that are compatible when operating multiple sys-
tems in the same environment.)
Note: When performing a frequency scan:
•Turn off the RF on the transmitters for the systems you are setting up. (This prevents them from interfering with
the frequency scan.)
•Turn on potential sources of interference such as other wireless systems or devices, computers, CD players,
large LED panels, effects processors, and digital rack equipment so they are operating as they would be during
the presentation or performance (so the scan will detect and avoid any interference they generate).
Sync
You can transfer frequency settings in either direction: from the bodypack to the rack unit, or from the rack unit to
the bodypack.
Note: You can also choose to transfer other settings to the bodypack during a sync, such as lock or mode settings,
using the Sync > RxSetup menu on the rack transmitter.
Downloading settings from the bodypack
1. Press the scanbutton on the bodypack.
2. Align the IR windows and press the syncbutton from the rack transmitter LCD menu while the bodypack display
is flashing "SYNC NOW...".
The level LEDs on the rack unit flash.
Sending settings to the bodypack
1. Press the Sync button on the rack transmitter to access the sync menu.
2. Align the IR windows.
When properly aligned the IR window on the transmitter illuminates.
3. Press Sync to transfer settings.
The blue LED on the bodypack flashes.
Other manuals for PSM 900
9
Table of contents
Other Shure Recording Equipment manuals

Shure
Shure PSM1000 User manual

Shure
Shure ANI22 User manual

Shure
Shure AMS880 User manual

Shure
Shure Microphone Level Tone Generator A15TG User manual

Shure
Shure PSM 900 User manual

Shure
Shure M95ED User manual

Shure
Shure DT15P User manual

Shure
Shure ANI22 User manual

Shure
Shure R180 User manual

Shure
Shure M625 User manual

Shure
Shure ANI4IN Series User manual

Shure
Shure MV88+ User manual

Shure
Shure MVI User manual

Shure
Shure 35 Series User manual

Shure
Shure LEGENDARY PERFOMANCE MVi User manual

Shure
Shure DFR11EQ Version 5 User manual

Shure
Shure PSM 900 User manual

Shure
Shure PSM700 User manual

Shure
Shure PSM 300 User manual

Shure
Shure MVI User manual