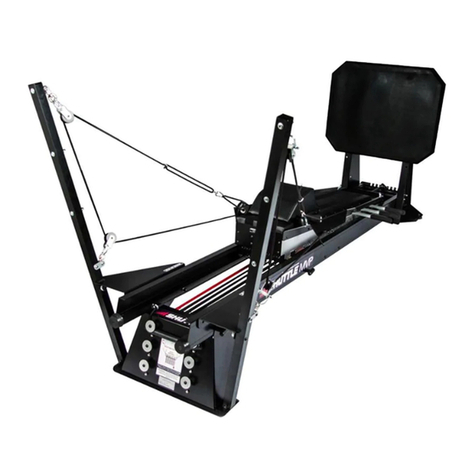
Shuttle MVP User manual

Page 1
MVP

Page 1
Congratulations on the purchase of your new Shuttle MVP. Shuttle equipment has been trusted by physical therapists and
sports training facilities around the globe for almost half a century. It is our mission to deliver the finest quality exercise
devices with superior customer service. We welcome you as a valued customer.
For your safety it is crucial that you read this manual thoroughly and understand the equipment before use. If you have any
questions about your Shuttle MVP you can give us a call at +1 (800)-334-5633, email us at
[email protected], or chat with us via live chat at www.shuttlesystems.com (Monday-Friday, 8 am to 5
pm Pacific Time).
WELCOME TO THE FAM

IMPORTANT SAFETY INFORMATION ..…………………………………………………………….…………. 1
PERSONAL SAFETY ……….……………………………………………………………………….……………. 1
SPECIFICATIONS ………………………………….………………………………………..…………..……….. 2
IDENTIFICATION OF THE MANUFACTURER …………………………………………………….……….…. 2
ASSEMBLY OF THE MVP ………………………………………………………..……………………………… 3
- ASSEMBLY OF MVP RAILS…………………………………………………………..4
- ATTACHING THE HEAD-END STAND………………………………………..……5
- ATTACHING THE KICKPLATE STRUCTURE………………………………………..6
- INSTALLING THE REBOUND STOP BLOCKS……………………………………..7
- INSTALLING THE ELASTICORDS…………………………………………….……..8
- INSTALLING THE HANDLEBARS………………………………………………….10
- INSERTING THE CARRIAGE……………………………………………………….11
- ATTACHING THE KICKPLATE BOARD……………………………………………13
- ATTACHING THE HEADREST……………….………………………………..……14
- ATTACHING THE BACKREST EXTENSION PAD………….……………………..15
USING THE PRODUCT ………………………………………………………………………….………….….. 16
MAINTENANCE AND CARE ……………………………………………………………………….….……… 17
WARRANTY….…………………………………………………………..……………………..…………..…… 19
SUPPORT… ………………………………………………………………………………………….………….. 20
TABLE OF CONTENTS

Page 1
Read all safety information before operating the MVP. It is the owner’s responsibility to ensure that users are aware of
all warnings and precautions.
Please read all instructions before using the product. These instructions were written to ensure the safety of the user and to
protect the product.
You should always consult with a physician before beginning a new fitness plan.You are advised to investigate and inform
yourself about any health related actions and choices you make.
Use caution when mounting and dismounting.
Do not allow children to have unsupervised access to the product.
Keep pets away from the MVP at all times.
Perform regular maintenance for optimal performance and longevity. To ensure safety, the MVP must be checked for wear
and damage on a regular basis.
Replace any damaged or worn parts immediately. Do not use the MVP until the repair is performed.
Use only original parts from the manufacturer. Changes or modifications to this unit not expressly approved by Shuttle
Systems could void the warranty.
The MVP is for indoor use only. Do not store the MVP outdoors, near water, or at high humidity levels.
Fully assemble the product before using it. Check the product before each use. Do not continue to use the product if it is
not working properly.
The MVP provides anchor slots in the kickplate structure and head-end stand to enable securing the machine to the floor.
Use of this product is subject to medical examination to assess your suitability to the type of workout exercise you intend to
perform, and in compliance with the conditions for use laid down by Shuttle Systems.
Persons suffering from certain physical conditions may only use the product under the strict supervision of a doctor with
specific qualifications.
Before starting any workout, make sure your position on the product is correct, paying attention to any components that
may obstruct use.
Plan the workout according to your physical characteristics and state of health, beginning with less demanding workloads.
Do not overexert yourself or work to exhaustion. Incorrect or excessive exercise may cause physical harm or sudden death.
If you feel any pain or abnormal symptoms, stop your workout immediately and consult your physician.
Wear proper workout clothing and shoes during training; do not wear loose clothing. Tie long hair back. Keep hands,
shoelaces, garments, and accessories away from moving parts. Do not insert objects into openings on the equipment.
When using the MVP, other people must remain at a safe distance.
Do not use the product when children or pets are present.
The person in charge of the gym must explain proper and improper use of the equipment to users.
Assemble and use the product only on a solid and flat surface.
Keep the product in good working condition. If you see signs of wear, contact Shuttle Technical Support Service.
Do not attempt any maintenance work on the product other than the operations described in the user manual.
IMPORTANT SAFETY INFORMATION
PERSONAL SAFETY

Page 2
Dimensions: 31”W x 109”L
Floor Space Required: 3’W x 10’L
Carriage Capacity: 450 lbs
Max Resistance:
Classic: 12-300 lbs*
Pro: 12-500 lbs*
Elite: 12-650 lbs*
Total Elasticords:
Classic: (8) Total Elasticords
(1) 12 lb elasticord
(7) 25 lb elasticords
Pro: (12) Total Elasticords
(1) 12 lb head-end elasticord
(7) 25 lb head-end elasticords
(4) 25 lb foot-end elasticords
Elite: (16) Total Elasticords
(1) 12 lb head-end elasticord
(7) 25 lb head-end elasticords
(8) 25 lb foot-end elasticords
KICKPLATE
HANDLEBARS
HEADREST
BACKREST
HEAD-END
ELASTICORDS
FOOT-END
ELASTICORDS
ROM HANDLE
KNEE
BUMPERS
BUTT
PAD
KNURLED
KNOBS
ANCHOR
SLOTS
HEAD-END
SLOTTED PLATE
FOOT-
END
SLOTTED
PLATE
A - Manufacturer’s name and contact
B - Item number
C - Description of product
D - Serial number
A
B
D
C
* Elasticords are rated starting resistance, but will gain resistance up to 40% in extension
SPECIFICATIONS
IDENTIFICATION OF MANUFACTURER

Page 3
Assembly of the MVP requires two people
Keep in mind that the following images pertain to just one of the four available MVP models, your parts may appear slightly
different than those in the included images but the required steps remain the same.
Tools Needed: 7/16 inch socket and/or wrench, 1/2 inch socket and/or wrench, 9/16 inch socket and/or wrench.
The MVP will come in four boxes:
1. Head-End Stand
- Head-End Stand
- Connector Plate
- Parts Bags (1-7)
- User Manual
-Accessories
3. Kickplate Structure
- Kickplate Structure
- Backrest Extension Pad &
Bib Headrest
- Elasticords (small box)
- Kickplate Board
2. MVP Rails
- Two 9 foot Rails
4. Carriage
- MVP Carriage
- Three Handlebars
It is important to become familiar with the expressions “foot-end” and “head-end”, as they indicate orientation for the
various steps and structures.
Head-End Stand
(Head-End)
Kickplate Structure
(Foot-End)
ASSEMBLY OF THE MVP

Page 4
ASSEMBLING THE MVP RAILS WITH THE CONNECTOR PLATE
STEP 1
ITEMS REQUIRED
MVP Rails
Connector Plate
Parts Bag #1
1. Arrange the MVP rails parallel to each other on the floor, upright, hole patterns matching and labels facing outward.
(Pic 1.1)
2. Insert the connector plate (sticker facing up) and align the holes of the plate with those located midway along the rails.
(Pic 1.2)
3. Insert the four 5/16” x 1 3/4” long button head bolts from outside the MVP rails and through the connector plate.
4. Hand tighten a 5/16” lock nut onto each bolt end on the inside of the connector plate.
1.1
1.2
ASSEMBLY OF THE MVP (STEP 1)

Page 5
ATTACHING THE HEAD-END STAND
STEP 2
ITEMS REQUIRED
Head-End Stand
Carriage Box
Parts Bag #2
1. Set the assembled MVP rails, right side up, atop the carriage box, allowing the head-end of the rails to overhang the
box at least 18”. (Pic 2.1)
2. Place the head-end of the MVP rails to the inside of the head-end stand vertical tabs, and slide the stand forward until
the holes of each structure are aligned. Once aligned, move the box to where the head-end stand can rest against it.
3. Locate the lower bolt holes (one on each side) of the head-end stand. Insert the 5/16”x 5/8” button head bolts from
outside the head-end stand and through the MVP rails. Hand tighten the 5/16” lock nuts. (Pic 2.2)
4. Locate the upper bolt holes (two on each side) of the head-end stand. Insert the 5/16”x 5/8” button head bolts from
inside the rails and out through the head-end stand. Hand tighten the 5/16” lock nuts. (Pic 2.3)
2.1
2.2
2.3
Head-End
ASSEMBLY OF THE MVP (STEP 2)

Page 6
3.1
3.2
3.3
Flange
ATTACHING THE KICKPLATE STRUCTURE
STEP 3
ITEMS REQUIRED
Kickplate Structure
Parts Bag #3
1. Remove the plywood attached to the bottom and back of the kickplate structure. Dispose of the plywood along with the
nuts and bolts that held it together.
2. Position the foot-end of the MVP rails to the inside of the kickplate structure. Align the holes and place the MVP rail
ends on the flange of the kickplate structure. (Pic 3.1)
3. From outside the kickplate structure, insert the 3/8”x 2” socket head bolts into the bottom eight holes (four on each
side) and through the rails. Gently rock the stand to align the remaining four exterior bottom holes and insert the bolts.
Once all eight bolts are in, place the 3/8” washers, then the lock nuts, onto the bolt ends and hand tighten. (Pic 3.2)
4. From the inside of the MVP rails, insert the 5/16”x 5/8” button head bolts into the top four parallel bolt holes (two on
each side) and out through the kickplate structure. Add the lock nuts to the bolt ends and hand tighten. (Pic 3.3)
5. Tighten all the bolts of the assembled pieces including the connector plate, head-end stand, and kickplate structure.
ASSEMBLY OF THE MVP (STEP 3)

Page 7
INSTALLING THE REBOUND STOP BLOCKS
STEP 4
ITEMS REQUIRED
Remaining Parts in Parts Bag #2 & #3
Parts Bag #4
1. Remove the two plastic rebound stop blocks from Parts Bag #4 and unscrew the lock nuts from the bolts.
2. With the bumper cones facing toward the head-end stand, insert the bolts of the plastic rebound blocks into the MVP
rails and through the kickplate structure. Tighten down fully. (Pic 4.1)
3. Place the nut caps from Parts Bag #4 on the rebound stop blocks and the nut caps from Parts Bag #3 over the lower lock
nuts and upper 4 lock nuts on the kickplate structure. (Pic 4.2 & 4.3)
4. Place the nut caps fro Parts Bag #2 over the 4 lock nuts on the outside of the head-end stand. (Pic 4.4)
4.1
4.2
4.3
4.4
ASSEMBLY OF THE MVP (STEP 4)

Page 8
INSTALLING THE ELASTICORDS
STEP 5
ITEMS REQUIRED
Elasticord Box
Parts Bag #5
7/16” Socket Wrench
1. Remove the elasticords from the box and place them on the floor between the MVP rails, on top of the connector plate.
(Pic 5.1)
2. Facing the head-end stand, insert the loop-end of the red lanyards through the far right side 3/4” hole, inserting the
dumbbell shaped lanyard mounting rod from Part Bag #5 through the red lanyard loop. (Pic 5.2)
3. Repeat this process with the black lanyards. There will be eight lanyards on each lanyard mounting rod. (Pic 5.3)
4. Untangle the elasticords, correcting any tests in the webbing, and lay them flat over the connector plate. Insert the
threaded rod end of each elasticord into the aligned holes located directly below the slots of the kickplate structure.
5. Take two steel/rubber bonded washers and arrange them so the steel sides are back-to-back. Slip them onto the
threaded rod and screw on a 1/4-20 lock nut onto the rod. Use a 7/16” socket wrench to tighten the lock nuts. Wen
tightening the lock nuts, the rod should just protrude the opening of the lock nuts. In order to tighten the lock nuts, the
elasticord is going to have to be held in place while using the wrench. (Pic 5.4)
6. Apply the plastic nut caps over the lock nuts. If the caps do not seat properly, an adjustment of the lock nut on the rod
may be necessary. (Pic 5.5)
TIPS!
-Use the head-end elasticords (lanyards) first. When more resistance is required, engage the cords with the plastic T-
handles at the foot-end.!
-Disengage the elasticords after each use to promote longer life.!
-Use the provided silicone gel to lubricate the cords. Apply every 6 months, especially in overly sunny, dry and air-
conditioned environments.
Images on next page
ASSEMBLY OF THE MVP (STEP 5)

Page 9
5.1
5.2
5.3
5.4
5.5
INSTALLING THE ELASTICORDS
STEP 5
ASSEMBLY OF THE MVP (STEP 5)

Page 10
INSTALLING THE HANDLEBARS
STEP 6
ITEMS REQUIRED
Parts Bag #6
Carriage
30” Long Handlebars
1. Turn the carriage upside down. Cut the zip-ties to remove the three, 30” long handlebars. Lift up on the retainer plate
and slide the three handlebars through a side hold of the carriage, under the plate, and out through the corresponding
hole on the other side. (Pic 6.1)
2. 2. Apply the foam handle grips from parts bag #6. To assist with easing them onto the handlebars, lubricate the inside of
the foam hand grips with a little hairspray.
3. Adjust the handlebars so they is they appear even on each side of the carriage. Tighten the three lock nuts on the
retainer plate. (Pic 6.2)
6.1
6.2
ASSEMBLY OF THE MVP (STEP 6)

Page 11
7.1
7.2
Images on next page
INSERTING THE CARRIAGE
STEP 7
ITEMS REQUIRED
Parts Bag #7
Carriage
1. While the carriage is still overturned, grasp both sides of the Range of Motion (ROM) Control Rope to the center, pull
them tight, letting the ROM control bar, rebound elastic, and eyebolts extend over the plate between the wheels to rest
on the floor. (Pic 7.1)
2. Keeping the ROM control ropes to the inside of the wheels, turn the carriage over. Insert the foot-end of the carriage
into the MVP rails, and let it gently slide along the inside track until it contacts the rebound blocks. (Pic 7.2)
3. Verify the ROM control ropes are not crossed. With the eyebolts on the inside, insert the two forward eyebolts (closest
to the carriage) outward through the holes of the MVP rails, just behind the carriage. Thread a t-knob onto each bolt.
Make sure the eyebolts are vertical so the ROM control ropes can move freely through the eyebolt holes. (Pic 7.3 & 7.4)
4. Insert the remaining two eyebolts, following the same method through the MVP rails just above the head-end stand. (Pic
7.5)
5. To apply the noise dampener, run an end of the dampener over one side of the rope, under the elasticord lanyards, and
back up over the remaining control rope to then join the ends of the dampener together under the elasticords. (Pic 7.6)
6. From parts bag #7, insert the two knee bumpers into the bottom slot of the MVP rails near the head-end stand so they
rest against the rubber cone. (Pic 7.7)
ASSEMBLY OF THE MVP (STEP 7)

Page 12
7.3
7.4
7.5
7.6
7.7
INSERTING THE CARRIAGE
STEP 7
ASSEMBLY OF THE MVP (STEP 7)

Page 13
ATTACHING THE KICKPLATE BOARD
STEP 8
ITEMS REQUIRED
Kickplate Board
1. The kickplate board is adjustable to three different heights. Once the desired position is determined, insert the four
protruding bolts at the back of the board into the desired corresponding holes of the kickplate structure. Secure the
board by tightening the knurled knobs to the exposed bolts. (Pic 8.1)
8.1
ASSEMBLY OF THE MVP (STEP 8)

Page 14
ATTACHING THE HEADREST
STEP 9
ITEMS REQUIRED
Bib Headrest
1. Align the Velcro strips on the back of the headrest with those on the carriage. With the pillow toward the head-end of
the carriage, locate the desired position and press down and into place to ensure sufficient contact. (Pic 9.1)
9.1
ASSEMBLY OF THE MVP (STEP 9)

Page 15
ATTACHING THE BACKREST EXTENSION PAD
STEP 10
ITEMS REQUIRED
Backrest Extension Pad
1. The backrest extension pad can either be used as an extension of the padded center on the carriage (supports deep
squats) or as an alternative low profile headrest (Pic 10.1). To use an extension, fit into the space at the foot-end of the
carriage (Pic 10.2). When performing single-leg exercises you may remove the extension pad from the foot-end of the
carriage and use the exposed area as a footrest for the uninvolved foot.
10.1
10.2
ASSEMBLY OF THE MVP (STEP 10)

Page 16
KICKPLATE
HANDLEBARS
HEADREST
BACKREST
HEAD-END
ELASTICORDS
FOOT-END
ELASTICORDS
ROM HANDLE
KNEE
BUMPERS
BUTT
PAD
KNURLED
KNOBS
ANCHOR
SLOTS
HEAD-END
SLOTTED
PLATE
FOOT-END
SLOTTED
PLATE
Located between the MVP rails are eight elasticords. They are at the head-end of the machine attached to the black and
red lanyards. There are also eight additional elasticords attached to the foot-end of the carriage with t-handles.
Warning!!If you grasp the lanyard too close to the!plastic white knob you risk pinching your fingers.!!
Always detach the elasticords when the machine is not in use. This prevents premature stretching of the elasticords
and greatly extends their life.
Attaching Elasticords: To engage the head-end elasticords grasp the middle of the lanyard (one at a time) and pull back
towards the head-end stand preferably using your core. Slip the exposed plastic white knob at the end of the elasticord
into at the corresponding slot at the!head-end of the carriage to engage the elasticord.
To engage the foot-end elasticords pull the black t-handle (one at a time) towards the foot-end to engage with the slotted
plate at the bottom of the kickplate structure. Engage the elasticords with lanyards before engaging the elasticords with t-
handles.
Detaching Elasticords: To disengage resistance, grasp the middle of the lanyard and pull back towards the head-end stand
and drop it down into the carriage. To disengage resistance of the elasticords with t-handles, grasp the handle and gently
pull it back towards the kickplate structure and back into the carriage.
Adjusting the Kickplate: The kickplate adjusts to three vertical positions. To adjust the height, begin by removing the four
knurled knobs from the back of the kickplate. Move the kickplate board to the desired vertical position. Line up the bolts on
the back of the kickplate board with the appropriate holes in the kickplate structure and secure by tightening the four
knurled knobs down.
The vertical position of the kickplate can be positioned as follows: High- This is the best position for 90 degree flexion of
taller individuals and unsupported heel activities. Middle- Majority of users will enjoy this position to achieve 90 degree
flexion. Low- This position is best for direct body alignment activities.
The headrest is easily adjusted depending on patient size and desired exercise type. This can be done by pulling the
headrest up and away from the backrest and repositioning with the velcro strips.
The footrest is located at the end of the carriage. It provides a surface to rest an uninvolved foot. It can be covered with the
butt pad provided to accommodate small adults or children.
Adjusting the ROM Control: At the head-end of the carriage is a ROM control handle. The handle may be pulled forward
and secured in any of the three
positions at the head-end stand. Moving the ROM handle down the surface of the head-end stand draws the carriage
head-ward up the rails. This adjustment will decrease the angle of knee flexion.
Warning! Never
attempt to move
the ROM handle
while the elasticords
are attached or the
machine is in use,
as the handle may
move too quickly
to control.
USING THE PRODUCT

Elasticord Maintenance
1. Lubricating elasticords is suggested every 6 months. A well maintained elasticord should last 3 to 5 years.
2. Sagging Elasticords - This can result from normal wear and tear and only needs to be replaced if you are not
receiving the resistance you require.
3. Cracked, dry, or pitted elasticords - This is a sign that your elasticords are worn-out which could result in an
elasticord breaking when in use and should be replaced immediately.
Part #1011 - Silicone Gel
Part #3204 - Set of 8 Head-End Elasticords
Part #3104 - Set of 8 Foot-End Elasticords
Part #3207A - Light Resistance Elasticord
Lubricate Elasticords
1. Remove the carriage.
- Remove four eyebolts from inside the MVP rails.
- Remove knee bumpers from the end of the the MVP rails.
- Remove the carriage.
2. Flip the carriage over. (Pro, Elite, and Elite+ models)
- With the carriage flipped over apply silicone gel to the elasticords with gloves.
3. Lubricate elasticords located in the MVP rails (All models)
- Apply silicone gel to the rubber portion of the MVP rail elasticords
4. Re-insert carriage into the MVP rails.
- Re-insert four eyebolts into the inside of the MVP rails.
- Re-insert knee bumpers at the end of the MVP Rails.
Inspect Carriage Wheels
1. Remove the carriage.
- Remove four eyebolts from inside the MVP rails.
- Remove knee bumpers from the end of the the MVP rails.
- Remove the carriage.
2. Flip the carriage over.
3. Visually inspect wheels for any damage (flat surfaces, damaged bearings, cracks). After visually inspecting the
wheels, text them by individually rolling them. All wheels should operate smoothly.
Inspect Upholstery
1. Make sure seams are all intact and that there is no ripping or cracks in the fabric of the backrest as well as the
headrest.
2. Velcro is located on the bottom of the headrest and on the backrest. The velcro is what holds the headrest in place.
The velcro loop on the backrest will lose grip over time and become a safety issue if the headrest is not firmly
secured.
3. The foam insert located in the headrest should still hold form.
4. The rubber cover on the kickplate is attached with Velcro and is easily removed and replaced if it should become
excessively worn. The Velcro around the edge of the kickplate allows for easy attachment of the kickplate cover and
accessories such as the foot supports and proprioceptive disk.
5. The recommended cleaning product for all upholstery: common household and antibacterial cleaners. Avoid
alcohol based cleaners.
Page 17
MAINTENANCE
Other manuals for MVP
1
Table of contents
Other Shuttle Fitness Equipment manuals

Shuttle
Shuttle BALANCE User manual

Shuttle
Shuttle TNT User manual

Shuttle
Shuttle Shuttle Recovery User manual

Shuttle
Shuttle TNT User manual

Shuttle
Shuttle MVP User manual

Shuttle
Shuttle BALANCE User manual

Shuttle
Shuttle Z0-2734 User manual

Shuttle
Shuttle MiniPress User manual

Shuttle
Shuttle Ultimate User manual

Shuttle
Shuttle BALANCE User manual