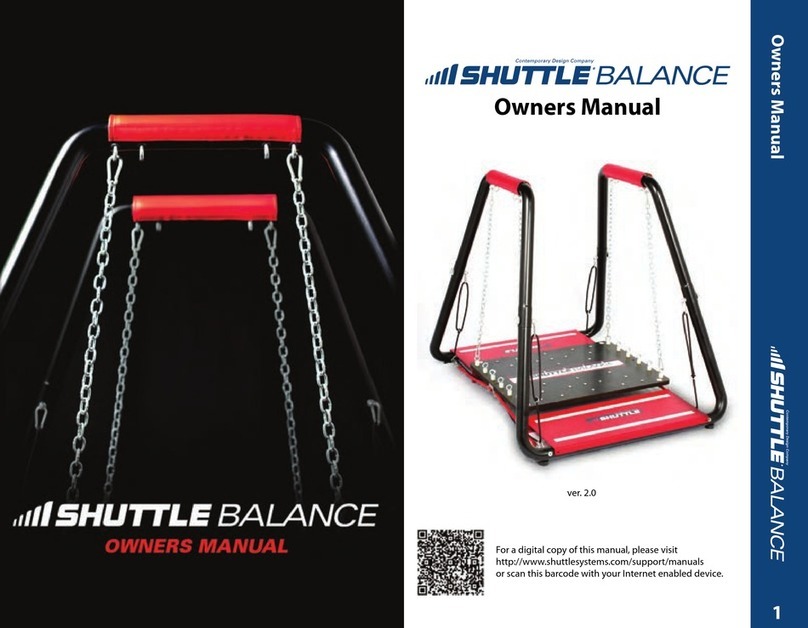
Shuttle BALANCE User manual

BALANCE

Congratulations on the purchase of your new Shuttle Balance. Shuttle equipment has been trusted by physical therapists
and sports training facilities around the globe for almost half a century. It is our mission to deliver the finest quality exercise
devices with superior customer service. We welcome you as a valued customer.
For your safety it is crucial that you read this manual thoroughly and understand the equipment before use. If you have any
questions about your Shuttle Balance you can give us a call at +1 (800)-334-5633, email us at
[email protected], or chat with us via live chat at www.shuttlesystems.com (Monday-Friday, 8 am to 5
pm Pacific Time).
WELCOME TO THE FAM

IMPORTANT SAFETY INFORMATION ..…………………………………………………………….…………. 1
PERSONAL SAFETY ……….……………………………………………………………………….……………. 1
SPECIFICATIONS (STANDARD)………………………..……………………………………………………….. 2
SPECIFICATIONS (PROFESSIONAL)…………………..……………………………………………………….. 3
SPECIFICATIONS (SPORT)…….………………………..……………………………………………………….. 4
SPECIFICATIONS (SENIOR)…………….…………..….……………………………………………………….. 5
IDENTIFICATION OF THE MANUFACTURER …………………………………………………………..……. 6
ASSEMBLY OF THE BALANCE …………….…………………………………..……………………….……… 7
- ASSEMBLING THE HANDRAIL TUBES AND THE BOTTOM FRAME TUBES……………..….8
- ATTACHING THE PLATFORM……………………..………………………………………..…..…9
- SECURING THE STEPS TO THE FRAME……………..….……………………………….…….. 11
USING THE PRODUCT (STANDARD)……………………………………………………….………………… 12
USING THE PRODUCT (PROFESSIONAL)………………………………………………….………………… 13
USING THE PRODUCT (SPORT)…………………………………………………………….………………… 14
USING THE PRODUCT (SENIOR)………………………..………………………………….………………… 15
MAINTENANCE AND CARE ……………………………………………………………………….….……… 16
TREATMENT PROGRESSION……………………………………………………………………….….……… 17
WARRANTY ………………………………………………………………………………………….………….. 19
SUPPORT ………………………………………………………………..……………………..………….…….. 20
TABLE OF CONTENTS

Page 1
Read all safety information before operating the Balance. It is the owner’s responsibility to ensure that users are
aware of all warnings and precautions.
Please read all instructions before using the product. These instructions were written to ensure the safety of the user and to
protect the product.
You should always consult with a physician before beginning a new fitness plan.You are advised to investigate and inform
yourself about any health related actions and choices you make.
Use caution when mounting and dismounting.
Do not allow children to have unsupervised access to the product.
Keep pets away from the Balance at all times.
Perform regular maintenance for optimal performance and longevity. To ensure safety, the Balance must be checked for
wear and damage on a regular basis.
Replace any damaged or worn parts immediately. Do not use the Balance until the repair is performed.
Use only original parts from the manufacturer. Changes or modifications to this unit not expressly approved by Shuttle
Systems could void the warranty.
The Balance is for indoor use only. Do not store the Balance outdoors, near water, or at high humidity levels.
Fully assemble the product before using it. Check the product before each use. Do not continue to use the product if it is
not working properly.
Use of this product is subject to medical examination to assess your suitability to the type of workout exercise you intend to
perform, and in compliance with the conditions for use laid down by Shuttle Systems.
Persons suffering from certain physical conditions may only use the product under the strict supervision of a doctor with
specific qualifications.
Before starting any workout, make sure your position on the product is correct, paying attention to any components that
may obstruct use.
Plan the workout according to your physical characteristics and state of health, beginning with less demanding workloads.
Do not overexert yourself or work to exhaustion. Incorrect or excessive exercise may cause physical harm or sudden death.
If you feel any pain or abnormal symptoms, stop your workout immediately and consult your physician.
Wear proper workout clothing and shoes during training; do not wear loose clothing.
When using the Balance, other people must remain at a safe distance.
Do not use the product when children or pets are present.
The person in charge of the gym must explain proper and improper use of the equipment to users.
Assemble and use the product only on a solid and flat surface.
Keep the product in good working condition. If you see signs of wear, contact Shuttle Technical Support Service.
Do not attempt any maintenance work on the product other than the operations described in the user manual.
IMPORTANT SAFETY INFORMATION
PERSONAL SAFETY

Page 2
Platform Dimensions: 24” x 30”
Dimensions: 42” x 50”
Floor Space Required: 4.5’ x 5’
Load Capacity: 400 lbs
Rail Height: 41”
UPPER
STABILITY
EYEBOLTS
OUTER
STABILITY
EYEBOLTS
CONTROL
ROPE
PLATFORM
SAFETY
GRIPS
ELASTIC
DAMPENERS
SPECIFICATIONS (STANDARD)

Page 3
Platform Dimensions: 24” x 30”
Dimensions: 42” x 50”
Floor Space Required: 4.5’ x 5’
Load Capacity: 400 lbs
Rail Height: 41”
UPPER
STABILITY
EYEBOLTS
OUTER
STABILITY
EYEBOLTS
CONTROL
ROPE
PLATFORM
STEPS
SAFETY
GRIPS
ELASTIC
DAMPENERS
SPECIFICATIONS (PROFESSIONAL)

Page 4
Platform Dimensions: 36” x 48”
Dimensions: 53” x 60”
Floor Space Required: 6’ x6.5’
Load Capacity: 400 lbs
Rail Height: 41”
SAFETY
GRIPS
CONTROL
ROPE
STEPS
PLATFORM
OUTER
STABILITY
EYEBOLTS
INNER
STABILITY
EYEBOLTS
UPPER
STABILITY
EYEBOLTS
WHEELS
SPECIFICATIONS (SPORT)

Page 5
Platform Dimensions: 24” x 30”
Dimensions: 42” x 50”
Floor Space Required: 4.5’ x 5’
Load Capacity: 400 lbs
Rail Height: 41”
SAFETY
GRIPS
STEPS
CONTROL
ROPE
CHAIN
COVERS
PLATFORM
UPPER
STABILITY
EYEBOLTS
SPECIFICATIONS (SENIOR)

Page 6
C
A
B
D
A - Manufacturer’s name and contact
B - Item number
C - Description of product
D - Serial number
IDENTIFICATION OF THE MANUFACTURER

Page 7
Keep in mind that the following images pertain to just one of the four available Shuttle Balance models. Your parts may
appear slightly different than those in the included images, but the required steps remain the same.
The Balance Standard, Professional, and Senior will come in one box.
The Balance Sport will come in two boxes.
1. Balance Standard, Professional, & Senior
- Two handrail tubes
- Two bottom frame tubes
- Platform
- Four knurled knobs & four steel/rubber washers
- Two steps (Professional & Senior model)
- Manual
1. Balance Sport Box #1
- Two handrail tubes
- Two bottom frame tubes
- Two steps
- Manual
2. Balance Sport Box #2
- Platform
- Four knurled knobs & four steel/rubber washers
ASSEMBLY OF THE BALANCE

Page 8
ASSEMBLING THE HANDRAIL TUBES TO THE BOTTOM FRAME TUBES
STEP 1
ITEMS REQUIRED
Handrail Tubes
Bottom Frame Tubes
1. Remove all protective packaging from the handrail tubes.
2. Connect both handrail tubes to one bottom frame tubes, aligning the eyebolt holes. (Pic 1.1)
3. Lift both handrail tubes and attach the remaining bottom frame tube. (Pic 1.2)
1.1
1.2
ASSEMBLY OF THE BALANCE (STEP 1)

Page 9
ATTACHING THE PLATFORM (STANDARD, PROFESSIONAL, & SPORT MODELS)
STEP 2
ITEMS REQUIRED
Platform
Knurled Knobs Bag
1. Place the platform in the middle of the frame. Remove the zip-tie and parts bag containing four knurled knobs and
steel/rubber washers from the platform. (Pic 2.1)
2. Detach each chain by unclipping one carabiner from the outer eyebolt on the platform and reattach the carabiner to the
outside upper stability eyebolt on the handlebar rail. Make sure not to detach the carabiners from the chain. Repeat with
the remaining three chains. (Pic 2.2)
3. Remove each carabiner attached to the black control rope from the inner eyebolts on the platform. Attach the top
carabiner on the control ropes to the corresponding eyebolt located on the upper side of the handrail frame. Insert the
eyebolts that are attached to the control ropes, into and through the middle of the frame. Tighten down the eyebolts
with a steel/rubber washer and knurled knob. The rubber end of the washers should rest against the tubes. Attach the
last remaining carabiner on the black control ropes to the bottom eyebolts of the bottom frame tubes. (Pic 2.3 & 2.4)
4. Detach the carabiners that connect all four red elastics. Attach each red elastic to the bottom eyebolts on the frame. The
elasticords and control ropes should both be attached to the bottom eyebolts of the frame. (Pic 2.5)
ATTACHING THE PLATFORM (SENIOR MODEL)
STEP 2
ITEMS REQUIRED
Platform
Parts Bag
1. Place the platform in the middle of the frame. Remove the zip-tie and parts bag containing four knurled knobs and
steel/rubber washers from the platform. (Pic 2.1)
2. Detach each chain by unclipping one carabiner from the eyebolt on the platform and reattach the carabiner to the
outside upper stability eyebolt on the handlebar rail. Make sure not to detach the carabiner from the chain. Repeat with
the remaining three chains. (Pic 2.2)
3. Remove the carabiner attached to the black control rope from the eyebolts on the platform. Make sure not to detach
the carabiners from the control ropes. Attach the carabiner on the control ropes to the corresponding eyebolt located
on the bottom eyebolt of the frame tubes. (Pic 2.6)
4. Insert the eyebolts provided in the parts bag into and through the middle of the frame. Tighten down the eyebolts with
a steel/rubber washer and knurled knob. The rubber end of the washers should rest against the tubes. (Pic 2.4 without
the rope going through the eyelet)
Images on next page
ASSEMBLY OF THE BALANCE (STEP 2)

Page 10
ATTACHING THE PLATFORM
STEP 2
2.1
2.2
2.3
2.4
2.5
2.6
Blance Senior
ASSEMBLY OF THE BALANCE (STEP 2)

Page 11
SECURING THE STEPS TO THE FRAME
STEP 3
ITEMS REQUIRED
Two Steps
1. Align the velcro strips on the bottom frame tube with the velcro on the bottom of the steps. Press the steps down firmly
to secure them to the frame. The Shuttle Logo should be facing out from the platform. The steps can be placed on the
inside of the frame or the outside of the frame depending on patient use. (Pic 3.1 & 3.2))
3.1
3.2
ASSEMBLY OF THE BALANCE (STEP 3)

Page 12
Adjusting the degree of stability: The stability of the balance platform is achieved by the positioning of the chains on the
platform. The chains can be positioned with the chain carabiners to the corresponding color coded stability eyebolts
located on the platform.
Attaching the chains to the stability eyebolts on the utmost corners of the platform will give the patient the most stable
surface.
Attaching the chains to the stability eyebolts near the center of the platform (red washers) will give the patient the most
instability. This position will give the platform a “tipping” motion.
The radius of the motion may be adjusted by moving the chain carabiners on the upper stability eyebolts located
underneath the safety grips.
Warning! Never attempt to adjust the degree of stability when the equipment is in use.
Adjusting the height and angle of the platform: Shortening the chains can create an unstable “step up” for users/patients.
This can be done by moving the upper carabiners down the chain to raise the platform. The platform can then be used for
an unstable “box” jump. The platform may also be raised to a “seat height” to perform core strengthening exercise.
By shortening only two of the chains the platform can create an incline angle.
Warning! Never attempt to adjust the height and/or angle of the platform when the equipment is in use.
Adjusting the red elastics: The red elastic dampeners provide resistance to the platform when attached to the frame. If the
patient desires to have a completely free swaying platform, disengage the red elastic dampeners from the frame by
unclipping the carabiner from the eyebolt.
Warning! Never attempt to adjust the elastic dampeners when the equipment is in use.
Adjusting the range of motion: The black control ropes allows the patient to adjust the range of motion of the platform.
This can be done by sliding the black plastic rope lock (found on the control rope adjacent tot he safety grips) to tighten or
loosen the black ropes. The main purpose is to reduce the sway for patients getting acquainted with the balance motion.
UPPER
STABILITY
EYEBOLTS
OUTER
STABILITY
EYEBOLTS
CONTROL
ROPE
PLATFORM
SAFETY
GRIPS
RED
ELASTICS
USING THE PRODUCT (STANDARD)

Page 13
Adjusting the degree of stability: The stability of the balance platform is achieved by the positioning of the chains on the
platform. The chains can be positioned with the chain carabiners to the corresponding color coded stability eyebolts
located on the platform.
Attaching the chains to the stability eyebolts on the utmost corners of the platform will give the patient the most stable
surface.
Attaching the chains to the stability eyebolts near the center of the platform (red washers) will give the patient the most
instability. This position will give the platform a “tipping” motion.
The radius of the motion may be adjusted by moving the chain carabiners on the upper stability eyebolts located
underneath the safety grips.
Warning! Never attempt to adjust the degree of stability when the equipment is in use.
Adjusting the height and angle of the platform: Shortening the chains can create an unstable “step up” for users/patients.
This can be done by moving the upper carabiners down the chain to raise the platform. The platform can then be used for
an unstable “box” jump. The platform may also be raised to a “seat height” to perform core strengthening exercise.
By shortening only two of the chains the platform can create an incline angle.
Warning! Never attempt to adjust the height and/or angle of the platform when the equipment is in use.
Adjusting the red elastics: The red elastic dampeners provide resistance to the platform when attached to the frame. If the
patient desires to have a completely free swaying platform, disengage the red elastic dampeners from the frame by
unclipping the carabiner from the eyebolt.
Warning! Never attempt to adjust the elastic dampeners when the equipment is in use.
Adjusting the range of motion: The black control ropes allows the patient to adjust the range of motion of the platform.
This can be done by sliding the black plastic rope lock (found on the control rope adjacent to the safety grips) to tighten or
loosen the black ropes. The main purpose is to reduce the sway for patients getting acquainted with the balance motion.
Adjusting the steps: The steps should be
secured to the inside of the frame tubes, unless
specified below. This provides more security
when performing exercises and a place to step
when walking on and off the platform.
The steps should be secured to the outside of
the bottom frame tube when the platform is
adjusted to the center (red) stability eyebolts.
When performing upper body exercises the
steps may be fully removed from the frame,
giving room for a patient to rest their knees on
the ground.
Warning! The steps must be firmly
secured to the frame tubes before
beginning a workout that involves
stepping onto the platform.
UPPER
STABILITY
EYEBOLTS
OUTER
STABILITY
EYEBOLTS
CONTROL
ROPES
PLATFORM
STEPS
SAFETY
GRIPS
RED
ELASTICS
USING THE PRODUCT (PROFESSIONAL)

Page 14
Adjusting the degree of stability: The stability of the balance platform is achieved by the positioning of the chains on the
platform. The chains can be positioned with the chain carabiners to the corresponding color coded stability eyebolts
located on the platform.
Attaching the chains to the stability eyebolts on the utmost corners of the platform will give the patient the most stable
surface.
Attaching the chains to the stability eyebolts near the center of the platform (red washers) will give the patient the most
instability. This position will give the platform a “tipping” motion.
The radius of the motion may be adjusted by moving the chain carabiners on the upper stability eyebolts located
underneath the safety grips.
Warning! Never attempt to adjust the degree of stability when the equipment is in use.
Adjusting the height and angle of the platform: Shortening the chains can create an unstable “step up” for users/patients.
This can be done by moving the upper carabiners down the chain to raise the platform. The platform can then be used for
an unstable “box” jump. The platform may also be raised to a “seat height” to perform core strengthening exercise.
By shortening only two of the chains the platform can create an incline angle.
Warning! Never attempt to adjust the height and/or angle of the platform when the equipment is in use.
Adjusting the red elastics: The red elastic dampeners provide resistance to the platform when attached to the frame. If the
patient desires to have a completely free swaying platform, disengage the red elastic dampeners from the frame by
unclipping the carabiner from the eyebolt.
Warning! Never attempt to adjust the elastic dampeners when the equipment is in use.
Adjusting the range of motion: The black control ropes allows the patient to adjust the range of motion of the platform.
This can be done by sliding the black plastic rope lock (found on the control rope adjacent to the safety grips) to tighten or
loosen the black ropes. The main purpose is to reduce the sway for patients getting acquainted with the balance motion.
Adjusting the steps: The steps should be
secured to the inside of the frame tubes,
unless specified below. This provides
more security when performing exercises
and a place to step when walking on and
off the platform.
The steps should be secured to the
outside of the bottom frame tube when
the platform is adjusted to the center (red)
stability eyebolts.
When performing upper body exercises
the steps may be fully removed from the
frame, giving room for a patient to rest
their knees on the ground.
Warning! The steps must be firmly
secured to the frame tubes before
beginning a workout that involves
SAFETY
GRIPS
CONTROL
ROPE
STEPS
PLATFORM
OUTER
STABILITY
EYEBOLTS
INNER
STABILITY
EYEBOLTS
UPPER
STABILITY
EYEBOLTS
WHEELS
USING THE PRODUCT (SPORT)

Page 15
Adjusting the range of motion: The black control ropes allows the patient to adjust the range of motion of the platform.
This can be done by sliding the black plastic rope lock (found on the control rope adjacent to the safety grips) to tighten or
loosen the black ropes. The main purpose is to reduce the sway for patients getting acquainted with the balance motion.
The radius of motion may be adjusted by moving the chain carabiners on the upper stability eyebolts located underneath
the safety grips.
Warning! Never attempt to adjust the chain carabiners when the equipment is in use.
Adjusting the steps: The steps should be adjusted to the inside of the frame tubes. This provides more security when
performing exercises and a place to step when walking on and off the platform.
When performing upper body exercises the steps may be fully removed from the frame, giving room for a patient to rest
their knees on the ground.
Warning! The steps must be firmly secured to the inside of the frame tubes before beginning a workout that involves
stepping onto the platform.
SAFETY
GRIPS
STEPS
CONTROL
ROPE
CHAIN
COVERS
PLATFORM
UPPER
STABILITY
EYEBOLTS
USING THE PRODUCT (SENIOR)

Page 16
Inspect Upholstery
1. Make sure seams are all intact and that there is no ripping or cracks in the fabric of the safety grips as well as the
chain covers (if applicable).
2. Velcro is located on the bottom of the steps. The velcro is what holds the steps in place. The velcro loop on the
frame tubes will lose grip over time and become a safety issue if the steps are not firmly secured.
3. The recommended cleaning product for all upholstery: common household and antibacterial cleaners. Avoid
alcohol based cleaners.
Part #8031A - Vinyl Chain Covers
Part #8012A - Balance Steps (Set of 2)
Inspect Wheels*
There are two wheels located on the outside of one of the bottom frame tubes. Visually inspect wheels for any damage (flat
surfaces, damaged bearings, cracks). After visually inspecting the wheels, test them by individually rolling them. Both wheels
should operate smoothly for easier transportation of the machine.
*Wheels are original equipment on the Balance Sport. They may be purchased as an accessory for the other Balance
models.
Part #8024 - Balance Wheel Kit
Elastic Dampener Maintenance
1. Lubricating elastic dampeners is suggested every 6 months. A well maintained elastic dampener should last 3 to 5
years.
2. Sagging Elastics - This can result from normal wear and tear and only needs to be replaced if you are not
receiving the resistance you require.
3. Cracked, dry, or pitted elastics - This is a sign that your elastic dampeners are worn-out which could result in an
elastic breaking when in use and should be replaced immediately.
Part #1011 - Silicone Gel
Part #8016A - Red Elasticords for Balance Standard & Professional (Set of 4)
Part #8062 - Red Elasticords for Balance Sport (Set of 4)
MAINTENANCE

Page 17
Step onto the balance platform facing
forward, feet shoulder width apart.
Release hold on the safety grips
while keeping the platform still.
Move eyes and head, looking at
different fixed points.
Reach and touch a feed point: Catch a ball,
pull a therapy band, throw a ball against a
rebounder, or move free weights.
Foot Positions: Feet-in-line, one
behind the other.
Single leg balancing
TREATMENT PROGRESSION
Other manuals for BALANCE
2
Table of contents
Other Shuttle Fitness Equipment manuals

Shuttle
Shuttle TNT User manual

Shuttle
Shuttle MiniPress User manual

Shuttle
Shuttle MVP User manual

Shuttle
Shuttle TNT User manual

Shuttle
Shuttle BALANCE User manual

Shuttle
Shuttle Z0-2734 User manual

Shuttle
Shuttle BALANCE User manual

Shuttle
Shuttle TNT User manual

Shuttle
Shuttle Ultimate User manual

Shuttle
Shuttle MVP User manual