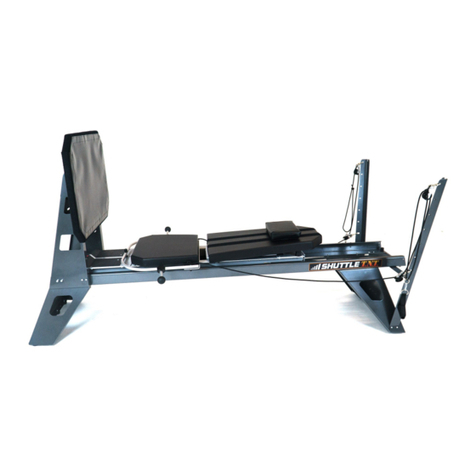
Shuttle BALANCE User manual

Owners Manual
ver. 2.0
For a digital copy of this manual, please visit
http://www.shuttlesystems.com/support/manuals
or scan this barcode with your Internet enabled device.
1
Owners Manual

3
Contact Shuttle Systems
1 (800) 334-5633
info@ShuleSystems.com
www.ShuleSystems.com
Table of Contents
Owners Manual
Table of Contents
Introducon
Assembly and Adjustment Instrucons
Treatment Progression
Know Your Shule Balance
Exercise Protocols
About The Shule Balance
Product Registraon
1
2
3
4 - 5
6 , 9
7 - 8
10 - 12
13
14
2
Table of Contents
The Shuttle Balance Owner’s manual has been prepared to help you
make full use of all the capabilities of your Shuttle Balance, whether
for ecient rehabilitation or for athletic training and performance.
This manual contains instructions about how to assemble, adjust,
use, and maintain your Shuttle Balance. With this knowledge - and
your own imagination - the extraordinary features of the Shuttle
Balance will allow you to design a customized workout program to
reach all your tness or rehabilitation goals.
Introduction to the Shuttle Balance
Shuttle Balance Models
Shule Balance Accessories
Balance Professional
Red Balance Steps
Control Cords
Padded Hand Grips
Red Elasticords
Balance Standard
Control Cords
Padded Hand Grips
Red Elasticords
Balance Sport
Lower Handrail (30”)
Control Cords
Padded Hand Grips
Red Elasticords
Steps
Part# 8012
Safety Grips
Part# 8013
Exercise Protocols

5
Note: Open box, remove and inspect all parts before assembly. If
there is any shipping damage, please take a photo of the damage
Shuttle Balance Assembly
Step 1
Remove black steel tubes from the box and
discard the tube protection from the ends of the
tubes.
Step 2
Fit the tubes together. Keep the round rubber
skid pads at on the oor. Align the holes at the
ends of the top and bottom tubes.
Step 3
When all tubes are loosely assembled, insert the
four eye bolts provided with washer on the inside
surface of the tubes. Then secure it with the
aluminum knob.
Step 4
Place the Balance platform between the lower
frame tubes.
Step 5
Hook up the four chains from the outer corners of
the balance board to the four outside eye bolts
on the top bars of the frame.
Step 6
Attach the carabiners in the middle of the black
control cords and the four red elastics to the eye
bolts at the base of the frame.
Step 7
The range of movement can be controlled by
adjusting the length of the control cords using
the three-hole rope adjustment lock, pulling it up
or down.
4
Assembly Instructions
1. Balance Platform (SEE PHOTOS for a variety of positions)
You can adjust the chain lengths to change the height, diculty or
angle of the board.
2. Adjustable Chains
The degree of stability of your platform may be adjusted by placing the
chains on the various eye bolts on the edge of the platform.
Attaching the chains to the eye bolts on the corners of your platform
will give you the most stable surface.
Attaching the chains to the eye bolts near the center of the platform
will give you the most instability. This position will also give your
platform a“tippy” movement. And, you can attach the chains to the
other eye bolts along the outside of the platform for varying degrees of
stability/instability.
You can also change the stability of the platform by adjusting the
chains on the eye bolts located underneath the safety grips.
3. Elastic Dampeners
There are two purposes for the red elastic dampeners.
They provide a lateral resistance to any exercise you
do on the Balance. If you desire to have a completely
free swaying platform on your Balance, disengage
both the Elastic Dampeners and the adjustable
Control Cords.
4. Control Cords
The black Control Cords allow you to adjust the range
of motion of the balance platform.
Adjusting Your Shuttle Balance
Assembly Instructions

Know Your Shuttle Balance
7
When working with the Shuttle Balance you’re only limited by your
imagination.
Treatment Progression
For instructional videos on using the Balance, please visit
www.ShuttleSystems.com/movies or scan the barcode
on the left with your internet enabled device.
Release hold on the safety grips while
keeping the platform still.
Step on to the balance platform facing
forward, feet shoulder width apart.
Move Eyes & Head looking at dierent
xed points.
Reach and touch a xed point: Catch a
ball, pull a therapy band, throw a ball
against a rebounder, or move free
weights.
Foot Positions: Feet in line, one behind
the other.
Treatment Progression
6
Overview
Top Side

Treatment Progression (Cont.)
9
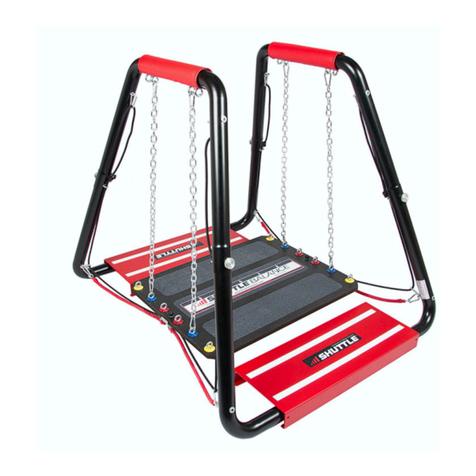
1. Adjustable Chains
Adjust the Balance Platform height, degree
of stability, and tilt sensitivity.
2. Safety Rails
Convenient handles provide security and
increased condence during training.
3. Control Cords
Travel tethers attached to frame and Balance
Platform allow you to control range of
perturbation and lateral movement.
4. Elastic Dampeners
These bands provide dual benet of
softening perturbation as well as allowing
progressive resistance for both abduction
and adduction protocols.
5. Balance Platform
Non-slippery surface provides secure footing
and assists you in determining and
repeating foot placement. Supports up to
500 pounds.
6. Balance Step
The Step provides your most debilitated
patients easy ingress and egress for comfort,
condence, and security.
Know Your Shuttle Balance
8
Rotate on the balance board one complete
turn (360 Degrees).
Perturbation: Standing behind the patient,
gently kick or move the platform.
Use a Therapy band to provide resistance.
Jump on, stick landing, and then jump o.
(Remove Balance Steps)
Single Leg Balancing
Repeat the above protocols facing the
handrail.
Repeat the above protocols with eyes
closed.

Exercise Protocols
10
Exercise Protocols
11
Shift the platform back and forth or side to
side. Brace your core to stop movement.
Squats
Hand Weight Drills: Shoulder rotations,
curls, press ups.
Throwing and Catching a ball with a
therapist or rebounder.
Throwing and Catching with Rotation:
catch a ball coming from the side with
arms extended.
Eyes Closed: Repeat the above steps with
eyes closed.
Exercise Protocols: Bilateral & Unilateral
For instructional videos on using the Balance, please visit
www.ShuttleSystems.com/movies or scan the barcode
on the left with your internet enabled device.
Note: Progress from Bilateral to Unilateral with improved ability.
Kneeling on foam pad or proprioception
disk.
Dorsiexion: Platform in tilted position.
Plantarexion: Platform in tilted position.
Abduction/Adduction: One foot on the
platform and one foot on step.
(Loosen up control cord)
Step Facing Forwards and Sideways.
Look Up.
To increase diculty add a Balance Ball, Foam Pad, Wobble
Board, Proprioceptive Disk.

Exercise Protocols
12
About The Shuttle Balance
13
Soccer Kicks: Suspend a target in front of
athlete. While standing on one leg kick at
the target.
Football Stance: While in a three point
stance, maintain balance as a trainer
perturbs the platform.
Golf & Baseball Swing: With club or bat in
hand perform a full swing.
Sport Specic Protocols
For instructional videos on using the Balance, please visit
www.ShuttleSystems.com/movies or scan the barcode on
the left with your internet enabled device.
Upper Body Exercise Protocols
Closed Chain Proprioception: Shift the
platform back and forth.
Plyometric Push-up: Push o then land on
the platform surface.
Abdominal Exercises: Turn sideways, hold
safety grips, bend at waist and propel the
feet backward or forward.
While the Shuttle Balance is a product of Shuttle Systems, its
creation and continual improvement over the years can be attrib-
uted to a variety of individuals. We’d like to thank them for their
wonderful insight and kind assistance in making the Shuttle
Balance what it is today.
The need for such a device as the Shuttle Balance was articulated by
several Washington State physical therapists who were owners of
our Shuttle products. We have found over the years that our current
Shuttle owners are the best source for product development and
innovation. Thank you all.
Robert Crouch of Precision Fitness in Adelaide, South Australia was
kind enough to use some of the rst prototypes of the Shuttle
Balance with the Lightning Girls women’s basketball team, Forty
Niners men’s basketball team, Australia Cricket team and his“Strong
Bones”Program for seniors. In those product trials, the Shuttle
Balance was demonstrated to be a very eective tool for balance
training, rehabilitation and athletic development. Thank you Robert.
During the early phases of the Shuttle Balance program it came to
light that Mick Lynch MD, a physician and college professor from
Florida, and his sister Teresa Schuemann, a Physical Therapist in
Washington State, had obtained a patent on a device very similar to
our Shuttle Balance. After contacting Dr. Lynch and showing him
what we had done, we were able to achieve a working relationship
that beneted both parties relative to their technology. We appreci-
ate the opportunity to work with Dr. Lynch and Teresa Schuemann,
PT.
About The Shuttle Balance
The Home of Shuttle Systems
Please visit ShuleSytems.com/register to register
your new Shule Balance today and receive the
following:
Register Your Product
& Get Free Stuff!
Shule Insider:
Bi-monthly email newsleer with ps and tricks from
current owners and respected therapists of the Shule
Balance.
Contest, events, and more!
Submit videos or ps about our products to be one of
our featured “Meet an MVP” instructors.
Maintenance videos to help keep your product working
longer for less.
Latest news on Shule products and accessories.
Limited Warranty:
Structural - 5 yrs, Upholstery - 2yrs, Parts - 1yr
Join us online: www.shulesystems.com
Product Registration
14
Other manuals for BALANCE
2
Other Shuttle Fitness Equipment manuals

Shuttle
Shuttle Z0-2734 User manual

Shuttle
Shuttle TNT User manual

Shuttle
Shuttle TNT User manual

Shuttle
Shuttle MVP User manual

Shuttle
Shuttle Ultimate User manual

Shuttle
Shuttle BALANCE User manual

Shuttle
Shuttle BALANCE User manual

Shuttle
Shuttle MVP Elite Plus User manual

Shuttle
Shuttle MiniPress User manual

Shuttle
Shuttle TNT User manual
Popular Fitness Equipment manuals by other brands

G-FITNESS
G-FITNESS AIR ROWER user manual

CAPITAL SPORTS
CAPITAL SPORTS Dominate Edition 10028796 manual

Martin System
Martin System TT4FK user guide

CIRCLE FITNESS
CIRCLE FITNESS E7 owner's manual

G-FITNESS
G-FITNESS TZ-6017 user manual

Accelerated Care Plus
Accelerated Care Plus OMNISTIM FX2 CYCLE/WALK user manual