manuals.online logo
Brands
  1. Home
  2. •
  3. Brands
  4. •
  5. Siemens
  6. •
  7. Cables And Connectors
  8. •
  9. Siemens SIMATIC NET Power Plug PRO User manual

Siemens SIMATIC NET Power Plug PRO User manual

SIMATIC NET
Produktinformation
Product Information Stand / Dated /06.07
Montageanleitung für / Assembly Instructions for
SIMATIC NET Industrial Ethernet
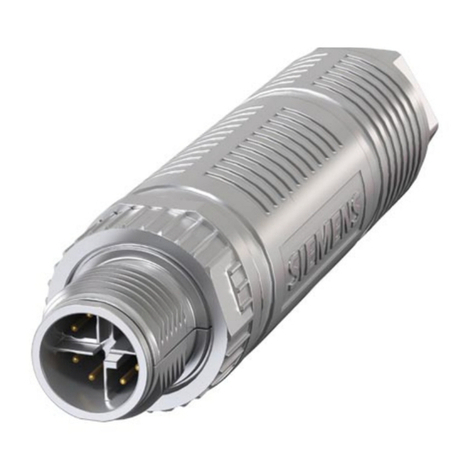
Power Plug PRO 6GK1907-0AB10-6AA0
an /with
Energy Cable 5 x 2.5 mm2 (AWG 14) oder /or 5 x 1.5 mm2 (AWG 16)
Nachfolgend finden Sie Informationen in deutscher Sprache.
This document contains information in English.
A5E01171848A
A
5E01171848A
© SIEMENS AG 2007
Ä
nderungen vorbehalten
Subject to change
6GK1907-0AB10-6AA0 Montageanleitung für / Assembly Instructions for Power Plug PRO
2 Copyright © 2007 Siemens AG
Wir haben den Inhalt der Druckschrift auf Über-einstimmung mit dem
beschriebenen Werkzeug geprüft. Dennoch können Abweichungen
nicht ausgeschlossen werden, so daß wir für die vollständige
Übereinstimmung keine Gewähr übernehmen. Die Angaben in der
Druckschrift werden jedoch regelmäßig überprüft. Notwendige
Korrekturen sind in den nachfolgenden Auflagen enthalten. Für
Verbesserungsvorschläge sind wir dankbar.
Technische Änderungen vorbehalten.
Weitergabe sowie Vervielfältigung dieser Unterlage, Verwertung und
Mitteilung ihres Inhalts nicht gestattet, soweit nicht ausdrücklich
zugestanden. Zuwiderhandlungen verpflichten zu Schadenersatz. Alle
Rechte vorbehalten, insbesondere für den Fall der Patenterteilung
oder GM-Eintragung.
Copyright © Siemens AG 2007
All Rights Reserved
Wichtiger Hinweis
Wir weisen darauf hin, daß der Inhalt dieser Betriebsanleitung nicht Teil einer früheren oder bestehenden Vereinbarung, Zusage oder eines
Rechtsverhältnisses ist oder diese abändern soll. Sämtliche Verpflichtungen von Siemens ergeben sich aus dem jeweiligen Kaufvertrag, der auch
die vollständige und allein gültige Gewährleistungsregel enthält. Diese vertraglichen Gewährleistungsbestimmungen werden durch die
Ausführungen dieser Betriebsanleitung weder erweitert noch beschränkt.
Wir weisen außerdem darauf hin, daß aus Gründen der Übersichtlichkeit in dieser Betriebsanleitung nicht jede nur erdenkliche Problemstellung
im Zusammenhang mit dem Einsatz dieses Werkzeugs beschrieben werden kann. Sollten Sie weitere Informationen benötigen oder sollten
besondere Probleme auftreten, die in der Betriebsanleitung nicht ausführlich genug behandelt werden, können Sie die erforderliche Auskunft über
die örtliche Siemens-Niederlassung anfordern.
WARNUNG !
Der in der Anleitung beschriebene Power Plug PRO ist nur im Zusammenhang mit Energieleitungen
5 x 2,5 mm2(AWG14) oder 5 x 1,5 mm2(AWG16) zu Verwenden. Bei anderweitiger Verwendung kann es zu
Unfällen oder zur Zerstörung von Werkzeug, Power Plug PRO, Leitung oder angeschlossenem Gerät
kommen.
Während der Montage des Power Plug PRO darf die Leitung auf keinen Fall unter Spannung stehen.
Überschreiten Sie nicht die in dieser Anleitung bzw. in der Anleitung ihres angeschlossenen Gerätes
angegebenen Grenzwerte für den maximalen Strom sowie die maximale Umgebungstemperatur.
Anforderung an die Qualifikation des Personals
Qualifiziertes Personal im Sinne dieser Betriebsanleitung bzw. der Warnhinweise sind Personen, die mit Aufstellung, Montage,
Inbetriebsetzung und Betrieb dieses Produktes vertraut sind und über die ihrer Tätigkeit entsprechenden Qualifikation verfügen
und in erster Hilfe geschult sind.
_________________________________________________________________________________
We have checked the contents of this manual for agreement with
this tool described. Since
deviations cannot be precluded entirely, we cannot guarantee full
agreement. However, the data in this manual are reviewed regularly
and any necessary corrections included in subsequent editions.
Suggestions for improvement are welcome.
Technical data subject to change.
The reproduction, transmission or use of this document or its contents is not
permitted without express written authority. Offenders will be liable for
damages. All rights, including rights created by patent grant or registration of
a utility or design, are reserved.
Copyright © Siemens AG 2007
All Rights Reserved
Note
We would point out that the contents of this product documentation shall not become a part of or modify any prior or existing agreement,
commitment or legal relationship. The Purchase Agreement contains the complete and exclusive obligations of Siemens. Any statements
contained in this documentation do not create new warranties or restrict the existing warranty.
We would further point out that, for reasons of clarity, these operating instructions cannot deal with every possible problem arising from the use of
this device. Should you require further information or if any special problems arise which are not sufficiently dealt with in the operating
instructions, please contact your local Siemens representative.
WARNING !
The Power Plug PRO described in the instructions may only be used in conjunction with energy cables
5 x 2.5 mm2(AWG14) or 5 x 1.5 mm2(AWG16). If used elsewhere, accidents may occur or tools, POWER Plug
PRO, cable or connected device may be irreparably damaged.
During assembly of the POWER Plug PRO, the cable must under no circumstances be live.
Do not exceed the limit values for maximum current and maximum ambient temperature as specified in these
instructions or the manual of the connected device.
Wiring shall be installed in accordance with the current NEC/CEC requirements.
Personnel qualification requirements
Qualified personnel as referred to in the operating instructions or in the warning notes are defined as persons who are familiar
with the installation, assembly, startup and operation of this product and who possess the relevant qualifications for their work and
have a First Aid qualification.
Montageanleitung für / Assembly Instructions for Power Plug PRO 6GK1907-0AB10-6AA0
Copyright © 2007 Siemens AG 3
Verwenden Sie mit dem Power Plug PRO
nur Kabel, die folgender Spezifikation
entsprechen:
Kabeldurchmesser 9 bis 13 mm
Leiterquerschnitt mm22,5 1,5
Leiterquerschnitt AWG 14 16
Aderendhülse L x D 10x2,2 10x1,7
16 A
58° C
16 A
45° C
maximaler Strom
bei Umgebungs-
temperatur 13 A
73° C
13 A
60° C
a Druckmutter e Steckereinsatz
b Dichtring f Gehäuseeinkerbung
c Rückwand g Gehäuse
d Rastnase
1. Fädeln Sie die Druckmutter, den Dichtring
und die Rückwand lose über die Leitung.
2) Isolieren Sie 35 mm des Kabelmantels
ab.
3) Entfernen Sie die Aderisolierung auf einer
Länge von 10 mm.
4) Krimpen Sie bei einem Leiterquerschnitt
von 2,5 mm2(AWG14) Aderendhülsen
DIN 46228-A2,5-10 (Masse siehe Bild)
auf die Aderenden. Für einen
Leiterquerschnitt von 1,5 mm2(AWG16)
verwenden Sie Aderendhülsen
DIN 46228-A1,5-10.
5) Schieben Sie die Adern entsprechend der
nebenstehenden Tabelle in die
Federkraft-Anschlussklemmen.
Pin PROFINET
1 L1
2 N1
3 L2
4 N2
5 FE
6. Kontrollieren Sie die einwandfreie
Kontaktierung durch leichten Zug an den
Adern.
7. Setzen Sie den Dichtring in die Rückwand
und schrauben Sie die Druckmutter locker
darüber.
8. Drehen Sie die Rastnase der Rückwand
auf die selbe Seite wie die roten
Codierreiter des Steckereinsatzes.
9. Schieben Sie die Rückwand bis zum
Anschlag an den Steckereinsatz.
10. Drehen Sie die Rastnase der Rückwand
und die Gehäuseeinkerbung auf die selbe
Seite.
11. Schieben Sie das Gehäuse bis zum
Anschlag über den Steckereinsatz
12. Drücken Sie die Rückwand so weit in das
Gehäuse bis sie hörbar verrastet.
13. Drehen Sie die Druckmutter zu.
Stecker demontieren:
1) Zum Öffnen hebeln Sie die Rastfeder im
Gehäuse mit einem Schlitzschrauben-
dreher in Richtung Seitenwand.
2) Ziehen Sie die Rückwand bei herunter-
gehaltenem Schraubendreher am Kabel
aus dem Gehäuse.
3) Drücken Sie die Käfigzugfedern mit
einem Schlitzschraubendreher auf.
4) Ziehen Sie die Adern einzeln aus den
Kontaktkammern.
Weitere Informationen zum Netzaufbau finden Sie im SIMATIC NET TP und FO Netzhandbuch
6GK1907-0AB10-6AA0 Montageanleitung für / Assembly Instructions for Power Plug PRO
4 Copyright © 2007 Siemens AG
Only use cables with the Power Plug PRO
that meet the following specifications:
Cable diameter 9 to 13 mm
Core cross section
mm2
2,5 1,5
Core cross section
AWG
14 16
Ferrule L x D 10 x
2.2
10 x
1.7
16 A
58 °C
16 A
45 °C
Maximum current
at ambient temperature
13 A
73 °C
13 A
60 °C
a Forcing nut e Plug insert
d Sealing ring f Housing notch
c Rear wall g Housing
d Latch
1. Thread the forcing nut, the sealing ring
and the back wall loosely over the cable.
2. Strip 35 mm of the cable jacket.
3. Remove 10 mm of the insulation from the
wires.
4. With a wire cross section of 2.5 mm2
(AWG14), crimp ferrules DIN 46228-A2.5-
10 (ground see figure) to the wire ends.
For a wire cross section of 1.5 mm2
(AWG16), use the DIN 46228-A1.5-10
ferrules.
5. Push the wires into the spring terminal
clamps as shown in the table.
Pin PROFINET
1 L1
2 N1
3 L2
4 N2
5 FE
6. Check that good contact is established by
pulling lightly on the wires.
7. Put the sealing ring into the rear wall and
screw the forcing nut over it loosely.
8. Turn the latch of the rear wall to the same
side as the red coding bars of the plug
insert.
9. Push the rear wall as far as the limit stop
of the plug insert.
10. Turn the latch of the rear wall and the
notch in the housing to the same side.
11. Push the housing over the plug insert as
far as the limit stop.
12. Press the rear wall into the housing until it
clicks in place audibly.
13. Tighten the forcing nut.
Dismantling the plug:
1. To open the plug, lever the catch in the
housing towards the side wall with a
slotted screwdriver.
2. Pull the rear wall out of the housing by the
cable while holding down the screwdriver.
3. Press open the cage springs with a
slotted screwdriver.
4. Pull the wires out of the contact clamps
one by one.
For more detailed information on setting up networks, refer to the SIMATIC NET TP and FO Network Manual

This manual suits for next models

1

Other Siemens Cables And Connectors manuals

Siemens 6FX2003-0DE01 User manual

Siemens

Siemens 6FX2003-0DE01 User manual

Siemens 3VL9000-8AQ10 User manual

Siemens

Siemens 3VL9000-8AQ10 User manual

Siemens 3VA9 3-0JF60 Series User manual

Siemens

Siemens 3VA9 3-0JF60 Series User manual

Siemens SIMATIC NET 6GK1901-0BE10-0AA0 Administrator guide

Siemens

Siemens SIMATIC NET 6GK1901-0BE10-0AA0 Administrator guide

Siemens 3WX3625-1JC00 User manual

Siemens

Siemens 3WX3625-1JC00 User manual

Siemens SENTRON 3NJ620 User manual

Siemens

Siemens SENTRON 3NJ620 User manual

Siemens FastConnect FC SC User manual

Siemens

Siemens FastConnect FC SC User manual

Siemens SIMATIC NET PROFIBUS SpliTConnect... User manual

Siemens

Siemens SIMATIC NET PROFIBUS SpliTConnect... User manual

Siemens SIVACON 8PS BD01 User manual

Siemens

Siemens SIVACON 8PS BD01 User manual

Siemens 3WN6 User manual

Siemens

Siemens 3WN6 User manual

Siemens SENTRON 3NJ622 User manual

Siemens

Siemens SENTRON 3NJ622 User manual

Siemens SIRIUS 3RT261.-1 Series User manual

Siemens

Siemens SIRIUS 3RT261.-1 Series User manual

Siemens 3VA957-0JB23 Series User manual

Siemens

Siemens 3VA957-0JB23 Series User manual

Siemens SIMATIC NET FC FO LC GK1900-1RB00-2AB0 User manual

Siemens

Siemens SIMATIC NET FC FO LC GK1900-1RB00-2AB0 User manual

Siemens BD2 User manual

Siemens

Siemens BD2 User manual

Siemens 3RK1911-2B 0 Series User manual

Siemens

Siemens 3RK1911-2B 0 Series User manual

Siemens SENTRON VL160X User manual

Siemens

Siemens SENTRON VL160X User manual

Siemens 3VT9500-4PL00 User manual

Siemens

Siemens 3VT9500-4PL00 User manual

Siemens 3WX31 46-7C1 3 Series User manual

Siemens

Siemens 3WX31 46-7C1 3 Series User manual

Siemens SENTRON 3VL630 User manual

Siemens

Siemens SENTRON 3VL630 User manual

Siemens SINUMERIK 808D User manual

Siemens

Siemens SINUMERIK 808D User manual

Siemens SIMATIC NET IE RJ45 Plug PRO User manual

Siemens

Siemens SIMATIC NET IE RJ45 Plug PRO User manual

Siemens 8PQ9801-5AA21 User manual

Siemens

Siemens 8PQ9801-5AA21 User manual

Siemens 4000A User manual

Siemens

Siemens 4000A User manual

Popular Cables And Connectors manuals by other brands

EKT HDEX003M1 quick start guide

EKT

EKT HDEX003M1 quick start guide

FasTest FI Series user manual

FasTest

FasTest FI Series user manual

Sun Microsystems Sun Enterprise 450 installation guide

Sun Microsystems

Sun Microsystems Sun Enterprise 450 installation guide

Projecta EVCBT2T2-3P quick start guide

Projecta

Projecta EVCBT2T2-3P quick start guide

Digitus DA-70011-1 user manual

Digitus

Digitus DA-70011-1 user manual

Briteq LD-SPLIT IP68 - INSTALLATION V1.0 installation manual

Briteq

Briteq LD-SPLIT IP68 - INSTALLATION V1.0 installation manual

Electro Terminal MICROCON SMD PURE Assembling Instruction

Electro Terminal

Electro Terminal MICROCON SMD PURE Assembling Instruction

3M 45116 Instruction guide

3M

3M 45116 Instruction guide

Tait TMAA04-05 installation instructions

Tait

Tait TMAA04-05 installation instructions

ITT CAS25128E-CU operating instructions

ITT

ITT CAS25128E-CU operating instructions

Larson Electronics XLE-PA-N4X-1686-1PH-30A-600V-2P3W-P instruction manual

Larson Electronics

Larson Electronics XLE-PA-N4X-1686-1PH-30A-600V-2P3W-P instruction manual

Project Source EC0720WH quick start guide

Project Source

Project Source EC0720WH quick start guide

Sennheiser RCS 400 quick guide

Sennheiser

Sennheiser RCS 400 quick guide

HP E5346A Installation notes

HP

HP E5346A Installation notes

Nibe ACK 22 installation instructions

Nibe

Nibe ACK 22 installation instructions

Philips SWU1503 Specifications

Philips

Philips SWU1503 Specifications

Gefen EXT-DVI-142SL user manual

Gefen

Gefen EXT-DVI-142SL user manual

Gomax SP-5018P user manual

Gomax

Gomax SP-5018P user manual

manuals.online logo
manuals.online logoBrands
  • About & Mission
  • Contact us
  • Privacy Policy
  • Terms and Conditions

Copyright 2025 Manuals.Online. All Rights Reserved.