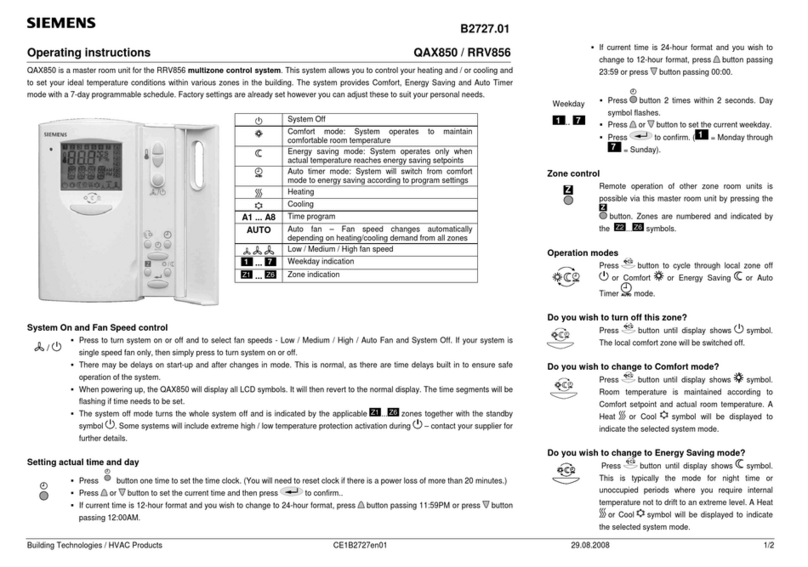
Do you wish to change to Auto Timer mode?
Press button until display shows symbol.
The system can automatically change over
between Standby, Day and Night zones according
to 8 pre-programmed timers.
Do you want to change the permanent
temperature setpoints of Day and Night or Both
zone?
Press , the symbol and setpoint value is
flashing indicating Day zone setpoint change
expected.
Press or button to change this setpoint in
steps of 0.5°C.
Press to confirm and continue to the
Night zone setpoint. Repeat previous step
for night zone setpoint change.
Press to confirm and continue to the
Both zone setpoint. Repeat previous step
for both zone setpoint change.
Press to save the change.
Note: If no button is pressed after 5 seconds, setpoint
setting changes will be saved and operational mode will
resume.
During operation are you too warm / too cold?
You can temporarily adjust the temperature
setpoint when in Day , Night or Both
zone mode. Press or button to adjust the
temperature setpoint. You can increase or
decrease the room temperature setpoint in steps
of 0.5°C. The maximum range is from 5°C to
35°C, however it is recommended to not exceed
18°C to 26°C range. Setpoints will revert back to
permanent setpoint settings after any mode
change.
Do you want to view and set the Programmable
Timer setting?
Press button once to sequentially review
the 8 auto timers.
To adjust the time schedule, hold for 3 seconds
to go into Programmable Timer Setting mode.
Press button to schedule Day or Night zone.
Auto timer 1 shows, A1 and or along with
symbol displays, with time xx:xx flashing to
indicate timer setting change is expected.
Press or buttons to adjust the Day or Night
zone start time.
Press button to set the days applicable to the
timer. The 1symbol will flash. Press or
button to select or deselect each day and
advance to the next day.
Press to save the changes for the Day or
Night zone start time.
Press or button to adjust the end time.
To cancel the timer, press button until time
schedule changes to --:--.
Press to save the Day or Nigth zone end
time and advance to Auto timer 2.
Repeat the procedure for setting Timer A1 and
advance to next timer.
System will return to normal operational mode if
no button is pressed within 20 seconds. All
modifications made after last Time Schedule
and button pressed will not be saved.
This button is not used.
Do you want just heating?
Press button until display shows symbol only.
The system is restricted to heat. The symbol
will not appear if your air conditioning equipment
provides cooling only.
Do you want just cooling?
Press button until display shows symbol
only. The system is restricted to cool. The
symbol will not appear if your air conditioning
equipment provides heating only.
Do you want auto-changeover of heat / cool?
Press button until display shows both and
symbols. This indicates the system will activate
heating or cooling in order to maintain desired
temperature setpoint. This applies to heating /
cooling air conditioning equipment only.
Do you want ventilation fan only?
Press button until the and symbols are not
displayed. No heating or cooling will be provided -
only ventilation.
What is the green LED for?
The green LED indicates when heating or cooling energy is
activated.
Energy saving tips without sacrificing comfort
Never allow room temperatures to exceed 21°C when
heating or fall below 22°C when cooling.
Select System Off mode when absent for extended periods.
Although auto-changeover of heat / cool is possible, it is
recommended you select cool mode only in summer and
heat mode only in winter.
Note: This document provides user instructions only. For
more detailed technician information please refer to
RRV852 installation / commissioning guide.
+
-
Z
