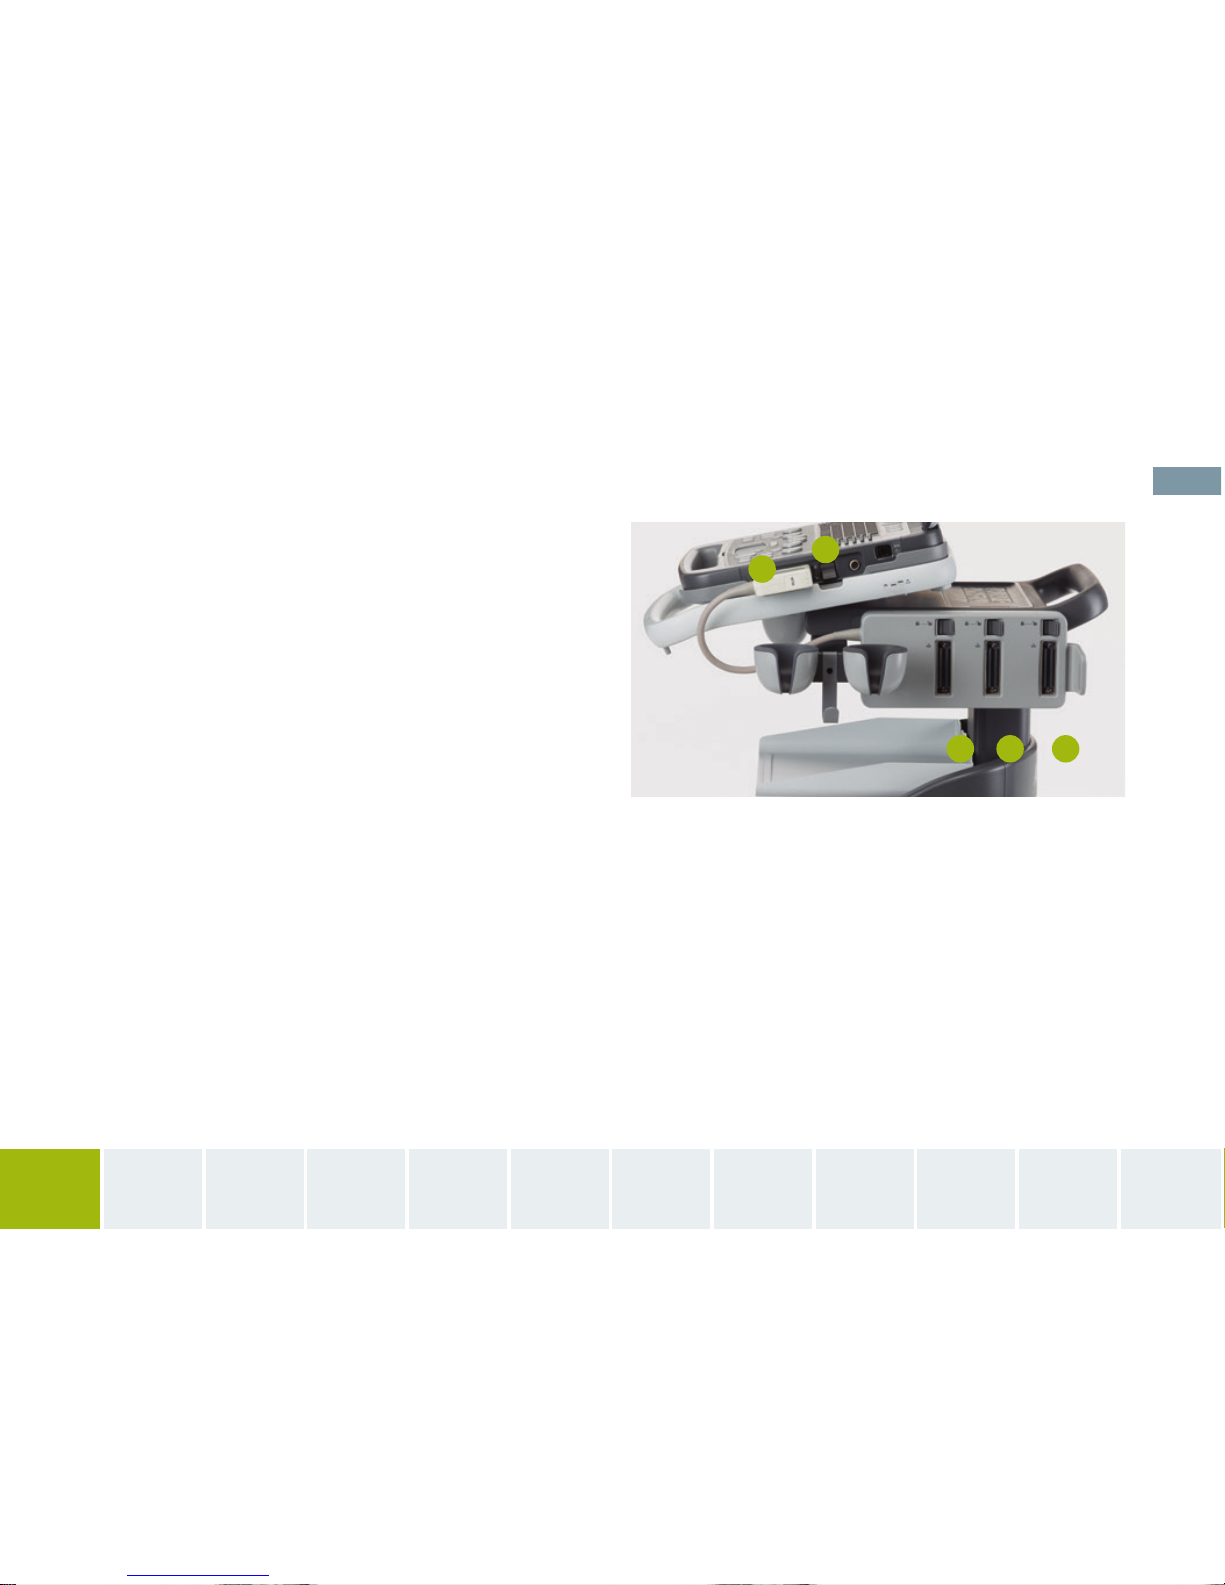
Siemens ACUSON P500 User manual

ACUSON P500™Ultrasound System, FROSK Edition
Quick Reference Guide
siemens.com/ultrasound

Contents
Smart Cart Overview 3
System Overview 10
Control Panel 16
Touch Screen 20
Patient Exam 22
2D 26
Doppler 30
Annotation / Body Marker 36
Analysis 38
Review 42
Reports 46
Export / Import 50
2

Smart Cart Overview
Press leaver and push down or pull up to
adjust height.
Smart Cart Height Adjustment
Smart
Cart
Overview
System
Overview
Control
Panel
Touch
Screen
Patient
Exam 2D Doppler
Annotation
/ Body
Marker
Analysis Review Reports Export /
Import
3

Locking and Unlocking the Wheels
1. There are two lock positions.
2. Press large tab down to lock.
3. Lift large tab up to unlock.
Lock Unlock
Smart Cart Overview 4

1. Ensure lever lock is in the down unlocked
position.
2. Align the connector and press into the
system port.
3. To lock, place the lever in the up position.
4. Connecting transducers to the MTM follows
the same process.
Attaching the Multiple Transducer Module (MTM)
21
4 4 4
Control
Panel
Touch
Screen
Patient
Exam 2D Doppler Analysis Review Reports Export /
Import
Annotation
/ Body
Marker
Smart
Cart
Overview
System
Overview
5

Cable Management
1. Transducers can be placed in the holders
located at each side of the Smart Cart.
2. When transporting the cart with transducers,
place the cables through the provided hook
to prevent damage.
TIP Instructions for removal of the ACUSON P500 system from
the cart are located by the back handle of the Smart Cart.
Smart Cart Overview 6

Input / Output Connections Accessory Power Connection
HDMI
Cart Power Peripheral Power
Peripheral USB
LAN DC Out
Located on the upper back of the Smart Cart. Located on the lower back of the Smart Cart.
Smart
Cart
Overview
Control
Panel
Touch
Screen
Patient
Exam 2D Doppler Analysis Review Reports Export /
Import
Annotation
/ Body
Marker
System
Overview
7

Smart Cart Overview
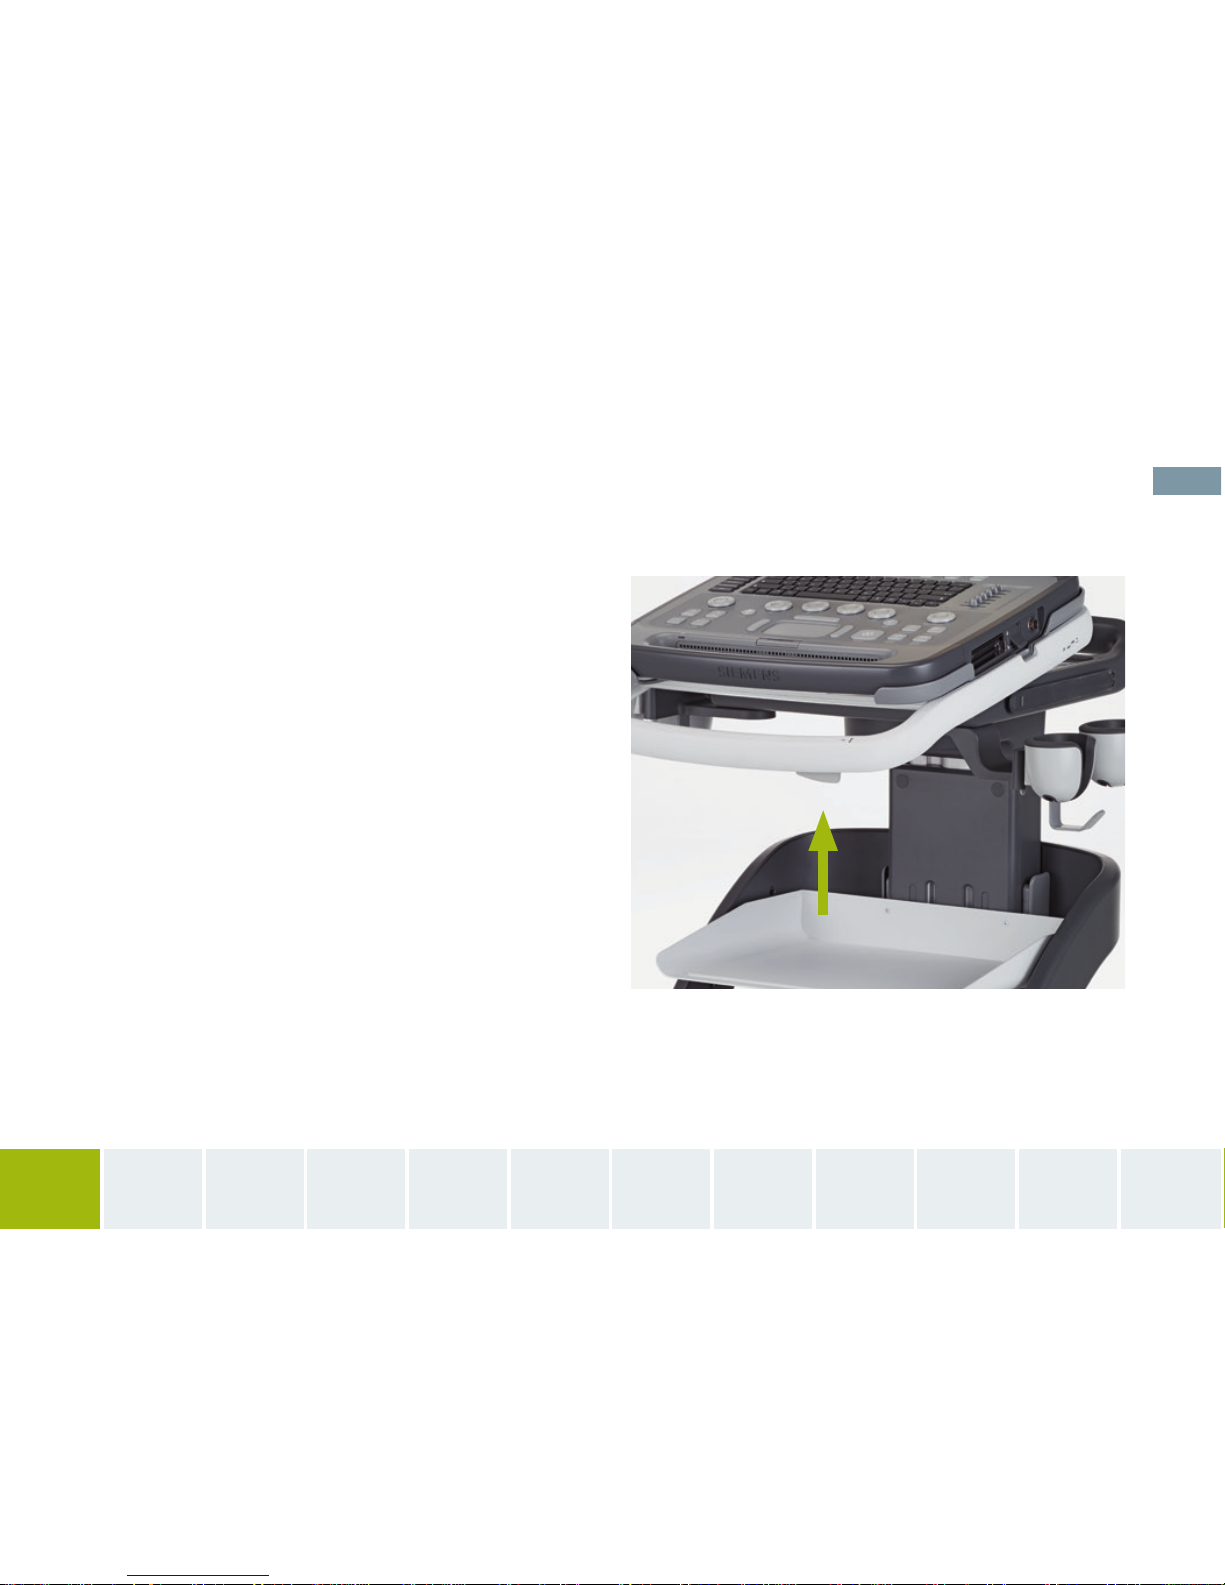
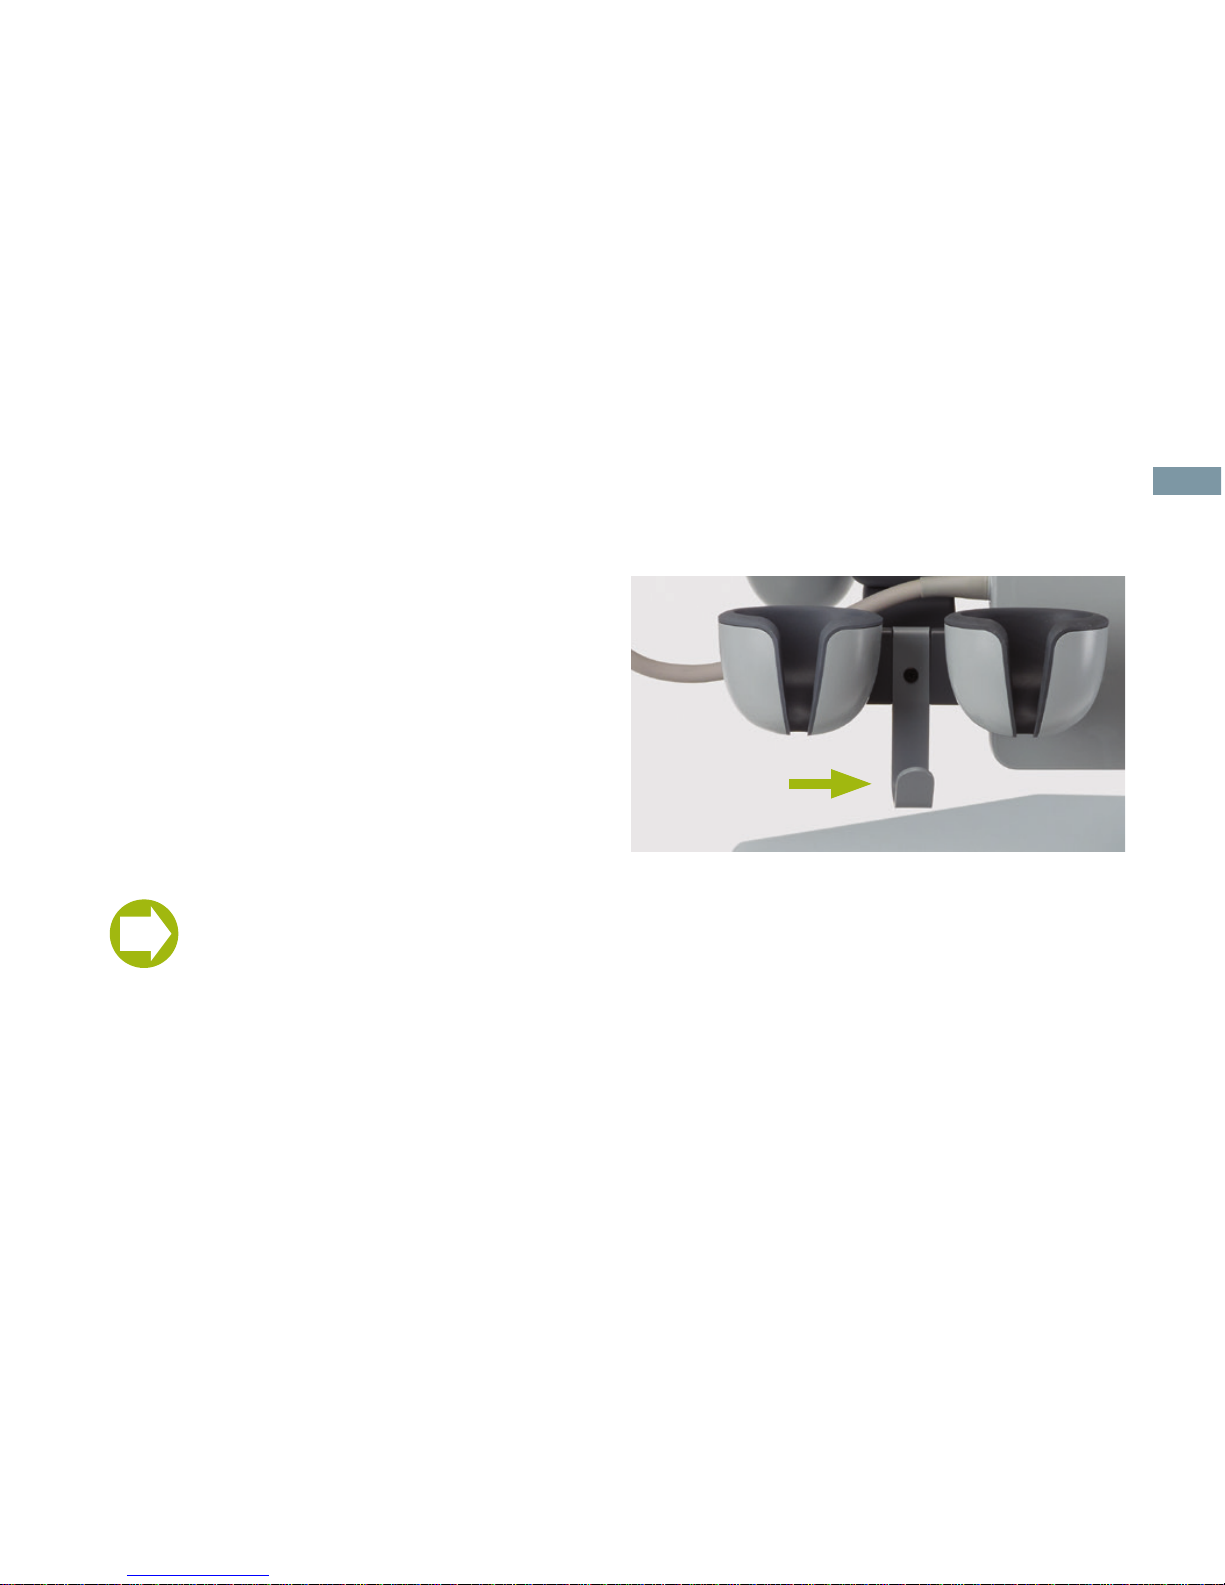
Removing the Transducer Holder
◾Press the tab located at the back of the holder.
◾Pull the holder towards the floor to remove.
◾Clean with mild detergent.
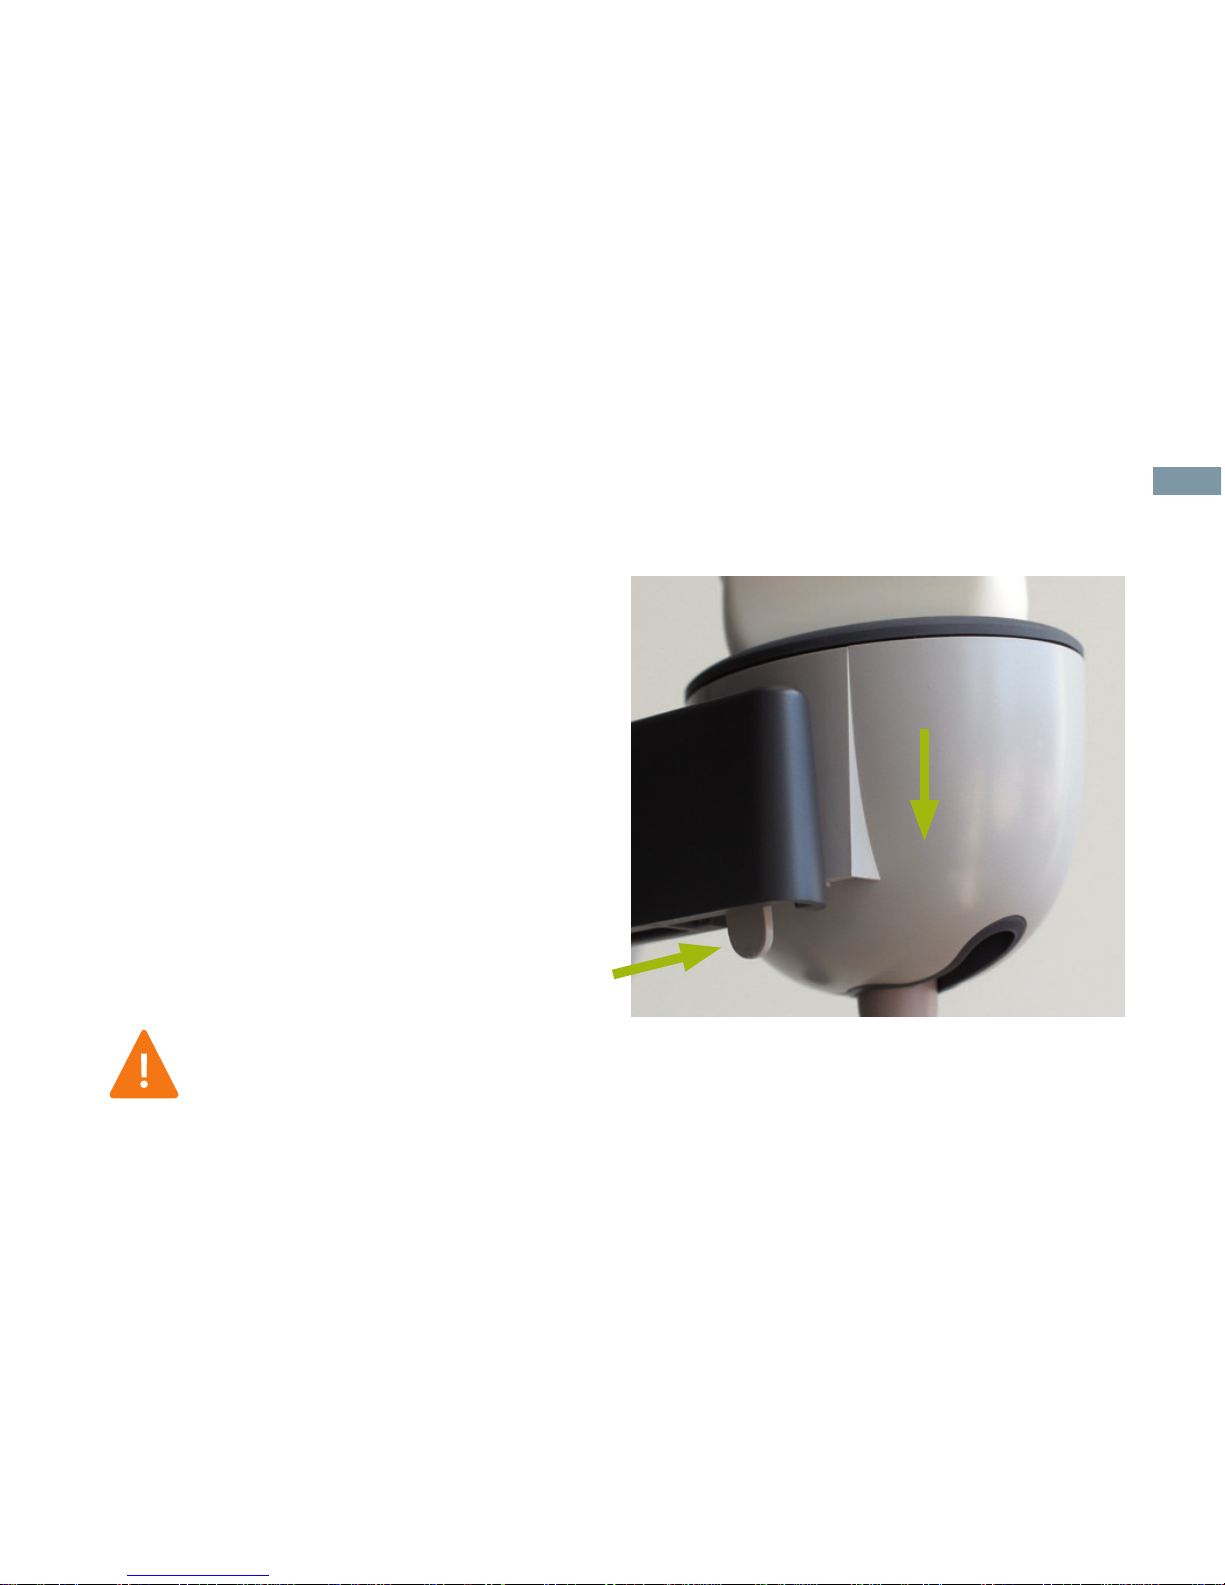
◾Insert into transducer holder pressing upward
until you hear a click.
Cleaning the Smart Cart
Use only approved disinfectants.
For a complete list see the ACUSON P500 system Help menu.
8

Control
Panel
Touch
Screen
Patient
Exam 2D Doppler Analysis Review Reports Export /
Import
Annotation
/ Body
Marker
Smart
Cart
Overview
System
Overview
9

System Overview
Attaching a Transducer
1. Ensure lever lock is in the down, unlocked
position.
2. Align the connector and press into the
transducer port.
3. Place the lock in the up position.
4. Once the system detects the transducer, the
name displays to the right of the image.
10

Input / Output Connector
1 2 3 4
1. Local area network (LAN) cable connection.
2. High-Definition Multimedia Interface (HDMI)
connection.
3. Universal Serial Bus (USB) ports.
4. Audio Jack (Headphones).
Smart
Cart
Overview
Control
Panel
Touch
Screen
Patient
Exam 2D Doppler Analysis Review Reports Export /
Import
Annotation
/ Body
Marker
System
Overview
11

Control Panel Workflow Controls
Control Function
2D Button: Starts 2D mode. Dial: Adjusts the 2D gain.
CButton: Starts or ends Color Mode. Dial: Adjusts the Color gain.
MButton: Starts or ends M-mode. Dial: Adjusts the M-mode gain.
PW Button: Starts or ends PW spectral Doppler Mode.
Depth / Zoom Button: Press to start or end Zoom.
Dial: Adjusts the scanning depth or amount of magnification of the image.
Angle Button: Changes the PW Doppler angle in 60 degree increments.
Dial: Changes the PW Doppler angle in 1 degree increments.
Invert Moves the spectral tracing or color Doppler to above or below the baseline.
Starts or stops Tissue Equalization Technology (TEC) processing.
UD 1,2 User-define keys.
System Overview 12

Control Function
Print Store 1,2 User-define keys for print and store functions.
Activates general and exam-specific measurement packages.
Stores a cine clip.
Scale Increases or decreases the scale (PRF) in the pulsed and continuous wave, and
color Doppler modes.
Baseline Increases or decreases the baseline in the pulsed and continuous wave, and
color Doppler modes.
Freeze pauses or resumes scanning.
User-programmable key for ending a study.
Activates the Body Marker menus available for the active preset.
Activates the annotation menus for the active preset.
Smart
Cart
Overview
Control
Panel
Touch
Screen
Patient
Exam 2D Doppler Analysis Review Reports Export /
Import
Annotation
/ Body
Marker
System
Overview
13

Control Panel
◾Turn off and unplug system.
◾Moisten clean lint-free cloth with mild detergent or approved disinfectant.
◾Ensure touch pad and slide controls are free of gel.
◾Dry surface with lint-free cloth.
Monitor
◾Moisten clean lint-free cloth with mild detergent or water.
◾Wipe monitor to clean.
◾Dry surface with lint-free cloth.
Cleaning the ACUSON P500 System
Use only approved disinfectants.
For a complete list see the ACUSON P500 system Help menu.
System Overview 14

Smart
Cart
Overview
Touch
Screen
Patient
Exam 2D Doppler Analysis Review Reports Export /
Import
Annotation
/ Body
Marker
Control
Panel
System
Overview
15

Control PanelControl Panel
1. Power on / off
2. Rocker Soft Key buttons
3. DGC
4. Depth / Zoom
5. Measure
6. Clip Store
7. Print Store 1
8. Print Store 2
9. Freeze
10. TEQ
11. Touch pad keys
12. Touch pad
13. 2D push / rotary gain
14. Color push / rotary gain
15. M-mode push / rotary gain
1 2
3
4
5 6
7
9
10
11
12
13
14
15
8
16

16. Pulsed wave push / rotary gain
17. Invert
18. Baseline
19. Scale
20. User Defined 1
21. User Defined 2
22. Angle push / rotary
23. Workflow Controls
24. Arrow
25. Alternate keyboard
26. End Exam
27. Clear Screen
28. Text / Annotation
29. Body Marker
30. Alphanumeric keyboard
16
18
21
19
22
23 24 27
25 28
26 29
30
20
17
Smart
Cart
Overview
Patient
Exam 2D Doppler Analysis Review Reports Export /
Import
Annotation
/ Body
Marker
Control
Panel
Touch
Screen
System
Overview
17

Control Panel
Control Panel Workflow Controls
Control Function
Patient Opens the ‘New Patient’ and ‘Edit Patient Data’ page.
Exam Opens and closes the ‘Exam Selection’ page.
Review Opens the page to review an exam, create a slide show or teaching file.
Report Opens the report screen to view the results and close the study.
Browser Allows viewing of the patient studies, start a new exam, restart an exam and
delete studies.
Config Opens menus for user customization of the system.
Help Opens the user manual menu for the ‘Help’ menu.
18

Action Result
Tap
Activates functions assigned to the surrounding keys.
Activates selected button on a form i.e., reports page.
Anchors caliper when measuring.
Slide Moves or changes on-screen functions such as a caliper or color box.
Scrolls through a list i.e., thumbnails.
Pinch and spread Changes the size of an on-screen function i.e., Doppler gate.
Touch Pad
Smart
Cart
Overview
2D Doppler Analysis Review Reports Export /
Import
Annotation
/ Body
Marker
Patient
Exam
Control
Panel
Touch
Screen
System
Overview
19

Touch Screen
1. Mode indicators
2. Patient banner
3. System status bar
4. Thumbnail panel
5. Soft keys
6. Touch pad
7. Soft keys
8. Left panel controls
9. Imaging parameters
10. Transducer orientation
indicator
11. Thumbnail editing tools
12. Doppler tracing
13. 2D reference image
2D
Physio
Settings
Biopsy
<< Steer
L/R Flip
L
U/D Flip
U
Steer >>
PW xxxxxxxxxxx
xx_xx_xxxx_xx_xx_xxxACUSONxxxx
xxxx-xxxxxxxxxxxx
VF13-5
Small Parts ธ
Tx Power 100%
MA 0,59
ASC 2
DTCE Low
Dyn R 75 dB
THI 8.9 MHz
26 dB
45 tps
Dual
Focus
Position
MultiHertz
8.9 MHz
Update
Position Position
Dyn R
76 dB
THI
On
Gate
0
Image
Presets
Gen
Edge
OTCE
Adv: SieCl...
Map
Tint
Tx Power
Focus Min ...
Parallel ...
Trapezoid
Print Clear Delete
1 3
57 6
2
4
8
11
9
10 13
12
20
Table of contents
Other Siemens Diagnostic Equipment manuals