manuals.online logo
Brands
  1. Home
  2. •
  3. Brands
  4. •
  5. Siemens
  6. •
  7. Heater
  8. •
  9. Siemens 2NC2 9 User manual

Siemens 2NC2 9 User manual

D
GB
F
B
ES
CZ
PL
LIT
H
RUS
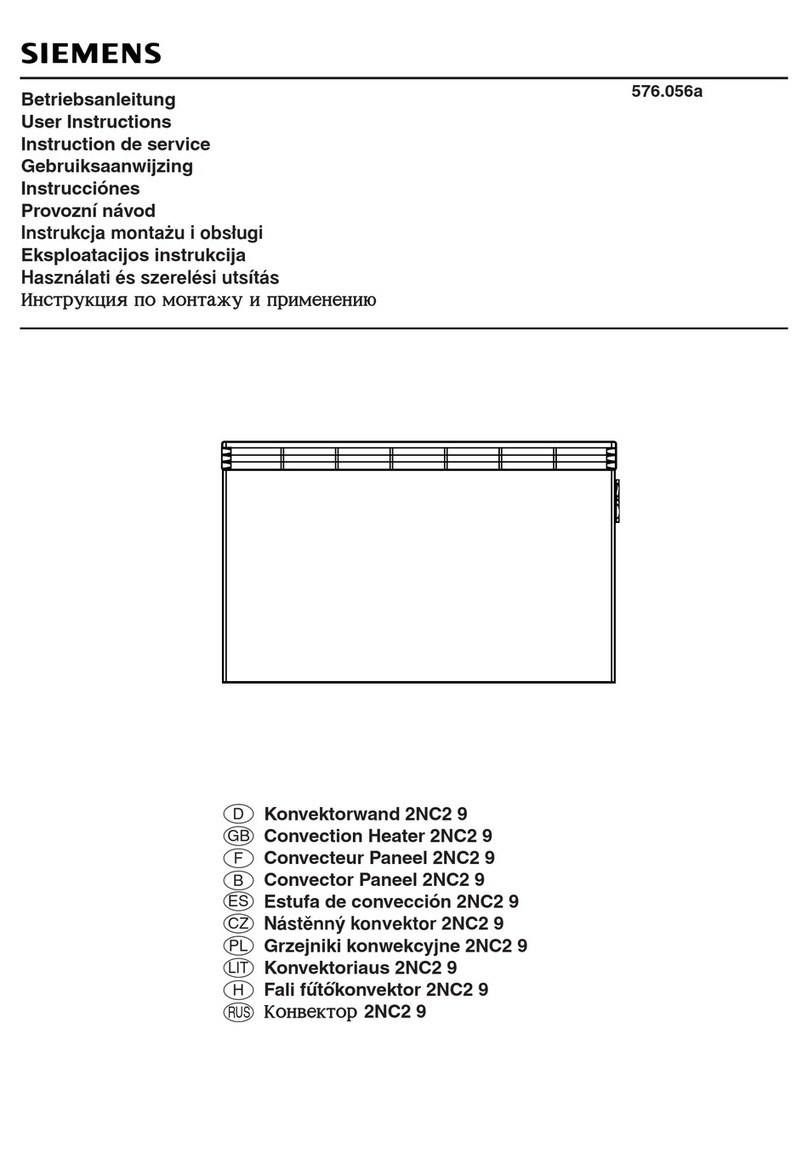
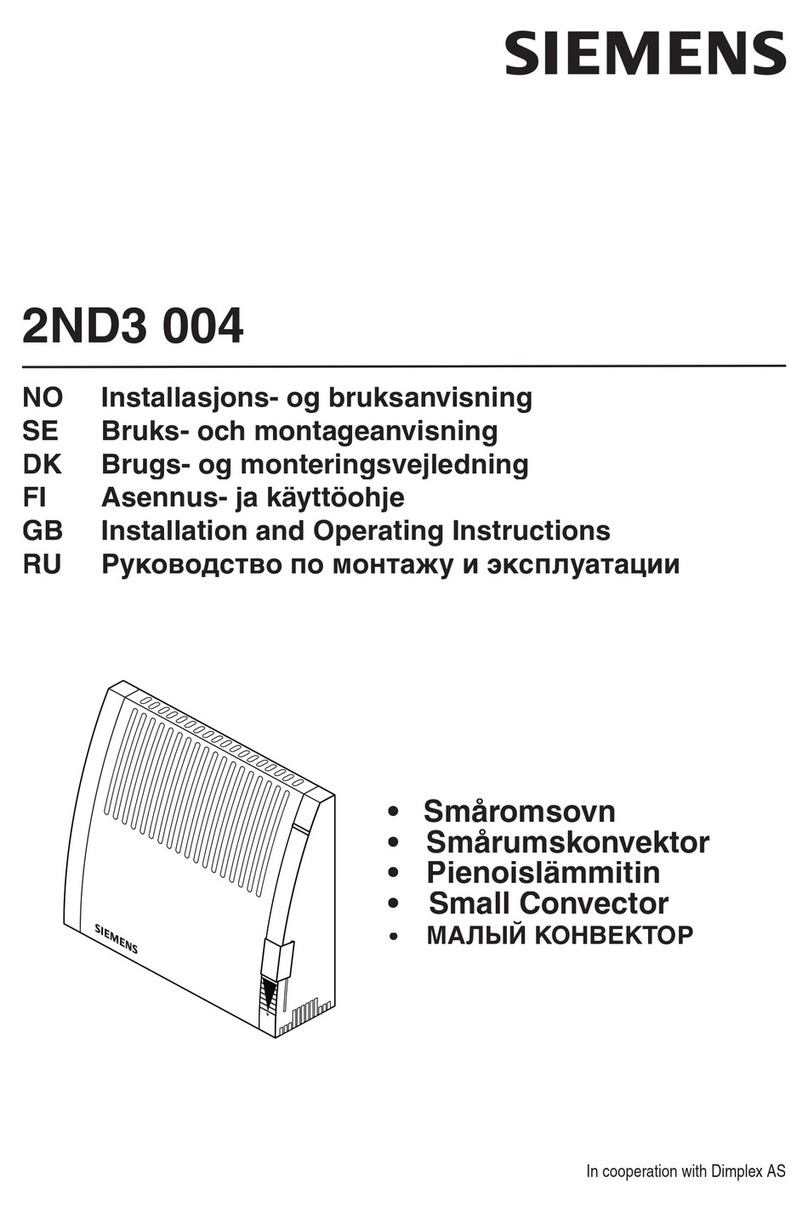
Konvektorwand 2NC2 9
Convection Heater 2NC2 9
Convecteur Paneel 2NC2 9
Convector Paneel 2NC2 9
Estufa de convección 2NC2 9
Na;ste=nny; konvektor 2NC2 9
Grzejniki konwekcyjne 2NC2 9
Konvektoriaus 2NC2 9
Fali fu´´to´´konvektor 2NC2 9
KKoonnvveekkttoorr 2NC2 9
576.056a
Betriebsanleitung
User Instructions
Instruction de service
Gebruiksaanwijzing
Instrucciónes
Provozní návod
Instrukcja montazæu i obs¬ugi
Eksploatacijos instrukcija
Haszna;lati e;s szerele;si utsíta;s
IInnssttrruukkcciiqq ppoo mmoonnttaa''uu ii pprriimmeenneennii[[
Thermostat
L
N (L)
Pilot
A
B
C
Brt. A B
Typ kg mm mm
2NC2 905-1. 500 W 3,4 376 190
2NC2 907-1. 750 W 3,4 376 190
2NC2 910-1. 1000 W 4,0 466 280
2NC2 912-1. 1250 W 4,7 556 370
2NC2 915-1. 1500 W 5,4 646 460
2NC2 917-1. 1750 W 6,1 736 550
2NC2 920-1. 2000 W 6,8 826 640
2NC2 925-1. 2500 W 8,0 1006 820
2NC2 930-1. 3000 W 9,2 1186 1000
Demontage:
1
2
Thermostat
;
;
;
;
;;
;;
;;
;;
;;
100
Min.
100
Min.
100 10
Min. A
B9393
320
70
Min.
425
;
;
;
;
2NC2 9..-1A
2NC2 9..-1L
Gelb/Grün
Braun
Blau
Gelb/Grün
Braun
Blau
Schwarz
Yellow/Green
Brown
Blue
Black
Jaune/Vert
Marron
Bleu
Noir
Z+lutozelena;
Hne=da;
Modra;
C:erna;
Geltonas¶z=alias
Rudas
Me;lynas
Juodas
Zo/ld¶Sa;rga
Barna
Ke;
Fe ete
"\dtyj#~ed\nyj
Korihnevyj
Sinij
H\rnyj
This heater, including additional equipment, is develo-
ped and manufactured in conformity with the EU-
Directives on Low Voltage Devices (73/23/EEC) and on
Electromagnetic Compability (89/336/EEC).
1. SAFETY INFORMATION
Take great care of these instructions for use, and pass them
on to any future owner of the heater.
If the appliance is damaged, the supplier must be notified
immediately, before installation takes place.
If a fault occurs, disconnect the appliance from the mains
supply (by switching off the fuse or unscrewing it, as
applicable).
The appliance must be used only for heating homes or simi-
lar places. It is suitable only for domestic use in houses or for
similar purposes in closed rooms.
In installation areas, there must be no use of substances
that could cause ignition, explosion, or that produce
vapours that could cause these effects, because of the
high temperature inside the appliance. In such cases (for
example, gluing down of floor coverings), one must ensure
in advance that the appliance has been cooled down to
room temperature.
The functional surfaces, especially the air circulation
grilles, heat up during operation. These functional surfaces
must therefore be secured so that they cannot be touched
by children or people who are ill or disabled.
Do not put any objects into the openings of the appliance - this
can lead to functional problems, and the object might catch fire.
Taking down the appliance and disconnection from the mains
supply must be done only by a suitably qualified person.
Caution! When the appliance has been connected up and
switches on automatically while you are out, danger can ari-
se. For example, a heater that in the meantime has been
covered, or had the setting changed, could start a fire.
2. Installation, clearances, connection
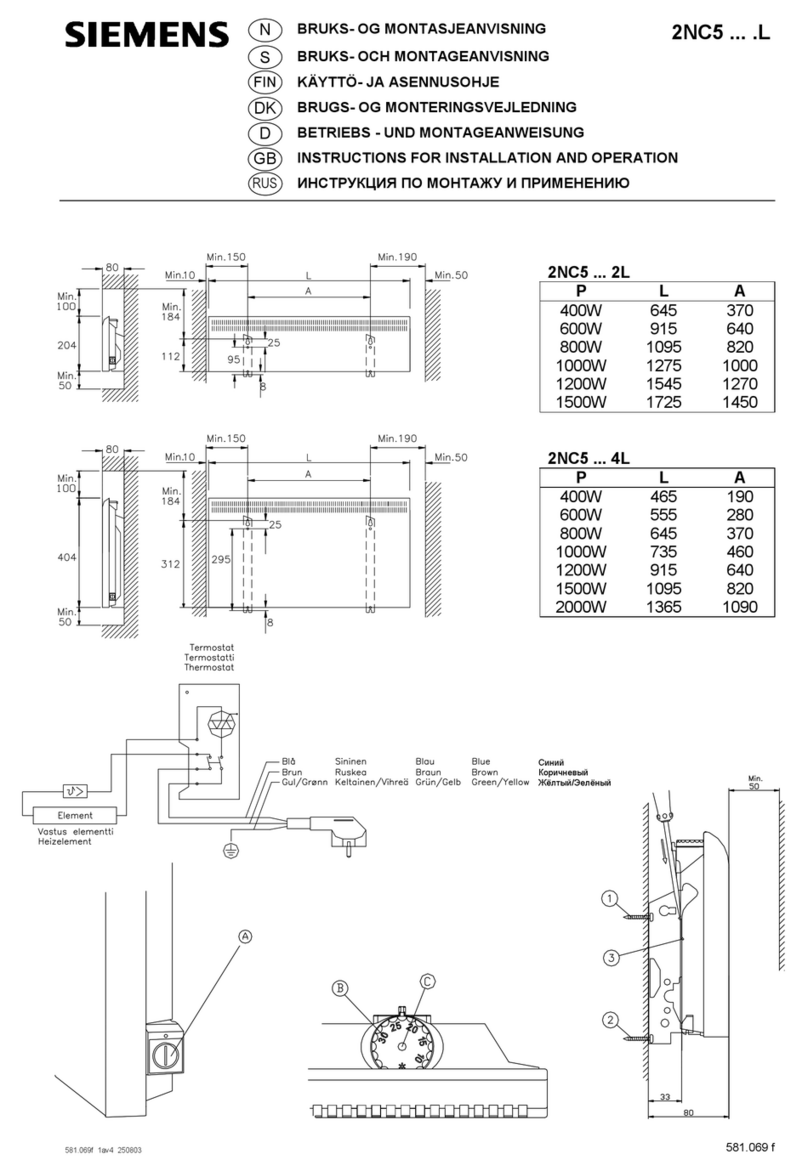
The heater Typ NC2 9..-1A must be installed by an authorized
and sutiably qualified person.
The wall heater must be installed horisontally only. Position
the heater in such a way that inflammable objects cannot be
set alight. You may attach the heater to wooden walls.
The minimum clearances must be maintained. The clearance
from easily inflammable articles such as curtains, upholstered
furniture, etc., is 100mm. Take special care to ensure that air
can flow freely in and out, above and below the heater.
Certain types of light vinyl (PVC) floor coverings and varnish
for parquet floors can become discoloured when subjected to
temperatures above 35° C. With such types of floor cove-
rings, it is recommended that the lower edge of the heater is
at least 150 mm above floor level.
The heater must not be screwed directly to the wall, but must
be hung in a wall bracket.
Do not install the heater below an electrical socket.
- Drill holes for the screws. The wall frame can be used as
a template.
- Screw the wall frame into place in the wall.
- Place the heater on the lower hooks of the bracket, and
allow it to lean forward until the hooks slide into the
openings on the lower edge of the heater.
- Press the mains supply cable into the plastic clips on the
wall bracket.
- Push the heater upwards so that it leans toward the
bracket, and the upper hooks slide into place.
3. Heating
3.1 Function of the service elements
Turn on switch A when the heating period starts.
Lamp B lights when the heater is emitting heat.
The thermostat dial C is for setting the desired room tempe-
rature, which will then remain constant.
Depending on where the heater is installed, it may happen
that the room temperature and the temperature shown on the
thermostat dial do not agree.
In this case we recommend that the adjustment wheel is
adjusted as follows:
Turn the heater on. Turn the thermostat dial up to the maxi-
mum (the lamp lights). Turn the thermostat dial back again
until the lamp goes out. If you can see that there is a diffe-
rence between the reading on the thermostat dial and the
room temperature, make the adjustment as follows:
Hold the adjustment wheel steady, and set the dial with the
temperature settings to the appropriate value using a small
screwdriver or something similar.
Important: Wait until the heater has been on for about 24
hours before you make this adjustment.
3.2 Lowering the temperature
For regular reduction of the temperature, you can use our
energy-saving cassette 2NC9 712 (extra accessory).
Heater Typ 2NC2 9..-1A can additionally be controlled by an
external timer.
You can start the appropriate program at the touch of a but-
ton, or set the temperature reduction period on the timer (see
the connection diagram regarding connection). The room
temperature will be lowered by up to 5° C during the tempe-
rature reduction period.
4. Important information about using the heater
NB: The heater element has been coated with a protective oil
that will evaporate the first time the heater is switched on.
This means that a harmless vapour may be released when
the heater is switched on for the first time.
For your safety, the heater is protected against overheating.
If the air circulation is obstructed, for example by something
hanging or set up in front of the air grille, the heater will cut
out automatically.
After the obstructing object has been removed, the heater
will resume normal operation after about 15 minutes.
To attain full heating power, the openings allowing air to flow
in and out must be kept free of dust. Please vacuum clean
the heater before the start of the heating season.
5. Problems in operation
If the heater is not emitting any heat, first check that it is swit-
ched on and that the thermostat dial is set to the appropriate
temperature. Then check that the automatic cut-out fuse has
not tripped. If the latter applies, contact your electrician.
Specify the E-number, which you will find on the plate indica-
ting the power (upper right of the heater).
6. Specifications
Power supply voltage : 1/N/PE 230V, 50 Hz
Protection category : Class I, IP21
Thermostat : Electronic, 5° to 30° C
Overheating cut-out : Automatic, resetable
7. Accessories
Cover for Switch and Thermostat dial 2NC9 710
Electronic Energy-saving plug-in Cassette 2NC9 712
Manuell Energy-saving plug-in Cassette 2NC9 713
GB
~tot pribor vkl[haq dopolnitel;noe oborudovanie sproek-
tirovan i izgotovlen v sootvetstvii s Direktivami
Evropejskogo soob]estva (ES) po nizkovol;tnym priboram
(73/23/EEC) i ~lektromagnitnoj bezopasnosti (B9/336/EEC).
1.INFORMACIQ PO BEZOPASNOSTI.
Vnimatel;no oznakom;tes; s dannoj instrukciej po `kspluata-
cii i dovedite ee do svedeniq ka'dogo vladel;ca nagrevatelq.
Pri obnaru'enii defekta pribora neobxodimo
nemedlenno do ustanovki
pribora postavit; v izvestnost; postav]ika.
Pri nenormal;noj rabote ili v sluhae povre'deniq
pribora `l. obogrevatel;
dol'en byt; otsoedinen ot `l. seti.
Pribor dol'en byt; ispol;zovan strogo po naznaheni[ dlq
obogreva domov i podobnyx zakrytyx pome]enij.
V mestax razme]eniq `l. obogrevatelej ne dol'no naxoditsq
vzryvoopasnyx i po'aroopasnyx ve]estv a tak'e ve]estv
vyzyva[]ix toksihnye ispareniq pri nagreve t. k. vnutri
pribora imeetsq `lement s vysokoj temperaturoj.
Pri nanesenii toksihnyx lakokrasohnyx pokrytij na pol
neobxodimo ubedits;sq hto poverxnost; obogrevatelq sni-
zilas; do komnatnoj temperatury.
Vo vremq raboty naru'nye poverxnosti pribora osobenno
cirkulqcionnye rewetki nagreva[tsq do 90 gradusov - ne
pozvolqjte detqm kasat;sq pribora.
Ne dopuskat; popadaniq vnutr; obogrevatelq postoronnix
predmetov vo izbe'anie ix vozgoraniq i vyvoda pribora
iz stroq.
Demonta' stacionarnogo pribora proizvoditsq tol;ko kva-
lificirovannym personalom.
Vnimanie@ Pribor rabotaet avtomatiheski. Ne dopuskat;
popadaniq postoronnix predmetov na pribor vo izbe'anie
vozgoraniq.
2. Ustanovka razme]enie i podkl[henie.
Obogrevatel; 2NC29..-1A dol'en ustanavlivat;sq tol;ko
kvalificirovannym personalom.
Nastennye obogrevateli dol'ny ustanavlivat;sq tol;ko
gorizontal;no na stene. Obogrevateli ne dol'ny
razme]at;sq rqdom s legkovosplamenq[]imisq predmetami.
Dopuskaetsq kreplenie obogrevatelej k derevqnnym stenam.
Minimal;nye rasstoqniq ukazannye na risunke dol'ny
byt; sobl[deny. Rasstoqnie ot obogrevatelq do
legkovosplamenq[]ixsq predmetov takix kak gardiny wto-
ry mqgkaq mebel; dol'no byt; ne menee 100 mm. Osoboe
vnimanie nado udelit; obespeheni[ svobodnoj cirkulqcii
vozduxa sverxu i snizu pribora.
Nekotorye tipy vinilovyx pokrytij i lakirovannye poly
mogut obescvetit;sq pri dlitel;nom vozdejstvii tempera-
tury vywe 35 grad. S. V `tix sluhaqx rekomenduetsq raz-
me]at; obogrevatel; na vysote ne menee 150 mm ot pola.
Nel;zq krepit; obogrevatel; k stene neposredstvenno sle-
duet ispol;zovat; prilagaemye kronwtejny.
Ne ustanavlivajte obogrevatel; v neposredstvennoj blizos-
ti s `lektriheskoj rozetkoj.
Monta' `lektroobogrevatelq%
- Prosverlite v stene otverstiq po wablonu privedennomu
na upakovke obogrevatelq.
- Prikrepite k stene kronwtejny.
- Ustanovite obogrevatel; na ni'nie kr[ki kronwtejnov i
povernite ot sebq do fiksacii.
3. Obogrev.
3.1 Rabota otdel;nyx `lementov.
Dlq nahala raboty vkl[hite vykl[hatel; A. Indikator V
svetitsq kogda nagrevatel;nye `lementy rabota[t.
Wkala S termoregulqtora prednaznahena dlq ustanovki
'elaemoj temperatury kotoraq budet podder'ivat;sq
avtomatiheski v pome]enii.
Porqdok nastrojki termostata.
V zavisimosti ot mesta ustanovki pribora vozmo'no nekoto-
roe rasxo'denie temperatury v komnate s temperaturoj
ukazannoj na termoregulqtore.
V `tom sluhae rekomenduetsq otregulirovat; ustanovohnoe
kolesiko termoregulqtora v sledu[]ej posledovatel;nosti%
vkl[hite obogrevatel;>
kolesiko termoregulqtora povernite do maksimal;nogo
znaheniq (pri `tom indikator zasvetitsq)>
zatem povernite kolesiko termoregulqtora v obratnu[
storonu do togo momenta poka indikator ne pogasnet>
sravnite temperaturu vozduxa v pome]enii s pokazaniem
wkaly na kolesike termoregulqtora. V sluhae nesootvetst-
viq uder'ivaq kolesiko termoregulqtora nepodvi'nym
otvertkoj povernite wkalu kolesika do znaheniq
temperatury v pome]enii.
V dal;nejwem ustanovka 'elaemoj temperatury v pome]enii
proizvoditsq tol;ko povorotom kolesa termostata.
Vnimanie@ Pered trebuemoj regulirovkoj obogrevatel;
dol'en prorabotat; v pome]enii okolo 24 hasov.
3.2. Poni'enie temperatury.
Dlq regulqrnogo poni'eniq temperatury vy mo'ete
ispol;zovat; `nergosberega[]ij blok 2NC9 712 (dopolni-
tel;noe oborudovanie).
Obogrevatel; tipa 2NC2 9..-1A mo'et dopolnitel;no reguli-
rovat;sq vnewnim tajmerom.
Vy mo'ete zapustit; vybrannu[ programmu na'atiem knopki
ili ustanovit; period poni'eniq temperatury na tajmere
(sm. diagrammu podkl[henia). Temperatura mo'et byt;
poni'ena na 5 grad. S v zadavaemyj period.
4. Neobxodimaq informaciq po
ispol;zovani[ pribora.
Vnimanie@ Nagrevatel;nye `lementy pokryty za]itnoj
smazkoj kotoraq budet isparqtsq v pervye minuty raboty
pribora.
V celqx obespeheniq Vawej bezopasnosti pribor osna]en
vykl[hatelem kotoryj avtomatiheski otkl[hit nagreva-
tel;nyj `lement v sluhae popadaniq postoronnix
predmetov na verxn[[ panel; i vnutr; pribora.
Posle udaleniq postoronnego predmeta obogrevatel;
vkl[hitsq v normal;nyj re'im raboty primerno herez 15
minut.
Dlq poluheniq maksimal;nogo `ffekta neobxodimo pered
nahalom otopitel;nogo sezona udalit; pyl; pri pomo]i
pylesosa.
5. Vozmo'nye neispravnosti.
Esli pribor ne obogrevaet prover;te vkl[hen li on i usta-
novleno li kolesiko termoregulqtora na nu'nu[ tempera-
turu> prover;te setevye predoxraniteli Vawego pome]eniq.
Esli ne `to qvlqetsq prihinoj obra]ajtes; k specialistu
servisnoj slu'by.
6. Texniheskie dannye%
Nominal;noe naprq'enie - 230 V 50 Gc
Kategoriq za]ity - klass I kapleza]itnoe
ispolnenie
Termostat - `lektronnyj ot 5 do 30 grad. S
Termovykl[hitel; - avtomatiheskij
Sertifikat sootvetstviq Gosstandart Rossii.
7. Dopolnitel;nye ustrojstva%
Krywka dlq vykl[hatelq i termoregulqtora 2NC9 710
~lektronnyj `nergosberega[]ij blok 2NC9 712
~nergosberega[]ij blok s ruhnym upravleniem 2NC9 713
RUS
Skipnes, 73 82 63 00

Other Siemens Heater manuals

Siemens DE 1113415 User manual

Siemens

Siemens DE 1113415 User manual

Siemens DE 12415 User manual

Siemens

Siemens DE 12415 User manual

Siemens 2NC8 2F Series User guide

Siemens

Siemens 2NC8 2F Series User guide

Siemens DE 18500 User manual

Siemens

Siemens DE 18500 User manual

Siemens BK 20100 User manual

Siemens

Siemens BK 20100 User manual

Siemens 2ND3 004 User manual

Siemens

Siemens 2ND3 004 User manual

Siemens 2NC5 L Series User guide

Siemens

Siemens 2NC5 L Series User guide

Siemens 2NC2 9 User manual

Siemens

Siemens 2NC2 9 User manual

Siemens DE 24405 User manual

Siemens

Siemens DE 24405 User manual

Siemens SSA911.01ZB User manual

Siemens

Siemens SSA911.01ZB User manual

Siemens 576.056A User manual

Siemens

Siemens 576.056A User manual

Popular Heater manuals by other brands

KING KBP2406 Installation & maintenance manual

KING

KING KBP2406 Installation & maintenance manual

Varma Tec WR2000 operating instructions

Varma Tec

Varma Tec WR2000 operating instructions

Prem-I-Air EH1794 user manual

Prem-I-Air

Prem-I-Air EH1794 user manual

Jaga VERTIGA HYBRID manual

Jaga

Jaga VERTIGA HYBRID manual

Profile PCL-333 Kalahari quick start guide

Profile

Profile PCL-333 Kalahari quick start guide

HOMEBASIX AIRTECH 352-8908 Operation instructions

HOMEBASIX

HOMEBASIX AIRTECH 352-8908 Operation instructions

Heinner HOH-SD11ECOBK instruction manual

Heinner

Heinner HOH-SD11ECOBK instruction manual

S&P RADIANT-1500 Installation manual. instructions for use

S&P

S&P RADIANT-1500 Installation manual. instructions for use

Gelia FROSTGUARD FP200 instruction manual

Gelia

Gelia FROSTGUARD FP200 instruction manual

Zibro Kamin R 50 C operating instructions

Zibro

Zibro Kamin R 50 C operating instructions

Anslut 411144 operating instructions

Anslut

Anslut 411144 operating instructions

Stadler Form Anna operating instructions

Stadler Form

Stadler Form Anna operating instructions

Bimar HR315 Instruction booklet

Bimar

Bimar HR315 Instruction booklet

BIEMMEDUE Jumbo instruction manual

BIEMMEDUE

BIEMMEDUE Jumbo instruction manual

Bionaire BCH9212 instruction manual

Bionaire

Bionaire BCH9212 instruction manual

TE Connectivity RBK-X1 CE Customer's manual

TE Connectivity

TE Connectivity RBK-X1 CE Customer's manual

TESY CB1005E01R user manual

TESY

TESY CB1005E01R user manual

Kampmann Lufterhitzer TOP 44 Series Assembly, installation and operating instructions

Kampmann

Kampmann Lufterhitzer TOP 44 Series Assembly, installation and operating instructions

manuals.online logo
manuals.online logoBrands
  • About & Mission
  • Contact us
  • Privacy Policy
  • Terms and Conditions

Copyright 2025 Manuals.Online. All Rights Reserved.