manuals.online logo
Brands
  1. Home
  2. •
  3. Brands
  4. •
  5. Siemens
  6. •
  7. Industrial Equipment
  8. •
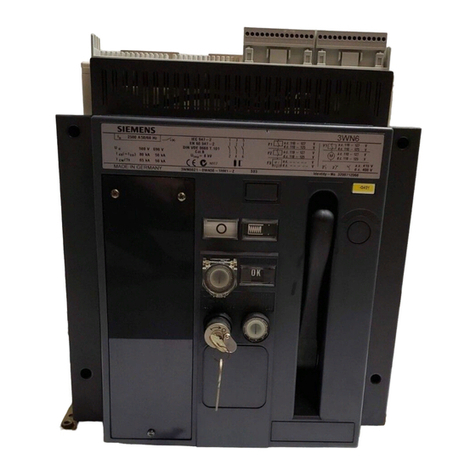
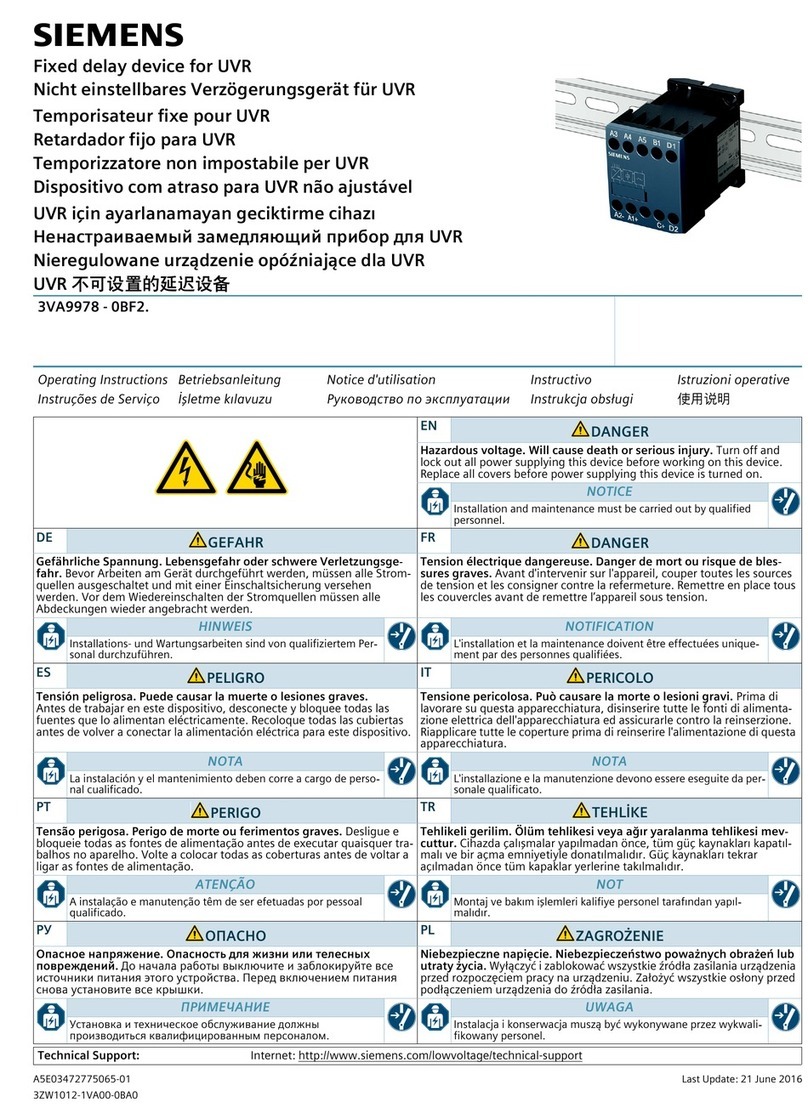
  9. Siemens 3WN6 User manual

Siemens 3WN6 User manual

1
3WN6
Strombahnen austauschen 3WY3621-0.A00
Pole assembly replacement
Remplacement des pôles
Cambiar conductores
Sostitione dei contatti principali
Byte av strömbanor
Betriebsanleitung/Operating Instructions Bestell-Nr./Order No.: 3ZX1812-0WX36-7CA0 / 9239 9790 422
Alle Rechte vorbehalten. All rights reserved. Tous droits réservés. Nos reservamos todos los derechos.
Tutti i diretti riservati. All rätt förbehålles.
© Siemens AG 1995
Einzelteilstückzahlen/Componentquantities/Jeudepiècescontenudansl'emballage/Desglosedecantidades/Descrizione
dei singoli pezzi / Antal komponenter
Packungsinhaltüberprüfen /Check contentsof pack / Vérificationde l'emballage /Comprobar el contenidodelpaquete/
Verifica del contenuto dell’imballo / Kontrollera förpackningens innehåll
2
345
7
10
98
6
1
Deutsch
English
Français
Italiano
Svenska Español
Baugröße I:
1 Kontaktträger, kpl. (1x)
2 Strombahn, fest (1x)
3 Koppelbolzen (1x)
4 Zylinderschraube M6x30 DIN 912 (4x)
5 Spannscheibe 6 DIN 6796 (4x)
Size I:
1 Contact carrier, cpl. (1x)
2 Pole, fixed (1x)
3 Connecting pin (1x)
4 Fillister-head screw M6x30 DIN 912 (4x)
5 Spring washer 6 DIN 6796 (4x)
Size II:
6 Contact carrier, cpl. (1x)
7 Pole, fixed (1x)
8 Connecting pin (1x)
9 Fillister-head screw M8x50 DIN 912 (4x)
10 Spring washer 8 DIN 6796 (4x)
Baugröße II:
6 Kontaktträger, kpl. (1x)
7 Strombahn, fest (1x)
8 Koppelbolzen (1x)
9 Zylinderschraube M8x50 DIN 912 (4x)
10 Spannscheibe 8 DIN 6796 (4x)
Taille I :
1 Porte-contacts, complet (1x)
2 Pôle, fixe (1x)
3 Axe de couplage (1x)
4 Vis à tête cylindrique M6x30 DIN 912 (4x)
5 Rondelle élastique 6 DIN 6796 (4x)
Taille II :
6 Porte-contacts, complet (1x)
7 Pôle, fixe (1x)
8 Axe de couplage (1x)
9 Vis à tête cylindrique M8x50 DIN 912 (4x)
10 Rondelle élastique 8 DIN 6796 (4x)
Tamaño constructivo 1:
1 Portacontactos, completo (1x)
2 Conductor, fijo (1x)
3 Perno de acoplamiento (1x)
4 Tornillo cilíndrico (4x)
5 Arandela de resorte (4x)
Tamaño constructivo 2:
6 Portacontactos, completo (1x)
7 Conductor, fijo (1x)
8 Perno de acoplamiento (1x)
9 Tornillo cilíndrico (4x)
10 Arandela de resorte (4x)
Grandezza costruttiva I:
1 Blocchetto portacontatti (1x)
2 Contatto principale, fisso (1x)
3 Spina cilindrica di connessione (1x)
4 Vite a testa cilindrica M6x30 DIN 912 (4x)
5 Rondella elastica 6 DIN 6796 (4x)
Baugröße II:
6 Blocchetto portacontatti (1x)
7 Contatto principale, fisso (1x)
8 Spina cilindrica di connessione (1x)
9 Vite a testa cilindrica M8x50 DIN 912 (4x)
10 Rondella elastica 8 DIN 6796 (4x)
Storlek I:
1 Kontaktbärare, komplett (1x)
2 Strömbana, fast (1x)
3 Kopplingstapp (1x)
4 Skruv med cylindrisk skalle M6x30 DIN 912 (4x)
5 Spännbricka 6 DIN 6796 (4x)
Storlek II:
1 Kontaktbärare, komplett (1x)
2 Strömbana, fast (1x)
3 Kopplingstapp (1x)
4 Skruv med cylindrisk skalle M8x50 DIN 912 (4x)
5 Spännbricka 8 DIN 6796 (4x)
2
Comentario:
La forma de las barras terminales en los portacontactos (1) y
(6) y en los conductores (2) y (7) varía según la ejecución
pedida.Elmontajeydesmontajetranscurredeformaanáloga
en todas las ejecuciones.
Bemerkung:
DieFormderAnschlußschienenandenKontaktträgern(1)und
(6) und an den Strombahnen (2) und (7) variiert je nach
bestellter Ausführung. Der Ein- und Ausbau verläuft bei allen
Ausführungen analog.
Note:
La forma delle sbarre di allacciamento sui blocchetti
portacontatti (1) e (6) e sui contatti principali (2) e (7) varia a
seconda dell’esecuzione richiesta, mentre resta invariata la
modalità di montaggio e smontaggio delle stesse.
Remark:
The shape of the connection strips on contact carriers (1) and
(6) and on poles (2) and (7) varies according to the version
ordered. Fitting and removal are analogous for all versions.
Anmärkning:
Formen på anslutningsskenorna på kontaktbäraren (1) och
(6) och på strömbanorna (2) och (7) varierar allt efter vilket
utförande som beställts. In- och urmontering förlöper analogt
för alla utföranden.
Remarque:
La forme des rails de raccordement sur les porte-contacts (1)
et (6) et sur les pôles (2) et (7) varie en fonction de la version
commandée. Le montage et le démontage se déroulent de la
même manière sur toutes les versions.
ATTENTION !
Tension électrique dangereuse!
Tension de ressort dangereuse!
Avant le début des travaux, mettre l'appareil
hors tension et le condammner dans cette
position.
Interveniruniquementsurl’appareilenposition
d’ouvertureetlorsque ledispositifd’accumula-
tion d’énergie par ressorts est détendu (voir
page 3).
Le non-respect de ces mesures de sécurité
peutentraînerlamort,desblessuresgravesou
des dommages matériels importants.
Installation et montage uniquement par des
personnes qualifiées.
ATTENZIONE !
Tensione elettrica pericolosa!
Molle precariche!
Primadiiniziareilavori,assicurarsichel’appa-
recchio non sia in tensione e che non sia
possibile una reinserzione accidentale.
Lavorare soltanto a interruttore disinserito e a
molle scariche.
La mancata osservanza di tali norme può pro-
vocare incidenti mortali, gravi lesioni alle per-
sone e ingenti danni materiali.
L’installazione e il montaggio devono essere ef-
fettuatiesclusivamente da personale specializzato!
GEFAHR !
Gefährliche Spannung!
Gefährlicher Federspeicher!
Vor Beginn der Arbeiten Gerät spannungsfrei
schaltenundgegenWiedereinschaltensichern.
NurbeiausgeschaltetemSchalterundentspann-
tem Federspeicher arbeiten (siehe Seite 3).
BeiNichtbeachtungkönnenTod,schwereKör-
perverletzung oder erheblicher Sachschaden
die Folge sein.
Einbau und Montage nur durch Fachpersonal!
¡PELIGRO!
¡Tension peligrosa!
¡Resorte peligroso!
Antesdeiniciarlostrabajoshayquedesconec-
tarelaparatoyasegurarlocontrareconexiones.
Trabajar únicamente con el interruptor desco-
nectadoyel resortedestensado(véasepágina3).
La inobservancia de esta advertencia puede
causarlamuerte,graveslesionescorporaleso
altos daños materiales.
¡Montaje sólo por personal experto!
DANGER !
Hazardous voltage!
Hazardous spring pressure!
Before beginning work on the unit, switch it to a de-
energized state and secure it against reactivation.
Work only with the circuit-breaker switched off
and the spring discharged (see page 3).
Non-observance can result in death, severe
personal injury or substantial property damage.
Onlyqualified personnelmay perform installa-
tion and assembly work.
FARA!
Farlig elektrisk spänning!
Farlig fjäderspänning!
Innanarbetenapåbörjasskallapparatenkopp-
lasspänningsfriochsäkrasmotåterinkoppling.
Arbeta endast vid frånkopplad brytare och av-
spänd fjäder (se sidan 3).
Om detta inte iakttas kan död, svåra kropps-
skador eller betydande materielskador vara
följden.
Installering och montering endast av fack-
personal!
Deutsch
Español English
Italiano Français
Svenska
3
Schalter ausschalten, Federspeicher entspannen / Switching off the circuit-breaker and relieving the energy store /
Ouverture du disjoncteur, désarmement du ressort d’accumulation d’énergie / Desconectar el interruptor,
destensar el acumulador de energía por resorte / manovrare l´interruttore in OFF scaricare le molle di carica /
Koppla ifrån brytaren, lossa fjäderspänningen
Einschubschalter / Draw-out circuit-breaker / Disjoncteur débrochable /
Interruptorextraíble/Interruttoreinesecuzioneestraibile/Insticksbrytare
Schalter aus der Anlage nehmen
Pullthecircuit-breakerremoveitfrom
system
Extraire le disjoncteur de l’armoire
Sacar el interruptor de la instalación
Estrarre l´interruttore dal carrello
Dra ut brytaren ur anläggningen
Estado posible: Interruptor Con Interruptor Des Interruptor Con
Resorte destensado Resorte tensado Resorte tensado
Secuencia de maniobra: Des Con - Des Des - Con - Des
possibile stato: interruttore in ON interruttore in Out interruttore in ON
molle scariche molle cariche molle cariche
sequenza di manovra: Off On - Off Off - On - Off
möjligt tillstånd: brytaren Till brytaren Från brytaren Till
fjädern avspänd fjädern spänd fjädern spänd
manövreringsföljd: Från Till - Från Från - Till - Från
OK
OK
OK
möglicher Zustand: Schalter Ein Schalter Aus Schalter Ein
Federspeicher entspannt Federspeicher gespannt Federspeicher gespannt
Betätigungsreihenfolge: Aus Ein - Aus Aus - Ein - Aus
Possible state: Circuit-breaker On Circuit-breaker Off Circuit-breaker On
Energy store relieved Energy store tensioned Energy store tensioned
Actuation sequence: Off On - Off Off - On - Off
Etat possible : disjoncteur fermé disjoncteur ouvert disjoncteur fermé
ressort désarmé ressort armé ressort armé
Séquence opératoire : ouverture ouverture - fermeture ouverture - fermeture - ouverture
➀
➁➀
➂
➁
Vorarbeiten / Preparations / Travaux préparatoires / Preparativos / Preparazione / Förberedelser
SteckverbinderabnehmenundSchalterausbauen
/ Detach the connector and take out the circuit-
breaker / Retirer le connecteur et démonter le
disjoncteur / Quitar el conectador enchufable y
extraer el interruptor / Rimuovere il connettore e
asportare l’interruttore / Ta bort lednings-
anslutningarna och montera ur brytaren
Festeinbauschalter/Fixedmountedcircuit-breaker/
Disjoncteur fixe / Interruptor fijo / Interruttore in
esecuzione fissa / Fast monterad brytare
4
Lichtbogenkammern abschrauben / Unscrew the arc chutes / Dévissage des chambres de soufflage /
Desmontar las cámaras de extinción de arco / Rimuovere le camere spegniarco / Skruva av ljusbågekamrarna
X400 X300 X200 X100
2.
Größe 2 / Size 2 / Taille 2 / Tamaño 2 /
Grandezza 2 / Storlek 2
1.
12
- Befestigungsschrauben(11)derLichtbogenkammern(12)
lösen
- Lichtbogenkammern herausheben
- Unscrew the screws (11) in the arc chutes (12)
- Take arc chutes out
- Défairelesvisdefixation(11)deschambresdesoufflage(12)
- Extraire les chambres de soufflage par le haut
- Soltar los tornillos de fijación (11) de las cámaras de
extinción de arco (12)
- Sacar las cámaras de extinción de arco
- Allentare le viti di fissaggio (11) delle camere spegniarco (12)
- Estrarre le camere spegniarco
- Lossa fästskruvarna (11) till ljusbågekamrarna (12)
- Lyft ur ljusbågekamrarna
11
Kontaktträger abkoppeln (Baugröße I und II) / Disconnect contact carrier (Sizes I and II) /
Découplage des porte-contacts (tailles I et II) / Desacoplar los portacontactos (Tamaños I y II) /
Scollegare i blocchetti portacontatti (grandezza costruttiva I et II) / Koppla ifrån kontaktbärarna (storlek I och II)
- Sicherungsschraube(13)lösen(nichtganzherausschrauben)
- Koppelbolzen (3) bzw. (8) mit Schraubendreher wie dar-
gestellt ausrücken
Bemerkung:
Bei Baugröße II ab 09/95 muß die Sicherungsschraube
(13) mit Abdeckung ganz herausgenommen werden.
- Loosenthesecuringscrew(13)(donotremoveitcompletely)
- Prise out the connecting pin (3) or (8) with a screwdriver,
as shown
Remark: With size II from 09/95, the securing screw (13)
with cover must be completely removed.
3, 8 13
- Desserrer les vis de blocage (13) (ne pas les défaire
entièrement)
- Désenclencher l'axe de couplage (3) ou (8) avec un
tournevis comme indiqué sur la figure
Remarque: Pour la taille II à partir de 09/95, il faut sortir
entièrement la vis de blocage (13) avec le recouvrement.
- Aflojar (sin extraer) el tornillo de retención (13)
- Desplazar el perno de acoplamiento (3) resp. (8) con el
destornillador según la figura
Comentario:
En el tamaño 2, a partir de 09/95, el tornillo de retención
(13) deberá extraerse totalmente junto con la cubierta.
- Allentarele viti disicurezza (non svitarlecompletamente)
- Estarrre con un cacciavite le spine cilindriche di
connessione(3)e(8)procedendocomeindicatoinfigura.
Note:
Nella grandezza costruttiva II (a partire dal 09/95) la vite
di sicurezza (13) deve essere asportata completamente.
- Lossa låsskruven (13) (skruva inte ur den helt)
- Kopplaurkopplingstappen(3)resp.(8)medenskruvmejsel
enligt figur
Anmärkning:VidstorlekIIfr.o.m.09/95måstelåsskruven
(13) med kåpa tas ut helt.
Deutsch
English
Français
Italiano
Svenska Español
5
Gehäuserückwand abnehmen (Baugröße I und II) / Remove rear wall of casing (Size I and II) /
Dépose de la paroi arrière du coffret (tailles I et II) / Desmontar la pared posterior de la caja (Tamaños I y II) /
Asportare il pannello posteriore dell’involucro (grandezza costruttiva I et II) / Ta av husets baksida (storlek I och II)
- Zylinderschrauben (14) bzw. (14a und 14b) lösen
- Senkkopfschrauben (17a) des Tragwinkels (15) heraus-
schrauben
- Senkkopfschrauben (17b) des Tragwinkels (15) lockern
(nicht ganz herausschrauben)
- Schalterrückwand (16) wie dargestellt wegklappen
- Loosen fillister-head screws (14) or (14a and 14b)
- Removecountersunk-headscrews(17a)ofanglebracket(15)
- Loosen countersunk-head screws (17b) of angle bracket
(15) (do not remove them completely)
- Swing out circuit-breaker rear wall (16), as shown
X
14
17a
16
17b
17b
15
14a
14b
X
X
- Défaire les vis à tête cylindrique (14) ou (14a et 14b)
- Enleverlesvisàtêtefraisée(17a)del'équerresupport(15)
- Desserrer les vis à tête fraisée (17b) de l'équerre support
(15) (ne pas les défaire entièrement)
- Rabattrelaparoiarrièredudisjoncteur(16)commeindiqué
sur la figure
- Soltar los tornillos cilíndricos (14) resp. (14a y 14b)
- Desatornillar los tornillos de cabeza avellanada (17a) del
ángulo soporte (15)
- Aflojar (sin extraer) los tornillos de cabeza avellanada
(17b) del ángulo soporte (15)
- Abatir la pared posterior del interruptor (16) según se
indica en la figura
- Allentare le viti di sicurezza (14) e (14a e 14b)
- Rimuovere le viti a testa svasata con intaglio (17a)
dall’angolare (15)
- Allentare le viti a testa svasata (17b) dell’angolare (15)
(non svitarle completamente)
- Asportare il pannello posteriore (16) procedendo come
indicato in figura
- Lossa skruvarna med cylindriskt huvud (14) resp. (14a
och 14b)
- Skruva ur bärvinkelns (15) skruvar med försänkt huvud
(17a)
- Lossa (skruva inte ur helt) bärvinkelns (15) skruvar med
försänkt huvud (17b)
- Sväng bort brytarens baksida (16) enligt figur
Baugröße I / Size I / Taille I / Tamaño I / Grandezza costruttiva I /
Storlek I
Baugröße II / Size II / Taille II / Tamaño II /
Grandezza costruttiva II / Storlek II
Baugröße I und II / Size I and II / Tailles I et II / Tamaños I y II /
Grandezza costruttiva I e II / Storlek I och II
Deutsch
English
Français
Italiano
Svenska Español
6
Isolierung ausbauen (Baugröße I) / Remove insulation (Size I) / Démontage de l'isolation (taille I) /
Desmontar el aislamiento (Tamaño 1) / Rimuovere l’isolante (grandezza costruttiva I) / Montera ur isoleringen (storlek I)
- Kontaktträger (1) nach oben anheben
- Isolierung (18) nach vorne abziehen (Seitenwände der
Isolierung (18) etwas nach außen drücken)
-
Lift contact carrier (1) upwards
- Pull out insulation (18) to the front (press the side walls of
insulation (18) outwards slightly)
- Soulever le porte-contacts (1)
- Extraire l'isolation (18) par l'avant (repousser légèrement
vers l'extérieur les parois latérales de l'isolation (18))
- Levantar el portacontactos (1)
- Sacar el aislamiento (18) hacia delante (Presionar los
tabiques laterales del aislamiento (18) un poco hacia
afuera)
- Sollevare il blocchetto portacontatti verso l’alto (1)
- Estrarrel’isolante (18) tirandolo verso l’esterno (spingere
leggermenteversol’esternole paretilateralidell’isolante)
- Lyft kontaktbäraren (1) uppåt
- Dra av isoleringen (18) framåt (tryck isoleringens (18)
sidoväggar något utåt)
18
1
Kontaktträger ausbauen (Baugröße I und II) / Remove contact carrier (Sizes I and II) /
Démontage du porte-contacts (tailles I et II) / Desmontar los portacontactos (Tamaños I y II) /
Asportare il blocchetto portacontatti (grandezza costruttiva I e II) / Montera ur kontaktbärare (storlek I och II)
- Kontaktträger (1) bzw. (6) nach oben anheben
- Zylinderschraube (4) bzw. (9) mit Spannscheibe (5) bzw.
(10) lösen
- Kontaktträger(1)bzw.(6)wiedargestelltausderGehäuse-
rückwand (16) ziehen
- Lift contact carrier (1) or (6) upwards
- Loosen fillister-head screw (4) or (9) with spring washer
(5) or (10)
- Pull contact carrier (1) or (6) out of the casing rear wall
(16), as shown
- Soulever le porte-contacts (1) ou (6)
- Défairela vis à tête cylindrique(4) ou (9) avec la rondelle
élastique (5) ou (10)
- Sortir le porte-contacts (1) ou (6) de la paroi arrière du
coffret (16) comme indiqué sur la figure
- Levantar el portacontactos (1) resp. (6)
- Soltar los tornillos cilíndricos (4) resp. (9) con arandelas
de resorte (5) resp. (10)
- Extraerelportacontactos(1)resp.(6)delaparedposterior
de la caja (16) según se indica en la figura
- Sollevare verso l’alto il blocchetto portacontatti (1) e (6)
- Allentare le viti a testa cilindrica (4) e (9) con la rondella
elastica (5) e (10)
- Estrarre il blocchetto portacontatti (1) e (6) dal pannello
posteriore (16) procedendo come indicato in figura
- Lyft kontaktbäraren (1) resp. (6) uppåt
- Lossa skruven med cylindriskt huvud (4) resp. (9) med
spännbricka (5) resp. (10)
- Dra kontaktbäraren (1) resp. (6) ur husets baksida (16)
enligt figur
1, 6
16 4, 9 5, 10
Deutsch
English
Français
Italiano
Svenska Español Deutsch
English
FrançaisEspañol
Svenska Italiano
7
Strombahnen ausbauen (Baugröße I und II) / Remove pole (Sizes I and II) / Démontage des pôles (tailles I et II) /
Desmontar los conductores (Tamaños I y II) / Asportare i contatti principali (grandezza costruttiva I e II) /
Montera ur strömbanorna (storlek I och II) /
- Zylinderschrauben (4) bzw. (9) mit Spannscheiben (5)
bzw. (10) lösen
- Strombahn (2) bzw. (7) wie dargestellt aus der Gehäuse-
rückwand (16) ziehen
- Loosenfillister-headscrews(4)or(9)withspringwashers
(5) or (10)
- Pullpole(2)or(7)outofthecasingrearwall(16),asshown
- Défairelesvisàtêtecylindrique(4)ou(9)accompagnées
des rondelles élastiques (5) ou (10)
- Sortir le pôle (2) ou (7) de la paroi arrière du coffret (16)
comme indiqué sur la figure
- Soltar los tornillos cilíndricos (4) resp. (9) con arandelas
de resorte (5) resp. (10)
- Extraer el conductor (2) resp. (7) de la pared posterior de
la caja (16) según se indica en la figura
- Allentare le viti a testa cilindrica (4) e (9) con la rondella
elastica (5) e (10)
- Estrarreicontattiprincipali(2)e(7)dalpannelloposteriore
procedendo come indicato in figura
- Lossa skruvarna med cylindriskt huvud (4) resp. (9) med
spännbrickor (5) resp. (10).
- Draströmbanan(2) resp.(7)ur husetsbaksida(16) enligt
figur.
16
4, 9 5, 102, 7
Deutsch
English
FrançaisEspañol
Svenska Italiano
8
Strombahn einbauen (Baugröße I und II) / Fitting the pole (Size I and II) / Montage du pôle (tailles I et II) /
Montar los conductores (Tamaños I y II) / Montare i contatti principali (grandezza costruttiva I e II) /
Montera in strömbana (storlek I och II)
- Strombahn(2)bzw.(7)vonobenindieGehäuserückwand
(16) schieben
- Distanzstück(19 bzw. 20) von unten bis zumAnschlagin
Gehäuserückwand (16) einschieben
- Strombahn(2)bzw.(7)undDistanzstück(19)mitZylinder-
schrauben(4)bzw.(9)undSpannscheiben(5)bzw.(10)
anGehäuserückwand (16)handfestanschrauben (nicht
festziehen)
Bemerkung: Das Distanzstück (19 bzw. 20) entfällt bei
anderen Ausführungen als 3WY3621-0AA00.
- Slidepole(2)or(7)intothecasingrearwall(16)fromabove
- Slidespacer(19or20)frombelowintothecasingrearwall
(16) as far as it will go
- Secure pole (2) or (7) and spacer (19) finger with fillister-
headscrews(4)or(9)andspringwashers(5)or(10)tothe
casing rear wall (16) (do not tighten)
Remark: Spacer (19 or 20) is not used only in version
3WX3621-0AA00.
19, 20
5,10
4, 9
16
192, 7
- Introduireparlehautlepôle(2)ou(7)danslaparoiarrière
du coffret (16)
- Insérer par le bas l'entretoise (19 ou 20) dans la paroi
arrière du coffret (16) jusqu'à ce qu'elle arrive en butée
- Solidariser le pôle (2) ou (7) et l'entretoise (19) à la paroi
arrière du coffret (16) par un vissage à la main des vis à
tête cylindrique (4) ou (9) accompagnées des rondelles
élastiques (5) ou (10) (ne pas serrer fort)
Remarque:L'entretoise(19ou20)estutiliséeuniquement
pour la version 3WY3621-0AA00.
- Introducir el conductor (2) resp. (7) desde arriba en la
pared posterior de la caja (16)
- Introducirlapiezadistanciadora(19resp.20)desdeabajo
en la pared posterior de la caja (16) hasta el tope
- Atornillarelconductor(2)resp.(7)ylapiezadistanciadora
(19)conlostornilloscilíndricos(4)resp.(9)ylasarandelas
de resorte (5) resp. (10) en la pared posterior de la caja
(16) (no terminar de apretar)
Comentario: La pieza distanciadora (19 resp. 20) no se
precisa en otras ejecuciones que la 3WY3621-0AA00.
- Inserireicontattiprincipali(2)e(7)nelpannelloposteriore(16)
- Partendodalbassoinserireildistanziatore(19)nelpannello
posteriore (16) fino al riscontro
- Fissarelaviadicontatto(2)e(7) eildistanziatore(19e20)con
leviti atestacilindrica (4)e (9) ele rondelle elastiche(5) e (10)
al pannello posteriore (non serrare completamente le viti)
Note: Il distanziatore è presente solo nell’esecuzione
3WY3621-0AA00
- Skjut in strömbanan (2) resp. (7) i husets baksida (16)
uppifrån.
- Skjut in distansstycke (19 resp. 20) underifrån till anslag
i husets baksida (16).
- Skruva för hand till (dra inte fast) strömbana (2) resp. (7)
ochdistansstycke(19)medskruvarmedcylindriskthuvud
(4) resp. (9) och spännbrickor (5) resp. (10) vid husets
baksida (16).
Anmärkning: Distansstycket (19 resp. 20) bortfaller vid
andra utföranden än 3WY3621-0AA00.
Deutsch
English
FrançaisEspañol
Svenska Italiano
9
Distanzstück anlegen (Baugröße I) / Fit spacer in position (Size I) / Mise en place de l'entretoise (taille I) /
Adosar la pieza distanciadora (Tamaño I) / Inserire il distanziatore (grandezza costruttiva I) /
Lägga mot distansstycke (storlek I)
- Distanzstück (20) wie dargestellt an Kontaktträger (1)
anlegen
Bemerkung: Das Distanzstück (20) entfällt bei anderen
Ausführungen als 3WY3621-0AA00.
- Fitspacer (20)in positionon contactcarrier (1),as shown
Remark: Spacer (20) is not used only in version
3WX3621-0AA00.
- Mettre en place l'entretoise (20) sur le porte-contact (1)
comme indiqué sur la figure
Remarque:L'entretoise(20)estutiliséeuniquementpour
la version 3WY3621-0AA00.
- Adosar la pieza distanciadora (20) al portacontactos (1)
según se indica en la figura.
Comentario: La pieza distanciadora (20) no se precisa
en otras ejecuciones que la 3WY3621-0AA00.
- Inserireildistanziatore (20)nelblocchetto portacontatti(1)
Note: Il distanziatore è presente solo nell’esecuzione
3WY3621-0AA00
- Lägg distansstycket (20) mot kontaktbäraren (1) enligt
figur.
Anmärkning: Distansstycket (20) bortfaller vid andra
utföranden än 3WY3621-0AA00.
1
20
Kontaktträger einbauen (Baugröße I und II) / Fit contact carrier (Sizes I and II) / Montage du porte-contacts (tailles I et II) /
Montar el portacontactos (Tamaños I y II) / Montare il blocchetto portacontatti (grandezza costruttiva I e II) /
Montera in kontaktbärare (storlek I och II)
- Kontaktträger (1) bzw. (6) (ggf. mit Distanzstück (20)) in
Gehäuserückwand(16)steckenundmitZylinderschrauben
(4) bzw. (9) und Spannscheiben (5) bzw. (10) anschrau-
ben (Anziehdrehmoment: 8 ± 1 Nm (4); 12 ± 1 Nm (9))
- Insertcontactcarrier(1)or(6)(withspacer(20)ifapplicable)
in casing rear wall (16) and screw in place with fillister-
head screws (4) or (9) and spring washers (5) or (10)
(Tightening torque: 8 ± 1 Nm (4); 12 ± 1 Nm (9))
- Engagerleporte-contacts(1)ou(6)(éventuellementavec
l'entretoise (20)) dans la paroi arrière du coffret (16) puis
visser les vis à tête cylindrique (4) ou (9) accompagnées
desrondellesélastiques(5)ou (10)(couple deserrage :8
+/- 1 Nm (4) ; 12 +/- 1 Nm (9))
- Montar el portacontactos (1) resp. (6) (si hace falta con la
pieza distanciadora (20)) en la pared posterior de la caja
(16) y atornillar con los tornillos cilíndricos (4)
resp. (9) y las arandelas de resorte (5) resp. (10) (par de
apriete: 8 ± 1 Nm (4); 12 ± 1 Nm (9))
- Inserireilblocchettoportacontatto(1)e(6)(eventualmente
con il distanziatore (20)) nel pannello posteriore e fissare
le viti a testa cilindrica (4) e (9) e le rondelle elastiche (5)
e (10) (coppia di serraggio 8 + 1Nm (4); 12 + 1 Nm (9))
- Sättinkontaktbäraren(1)resp.(6)(ev.meddistansstycke
(20)) i husets baksida (16) och skruva fast med skruvar
med cylindriskt huvud (4) resp. (9) och spännbrickor (5)
resp.(10)(åtdragningsmoment:8±1Nm(4);12±1Nm(9))
1, 6
5,10
4, 9
Deutsch
English
Français
Español
Svenska Italiano
Deutsch
English
Français
Español
Svenska Italiano
10
Isolierung anbauen (Baugröße I) / Fit insulation (Size I) / Montage de l'isolation (taille I) / Montar el aislamiento (Tamaño I)/
Montare l’isolante (grandezza costruttiva I e II) / Montera in isolering (storlek I)
- Kontaktträger (1) nach oben anheben
- Isolierung(18)aufKontaktträger(1)stecken(mußhörbar
einrasten)
- Lift contact carrier (1) upwards
- Insertinsulation(18)oncontactcarrier(1)(mustbeheard
to lock in position)
- Soulever le porte-contacts (1)
- Enficher l'isolation (18) sur le porte-contacts (1)
(l'encliquetage doit s'entendre)
- Levantar el portacontactos (1)
- Encajarelaislamiento(18)enelportacontactos(1)(debe
encajar de forma audible)
- Sollevare il blocchetto portacontatti (1) verso l’alto
- Inserire l’isolante (18) nel blocchetto portacontatti (1) (lo
scatto deve essere percettibile)
- Lyft kontaktbäraren (1) uppåt.
- Sättisoleringen(18)påkontaktbäraren(1)(måstehörbart
gå in i rätt läge)
18
1
Deutsch
English
FrançaisEspañol
Svenska Italiano
11
Gehäuserückwand anbauen (Baugröße I und II) / Fit casing rear wall (Size I and II) /
Montage de la paroi arrière du coffret (tailles I et II) / Montar la pared posterior de la caja (Tamaños I y II) /
Montare il pannello posteriore dell’involucro (grandezza costruttiva I et II) / Montera husets baksida (storlek I och II)
X
14
17a
16
17b
17b
15
14a
14b
X
Baugröße I / Size I / Taille I / Tamaño I / Grandezza costruttiva I /
Storlek I
Baugröße II / Size II / Taille II / Tamaño II /
Grandezza costruttiva II / Storlek II
Baugröße I und II / Size I and II / Tailles I et II / Tamaños I y II /
Grandezza costruttiva I e II / Storlek I och II
- Gehäuserückwand (16) an Gehäuse (21) anlegen.Dabei
darauf achten , daß keine Leitung eingeklemmt wird.
- Tragwinkel(15)undGehäuse(21)bzw.Gehäuserückwand
(16) mit Senkkopfschrauben (17a, b) verschrauben (An-
ziehdrehmoment 6 ± 1 Nm)
- Zylinderschrauben (14) bzw. (14a, b) festschrauben
(Anziehdrehmoment 10 ± 1 Nm)
- Place casing rear wall (16) on the casing (21). Make sure
that no conductor is caught between the two.
- Secure angle bracket (15) and casing (21) or casing rear
wall(16)withcountersunk-headscrews(17a,b)(tightening
torque 6 ± 1 Nm)
- Tighten fillister-head screws (14) or (14a, b)
(tightening torque 10 ± 1 Nm)
- Placer la paroi arrière du coffret (16) sur le coffret (21).
Veiller à ce qu'aucun câble ne soit coincé.
- Solidariser l'équerre support (15) et le coffret (21) ou la
paroi arrière du coffret (16) à l'aide des vis à tête fraisée
(17a, b) (couple de serrage 6 +/- 1 Nm)
- Serrer les vis à tête cylindrique (14) ou (14a, b)
(couple de serrage 10 +/- 1 Nm)
- Adosar la pared posterior de la caja (16) a la caja (21).
Observar que no quede ningún cable aprisionado.
- Atornillar el ángulo de soporte (15) y la caja (21) resp. la
paredposterior de la caja (16) con lostornillosde cabeza
avellanada (17a, b) (par de apriete: 6 ± 1 Nm)
- Apretar los tornillos cilíndricos (14) resp. (14 a, b)
(par de apriete: 10 ± 1 Nm)
- Posizionare il pannello posteriore (16) sull'involucro (21).
Accertarsi che i cavi presenti non vengano strozzati
- Fissare l'angolare (15) e il pannello posteriore (16)
dell'involucro (21) con viti a testa svasata (17a,b) (coppia
di serraggio 6 +1 Nm)
- Serrare le viti a testa cilindrica (14) e (14a,b)
(coppia di serraggio 10 + 1Nm)
- Lägghusetsbaksida(16)mothuset(21).Gedärvidaktpå
att ingen ledning blir inklämd.
- Skruva fast bärvinkeln (15) och huset (21) resp. husets
baksida(16)medskruvarmedförsänktahuvuden(17a,b)
(åtdragningsmoment 6 ± 1 Nm)
- Skruvafastskruvarnamedcylindriskahuvuden(14)resp.
(14a, b) (åtdragningsmoment 10 ± 1Nm)
21
Deutsch
English
FrançaisEspañol
Svenska Italiano
12
Kontaktträger einkoppeln (Baugröße I und II) / Fit contact carrier (Sizes I and II) /
Couplage du porte-contacts (tailles I et II) / Acoplar los portacontactos (Tamaños I y II) /
Collegare il blocchetto portacontatti (grandezza costruttiva I e II) / Koppla till kontaktbäraren (storlek I och II)
- Kontaktträger(1)bzw.(6)wiedargestelltinRichtungderKoppel-
laschen (22) drücken. Dabei darauf achten, daß die Koppel-
laschen (22) vollständig vom Kontaktträger (1) bzw. (6) aufge-
nommen werden
- Koppelbolzen (3) bzw. (8) mit Schraubendreher nach rechts
einrücken
- Koppelbolzen (3) bzw. (8) mit Sicherungsschraube (13) sichern
(Anziehdrehmoment 2 ± 0,3 Nm)
Bemerkung: Bei Baugröße II ab 09/95 muß die Sicherungs-
schraube (13) mit Abdeckung wieder eingeschraubt werden
(Anziehdrehmoment 2 ± 0,3 Nm).
- Press contact carrier (1) or (6) in the direction of the links (22).
Makesurethat the links (22) fully engage with the contactcarrier
(1) or (6).
- Insert coupling pin (3) or (8) to the right, using a screwdriver.
- Secure coupling pin (3) or (8) with screw (13) (tightening torque
2 ± 0,3 Nm)
Remark: With size II from 09/95 onwards, screw (13) must be
screwed in again with cover (tightening torque 2 ± 0,3 Nm).
B - B
BB
22
3, 8 13 1, 6
- Appuyer sur le porte-contacts (1) ou (6) dans la direction des
languettes de couplage (22) comme indiqué sur la figure. Veiller
àcequeleslanguettesdecouplage(22)s'engagententièrement
dans le porte-contacts (1) ou (6)
- Enclencher l'axe de couplage (3) ou (8) vers la droite avec un
tournevis
- Bloquer l'axe de couplage (3) ou (8) avec la vis de bloquage(13)
(couple de serrage 2 +/- 0,3 Nm)
Remarque: Pourla taille IIàpartir de 09/95,ilfaut revisser lavis
de blocage (13) avec le recouvrement (couple de serrage 2 +/-
0,3 Nm).
- Empujar el portacontactos (1) resp. (6) en dirección a las bridas
de acoplamiento (22) según se indica en la figura. Prestar
atención al completo alojamiento de las bridas (22) en el
portacontactos (1) resp. (6)
- Desplazar el perno de acoplamiento (3) resp. (8) hacia la
derecha con el destornillador
- Asegurarel perno deacoplamiento(3) resp. (8)conel tornillo de
retención (13) (par de apriete: 2 ± 0,3 Nm)
Comentario: En el tamaño 2, a partir de 09/95, el tornillo de
retención(13)deberáatornillarsetotalmentejuntoconlacubierta
(par de apriete: 2 ± 0,3 Nm).
- Spingere il blocchetto portacontatti (1) e (6) verso le linguette di
connessione(22),procedendocomeindicatoinfigura.Accertarsi
che le linguette (22) aderiscano perfettamente al blocchetto
portacontatti (1) e (6)
- Con l'ausilio di un cacciavite inserire sul lato destro la spina di
connessione (3) e (8)
- Fissare la spina di connessione (3) e (8) con la vite di sicurezza
(13) (coppia di serraggio 2 + 0,3Nm)
Note:Nellagrandezzacostruttiva II(apartire dal09/95)la vitedi
sicurezza (13) deve essere asportata completamente.
- Tryckkontaktbäraren(1)resp.(6)iriktningmotkopplingsskenorna
(22) enligt figur. Ge därvid akt på att kopplingsskenorna (22) blir
helt upptagna av kontaktbäraren (1) resp. (6).
- Tryckinkopplingstappen(3)resp.(8)åthögermedenskruvmejsel.
- Lås kopplingstappen (3) resp. (8) med låsskruven (13)
(åtdragningsmoment 2 ± 0,3 Nm).
Anmärkning:VidstorlekIIfr.o.m.09/95måstelåsskruven(13)
med kåpa åter skruvas in (åtdragningsmoment 2 ± 0,3 Nm).
Deutsch
English
FrançaisEspañol
Svenska Italiano
13
- Federspeicher spannen und Schalter einschalten
- Schalter unter Wahrung der nötigen Vorsicht einschalten
- Zylinderschrauben (4) bzw. (9) mit Spannscheiben (5)
bzw. (10) festschrauben (Anziehdrehmoment:
Baugröße I 8 ± 1 Nm, Baugröße II 12 ± 1 Nm)
Strombahn endmontieren (Baugröße I und II) / Fit pole in final position (Sizes I and II) / Montage final du pôle (tailles I et II)/
Montaje final de los conductores (Tamaños I y II) / Operazioni conclusive (grandezza costruttiva I e II) /
Slutmontera strömbanan (storlek I och II)
5, 10
2, 7
4, 9 - Tensionthespringmechanismandclosethecircuit-breaker
- Taking the necessary care, close the circuit-breaker
- Tightenfillister-headscrews(4)or(9)withspringwashers
(5) or (10) (tightening torque: Size I: 8 ± 1 Nm,
size II: 12 ± 1 Nm)
Vorsicht!
Gefährlicher Federspeicher!
Caution!
Dangerous spring mechanism!
- Activer l'accumulation d'énergie et enclencher le
disjoncteur
- Enclencher le disjoncteur en prenant les précautions
nécessaires
- Serrer les vis à tête cylindrique (4) ou (9) accompagnées
des rondelles élastiques (5) ou (10) (couple de serrage :
taille I : 8 +/- 1 Nm ; taille II : 12 +/- 1 Nm)
Attention!
Tension de ressort dangereuse !
- Tensar el acumulador de energía por resorte y conectar
el interruptor
- Conectar el interruptor con la debida precaución
- Apretarlos tornilloscilíndricos (4)resp. (9)con arandelas
deresorte(5)resp.(10)(pardeaprietetamaño1:8±1Nm
(4); tamaño 2: 12 ± 1 Nm (9))
¡Atención!
¡Resorte peligroso!
- Caricarele molle e manovrare l’interruttore in posizionediON
- Con la massima cautela manovrare l'interruttore in
posizione di ON
- Serrare le viti a testa cilindrica (4) e (9) con le rondelle
elastiche (5) e (10) (coppia di serraggio: grandezza
costruttiva I 8 + 1 Nm; grandezza costruttiva II 12 + 1Nm)
Attenzione!
Molle precariche!
- Spänn fjädern och koppla in brytaren.
- Koppla till brytaren under iakttagande av nödvändiga
säkerhetsåtgärder.
- Skruva fast skruvarna med cylindriska huvuden (4) resp.
(9)medspännbrickor(5) resp.(10)(åtdragningsmoment:
storlek I 8 ± 1 Nm, storlek II 12 ± 1 Nm).
Varning!
Farlig fjäderkraft!
Deutsch
English
Français
Español
Svenska Italiano
14
Lichtbogenkammern einsetzen / Assemble the arc chutes / Mise en place des chambres de soufflage /
Montar las cámaras de extinción de arco / Reinserire le camere spegniarco / Sätta in ljusbågekamrarna
X400 X300 X200 X100
- Lichtbogenkammern (12) einsetzen
- Lichtbogenkammern(12)mitBefestigungsschrauben(11)
sichern
- Insert arc chutes (12)
- Secure arc chutes (12) with screws (11)
- Mettre en place les chambres de soufflage (12)
- Bloquer les chambres de soufflage (12) avec les vis de
fixation (11)
- Colocar las cámaras de extinción de arco (12)
- Asegurar las cámaras de extinción de arco (12) con los
tornillos de fijación (11)
- Inserire le camere spegniarco (12)
- Fissarelecamerespegniarco(12)convitidifissaggio(11)
- Sätt in ljusbågekamrarna (12).
- Säkra ljusbågekamrarna (12) med fästskruvarna (11).
12
11
1.
2.
5±0,5 Nm
Deutsch
English
FrançaisEspañol
Svenska Italiano
Siemens Aktiengesellschaft Bestell-Nr./Order No.: 3ZX1812-0WX36-7CA0 / 9239 9790 422
Bestell-Ort/Place of Order:A&D CD SE PC Log P Berlin
Printed in the Federal Republic of Germany
AG 12.97 Kb De-En-Fr-Es-It-Sv
Herausgegeben von
Bereich Automations- und Antriebstechnik
Niederspannungs-Schalttechnik
Schaltwerk Berlin
D - 13623 Berlin
Änderungen vorbehalten
Published by the
Automation & Drives Group
Control and Distribution
Schaltwerk Berlin
D - 13623 Berlin
Federal Republic of Germany
Subject to change

Other manuals for 3WN6

38

This manual suits for next models

1

Other Siemens Industrial Equipment manuals

Siemens SIRIUS 3RT1954-7A/B User manual

Siemens

Siemens SIRIUS 3RT1954-7A/B User manual

Siemens SIMATIC NET RUGGEDCOM RS1600T User manual

Siemens

Siemens SIMATIC NET RUGGEDCOM RS1600T User manual

Siemens LITHOSTAR Multiline Installation manual

Siemens

Siemens LITHOSTAR Multiline Installation manual

Siemens 3VT9300-1SB00 User manual

Siemens

Siemens 3VT9300-1SB00 User manual

Siemens Simatic 6ES7 157-0AD81-0 A0 Series User manual

Siemens

Siemens Simatic 6ES7 157-0AD81-0 A0 Series User manual

Siemens 3VA52 User manual

Siemens

Siemens 3VA52 User manual

Siemens SIMATIC ET 200SP User manual

Siemens

Siemens SIMATIC ET 200SP User manual

Siemens 3MT7 Series User manual

Siemens

Siemens 3MT7 Series User manual

Siemens 7MH5102 User manual

Siemens

Siemens 7MH5102 User manual

Siemens 3RK1903-1BA00 PM-D F1 User manual

Siemens

Siemens 3RK1903-1BA00 PM-D F1 User manual

Siemens SENTRON VL 160 User manual

Siemens

Siemens SENTRON VL 160 User manual

Siemens Sentron 5ST3 COM User manual

Siemens

Siemens Sentron 5ST3 COM User manual

Siemens 3VA9671-0WD30 User manual

Siemens

Siemens 3VA9671-0WD30 User manual

Siemens 3WN6 User manual

Siemens

Siemens 3WN6 User manual

Siemens LI L Series User manual

Siemens

Siemens LI L Series User manual

Siemens SINAMICS S Series Datasheet

Siemens

Siemens SINAMICS S Series Datasheet

Siemens SIPROTEC 5 V9.30 User manual

Siemens

Siemens SIPROTEC 5 V9.30 User manual

Siemens FDM1101-R Series User manual

Siemens

Siemens FDM1101-R Series User manual

Siemens 5SV3 Series User manual

Siemens

Siemens 5SV3 Series User manual

Siemens MOBILETT XP User manual

Siemens

Siemens MOBILETT XP User manual

Siemens SIRIUS 3RT202 0LA2 Series User manual

Siemens

Siemens SIRIUS 3RT202 0LA2 Series User manual

Siemens 3VA960 0QB00 Series User manual

Siemens

Siemens 3VA960 0QB00 Series User manual

Siemens 3TL61 User manual

Siemens

Siemens 3TL61 User manual

Siemens 3VA1 Series User manual

Siemens

Siemens 3VA1 Series User manual

Popular Industrial Equipment manuals by other brands

Jäger Z45-D160.02 S21A manual

Jäger

Jäger Z45-D160.02 S21A manual

FIBRO Flex Cam manual

FIBRO

FIBRO Flex Cam manual

dunkermotoren AMETEK BG 75 dMove Translation of the original function and connection guide

dunkermotoren

dunkermotoren AMETEK BG 75 dMove Translation of the original function and connection guide

HOLZMANN MASCHINEN KAM 535 user manual

HOLZMANN MASCHINEN

HOLZMANN MASCHINEN KAM 535 user manual

TCS TC-HS V2 Original instruction

TCS

TCS TC-HS V2 Original instruction

ABB HT609404 Operation manual

ABB

ABB HT609404 Operation manual

HRS FX2BR-GPA Series instruction manual

HRS

HRS FX2BR-GPA Series instruction manual

ABB HT607330 Operation manual

ABB

ABB HT607330 Operation manual

Komet JEL JSF manual

Komet

Komet JEL JSF manual

Pentair AURORA 04 Series Instruction and repair manual

Pentair

Pentair AURORA 04 Series Instruction and repair manual

STM ROCKETBOX Training manual

STM

STM ROCKETBOX Training manual

Mecal UNI MECAL VERSION Operation and maintenance manual

Mecal

Mecal UNI MECAL VERSION Operation and maintenance manual

ABB HT574150 Operation manual

ABB

ABB HT574150 Operation manual

Dickson PB-101 Instructions for operation and care

Dickson

Dickson PB-101 Instructions for operation and care

ABB FIO-01 quick guide

ABB

ABB FIO-01 quick guide

Minebea Intec PR 6202 installation manual

Minebea Intec

Minebea Intec PR 6202 installation manual

SEW-Eurodrive DR Series Addendum to the operating instructions

SEW-Eurodrive

SEW-Eurodrive DR Series Addendum to the operating instructions

Jäger Z62-H360.02 S19W2/3 manual

Jäger

Jäger Z62-H360.02 S19W2/3 manual

manuals.online logo
manuals.online logoBrands
  • About & Mission
  • Contact us
  • Privacy Policy
  • Terms and Conditions

Copyright 2025 Manuals.Online. All Rights Reserved.